Have you ever seen a beautiful wooden egg? It’s amazing how a simple piece of wood can be shaped into something so lovely. Many people wonder how to turn eggs on a wood lathe. This art isn’t just for experts. Anyone can learn it with a bit of practice.
Imagine standing in your workshop, the hum of the lathe filling the air. You flick on the switch, and the wood starts to spin. You can shape it into an egg with just a few tools. Sound fun, right?
Did you know woodturning has been around for over 3,000 years? Craftsmen used to create everyday items. Today, we can make fantastic decorative pieces. Learning how to turn eggs on a wood lathe can be a fun hobby. Plus, you get to impress friends and family with your beautiful creations!
In this article, we will explore the steps and tips for turning eggs on a wood lathe. You’ll discover how to make this engaging craft your own. Are you ready to unleash your creativity?
How To Turn Eggs On A Wood Lathe: A Step-By-Step Guide

How to Turn Eggs on a Wood Lathe
Turning eggs on a wood lathe can be a fun project for woodworkers. Start with a piece of wood, preferably a light, firm variety. Secure it well on the lathe to avoid accidents. Use a spindle gouge for shaping the egg form. Remember, egg shapes are rounded, so take gentle cuts. Did you know that making wooden eggs can be a great gift? With some practice, anyone can create beautiful pieces!Choosing the Right Type of Eggs for Turning
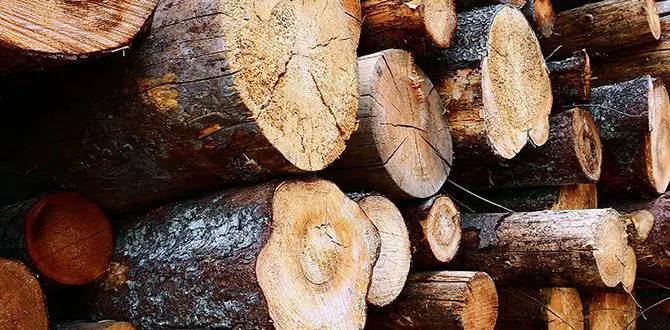
Different wood species suitable for egg turning. Factors to consider in selecting eggs (size, density, etc.).Not all eggs are created equal, especially when you’re turning them on a lathe! Choosing the right type is important for a perfect finish. Hardwoods like maple or walnut offer a great blend of strength and beauty. Softwoods, like pine, are easier to work with but may not look as fancy. Size matters too! Smaller eggs are easier to handle and less likely to get lost under the lathe. Lastly, consider density. Denser wood will give you a smoother turn. In the end, it’s about what fits you best!
| Wood Type | Density (lb/ft³) | Notes |
|---|---|---|
| Maple | 38-50 | Great for fine details |
| Walnut | 38-58 | High durability and beauty |
| Pine | 20-30 | Easy to work with, but soft |
Setting Up Your Wood Lathe for Egg Turning
Proper lathe setup and adjustments. Safety precautions to observe during setup.Before turning eggs on a wood lathe, setting it up properly is vital. Ensure the lathe is stable on a flat surface. Adjust the speed to the right level for safe turning. Always wear protective gear like goggles and a mask.
- Check the tool rest height for comfort.
- Make sure the workpiece is secured tightly.
- Keep your hands away from the rotating parts.
These steps help keep you safe and make your project easier. Remember, a careful setup leads to smoother work!
What safety precautions should you take during setup?
Always wear goggles, gloves, and a mask. Ensure your workspace is clean and free of clutter too.
Turning Process: Step-by-Step Guide
Preparing the wood blank for egg turning. Techniques for achieving an even shape.Before you turn eggs on a wood lathe, you need to prepare your wood blank. First, choose a piece of wood that is dry and clean. Cut it to a suitable size. Round the edges to help the lathe grip better. This makes turning easier.
To achieve an even shape, follow these techniques:
- Start at a slow speed to prevent mistakes.
- Gradually increase the speed as you gain confidence.
- Use sandpaper for a smooth finish.
With patience and practice, your egg will take shape. Enjoy the process!
What is the best wood to use for turning eggs?
The best wood is lightweight and easy to carve. Some options include pine, birch, and maple. These woods help create a balanced egg shape.
Creating Unique Designs and Patterns
Tools and techniques for adding decorative elements. Tips for customizing egg designs.Making eggs on a wood lathe can be super fun! To create unique designs, you need special tools. A parting tool helps shape edges, while a skew chisel adds smooth finishes. You can also use sandpaper for a nice shine. Want to customize your designs? Try these tips:
- Choose a theme, like nature or patterns.
- Experiment with colors using paint or dyes.
- Add textures with different tools, like a texturing tool.
Don’t forget, your imagination is the limit!
What tools are best for decorating eggs on a lathe?
The best tools are parting tools, skew chisels, and texturing tools. These help create clean cuts and fun patterns.
Finishing Techniques for Wooden Eggs
Different finish options (oils, lacquers, etc.). How to apply finishes effectively.To make your wooden eggs look great, you can try different finishing techniques. Common options include oils and lacquers. Each finish gives a unique look and feel to your work. Here are ways to apply them:
- Oils: Apply with a soft cloth. Let it soak for a bit, then wipe off excess.
- Lacquers: Spray evenly from a distance. Build layers slowly for best results.
Finishing your wooden eggs not only makes them shiny but also helps protect them. Enjoy experimenting with different styles!
What is the best finish for wood eggs?
The best finish is often food-safe oil for safety and a nice look.
Common Mistakes to Avoid When Turning Eggs
Frequent errors beginners make and how to prevent them. Troubleshooting tips for common issues.Beginners often make some common mistakes when turning eggs. Here are a few errors and how to avoid them:
- Not securing the egg: Make sure the egg is clamped tightly in place. This prevents wobbling.
- Incorrect speed: Start slow to avoid damage. Adjust once you gain control.
- Overly aggressive cutting: Use gentle pressure to create a smooth surface. Rushing leads to breaks.
If you face issues, check for even cuts and listen for strange sounds. Ask for help if needed. Remember, practice helps improve your skills!
What should I do if my eggs crack while turning?
Start with smaller eggs and check your speed. Use sharp tools for a cleaner cut. Taking it slow can save your projects!
How can I tell if my egg is off-center?
Watch for uneven cuts. You might see one side getting thinner. Adjust the egg in the clamp to center it better.
Showcasing and Selling Your Turned Eggs
Creative display ideas for finished eggs. Tips for marketing and selling your wooden eggs online.Once you’ve turned your beautiful wooden eggs, it’s time to show them off! Try using a tiered display stand for an eye-catching look. You can also add some bright fabric underneath to make those colors pop! Talk about a party for your eggs!
For selling online, use crisp pictures and catchy descriptions. Share the story behind each egg; everyone loves a good tale! Don’t forget to use social media to attract egg lovers. Embrace hashtags like #EggcellentArt to hop into the spotlight!
| Display Ideas | Marketing Tips |
|---|---|
| Tiered stands | Use great photos |
| Bright backgrounds | Share stories |
| Shadow boxes | Engage on social media |
Remember, the egg’s journey doesn’t end with turning; it’s really just the beginning of a shell-tastic adventure in art and sales!
Conclusion
In conclusion, turning eggs on a wood lathe is fun and creative! Choose the right wood and set up your lathe properly. Always use safety gear and start slowly. Practice makes perfect, so don’t worry if it’s not perfect the first time. We encourage you to try this exciting project and explore more woodworking techniques!FAQs
What Types Of Wood Are Best For Turning Egg Shapes On A Lathe?For making egg shapes on a lathe, we can use several types of wood. Good choices include maple, cherry, and walnut. These woods are strong and smooth, making them easy to shape. Soft woods like pine can work too, but they may not look as nice. Choose wood that feels nice to you!
What Are The Essential Tools And Safety Precautions Needed For Turning Eggs On A Wood Lathe?To turn eggs on a wood lathe, you need a few important tools. First, you need a good wood lathe, chisels, and sanding paper. Always wear safety goggles to protect your eyes and a dust mask to keep out sawdust. Keep your fingers away from sharp tools and always check that everything is secure before you start. Following these steps will help you stay safe while having fun!
How Do You Properly Mount A Blank Piece Of Wood For Egg Turning On A Lathe?To mount a blank piece of wood on a lathe, first, make sure it’s the right size. Then, place the wood on the lathe’s headstock. Use the tailstock to hold the other end tight. Make sure it doesn’t wobble by checking both ends. Finally, turn on the lathe and start shaping your wood!
What Techniques Can Be Used To Achieve A Smooth Finish On Wood Eggs After Turning?To get a smooth finish on wood eggs, you can sand them. Start with rough sandpaper, then use finer sandpaper. After sanding, you can apply a finish like oil or wax. This helps protect the wood and makes it shiny. Finally, buff the egg gently with a soft cloth for extra smoothness.
Are There Specific Lathe Speeds Recommended For Turning Small Objects Like Eggs?Yes, there are good speeds for turning small objects like eggs on a lathe. You should start at a low speed, around 500 to 1000 RPM (Revolutions Per Minute). This helps you control the shape better. If you feel comfortable, you can go a little faster, but be careful! Always keep your tools sharp to make cutting easier.