Have you ever watched a lathe in action? It spins and shapes materials with precision. But did you know that the setup of a lathe parting tool plays a big role in this process? Proper setup is key to achieving clean cuts and smooth finishes. Without it, your project can go sideways quickly.
Imagine you’re trying to carve a sculpture from a block of wood. If your tools aren’t right, the shape can get messed up easily. The same goes for using a lathe. A well-set parting tool can make all the difference in your work. It’s like using a sharp knife instead of a dull one.
In this article, we will explore the lathe parting tool setup procedure. You will discover simple steps to help you set up your tool correctly. Plus, we’ll share tips to help you avoid common mistakes. Get ready to master the art of lathe setup!
Lathe Parting Tool Setup Procedure: A Comprehensive Guide

Lathe Parting Tool Setup Procedure
Setting up a lathe parting tool is crucial for smooth cutting. First, ensure the tool is sharp and properly aligned. A dull tool won’t make clean cuts. It’s essential to adjust the tool height, so it matches the lathe center and doesn’t bind during cutting. Did you know that even a tiny misalignment can cause damage? Always take a moment to double-check. Following these steps leads to better accuracy and safer operations. Happy turning!Understanding Lathe Parting Tools
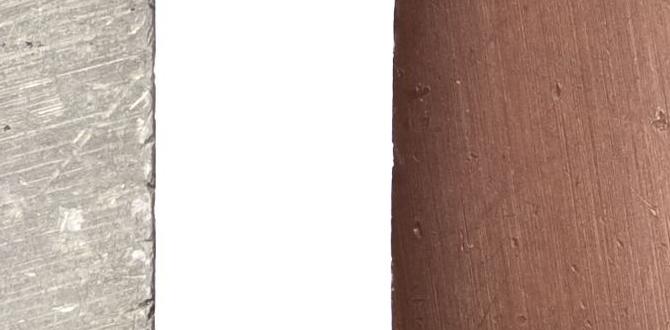
Definition of lathe parting tools. Importance of parting tools in machining.Lathe parting tools are cutting tools used in machining to create grooves or separate workpieces. Think of them as the scissors of the metalworking world! Their importance can’t be overstated; they help you cut materials accurately and efficiently. This saves time and helps make neat finishes. Without proper parting tools, machining can be as messy as a toddler with a paint set!
| Key Features | Benefits |
|---|---|
| Precision Cutting | Ensures clean edges and tight tolerances |
| Variety of Shapes | Can handle different workpiece types |
| Durability | Lasts long, saving money over time |
Preparing for Setup
Required tools and materials. Safety precautions to consider.Before diving into the exciting world of lathe parting, let’s get ready! First, gather essential tools like a parting tool, measuring tape, and clamping devices. Don’t forget your safety gear—gloves and goggles are a must. They protect you from flying chips! You wouldn’t want your fingers to experience a new kind of trim. Remember, safety first and style second. Below is a quick checklist to ensure you’re all set:
| Tools and Materials | Safety Precautions |
|---|---|
| Parting Tool | Wear Safety Glasses |
| Measuring Tape | Wear Gloves |
| Clamp Device | Keep Hair Tied Back |
With your tools in hand and safety gear on, you’re all set to start. Let’s make some chips fly!
Measuring and Marking Workpiece
Techniques for accurate measurement. Marking methods for optimal parting.To create precise cuts, measuring your workpiece is key. Use a caliper or a ruler for accuracy; it’s like using a magic wand for numbers! Be sure to double-check your measurements before moving on. Mark your spots with a sharp pencil or a scribe. A simple cross or line can guide your cuts. Remember, “Measure twice, cut once!” To help you remember, here’s a quick table:
| Technique | Description |
|---|---|
| Calipers | Great for precise measurements. |
| Ruler | Easy way to check longer distances. |
| Pencil | Perfect for marking spots accurately. |
| Scribe | Creates a clearer line than a pencil. |
With solid measuring and marking, you’re well on your way to successful parting!
Setting Up the Lathe
Mounting the workpiece securely. Aligning the tailstock and tool holder.To set up a lathe, start by mounting the workpiece securely. Make sure it is tightly held to prevent any movement during cutting. Next, align the tailstock and tool holder properly. This step ensures accurate cuts. Here’s how:
- Check the workpiece for tightness.
- Adjust the tailstock to the correct position.
- Ensure the tool holder is secure and straight.
Getting these steps right makes your lathing project safe and effective!
Why is it important to secure the workpiece?
Securing the workpiece prevents accidents and ensures precise cuts. A loose piece can wobble, ruining your project. Staying safe during any project is key!
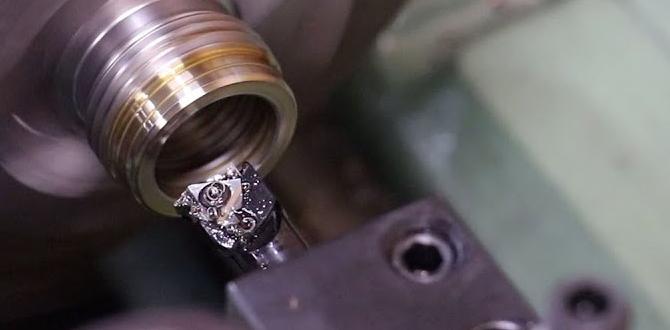
Tool Positioning
Setting the correct height for the parting tool. Adjusting the angle for effective cutting.Getting the tool in the right spot is key for a clean cut. First, set the height of the parting tool. It should be at the same level as the center of the workpiece. This helps the tool to cut smoothly. Next, adjust the angle of the tool. A slight tilt helps it slice better through the material. Here’s how:
- Height: Align with the center
- Angle: Tilt for better slicing
Why is tool positioning important?
Correct positioning helps avoid mistakes and improves cutting quality. It’s essential for smooth operation and safety during use.
Initiating the Parting Process
Recommended spindle speeds and feeds. Techniques for a smooth start.Before starting the parting process, it’s essential to pay attention to the spindle speeds and feeds. Recommended speeds can vary depending on the material. For metals, a speed of 300-600 RPM works well. For softer materials like plastics, go for around 1000 RPM. To ensure a smooth start, use these techniques:
- Make sure the lathe is clean and dry.
- Start at a low speed and gradually increase.
- Use light pressure to avoid chatter.
Following these tips will help you have a better experience when working with your lathe.
What is the best speed for a lathe when parting?
The best speed depends on your material. For aluminum, 300-600 RPM is useful. For plastic, try 1000 RPM. Adjust based on your needs.
Troubleshooting Common Issues
Identifying chatter and vibration problems. Solutions for tool binding and breakage.Chatter and vibration can make cutting difficult. If your tool shakes, check for proper speed and tool sharpness. Use these tips to solve common issues:
- Check for tightness: Ensure everything is secure.
- Adjust feed rate: Too fast may cause chatter.
- Inspect tool condition: Dull tools can break.
For tool binding, ease the cutting pressure. If breakage happens, use a softer material or reduce the cutting depth. Staying aware of these signs can help keep your work smooth and safe.
What causes tool chatter?
Tool chatter is caused by vibration when cutting too quickly or with a dull tool.
How can I reduce tool breakage?
To reduce breakage, use sharp tools and lower cutting speeds.
Maintenance of Parting Tools
Cleaning and storage best practices. When to replace parting tools.To keep parting tools in great shape, regular cleaning and proper storage are key. After each use, wipe the tools with a clean cloth to remove dirt and shavings. Store them in a dry place, preferably in a toolbox. You wouldn’t want them to rust like an old bike tire! It’s also essential to check them regularly. Replace tools when you notice dull edges or if they start to break. A sharp tool makes parting smooth, and nobody wants a tool that’s ‘past its prime!’
| Task | Recommendation |
|---|---|
| Cleaning | Wipe after each use |
| Storage | Keep in a dry place |
| Replacement | Change when dull or damaged |
Conclusion
In summary, setting up a lathe parting tool involves checking the tool’s height and alignment. You must securely fasten the tool in the holder. Remember to adjust the feed rate and depth accordingly. Practice these steps carefully to achieve precise cuts. Now, you can explore more about lathe operations for improved skills and confidence. Happy machining!FAQs
What Are The Necessary Steps To Properly Install A Parting Tool In A Lathe?To install a parting tool in a lathe, first, turn off the machine and make sure it’s safe. Then, loosen the screw on the tool holder. Place the parting tool into the holder and make sure it’s straight. Tighten the screw to hold it in place. Finally, check that the tool is at the right height before starting the lathe again.
How Do You Determine The Optimal Cutting Speed And Feed Rate For Parting Operations?To find the best cutting speed and feed rate for parting operations, we can follow a few steps. First, we need to check the material we are cutting. Different materials, like metal or plastic, need different speeds. Next, we can use guidelines or charts that tell us the best speed and feed for that material. Finally, we should test on a small piece to see if it works well before doing the big cut.
What Safety Precautions Should Be Observed When Setting Up And Using A Parting Tool On A Lathe?When you use a parting tool on a lathe, keep your hands away from the moving parts. Always wear safety goggles to protect your eyes. Make sure your hair is tied back and your clothes fit well so they don’t get caught. Check that everything is tight and secure before you start the lathe. Finally, stay focused and don’t talk to others while working.
How Do You Align The Parting Tool To Ensure Accurate Cuts And Minimize Tool Breakage?To align the parting tool, you first make sure it’s straight. You can do this by checking it against the workpiece. Then, you adjust it until it lines up perfectly. This helps you make clean cuts. Good alignment also helps keep the tool from breaking.
What Types Of Parting Tools Are Available, And How Do You Choose The Right One For Your Specific Lathe Project?There are several types of parting tools you can use. Some are thick for heavy jobs, while others are thin for delicate work. When you choose one, think about how big your project is and what material you’re cutting. A thicker tool is great for wood, while a thinner one works better for metal. Always pick a tool that feels comfortable for you to hold and use!