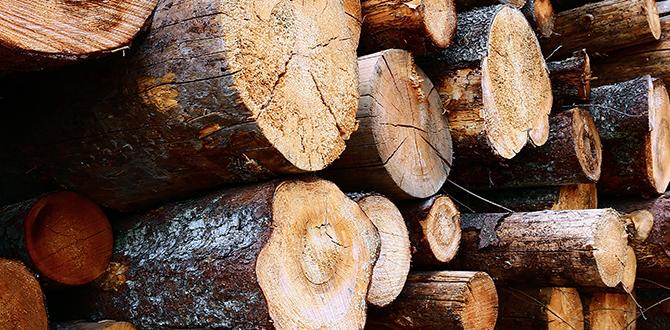
Have you ever wondered how a simple piece of wood can become a stunning vase? The magic often starts with lathe turning, a method that shapes wood as it spins. One of the most interesting materials to use is layered plywood. Its unique patterns create beautiful designs that catch the eye.
Imagine seeing a vase that looks like a piece of art. That’s the beauty of lathe turning layered plywood vases! Each piece tells a story through its layers. Artistic creators can turn something ordinary into a striking decoration in no time.
Did you know that creating such vases can be both easy and fun? With the right tools and techniques, even beginners can start their journey into wood turning. So, are you ready to dive into the world of lathe turning and discover how to make your own layered plywood vase?

Lathe Turning Layered Plywood Vase: A Unique Crafting Technique

Understanding Layered Plywood
Definition and characteristics of layered plywood. Advantages of using layered plywood for vase making.
Layered plywood is made by gluing together thin sheets of wood. This creates a strong and flexible material. It has a smooth surface and can be easily shaped. Using layered plywood for making vases has many benefits:
- Lightweight: It is easy to handle and move.
- Strong: It resists breaking or cracking.
- Eco-friendly: It uses fewer resources compared to solid wood.
This makes layered plywood a great choice for creating beautiful vases!
What are the benefits of layered plywood?
Layered plywood is lightweight, strong, and eco-friendly. It is an excellent option for crafting vases.
Preparing the Plywood for Turning
Selecting the right type of plywood. Steps to cut and laminate plywood layers.
Choosing the right plywood is key for your project. Look for plywood that is stable and strong. It should have a smooth surface and be at least ¾ inch thick. This strength helps when turning on a lathe.
Follow these steps to prepare your plywood:
- Measure and cut the plywood into layers.
- Use strong glue to laminate the layers together.
- Clamp the layers and let them dry completely.
Once dry, you will have a sturdy piece ready for turning. This prepares you well for crafting your unique vase.
What type of plywood is best for a layered vase?
Baltic birch plywood is often the best choice. It’s strong, smooth, and perfect for lathe projects. This plywood helps your vase look great!
Lathe Turning Techniques
Basic turning techniques for beginners. Advanced techniques for intricate designs.
Lathe turning can be fun and rewarding. For beginners, focus on these basic techniques:
- Faceplate turning: Attach the wood securely to create a flat surface.
- Spindle turning: Rotate the wood to shape long objects like toys or candlesticks.
As you gain confidence, explore advanced techniques for intricate designs:
- Compound angles: Create unique shapes by cutting at different angles.
- Texturing: Add detail using special tools for added flair.
Each technique helps you craft beautiful items, like a lathe turned layered plywood vase!
What is lathe turning?
Lathe turning is a method of shaping wood or metal by spinning it on a lathe, allowing you to create rounded objects easily.
What tools do I need for lathe turning?
You’ll need a lathe, tools like gouges and chisels, and safety gear to start.
Design Considerations for Plywood Vases
Aesthetics and functionality in design. Tips for creating unique layered patterns.
Creating a plywood vase is like cooking a stew; it’s all about the right mix of flavors! Start with looks and function. Your vase should catch the eye but also hold some water (no one wants a soggy mess). To make unique layers, try different colored plywood. Think of it as a cake—you can stack, glue, and turn until it’s just right!
| Design Aspect | Tip |
|---|---|
| Aesthetics | Choose wood colors that contrast for a striking look. |
| Functionality | Seal with waterproof finish to ensure durability. |
| Layered Patterns | Experiment with different shapes while turning. |
Remember, designing a plywood vase is about balancing beauty and use. So, get creative, have fun, and let your imagination flow like water in a well-made vase!
Finishing the Vase
Recommended finishing methods (stains, seals, etc.). Tips for achieving a professional look.
To make your vase look beautiful, finishing is key. A good finish adds shine and protects the wood. Here are some popular methods:
- Stains: They add color and highlight the wood grain.
- Sealants: These protect against water and damage.
- Varnish: This gives a glossy look and a super finish.
For a professional touch, you can:
- Sand the surface between coats.
- Apply thin layers for even results.
- Use a soft cloth for a smooth finish.
With these tips, your lathe turning layered plywood vase will shine!
What is the best finish for wood vases?
Oil-based finishes work well as they soak in and enhance the wood’s beauty.
Common Mistakes to Avoid
Mistakes in selecting materials. Errors during the turning process.
Choosing the right materials is key. Use good quality plywood to avoid weak spots. Also, pick layers that bond well together. While turning your vase, stay focused. Rushing can lead to uneven cuts. Make sure the tool is sharp to prevent splinters.
- Check the plywood’s glue quality.
- Ensure the layers are evenly cut.
- Maintain a steady speed during turning.
- Inspect for splinters or rough edges.
What should I avoid when using a lathe?
Avoid using cheap materials. They can ruin your project. Don’t ignore safety gear, like goggles and gloves, to protect yourself.
Showcasing Your Finished Vase
Ideas for displaying and using the vase. Suggestions for gifting and selling your creations.
Now that your lathe-turned vase is ready to shine, let’s talk about how to show it off! Place it in a sunny spot to catch the light, or fill it with colorful flowers to brighten up any room. If you’re feeling crafty, consider gifting it to a friend. Nothing says, “I care” like a handmade treasure! Want to earn some cash? Selling your creations could be a fun side hustle. Just think of all the coffee you could buy!
| Showcasing Ideas | Gifting Suggestions | Selling Options |
|---|---|---|
| Sunny windowsill | Birthday gift | Online market platforms |
| Colorful flower display | Holiday decor | Local craft fairs |
| Table centerpiece | Housewarming gift | Social media posts |
Play around with different styles, and your vase will be the talk of the town! Why not share a picture of it on social media? You could inspire others with your creativity!
Conclusion
In summary, making a lathe-turned layered plywood vase is a fun and creative project. You can explore different designs and colors. Using a lathe lets you shape the wood easily. We encourage you to try this project yourself! Check out tutorials online for step-by-step guidance. With practice, you can make beautiful vases to share or decorate your home.
FAQs
What Are The Best Types Of Plywood For Turning On A Lathe To Create A Layered Vase?
The best types of plywood for creating a layered vase are birch and maple plywood. They are strong and smooth, making them easy to work with. You can also use oak plywood for its pretty patterns. Always choose plywood that is at least 1 inch thick to make it sturdy. Have fun making your vase!
How Do You Properly Prepare Layered Plywood Before Turning It On The Lathe?
To prepare layered plywood for the lathe, start by checking for any loose layers. Use a strong glue to secure them if needed. Next, cut the plywood into a shape that fits the lathe. Then, sand the edges to make them smooth. Finally, make sure everything is clean and dry before you begin turning.
What Techniques Can Be Used To Achieve A Smooth Finish On A Lathe-Turned Plywood Vase?
To get a smooth finish on a lathe-turned plywood vase, we can use several techniques. First, sand the surface gently with sandpaper, starting with a rough grit and moving to a finer one. Next, you can wipe the vase with a damp cloth to remove dust. After that, you can apply a wood finish, like oil or wax, to make it shine. Finally, let it dry completely before touching it again.
How Do You Control The Grain Orientation Of Layered Plywood When Shaping A Vase?
To control the grain of layered plywood when making a vase, you need to plan carefully. First, look at the wood layers. They have lines, which show the grain direction. You want to place the layers so the lines flow nicely together. When you cut and shape the vase, make sure the grain lines match. This way, your vase will be strong and look good!
What Safety Precautions Should Be Taken When Lathe Turning Layered Plywood?
When turning layered plywood on a lathe, you should always wear safety goggles to protect your eyes. Keep your hair tied back and wear tight-fitting clothes to avoid getting caught in the machine. Make sure your hands stay clear of the spinning wood. Always use both hands to hold the tool securely. Finally, don’t forget to keep your work area clean to avoid any trips or accidents.
{“@context”:”https://schema.org”,”@type”: “FAQPage”,”mainEntity”:[{“@type”: “Question”,”name”: “What Are The Best Types Of Plywood For Turning On A Lathe To Create A Layered Vase? “,”acceptedAnswer”: {“@type”: “Answer”,”text”: “The best types of plywood for creating a layered vase are birch and maple plywood. They are strong and smooth, making them easy to work with. You can also use oak plywood for its pretty patterns. Always choose plywood that is at least 1 inch thick to make it sturdy. Have fun making your vase!”}},{“@type”: “Question”,”name”: “How Do You Properly Prepare Layered Plywood Before Turning It On The Lathe? “,”acceptedAnswer”: {“@type”: “Answer”,”text”: “To prepare layered plywood for the lathe, start by checking for any loose layers. Use a strong glue to secure them if needed. Next, cut the plywood into a shape that fits the lathe. Then, sand the edges to make them smooth. Finally, make sure everything is clean and dry before you begin turning.”}},{“@type”: “Question”,”name”: “What Techniques Can Be Used To Achieve A Smooth Finish On A Lathe-Turned Plywood Vase? “,”acceptedAnswer”: {“@type”: “Answer”,”text”: “To get a smooth finish on a lathe-turned plywood vase, we can use several techniques. First, sand the surface gently with sandpaper, starting with a rough grit and moving to a finer one. Next, you can wipe the vase with a damp cloth to remove dust. After that, you can apply a wood finish, like oil or wax, to make it shine. Finally, let it dry completely before touching it again.”}},{“@type”: “Question”,”name”: “How Do You Control The Grain Orientation Of Layered Plywood When Shaping A Vase? “,”acceptedAnswer”: {“@type”: “Answer”,”text”: “To control the grain of layered plywood when making a vase, you need to plan carefully. First, look at the wood layers. They have lines, which show the grain direction. You want to place the layers so the lines flow nicely together. When you cut and shape the vase, make sure the grain lines match. This way, your vase will be strong and look good!”}},{“@type”: “Question”,”name”: “What Safety Precautions Should Be Taken When Lathe Turning Layered Plywood? “,”acceptedAnswer”: {“@type”: “Answer”,”text”: “When turning layered plywood on a lathe, you should always wear safety goggles to protect your eyes. Keep your hair tied back and wear tight-fitting clothes to avoid getting caught in the machine. Make sure your hands stay clear of the spinning wood. Always use both hands to hold the tool securely. Finally, don’t forget to keep your work area clean to avoid any trips or accidents.”}}]}