Imagine you’re in a workshop with many shiny metal tools around you. Have you ever seen a metal lathe in action? It can turn a plain metal bar into something amazing. One cool trick it does is called knurling. Do you know what that is?
Knurling adds patterns on the metal surface. This makes it look nice and gives grip so things don’t slip. It’s fun to watch, but setting up the knurling tool is the real magic!
Think of setting up a metal lathe knurling tool like preparing a delicious sandwich. You need to get everything right, or it won’t taste good. The metal lathe needs the correct knurling tool to make perfect patterns.
Some folks might find it tricky at first. But with practice, setting up becomes easy and fun. What patterns will you create next with your setup skills?
Effective Metal Lathe Knurling Tool Setup Guide

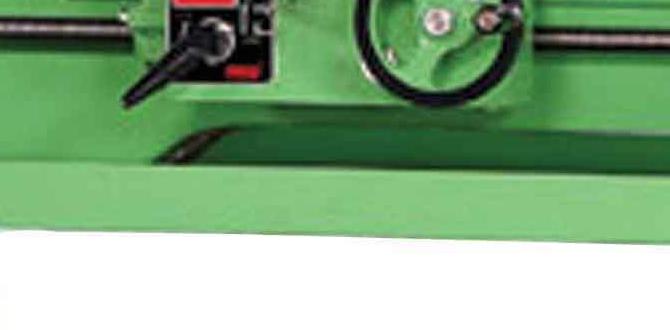
Metal Lathe Knurling Tool Setup
Ever tried gripping a slippery metal object? It’s tricky! A metal lathe knurling tool setup helps solve this by creating tiny patterns on metal surfaces. Imagine a metal rod with a crisscross pattern. Cool, right? These patterns provide better grip. Setting up the knurling tool is simple. Align it with the metal lathe, adjust its pressure, and begin. This setup transforms smooth metal into a grip-friendly wonder!Understanding Knurling and Its Applications
Types of knurling and their uses. Why knurling is essential in metalworking.Knurling is like adding small patterns to metal. It helps in gripping things better. There are three main types:
- Straight Knurling: Handy for providing a good grip.
- Diamond Knurling: Used to make parts fit snugly together.
- Spiral Knurling: Helps with decoration and gripping too.
Why is knurling essential? Imagine holding a slippery tool; it’s hard, right? With knurling, tools become easier to hold. It’s very important for safety and comfort. Plus, it makes metal parts look cool!
What are the benefits of using a metal lathe knurling tool setup?
Knurling ensures a strong grip on metals. It adds texture, making tools safer to handle. This setup is vital because it improves product quality in metalworking. It’s quick and efficient!
Essential Tools and Materials for Knurling
List of tools required for a lathe knurling setup. Different materials suitable for knurling.Knurling might sound like a funny word, but it’s a cool way to make grooves on metal. To get started, you’ll need a few tools. First, grab a **lathe**—this is the big guy that does the spinning. Then, arm yourself with a **knurling tool**. This tool looks like a mini pizza cutter with teeth! Next, pick your material—like aluminum or brass. Each material adds its flavor to the finished knurl.
| Essential Tools | Suitable Materials |
|---|---|
| Lathe Machine | Aluminum |
| Knurling Tool | Brass |
| Calipers | Steel |
Forget to measure? Don’t worry, calipers will come to the rescue. Want a pro tip? Stainless steel gives a sturdy knurl, but aluminum’s shine is quite the head-turner! Remember, each material acts a bit like choosing a dance partner—they all move uniquely.
Preparing Your Lathe for Knurling
Steps to ensure your lathe is ready for knurling. Safety precautions to consider before starting.Before using your lathe for knurling, it’s important to make sure everything is set up right and safe. First, check that all parts of your lathe are tightly in place. Loose parts can be dangerous. Next, make sure the tool is clean and free from any dirt. Double-check that the knurling tool is tight and in a good position. Wear safety goggles to protect your eyes from any flying bits. Keep your hair and clothes away from the machine. Always be aware and safe when working with your lathe.
Why is knurling used on lathe?
Knurling adds grip to metal parts. It is often used on tools and knobs to make them easier to hold. The rough texture can also make parts look nice. This helps when you need a better grip on handles or as a detailed finish on metal objects.
What are the types of knurling?
- Straight Knurling: Creates straight lines and is used for grips.
- Diamond Knurling: Makes a crisscross pattern often preferred for appearance.
- Annular Knurling: Offers a wave pattern, mostly used for decorative finishes.
Is knurling difficult?
Knurling is not hard but requires practice. Starting with a simple piece helps. Make sure to have the right tools and follow safety tips. Patience and care make the process easier and safer.
Choosing the Right Knurling Tool
Comparison of different types of knurling tools. Selecting the appropriate knurling tool for specific projects.Picking a knurling tool can feel like choosing a superhero sidekick. Do you want the strength of a straight knurl, the dexterity of a diamond pattern, or the versatility of a linear knurl? Think about what you need for your project—grip, appearance, or fit—and match it to the tool’s special power. Straight knurls are like trusty best friends for simple grips, while diamond patterns add some pizzazz for fancy finishes!
| Knurling Tool Type | Best For |
|---|---|
| Straight Knurl | Enhanced grip on cylindrical surfaces |
| Diamond Knurl | Visually appealing finishes |
| Linear Knurl | Precisely detailed patterns |
Remember, choosing the right tool is like picking the right hat—the perfect one will make the project shine and everyone’s day brighter. So, don’t rush, and know what each tool can do for your masterpiece!
Setting Up the Knurling Tool on the Lathe
Detailed process for attaching the knurling tool to the lathe. Adjusting tool angles and pressure for optimal results.Ever feel like setting up a knurling tool on a lathe is like solving a Rubik’s cube blindfolded? Well, it doesn’t have to be! Start by securing the knurling tool in the tool holder. Ensure it’s super snug, like a bug in a rug. With the tool in place, adjust the angles so the wheels meet the workpiece squarely; this gives crisp knurls. Now, it’s all about pressure. Too much can flatten the knurls, while too little makes them look sad! Aim for the goldilocks zone—not too hard, not too soft—just right!
| Step | Action |
|---|---|
| 1. Secure Tool | Attach firmly in tool holder |
| 2. Adjust Angles | Align tool for optimal contact |
| 3. Set Pressure | Find perfect balance |
Fun fact: the perfect knurl pressure makes tools hum, kind of like a happy cat purring. Your lathe knows this tune!
Executing the Knurling Process
Stepbystep guide to performing knurling on a metal lathe. Tips for achieving clean and uniform knurl patterns.To get good knurling on a metal lathe, follow these steps. Position the tool right above the workpiece. Next, start the lathe at a low speed. Turn slowly and press evenly with the knurling tool. Check the pattern often to make sure it’s even and clear. Keep the tool tight to avoid slips. Lubricate the metal for a smooth finish. Each knurl should be uniform and sharp. A clean working area helps achieve better results.
### Why is lubrication important in knurling?Lubrication keeps the knurling tool from overheating. It also helps create a smoother pattern. Without it, the tool might wear out or cause marks on the metal. Cool lubrication can extend tool life and maintain precision.
Troubleshooting Common Knurling Issues
Identifying common knurling problems and their causes. Solutions and adjustments to improve knurling quality.Troubleshooting common knurling issues
Knurling problems can appear for different reasons. Why does uneven knurling happen? It’s often due to uneven pressure or tool misalignment.
- **Worn knurls:** Check if they need replacing.
- **Slipping material:** Use a stronger grip or adjust feed rate.
Maintaining Your Knurling Tools
Best practices for cleaning and storing knurling tools. Regular maintenance routines to extend tool lifespan.Metal lathe knurling tools need special attention to stay sharp and effective. How can you keep them tip-top? First, make sure to clean them after using. This stops rust and build-up. Wipe them with an oil cloth. Store them in a dry spot. A toolbox or drawer works fine.
- Clean regularly – It keeps tools shiny and ready.
- Use oil – It helps fight rust.
- Store carefully – Keep them safe from moisture.
Regular maintenance plays a big role. Check your tools often. If you spot damage, fix it right away. This helps them last longer and work better. Remember, caring for your knurling tools can save you time and money. Give them the care they deserve.
Why is cleaning knurling tools important?
Cleaning knurling tools removes dirt and prevents rust. It keeps the tools in good condition, ready for the next project. Unclean tools can lead to poor work quality. Taking the time for simple cleaning every day can make a big difference.
How can you tell if a tool needs repair?
Inspect your tools for worn or broken edges. If they aren’t working well or catching metal, it might be time for a fix. Keeping an eye on this helps avoid bigger problems later on.
Skipping cleaning and storage steps can lead to problems. A little effort now saves time and money later. Follow these best practices to enjoy smooth and successful projects every day!
Conclusion
Setting up a metal lathe knurling tool is easy when you know the basics. You should secure the tool tightly and set it slightly above the center. Practice makes it perfect. Try different techniques to achieve great knurl patterns. Explore further to master your skills and create amazing designs. Happy learning and keep experimenting!FAQs
What Are The Essential Components And Tools Required For Setting Up A Metal Lathe Knurling Tool?To set up a metal lathe knurling tool, you need a strong metal lathe. Get a knurling tool, which makes patterns on the metal. You also need safety goggles to protect your eyes. Don’t forget a ruler to measure exactly where to knurl.
How Do You Properly Align A Knurling Tool With The Workpiece To Ensure Consistent And Precise Knurl Patterns?To align a knurling tool with the workpiece, first make sure both are tightly held in place. Then, position the tool so it lightly touches the workpiece’s surface. Start the machine slowly and check if the pattern begins forming evenly. Adjust the tool if needed to keep the pattern neat and even.
What Are The Different Types Of Knurling Patterns, And How Does The Setup Process Vary For Each Type?Knurling is when we make tiny patterns on metal to help us grip it better. There are three main types of knurling patterns: straight, diamond, and spiral. Straight knurling has lines that run in the same direction. Diamond knurling looks like tiny diamonds. Spiral knurling has raised lines that twist around like a spiral. When setting up to make these patterns, we use a special tool with the pattern we want. We then press this tool onto the metal to create those tiny raised lines.
How Do You Adjust The Pressure Applied By The Knurling Tool To Prevent Damage To Both The Tool And The Workpiece?First, make sure you hold the tool steady. Then, carefully turn the pressure knob to apply just a bit of force. Keep checking to see if the knurling (the patterns or lines) looks right. If the lines are clear but not cutting too deep, you’ve found the right pressure. If it’s too deep, turn the knob back a little to reduce the pressure.
What Safety Precautions Should Be Taken During The Setup And Operation Of A Knurling Tool On A Metal Lathe?When using a knurling tool on a metal lathe, wear safety glasses to protect your eyes. Make sure your sleeves are rolled up and no loose clothing can catch in the machine. Keep your fingers and hands away from spinning parts. Always turn off the lathe before making any adjustments. Finally, listen to your teacher or adult while they guide and supervise you.
{“@context”:”https://schema.org”,”@type”: “FAQPage”,”mainEntity”:[{“@type”: “Question”,”name”: “What Are The Essential Components And Tools Required For Setting Up A Metal Lathe Knurling Tool? “,”acceptedAnswer”: {“@type”: “Answer”,”text”: “To set up a metal lathe knurling tool, you need a strong metal lathe. Get a knurling tool, which makes patterns on the metal. You also need safety goggles to protect your eyes. Don’t forget a ruler to measure exactly where to knurl.”}},{“@type”: “Question”,”name”: “How Do You Properly Align A Knurling Tool With The Workpiece To Ensure Consistent And Precise Knurl Patterns? “,”acceptedAnswer”: {“@type”: “Answer”,”text”: “To align a knurling tool with the workpiece, first make sure both are tightly held in place. Then, position the tool so it lightly touches the workpiece’s surface. Start the machine slowly and check if the pattern begins forming evenly. Adjust the tool if needed to keep the pattern neat and even.”}},{“@type”: “Question”,”name”: “What Are The Different Types Of Knurling Patterns, And How Does The Setup Process Vary For Each Type? “,”acceptedAnswer”: {“@type”: “Answer”,”text”: “Knurling is when we make tiny patterns on metal to help us grip it better. There are three main types of knurling patterns: straight, diamond, and spiral. Straight knurling has lines that run in the same direction. Diamond knurling looks like tiny diamonds. Spiral knurling has raised lines that twist around like a spiral. When setting up to make these patterns, we use a special tool with the pattern we want. We then press this tool onto the metal to create those tiny raised lines.”}},{“@type”: “Question”,”name”: “How Do You Adjust The Pressure Applied By The Knurling Tool To Prevent Damage To Both The Tool And The Workpiece? “,”acceptedAnswer”: {“@type”: “Answer”,”text”: “First, make sure you hold the tool steady. Then, carefully turn the pressure knob to apply just a bit of force. Keep checking to see if the knurling (the patterns or lines) looks right. If the lines are clear but not cutting too deep, you’ve found the right pressure. If it’s too deep, turn the knob back a little to reduce the pressure.”}},{“@type”: “Question”,”name”: “What Safety Precautions Should Be Taken During The Setup And Operation Of A Knurling Tool On A Metal Lathe? “,”acceptedAnswer”: {“@type”: “Answer”,”text”: “When using a knurling tool on a metal lathe, wear safety glasses to protect your eyes. Make sure your sleeves are rolled up and no loose clothing can catch in the machine. Keep your fingers and hands away from spinning parts. Always turn off the lathe before making any adjustments. Finally, listen to your teacher or adult while they guide and supervise you.”}}]}