Mill the impossible on your mini lathe! A milling attachment transforms your lathe into a powerful, versatile machine tool, letting you create precise slots, keyways, gears, and more with ease. This essential guide shows beginners how to set up and use this game-changing accessory for fantastic workshop results.
Ever looked at a metal part with a neat slot or a precisely cut gear and thought, “How did they do that on a small lathe?” It’s a common question for anyone starting in the workshop. While mini lathes are amazing for turning, they have limits. But what if I told you there’s a simple attachment that unlocks a whole world of precise, flat-surface machining? That’s where the milling attachment for your mini lathe comes in – a true game-changer! It might seem a bit intimidating at first, but don’t worry. I’m Daniel Bates from Lathe Hub, and I’m here to guide you through it, step-by-step. We’ll get you milling like a pro in no time.
This guide is your go-to resource for understanding what a milling attachment is, why you need one, and how to use it safely and effectively. We’ll cover everything from initial setup to making your first cuts. Get ready to expand your machining capabilities and impress yourself with what you can create!
What Exactly is a Milling Attachment for a Mini Lathe?
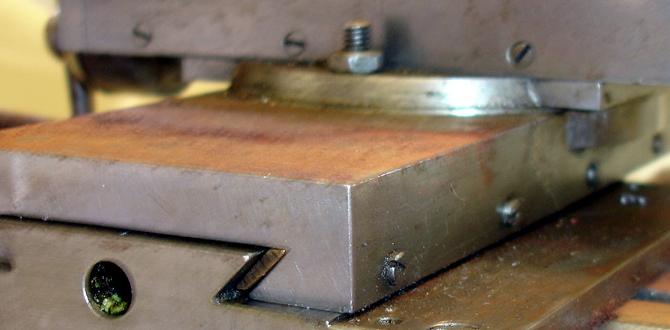
Think of your mini lathe like a spinning chisel. It’s fantastic for making round shapes. A milling attachment, on the other hand, turns your lathe into something more like a stationary cutting tool. It essentially clamps onto your lathe’s bed and holds a cutting tool (like an end mill) that spins. You then carefully move your workpiece into this spinning cutter to remove material. This allows you to create flat surfaces, cut slots, make keyways, drill precise holes, and even mill small gears – tasks that are difficult or impossible on a lathe alone.
It’s like giving your mini lathe a super-powered upgrade, transforming it from a “round maker” into a multi-talented machining center. For hobbyists and DIY makers, it’s an absolute must-have for tackling more complex projects.
Why You Absolutely Need a Milling Attachment
If you’ve ever found yourself wishing your mini lathe could do more than just turn round parts, you’ve probably hit a wall. Maybe you needed to cut a slot for a set screw, create a flat surface to mount something, or make a small gear. Trying to do these on a lathe can be inaccurate, time-consuming, and sometimes downright impossible. That’s where the milling attachment shines.
It opens up a whole new realm of project possibilities. Imagine:
- Creating precise keyways for shafts and pulleys.
- Milling flat surfaces on oddly shaped workpieces.
- Cutting accurate slots for custom fittings.
- Machining small gears or splines.
- Drilling holes perfectly perpendicular to a surface.
- Adding custom features to existing parts.
For anyone serious about taking their DIY projects, metalworking, or even woodworking to the next level, a milling attachment isn’t just a useful accessory; it’s an essential tool for unlocking your creative potential and achieving professional-looking results.
Types of Milling Attachments for Mini Lathes
When you start looking for milling attachments, you’ll notice a few common types. They all aim to do the same thing – hold a spinning cutter close to your workpiece – but they achieve it in slightly different ways. Understanding these differences can help you choose the best one for your needs and your mini lathe.
1. The Over-the-Head (or Saddle) Milling Attachment
This is perhaps the most common type for mini lathes. It clamps onto the lathe’s saddle (the part that moves the tool post along the bed) and positions the spindle and cutting tool above the workpiece, which is held in the chuck or a vise on the cross-slide. The spindle is usually belt-driven from a separate motor or sometimes even from the lathe’s main spindle.
Pros:
- Generally good stability.
- Can accommodate larger workpieces.
- Often allows for more Z-axis (longitudinal) travel.
Cons:
- Can add significant weight and bulk to the lathe saddle.
- May reduce the available swing (the maximum diameter you can turn).
- Setup can sometimes be more involved.
2. The Cross-Slide Mounted Milling Attachment
These attachments clamp directly onto the cross-slide and hold the spindle parallel to the lathe’s bed, or sometimes at an angle. The workpiece is typically held in the chuck, and the entire cross-slide assembly moves to feed the workpiece into the spinning cutter. These are often smaller and more compact.
Pros:
- Generally more compact and lighter.
- Simpler to set up for some operations.
- Less impact on the lathe’s overall stability.
Cons:
- Limited by the travel of the cross-slide.
- May not be suitable for longer workpieces.
- Can be less rigid than over-the-head types.
3. DIY and Specialized Attachments
Many machinists, especially those with a strong DIY spirit, create their own milling attachments. These can range from simple vices adapted to hold end mills to more complex contraptions utilizing spare motors and custom-machined parts. There are also very specialized attachments for specific tasks, but for a beginner, sticking to a commercially available or well-documented DIY design is usually best.
When choosing, consider the size of your mini lathe, the types of projects you plan to undertake, and your budget. For most beginners with standard mini lathes (like those from Grizzly, Harbor Freight, or Shop Fox), an over-the-head attachment is often a good starting point.
Essential Components of a Milling Attachment Setup
To get your milling attachment up and running safely and effectively, you’ll need a few key pieces of equipment to work with it. It’s not just about the attachment itself; the supporting cast makes a big difference!
Here’s a breakdown of what you’ll typically need:
- The Milling Attachment: This is the main unit that holds your milling cutter. Ensure it’s designed to fit your specific mini lathe model for secure mounting.
- Cutting Tools (End Mills): You’ll need end mills for cutting. These are typically held in a collet or a milling chuck. Start with a few common sizes, such as 1/4″, 3/8″, and 1/2″, in both two-flute (for plastics and wood) and four-flute (for metals) varieties if you plan on milling metal.
- Collets or Milling Chuck: This is how you securely hold the end mill in the milling attachment’s spindle. Collets offer a very precise grip on the end mill shaft, while milling chucks are often more versatile and easier to use for beginners.
- Workholding Device: You’ll need a way to hold your workpiece securely while it’s being milled. A small milling vise that clamps onto your lathe’s cross-slide or tool post is the most common and recommended method.
- Measuring Tools: Precision is key! You’ll need calipers, a dial indicator, and possibly a height gauge for accurate setup and measurement.
- Safety Gear: Absolutely non-negotiable! Safety glasses (or better yet, a full face shield), hearing protection, and avoiding loose clothing are paramount.
Having the right components ensures a smooth, safe, and accurate milling experience. Investing in good quality tools here will save you frustration and improve the quality of your finished parts.
Setting Up Your Milling Attachment: Step-by-Step
Setting up your milling attachment for the first time can seem a bit daunting, but by following these steps carefully, you’ll have it ready for action. Safety first, always!
Step 1: Prepare Your Lathe
Ensure your mini lathe is clean and stable. If it’s mounted on a bench, make sure the bench is solid. Turn off the lathe and unplug it before you begin any mounting procedures.
Step 2: Mount the Milling Attachment
Follow the manufacturer’s instructions for your specific milling attachment. Most over-the-head types will clamp onto the lathe’s saddle. Ensure it’s mounted securely and squarely. A wobbly attachment leads to inaccurate cuts and potential hazards.
Check that the attachment doesn’t interfere with the lathe’s normal operation or limit its travel beyond what’s acceptable for your planned work.
Step 3: Install the Spindle and Drive System
Depending on your attachment, you might need to install the spindle and connect a drive system. Many attachments use a separate motor and belt system. Ensure the belts are properly tensioned – not too tight (which can strain bearings) and not too loose (which can cause slippage).
Some smaller attachments might be driven from the lathe’s own spindle, which requires a different setup involving gears or belts to transfer power and usually a different spindle speed range.
Step 4: Install Workholding on the Cross-Slide
Clamp your milling vise or other workholding device securely to the lathe’s cross-slide. Make sure it’s centered and square to the bed as much as possible. A vise is highly recommended for beginners.
Step 5: Mount Your Cutting Tool
Insert your chosen end mill into the collet or milling chuck. Then, insert the collet/chuck into the milling attachment’s spindle. Tighten it securely according to the manufacturer’s instructions. Make sure the end mill is centered in the collet/chuck.
Step 6: Align and Zero the Attachment
This is where precision really matters.
- Aligning the Spindle: Use a dial indicator. Mount the indicator on the tool post or in the milling attachment spindle. With the workpiece (or a test bar in the chuck) stationary, rotate the milling attachment’s spindle. You want the indicator reading to be as close to zero as possible across a full rotation of the milling attachment’s spindle. This ensures the cutter isn’t wobbling.
- Rough Alignment: Lower the milling attachment spindle until the cutting end of the end mill is very close to the workpiece.
- Zeroing: Use your dial indicator mounted on the cross-slide to measure the position of the workpiece. Jog the cross-slide until the end mill just touches the surface of your workpiece. Record this reading on your cross-slide dial. This is your “zero” point for depth.
Important Note: For initial setup and testing, it’s often best to use a piece of scrap material, not your actual workpiece!
Step 7: Power Up and Test Run
Ensure the area is clear. Put on your safety glasses and any other required safety gear. Start the milling attachment’s motor at a slow speed. Briefly run the end mill against your scrap material to ensure everything is running smoothly and that you have the correct depth zeroed.
Take your time with each step. Double-checking your setup will prevent mistakes and ensure your milling operations are accurate and safe. For more detailed alignment techniques, refer to your specific attachment’s manual or renowned machining resources like those found on the National Institute of Standards and Technology (NIST) Manufacturing Extension Partnership website which often links to best practices in manufacturing and machining.
How to Mill Safely and Effectively
Milling on a mini lathe requires a different approach than turning. Always prioritize safety and follow these guidelines for the best results.
Safety First, Always!
This can’t be stressed enough. Machining, especially milling, involves fast-moving cutting tools and potentially sharp chips.
- Eye Protection: Non-negotiable. Wear safety glasses with side shields or a full face shield at all times.
- No Loose Clothing or Jewelry: Anything that can get caught can lead to serious injury.
- Chip Management: Use a brush or chip hook to clear chips. Never use compressed air, as chips can fly at high speed. Directing airflow to clear chips is also dangerous, as chips can get blown into your face or the machine’s workings.
- Keep Hands Clear: Never place your hands near the cutting tool assembly while it’s running.
- Secure Workpiece: Ensure your workpiece is clamped firmly in the vise. A part coming loose during a cut is extremely dangerous.
- One Operation at a Time: Don’t try to mill and turn simultaneously. Disable the lathe’s spindle if the milling attachment is driven by its main motor.
The Milling Process: Step-by-Step for Beginners
Let’s walk through making a simple slot. This is a fundamental milling operation you’ll use often.
Step 1: Secure Your Workpiece
Mount your workpiece securely in the milling vise attached to the cross-slide. Make sure the surface you want to mill is accessible and oriented correctly.
Step 2: Set Your Cutting Depth (Depth of Cut)
Using your cross-slide dial (which you zeroed during setup), carefully advance the cross-slide to set the desired depth of cut. For initial cuts, take lighter passes. You might want to touch off the end mill on the surface of your workpiece and then turn the dial to the desired depth (e.g., if you want to cut 1/8″ deep, advance the dial 1/8″ from your zero point).
Step 3: Set the Cutting Speed
The right spindle speed is crucial for efficient cutting and tool life. For mini lathes and common end mills in metal, slower speeds are generally better. A good starting point for a 1/4″ end mill in aluminum might be around 500-800 RPM, and for steel, it might be even slower or require a tougher setup. Consult charts for recommended speeds and feeds for your specific material and tool size. (You can find many online charts, for example, from Practical Machinist) as a reputable resource.
Step 4: Feed the Workpiece into the Cutter
With the milling spindle running at the correct speed, use the cross-slide handwheel to slowly feed the workpiece into the spinning end mill. The tool will begin to remove material.
- Feed Rate: This is how fast you push the workpiece. For beginners, slow and steady is best. You should hear a consistent cutting sound, not a high-pitched squeal (too fast) or a chattering noise (tool dull, depth too much, or setup too loose).
- Direction of Cut: Most milling attachments effectively allow for conventional milling (where the cutter “climbs” the workpiece in the opposite direction of its rotation) or climb milling (where the cutter “bites” into the workpiece in the same direction of its rotation). Conventional milling is generally safer and easier for beginners to control.
Step 5: Complete the Cut
Continue feeding the workpiece at the set depth until you reach the desired length of your slot or surface. Don’t rush this process.
Step 6: Retract and Repeat (if necessary)
Once the full cut is made, carefully retract the workpiece away from the spinning cutter using the cross-slide handwheel. Then, you can advance the cross-slide for another depth of cut if your slot needs to be deeper. Remember to take light passes, especially in harder materials.
Step 7: Finishing and Measuring
After completing all necessary cuts, clean your workpiece and measure it carefully with calipers to ensure it’s within your desired tolerances. The surface finish might not be perfectly smooth after a milling operation; you may wish to do a light finish pass or a touch-up on the lathe if needed.
Key Considerations for Different Materials:
Milling speeds and feeds need to be adjusted for different materials.
A general guideline:
| Material | Cutting Speed (approx. SFM) | Feed Rate (per tooth) |
|---|---|---|
| Aluminum (Soft) | 200-400 | 0.002″ – 0.005″ |
| Mild Steel | 50-100 | 0.001″ – 0.003″ |
| Brass | 100-200 | 0.0015″ – 0.004″ |
| Plastic (e.g., Delrin) | 300-600+ (use sharp, often single-flute) | 0.003″ – 0.010″ |
Note: SFM = Surface Feet per Minute. These are starting points. Always listen to the cut and adjust. For

