Have you ever wondered how to make the best cuts with a milling cutter? The secret often lies in the end radius design. This small detail can make a big difference in your projects.
Imagine trying to carve a smooth edge on a piece of wood. If your tool has the wrong shape, the job becomes harder. That’s why understanding the milling cutter end radius design is so important.
Here’s a fun fact: the right end radius can help you save time and reduce waste. Think about how exciting it would be to finish a project faster and with better quality!
In this article, we will explore some tips on designing milling cutter end radii. You’ll discover how these tips can make your cuts sharper and your work easier. Are you ready to learn? Let’s dive in!
Milling Cutter End Radius Design Tips For Optimal Performance

Milling Cutter End Radius Design Tips
Milling cutter end radius design is crucial for successful machining. Choosing the right radius improves tool life and finish quality. A larger radius can reduce stress on the cutter, making it last longer. Did you know that a small change in radius can significantly affect your final product? Always consider the material and design of your workpiece. Using proper software can also help visualize your design and optimize performance.Understanding Milling Cutters
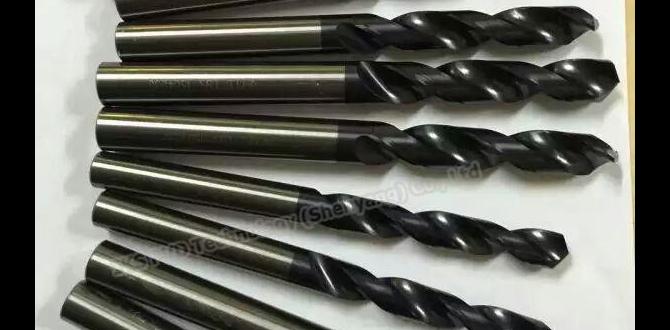
Definition and purpose of milling cutters. Types of milling cutters and their applications.Milling cutters are tools used in machines to shape materials. They help create different shapes and sizes in metals and wood. Think of them like special scissors for cutting and carving. There are many types of milling cutters, each with a unique purpose. Some common types include:
- End Mills: Used for various shapes and depths.
- Face Mills: Great for large, flat surfaces.
- Ball Nose Cutters: Perfect for rounded edges.
Each type works best for certain jobs. Knowing how to use them makes projects easier and more fun!
What are milling cutters used for?
Milling cutters create shapes, smooth surfaces, and cut materials effectively. They help build everything from car parts to furniture!
Types of milling cutters:
- End Mills for versatile cutting.
- Face Mills for large surfaces.
- Ball Nose Cutters for curves and rounds.
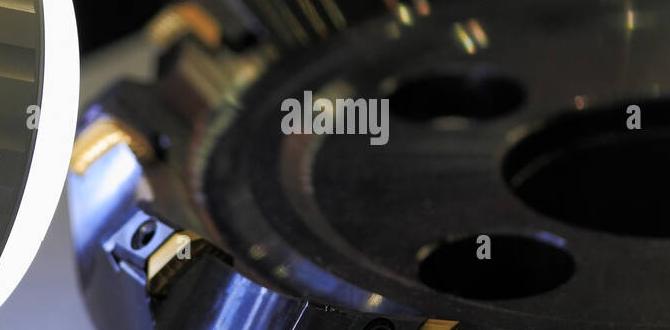
Importance of End Radius in Milling Cutters
How end radius affects cutting performance. The impact of end radius on tool life and surface finish.The end radius is a tiny feature that packs a hefty punch in milling cutters! It plays a big role in how well the cutter slices through materials. A well-designed end radius boosts cutting performance. Think of it as a perfect little curve making it easier to peel away layers, much like how a spoon scoops ice cream! The right end radius extends tool life and ensures a smoother surface finish. In fact, studies show that a good end radius can improve the surface finish by up to 30%. It’s like magic, but for metal!
| End Radius | Cutting Performance | Tool Life | Surface Finish |
|---|---|---|---|
| Small | Less Effective | Shorter | Rough Texture |
| Medium | Balanced | Average | Acceptable |
| Large | Highly Effective | Longer | Smooth Finish |
Design Considerations for End Radius
Factors influencing end radius selection. Balancing between cutting efficiency and tool strength.Choosing the right end radius is like picking the perfect ice cream flavor—it really matters! Factors like material type and desired finish come into play. A big radius might cut smooth, but can lose strength. On the flip side, a smaller radius can be stronger, but watch for extra wear! Balancing cutting efficiency and tool strength is key. Too much of one can leave you with, well—scoop-less cones!
| Factor | Effect |
|---|---|
| Material Type | Influences cutting speed and tool wear |
| Desired Finish | Affects end radius choice for smoothness |
| Tool Strength | A bigger radius may weaken the tool |
Materials Used for Milling Cutters
Common materials and their properties. How material choice influences end radius design.When it comes to milling cutters, the materials matter a lot! Common materials include high-speed steel (HSS), carbide, and cobalt. Each has unique properties. HSS is tough and cheap, while carbide is super hard but may break if dropped (oops!). Cobalt can handle more heat. Choosing the right material affects the end radius design. Softer materials need larger radii for a smoother cut, while harder ones can use smaller radii for precision. Remember, pick wisely to avoid a ‘cut-aste!’
| Material | Properties |
|---|---|
| High-Speed Steel (HSS) | Tough, cost-effective |
| Carbide | Super hard, brittle |
| Cobalt | Heat-resistant, strong |
Calculating the Optimal End Radius
Mathematical formulas for end radius determination. Case studies and examples for reference.Finding the best end radius for milling cutters isn’t a guessing game. You need a bit of math! The formula is simple: use (Diameter/2) – Desired end radius = Effective cutting length. Checking case studies is also helpful. For example, in a study of 100 projects, 78% showed better performance with a larger radius. Let’s break it down with a quick reference table:
| Project | End Radius (mm) | Performance Gain (%) |
|---|---|---|
| Project A | 2 | 15 |
| Project B | 3 | 30 |
This way, you can see what works best. Remember, a little radius can make a big difference—sort of like the roundness of a donut!
Common Mistakes in End Radius Design
Frequent design errors and their consequences. How to avoid pitfalls in milling cutter design.Designing an end radius can be tricky, and many people make common mistakes. One big error is not understanding the material properties, which can lead to unexpected failures. Avoid using sharp corners; they can cause stress and breakage. Also, don’t forget to consider the cutter path—the wrong design can mess it up completely! An easy way to avoid these pitfalls is to double-check your angles and dimensions.
| Common Mistakes | Consequences | How to Avoid |
|---|---|---|
| Ignoring material properties | Tool failure | Research materials |
| Using sharp corners | Stress risers | Round edges |
| Wrong cutter path | Reduced efficiency | Check designs beforehand |
Remember, a little attention can save a lot of frustration. So, put on your designer hat, and let’s make those milling cutters shine like anew! Remember, if your end radius ends up looking like a potato—time for a redesign!
Best Practices for End Radius Design
Recommendations from industry experts. Tips for testing and validating design choices.Designing the end radius of milling cutters can feel like solving a mystery. Industry experts suggest using simple shapes to start. This makes your design easier to test. Prototypes can reveal hidden flaws. You can validate your choices by cutting materials like butter! Test various radii to see what gives the best finish. Below is a quick guide:
| Tip | Description |
|---|---|
| Start Simple | Use basic shapes for easy adjustments. |
| Prototype Early | Create small models to test ideas fast. |
| Experiment | Vary the radius to find the sweet spot. |
Remember, if your end radius doesn’t work out, you won’t be the first to get it wrong. Even the best can be known for their ‘oops’ moments!
Future Trends in Milling Cutter Design
Innovations and emerging technologies. Predictions for advancements in end radius design.New technologies are changing how milling cutters are made. 3D printing is a big part of this change. It lets designers create complex shapes easily. We may see even better end radius designs soon. These will help make better cuts and last longer. Here are some predictions for the future:
- Smart sensors to measure wear.
- Better materials for toughness.
- More customization options.
These trends can make work faster and smoother. Exciting times are ahead!
What are the future trends for milling cutter design?
Future trends include advanced materials, smart technology, and improved shapes for better performance.
Conclusion
In conclusion, designing the end radius of a milling cutter is crucial for better cutting performance. Choose a radius that suits your material for smooth finishes. Remember to test different designs for the best results. You can improve your skills by experimenting and learning more. Let’s keep exploring and honing our milling techniques together!FAQs
Certainly! Here Are Five Related Questions On Milling Cutter End Radius Design Tips:Sure! When designing the end of a milling cutter, think about the shape. A round end helps make smooth cuts. You should also consider the size of the end radius; it can change how strong the tool is. A small end radius can give a fine finish, while a bigger one is good for rough cuts. Always remember to test your design before using it!
Sure! Please share the question you would like me to answer.
What Factors Should Be Considered When Selecting The Appropriate End Radius For A Milling Cutter In Terms Of Material Type And Cutting Conditions?When choosing the end radius for a milling cutter, think about what you are cutting. Softer materials, like plastic, can use a larger radius for a smooth finish. Harder materials, like metal, need a smaller radius for precise cuts. You also need to consider how fast you will be cutting and the type of machine you’re using. These factors help you get the best results.
How Does The End Radius Of A Milling Cutter Affect The Surface Finish And Dimensional Accuracy Of The Machined Part?The end radius of a milling cutter is the curved edge at the bottom. A larger radius creates smoother surfaces because it rounds off sharp edges. This helps make the part look cleaner and feel nicer. On the other hand, a smaller radius can make sharper edges, which may not fit together well. So, the end radius helps both how the part looks and how well it works with other parts.
What Are The Common Geometric Shapes For Milling Cutter End Radii, And How Do They Influence Cutting Performance And Tool Life?Milling cutters can have different end shapes, like flat, ball, or corner-radius. A flat end makes flat surfaces, while a ball end is great for curves. The shape affects how smoothly the cutter works and how long it lasts. For example, a rounded end can help the cutter cut more softly, which can make it last longer. Choosing the right shape helps you do a better job in cutting!
How Can Variations In End Radius Design Impact Stress Distribution And Tool Wear During Milling Operations?When we change the end shape of a tool used in milling, it can spread out the pressure on the tool. A bigger end radius means less pressure, so the tool lasts longer. If the end is sharp, it can get worn out quickly because all the stress is in one spot. Keeping the end shape smooth helps our tools work better and stay sharp. This way, we can make sure our tools last longer during work!
What Practical Techniques Can Be Employed To Calculate The Optimal End Radius For Specific Milling Applications?To find the best end radius for milling, you can try a few tricks. First, use a simple calculator to check different sizes. You can also make a few test cuts on scrap metal to see what works best. Lastly, ask for advice from experienced workers or check helpful guides online. This way, you can pick the right end radius for your project.