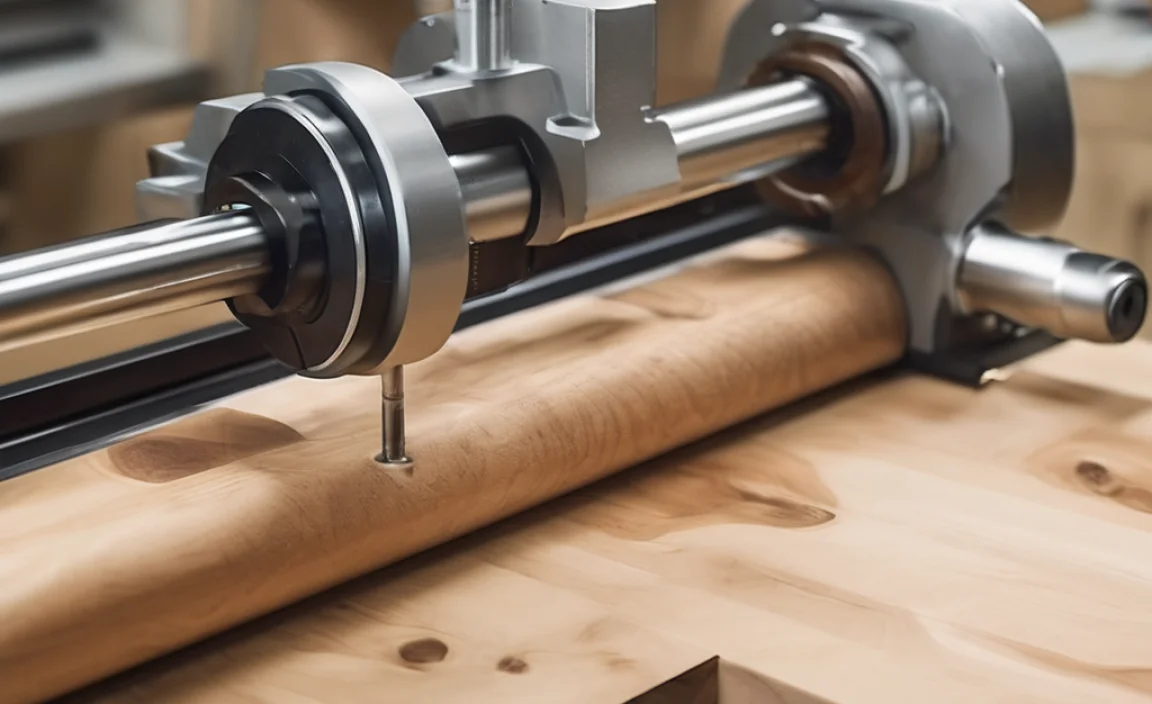
A 40-degree Tialn ball nose end mill is an excellent tool for wood, especially for creating smooth, curved surfaces and delicate details. Its specific angle allows for controlled material removal and consistent profiling in woodworking applications.
Hey there, fellow makers! Daniel Bates here from Lathe Hub. Ever found yourself staring at a piece of wood, wishing you could achieve those perfectly rounded edges or intricate, flowing lines? It can be frustrating when your tools just don’t give you the control you need. That’s where a special kind of tool comes in handy: the 40-degree Tialn ball nose end mill. This might sound fancy, but I promise it’s simpler than you think and can unlock some amazing possibilities in your woodworking projects. Stick around, and I’ll guide you through what this tool is, why it’s so great for wood, and how you can start using it effectively.
What Exactly Is a Ball Nose End Mill for Wood?
Let’s break down this tool. A standard end mill is designed for cutting slots, pockets, and profiles, usually with flat bottoms. A “ball nose” end mill, on the other hand, has a tip that’s shaped like a rounded ball. This unique shape means that instead of a sharp corner, it leaves a curved, smooth surface behind. Think of it like a pencil compared to a chisel – one makes a rounded mark, the other a sharp one. This rounded tip is fantastic for creating concave (inward-curving) surfaces, fillets (smooth transitions between two surfaces), and detailed carvings.
The 40-Degree Angle Explained
Now, what about that “40-degree” part? This refers to the angle of the flutes (the cutting edges) where they meet the ball nose. For woodworking, a 40-degree angle strikes a fantastic balance. It’s not too steep, which could lead to aggressive cutting and tear-out on softwoods, and it’s not too shallow, which might not provide enough cleaning action. This angle is particularly good for getting into tighter curves and creating a finely finished surface without grabbing or damaging the wood fibers too easily. It allows for a controlled “pecking” or “contouring” action, which is ideal for many woodworking tasks.
Tialn Coating: What It Is and Why It Matters
You might also see “Tialn” or “TiAlN” mentioned. This is a type of (Titanium Aluminum Nitride) coating applied to the end mill. This coating is super hard and creates a protective layer. For woodworking, this coating offers several benefits:
- Increased Durability: It makes the end mill last much longer, even when cutting harder woods.
- Reduced Friction: The smooth coating helps the tool glide through the wood with less effort.
- Better Heat Dissipation: Cutting creates heat. The coating helps manage this heat, preventing the tool from getting too hot and dulling quickly.
- Cleaner Cuts: By reducing friction and heat, Tialn coatings can help produce smoother, cleaner cuts with less fuzz or splintering.
Why Use a 40-Degree Tialn Ball Nose End Mill in Woodworking?
This specific tool isn’t just a general-purpose cutter; it excels in certain applications. Its design makes it perfect for achieving repeatable, high-quality results that are tough to get with traditional hand tools or less specialized machine tools. Let’s look at where it really shines:
Creating Smooth and Consistent Curves
This is the primary advantage. Whether you’re rounding over an edge, creating a concave bowl shape, or adding a decorative fillet, the ball nose shape ensures a perfect radius every time. The 40-degree angle helps maintain this smooth profile even when plunging into the material or traversing across it.
Detailed Carving and Profiling
For intricate designs, decorative inlays, or custom profiling, the precision of a ball nose end mill is invaluable. The finer points of the 40-degree ball can get into smaller areas, allowing for more detailed work than a larger or flatter-ended mill. This opens up possibilities for detailed relief carvings or creating unique edge profiles.
Thin-Wall Machining in Wood
This is where the “thin wall machining” keyword comes into play. While often discussed in metalworking, the principles apply to wood too. When you’re creating hollow forms, delicate shells, or structures with thin, curved walls, a standard end mill can easily gouge or break through the material. The gentle, sweeping cut of a ball nose end mill, especially one with a moderate angle like 40 degrees, allows for controlled material removal. This significantly reduces the risk of wall collapse or breakage, letting you achieve those impressive, thin-walled creations. You can learn more about strategies for machining delicate parts from reputable sources like the National Institute of Standards and Technology (NIST), which often covers advanced machining techniques.
Improved Surface Finish
The rounded tip of the ball nose end mill, combined with the Tialn coating, produces a remarkably smooth surface finish. This often means less sanding is required after machining, saving you time and effort in your finishing process. The consistent curvature it creates is much cleaner than trying to achieve the same effect with a fixed-radius router bit or a hand tool.
Consistency and Repeatability
Once you set up your CNC machine or milling attachment with a specific toolpath, the ball nose end mill will repeat that cut perfectly. This is crucial for creating identical parts, complex patterns, or symmetrical designs. You can achieve results that are difficult and time-consuming to replicate by hand.
Getting Started: Using Your 40-Degree Tialn Ball Nose End Mill
Ready to put this versatile tool to work? Here’s a step-by-step approach to using it effectively. Remember, safety first! Always wear safety glasses and ensure your workpiece is securely clamped.
Step 1: Understand Your Machine Setup
This tool is typically used with CNC machines (like desktop CNC routers) or equipped milling machine attachments for lathes or drill presses. Familiarize yourself with your machine’s controls, feed rates, spindle speeds, and how to load and secure the end mill.
Tools and Equipment You’ll Need:
- Your 40-degree Tialn ball nose end mill
- Your CNC machine or milling attachment
- Your workpiece (wood)
- Clamping system (e.g., vises, clamps, spoilboard)
- Collet or chuck to hold the end mill securely
- Safety glasses
- Dust collection system (highly recommended)
- Machining software (CAM software for toolpath generation)
Step 2: Securing the Workpiece
This is critical for safety and cut quality. Ensure your wood is firmly clamped down. Any movement during machining can ruin your project and be dangerous. If you’re working on a CNC, a sturdy spoilboard is essential. For more delicate thin-wall work, consider using jigs or vacuum hold-downs for even pressure distribution.
Step 3: Loading the End Mill
Insert the shank of the end mill into the collet or chuck of your spindle. Make sure it’s seated properly and tighten securely. Overtightening can damage the tool, but it must be held firm to prevent slipping during operation. Consult your machine’s manual for specific instructions on changing end mills.
Step 4: Software Setup and Toolpath Generation
This is where you tell your machine what to do. You’ll use CAD/CAM software to design your part or import a design. Then, you’ll define the cutting operations:
- Select the Tool: Choose your 40-degree Tialn ball nose end mill from your tool library. Input its diameter, number of flutes, and any specific coating information if your software allows.
- Define Cutting Strategy: For smooth curves and thin walls, you’ll likely use techniques like:
- Contour/Profile Cutting: For outlines and edge details.
- Pocketing: For carving out recessed areas.
- 3D Finishing: This strategy is ideal for creating complex, flowing surfaces, using the ball nose end mill to step across the surface and leave a smooth finish.
- Set Cutting Parameters: This is crucial for success and depends heavily on your wood type, the machine, and the end mill. We’ll cover this more in the next section.
- Generate G-code: The software will translate your design and cutting strategy into machine instructions (G-code).
For detailed insights into CAM software and toolpath strategies, resources like Autodesk Fusion 360 offer tutorials and guides that are invaluable for makers at all levels.
Step 5: Determining Cutting Parameters (Speeds and Feeds)
This is often the trickiest part for beginners, but it’s essential for preventing tool breakage, getting a good finish, and ensuring longevity of your tool.
Key Parameters:
- Spindle Speed (RPM): How fast the end mill spins.
- Feed Rate (IPM or mm/min): How fast the tool moves through the material.
- Depth of Cut (DOC): How deep the tool cuts in a single pass.
- Stepover: The distance the tool moves sideways between passes. For 3D surfaces, this significantly impacts the finish. Smaller stepovers (e.g., 5-10% of the ball diameter) create smoother finishes but take longer.
General Guidelines for Wood:
Wood is forgiving, but different types require different approaches. Hardwoods like oak or maple need slower speeds and feeds than softer woods like pine or poplar.
| Wood Type | Spindle Speed (RPM) | Feed Rate (IPM) | Typical Stepover (for 3D finishing) | Depth of Cut (per pass, for slotting/profiling) |
|---|---|---|---|---|
| Softwoods (Pine, Poplar) | 18,000 – 24,000 | 40 – 80 | 0.020″ – 0.050″ (0.5mm – 1.3mm) | 0.125″ – 0.250″ (3mm – 6mm) |
| Medium Woods (Cherry, Walnut) | 16,000 – 20,000 | 30 – 60 | 0.015″ – 0.040″ (0.4mm – 1.0mm) | 0.100″ – 0.200″ (2.5mm – 5mm) |
| Hardwoods (Oak, Maple, Exotic) | 14,000 – 18,000 | 20 – 40 | 0.010″ – 0.030″ (0.25mm – 0.75mm) | 0.080″ – 0.150″ (2mm – 4mm) |
Important Notes:
- These are starting points. Always do a test cut on scrap material first!
- Listen to your machine. If it sounds like it’s struggling, slow down the feed rate or reduce the depth of cut.
- Dust collection is vital. It clears chips, reduces fire risk, and improves visibility.
- For very thin-walled sections, you might need shallower depths of cut and smaller stepovers to prevent chatter and breakage.
Step 6: Performing the Cut
With your workpiece secured, end mill loaded, and toolpaths generated, it’s time to run the job.
- Zero the Machine: Set the machine’s X, Y, and Z zero points according to your CAM setup.
- Dry Run: Perform a test run with the spindle off to ensure the toolpath is clear of any clamps or obstacles and that the machine moves as expected.
- Start the Spindle: Turn on your spindle to the programmed RPM. Ensure your dust collection is active.
- Begin the Cut: Start the G-code program.
- Monitor: Stay close to your machine and watch the cutting process. Listen for unusual noises and check for excessive dust or smoke. Be ready to hit the pause or emergency stop button if anything seems wrong.
- For delicate thin-wall parts: You might want to program multiple shallow passes for depth and stepover, rather than trying to clear material too quickly.
Step 7: Inspection and Finishing
Once the machining is complete, carefully remove the workpiece from the machine.
- Inspect the Finish: Check for the desired curves, profiles, and wall thickness. The 40-degree ball nose should have left a smooth surface, but you might still need some light sanding.
- Sanding: Use sandpaper to knock down any minor fuzzies or tool marks. Due to the smooth cut of the ball nose, sanding is often minimal.
- Assembly/Further Work: Proceed with your project, knowing you’ve achieved precise results with your specialized tool.
Tips for Achieving the Best Results
To truly master using your 40-degree Tialn ball nose end mill, keep these extra tips in mind:
- Workpiece Material Selection: Denser, less-graining woods will give you the best results for intricate work and thin walls.
- Tool Holder Rigidity: A well-maintained spindle and a tight-fitting collet or chuck are crucial. Any wobble will translate into a poor finish.
- Chip Evacuation: Ensure your dust collection is effective. Chips piling up around the cutting area act like sandpaper, dulling your tool and creating a rough finish.
- Coolant/Lubrication (Less common in wood, but worth noting): While not typically used with wood in the same way as metal, sometimes a light mist of water can help control dust and reduce friction, especially with exotic hardwoods. Always test this first.
- Tool Wear: Even with Tialn coating, end mills wear out. If you notice your finish degrading, it might be time to replace the tool or consider sharpening if it’s a tool that can be resharpened.
- Experiment with Stepover: For 3D surfacing, the stepover is your primary control for finish quality. A finer stepover means a better finish but longer machining time. Find the right balance for your project.
- Understanding Cutting Forces: For thin-wall machining, try to minimize the cutting forces in any one area. This can be done by taking shallower cuts, using climb milling where appropriate (though typically conventional milling is safer for beginners and beginners must be careful with climb milling to avoid dig-ins), and not trying to remove too much material at once.
Common Problems and Solutions
Even with the best tools, things can go wrong. Here are some common issues and how to fix them:
| Problem | Possible Cause | Solution |
|---|---|---|
| Rough Surface Finish | Feed rate too fast | Slow down the feed rate. |
| Rough Surface Finish | Stepover too large (for
Related Posts |