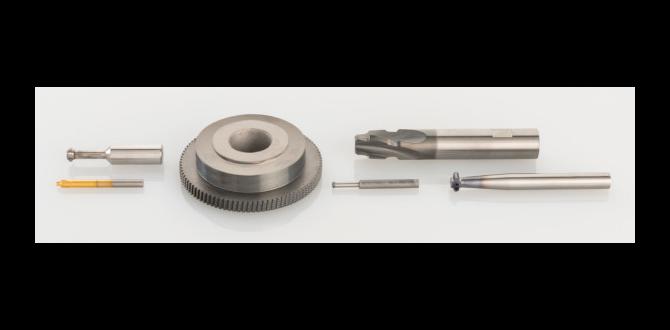
Tialn ball nose end mills are crucial for achieving precise curves and profiles in A2 steel, offering durability and efficiency for makers tackling demanding materials. This guide simplifies their use.
Welcome to Lathe Hub! Ever found yourself staring at a piece of tough A2 steel, wondering how on earth you’re going to create those smooth, rounded edges or intricate contours? It can feel like a real puzzle, especially when standard tools just aren’t cutting it. But don’t sweat it! I’m Daniel Bates, and I’ve spent more years than I can count getting my hands dirty with metal and machines. My goal here is to break down these sometimes-intimidating tools and techniques into simple, achievable steps. Today, we’re diving into the world of the Tialn ball nose end mill, specifically why it’s your secret weapon for A2 steel. By the end of this, you’ll feel confident in selecting, using, and caring for this essential tool.
What is a Ball Nose End Mill, Anyway?
At its core, a ball nose end mill is a type of cutting tool used in milling machines. Unlike flat-bottomed end mills, the tip of a ball nose end mill is shaped like a perfect half-sphere – its “nose” is round! This unique shape is what makes it so versatile for specific tasks.
Think of it like this: a standard end mill is great for making straight cuts or pockets with sharp corners. But when you need to create smooth, curved surfaces, fillets, or intricate 3D shapes, the round tip of the ball nose end mill is exactly what you need. It allows for continuous contact with the workpiece without creating a sharp corner, leading to beautiful, seamless finishes.
Why Tialn? The Coating That Matters
You might have seen different coatings on cutting tools, and “Tialn” (Titanium Aluminum Nitride) is a top performer, especially when you’re working with harder materials like A2 tool steel. So, what makes Tialn so special?
- Extreme Hardness: Tialn coatings are incredibly hard. This hardness means the tool resists wear and maintains its sharp cutting edge for much longer, even under tough conditions.
- Heat Resistance: Machining, especially in steel, generates a lot of heat. Tialn has excellent thermal stability, meaning it won’t break down or soften at high temperatures. This is crucial for preventing tool failure and ensuring good surface finishes.
- Reduced Friction: The coating also helps reduce friction between the tool and the workpiece. Less friction means less heat, less wear, and often, you can push for faster cutting speeds.
- Mating with A2 Steel: A2 steel is a cold-work tool steel known for its hardness and good wear resistance. It’s a fantastic material, but it demands respect. Tools coated with Tialn are specifically well-suited for milling A2 because they can handle the material’s toughness and resist the wear that would quickly dull uncoated tools. It’s a match made in the workshop!
The “55 Degree” Specificity: What Does It Mean?
When you’re looking at Tialn ball nose end mills for A2 steel, you’ll often see specifications like “55 degree.” This isn’t just a random number; it refers to the angle of the cutting edge profile that forms the ball nose. While it might seem technical, this angle influences how the tool engages with the material and the type of chips it produces.
For A2 steel and the kind of profiling work we’re discussing, a 55-degree angle on the ball nose is often a practical choice. It provides a good balance of cutting performance and tool strength. It’s designed to handle the material’s resistance effectively while facilitating the creation of smooth, flowing surfaces required in A2 steel applications, like dies, punches, or custom tooling components.
Applications for Your Tialn Ball Nose End Mill in A2 Steel
So, what kind of projects will benefit from this specialized tool? Your Tialn ball nose end mill is your go-to for tasks requiring precision and smooth finishes on A2 steel:
- Profiling and Contouring: Creating complex 3D shapes, rounded edges, or specific profiles is where this tool shines.
- Die and Mold Making: Machining the intricate cavities and core details found in dies and molds often requires the smooth, sweeping cuts that a ball nose end mill provides.
- Creating Radii and Fillets: Adding smooth transitions between surfaces (fillets) or creating specific rounded corners (radii) is a breeze.
- Surface Finishing: For a high-quality, smooth surface finish on A2 steel, especially in areas that will see a lot of friction or require aesthetic appeal.
- Engraving and Texturing: Small diameter ball nose end mills can be used for detailed engraving or adding textured surfaces.
Choosing the Right Tialn Ball Nose End Mill
Not all ball nose end mills are created equal, and selecting the right one depends on your specific A2 steel project. Here’s what to consider:
Key Specifications to Look For:
- Diameter: This is the width of the end mill. Choose a diameter appropriate for the features you need to create. Larger diameters are for broader contours, while smaller ones are for fine details.
- Flute Count: Most ball nose end mills for steel come with 2 or 4 flutes.
- 2-Flute: Generally better for softer materials or when clearing chips is a major concern. They offer more clearance.
- 4-Flute: Better for harder materials like A2 steel when you want to achieve a good surface finish and can manage chip evacuation. They offer more cutting edges for a smoother finish.
- Coating: We’ve covered Tialn, but ensure it’s explicitly stated.
- Material of the End Mill: Look for High-Speed Steel (HSS) or Carbide. Carbide is generally harder and more rigid, making it ideal for A2 steel, but HSS tools can also perform well with the right coating and slower speeds.
- Shank Diameter: Make sure it fits your milling machine’s collet or tool holder.
- Overall Length and Reach: Consider the depth of your cuts and the accessibility of the features you’re machining.
Example Product Specification Table:
Here’s a look at how specifications might be presented for a common type of tool:
| Specification | Example Value | Why It Matters for A2 Steel |
|---|---|---|
| Coating | Tialn | Provides hardness, heat resistance, and reduced friction essential for A2 steel. |
| End Mill Type | Ball Nose | Enables smooth, curved cuts and 3D profiling. |
| Material | Carbide | High hardness and rigidity for cutting tough A2 steel effectively. |
| Degree of Ball Nose | 55° | Optimized profile for balanced cutting and chip evacuation in hardened steels. |
| Diameter | 0.250″ (6mm) | Choose based on the size of the features you need to machine. |
| Number of Flutes | 4 | Good for smooth finishes on tough materials and efficient material removal. |
| Shank Diameter | 0.250″ (6mm) | Must match your tool holder/collet system. |
Essential Considerations Before You Mill A2 Steel
Milling A2 steel isn’t quite like milling softer aluminum or even mild steel. It requires a bit more care and attention. Here are some crucial points:
1. Machine Rigidity is Key: A2 steel is hard. Your milling machine needs to be rigid enough to handle the cutting forces without excessive vibration. A wobbly machine will lead to poor finishes, premature tool wear, and can even be dangerous.
2. Tooling and Fixturing:
Tool Holders: Use a high-quality, rigid tool holder. ER collets are common and work well, but ensure they are clean and properly seated.
Workholding: Your A2 workpiece needs to be held down securely. The last thing you want is for it to shift mid-cut. Use clamps, vises, or other appropriate workholding methods. Make sure your workholding doesn’t interfere with the tool path.
3. Cutting Parameters: This is where many beginners struggle. A2 steel needs to be cut at appropriate speeds and feeds. Too fast, and you’ll burn up the tool. Too slow, and you risk chatter or poor chip formation.
Speeds (RPM): Start conservatively. For carbide tools in A2 steel, you might look at surface speeds between 150-300 sfm (surface feet per minute). You’ll need to convert this to RPM based on your tool diameter. So for a 0.5″ tool at 200 sfm, RPM = (sfm 3.82) / diameter = (200 3.82) / 0.5 = 1528 RPM.
Feeds (IPM): Chip load is critical. This is the thickness of the material being removed by each cutting edge per revolution. A good starting point for a 0.5″ carbide ball nose end mill in A2 steel might be a chip load of 0.003 – 0.005 inches per tooth. For a 4-flute tool, this would translate to an IPM (inches per minute) of Chip Load Flutes RPM. So, 0.004 4 1528 = 24.4 IPM.
Depth of Cut (DOC): Don’t try to remove too much material at once. For A2 steel, axial depth of cut (how deep the tool cuts into the material along its axis) might be 0.05 to 0.1 times the tool diameter for roughing, and much shallower for finishing passes. Radial depth of cut (how far the tool steps over sideways) also matters.
Resources: Tool manufacturer websites are excellent sources for recommended speeds and feeds. For example, Sandvik Coromant’s site offers extensive data, though it can be technical. Always start on the conservative side and adjust based on sound and chip formation.
4. Coolant/Lubrication: Essential for A2 steel! A good cutting fluid or coolant will:
Keep the tool and workpiece cooler, preventing tool wear and material hardening.
Help evacuate chips from the cutting zone.
Improve the surface finish dramatically.
Use a flood coolant system or a high-quality cutting fluid applied directly to the cutting zone.
Step-by-Step: Using Your Tialn Ball Nose End Mill
Let’s walk through the process of using your Tialn ball nose end mill for a typical profiling job on A2 steel.
Preparation is Paramount:
- Secure the Workpiece: Mount your A2 steel block firmly in your milling machine’s vise or use appropriate clamps. Ensure it won’t move during the operation. Check for stability.
- Install the End Mill: Insert your Tialn ball nose end mill into a clean collet and tighten it securely in your milling machine’s spindle. Ensure it’s properly seated to prevent runout.
- Set Up Coolant: Ensure your coolant system is ready and will deliver fluid directly to the cutting zone.
- Program Your Toolpath (CNC) or Set Up Manually (Manual Mill): This is where you define how the tool will move.
- For CNC: This involves CAM software to generate G-code. You’ll define the stock material, the desired final shape, tool parameters, speeds, feeds, and stepovers.
- For Manual Mills: This requires careful manual operation. You’ll use the machine’s handwheels to control movement. It’s crucial to establish your zero point and plan your moves carefully, often using a depth stop for consistent depth.
The Machining Process:
- Establish Zero/Work Offset: For CNC, this is your G54 or similar coordinate system. For manual, you’ll manually find your X, Y, and Z zero points relative to the workpiece.
- Dry Run (Optional but Recommended): If using a CNC, perform a “dry run” with the spindle off to watch the tool path and ensure there are no collisions. For manual mills, move the tool manually through the expected path without cutting to verify clearances.
- Begin Cutting – Roughing Pass:
- Set your initial depth of cut. For roughing, a good rule of thumb is 0.05 to 0.1 times the tool diameter.
- Start the spindle at your calculated RPM.
- Turn on the coolant.
- Begin feeding the tool into the material at your calculated feed rate. Listen to the cut. If it sounds strained, back off the feed slightly.
- If milling a large area, use appropriate stepovers (e.g., 30-50% of the tool diameter) to remove material efficiently.
- Intermediate Passes (as needed): If your roughing depth is significant, you might make several passes, gradually increasing the depth or stepping over until you reach your target roughing depth. This reduces the load on the tool for each pass.
- Finishing Pass:
- For the final pass, significantly reduce the depth of cut (e.g., 0.010″ – 0.020″ or less).
- You might also want to reduce the feed rate slightly and potentially increase the spindle speed for a smoother finish, though this is material and machine dependent.
- For profiling, a 100% stepover (taking small “pencil” cuts along the contour) is often used in the final pass to get a perfectly smooth surface.
- Retract and Stop: Once the cutting is complete, cleanly retract the tool from the workpiece and turn off the spindle.
Post-Machining:
- Clean the Workpiece: Remove any residual coolant and chips.
- Inspect the Finish: Examine the machined surfaces for quality.
- Clean the Tool and Machine: Carefully remove the end mill, clean it thoroughly, and clean your machine to prepare for the next job.
Measuring True Ball Nose Diameter and Radius
Sometimes, especially with wear, you might need to verify the exact diameter or radius of your ball nose end mill. Here’s a simple way to do it:
Tools Needed:
- A height gauge or a sensitive digital caliper.
- A surface plate.
- A way to hold the end mill securely (a small vise, or even just by hand if you’re careful).
The Process:
- Calibration: Place your surface plate on a stable bench. Calibrate your height gauge to zero on the surface plate.
- Setup: Place the ball nose end mill on the surface plate so the shank is perpendicular. If using a vise, ensure it doesn’t lift the tool off the plate.
- Measure the Ball Radius: Carefully bring the tip of the ball nose down until it just touches the height gauge’s probe. Note the reading on the height gauge. This measures the distance from the surface plate to the very apex of the ball. This value is the radius of the ball.
- Measure the Shank Diameter: Measure the diameter of the shank using your calipers or another height gauge setup.
- Calculate Full Ball Diameter: The full diameter of the ball nose is twice the measured radius.
For example, if your height gauge reads exactly 0.250″ from the surface plate to the tip of the ball, your ball radius is 0.250″. The full ball diameter is then 0.500″. This is crucial for programming if your CAM software asks for the exact ball radius or diameter.
Maintenance and Care: Extending Tool Life
Your Tialn ball nose end mills are an investment. Proper care will ensure they last and perform optimally, especially with demanding materials like A2 steel.
- Cleaning: Always clean your end mills thoroughly after each use. Remove all coolant, chips, or debris. A brass brush and a solvent can be effective.
- Inspection: Before and after use, visually inspect the cutting edges for any chipping, wear, or damage. Check the flutes for any signs


