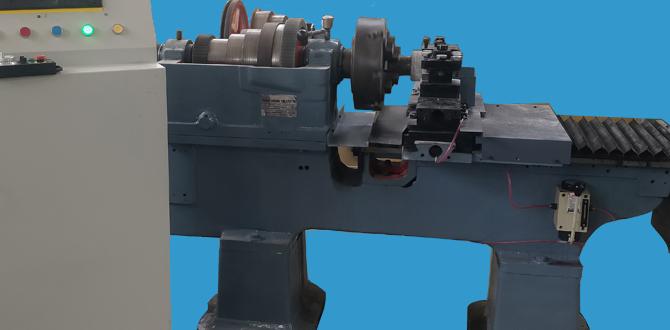
For a lathe, a tool holder is a genius essential for organization, ensuring your cutting tools are safely stored, readily accessible, and protected, leading to a tidier workspace and more efficient machining.
Working with a lathe can be incredibly rewarding, but it also involves a variety of sharp and precise cutting tools. Keeping these tools organized can feel like a constant challenge, especially when you’re just starting out. Tools might get misplaced, damaged, or simply clutter up your workbench, making it hard to find what you need when you need it. This not only slows down your work but can also be a safety hazard. Don’t worry, though! With a few smart strategies and the right kind of storage, you can transform your lathe area from chaotic to controlled. We’ll guide you through simple and effective ways to store your lathe tools, making your machining experience smoother and safer.
Why Lathe Tool Holders Are a Must-Have
Imagine this: you’re mid-project, focused on achieving that perfect finish, and you reach for a specific cutting tool. Instead of finding it right where you expect, you’re left rummaging through a bin or a drawer that’s a chaotic jumble of metal. Frustrating, right? This is where a good tool holder for your lathe steps in. It’s more than just a place to put your tools; it’s a critical component of an efficient and safe workshop.
A dedicated tool holder keeps your valuable cutting inserts and tool bits out of harm’s way. Without proper storage, edges can chip, shanks can bend, and you can end up with tools that are no longer accurate or usable. This translates to wasted money and frustrating cuts. Beyond protecting your tools, organized storage means you can grab the right tool instantly, without breaking your workflow. This boosts productivity and makes your time at the lathe much more enjoyable.
- Tool Protection: Prevents chipping, dulling, and damage to cutting edges.
- Accessibility: Keeps tools readily available, saving you time and frustration.
- Safety: Reduces the risk of accidental cuts or injuries from loose tools.
- Workspace Organization: Maintains a clean and tidy lathe area, improving focus.
- Cost Savings: Extends the life of your tools, reducing replacement costs.
Investing in the right tool holder system is one of the smartest decisions a lathe user can make, from hobbyists to seasoned professionals. We’ll explore the different types and how to choose the best one for your needs.
Types of Lathe Tool Holders Explained
When we talk about “tool holders” for lathes, there are a few different categories that come to mind, each serving a specific purpose. Understanding these will help you pick the best solutions for your workshop.
1. Tool Post Holders (For Machining Tools)
These are the most commonly associated “tool holders” in the context of the lathe itself. They are mounted directly onto the lathe’s tool post and hold the cutting tool bit or insert while you are performing a machining operation. They ensure the cutting tool is held rigidly and at the correct height.
There are two main types:
- Fixed Tool Posts: These are simpler and often found on older or more basic lathes. They typically rely on a wedge or cam system to hold a single tool holder or tool. You usually have to loosen and retighten to change tools.
- Quick Change Tool Posts (QCTP): These are a significant upgrade and a favorite among machinists. A QCTP consists of two parts: a T-slotted base mounted to the lathe’s compound rest and various tool holder “stations” or “assemblies” that fit into the base. You can swap out entire tool holders with pre-set tools in seconds without needing to adjust height, which is a massive time-saver. They come in different sizes and systems (e.g., Aloris, Dorian). For beginners using a common setup, a QCTP is highly recommended. You can read more about their benefits on sites like TWI Global’s FAQ on Lathe Tool Posts which gives a good overview.
2. Storage Holders (For Storing Idle Tools)
These are what most people think of when they want to organize their collection of lathe tools when they are not in use. These aim to keep your various cutting bits, inserts, boring bars, and other accessories safe and sorted.
Here are common options for storage:
- Tool Racks/Organizers: These are typically made of metal or plastic and feature slots or holes designed to hold individual tool bits. They can be mounted on walls, inside cabinets, or even sit on your workbench. Some are designed specifically for lathe tool bits, while others are more general-purpose.
- Insert Holders/Cassettes: If you primarily use carbide or ceramic inserts, you’ll need specialized holders. These often come with the insert boxes themselves, or you can buy dedicated organizers designed to hold these small, fragile inserts securely. Many insert manufacturers include excellent storage solutions with their products.
- Tool Chests and Drawers with Inserts: While not exclusively “tool holders,” a well-organized tool chest with foam inserts or dividers can serve the purpose. You can cut custom foam shapes to hold specific tools, preventing them from rolling around and protecting them.
- Magnetic Tool Holders: These are great for quick access to frequently used tools like hex keys, small files, or even some carbide end mills if you have them. However, they aren’t ideal for delicate or heavy cutting tools as they offer less positional security.
3. Boring Bar Holders
Boring bars are long, slender cutting tools used for internal diameters. They require specialized holders that provide rigidity and often some form of damping to prevent chatter during operation. These can be integrated into QCTPs or be separate units mounted in the tool post.
For storage outside of machining, boring bars often need long, shallow compartments or racks to prevent bending or damage. Some dedicated tool cabinets have long slots specifically for this purpose.
Choosing the Right Tool Holder System for You
Selecting the correct tool holder setup depends on several factors: the type of lathe you have, the kind of work you do, and your budget.
Consider These Factors:
Here’s a breakdown of what to think about:
- Lathe Size and Spindle Type: Larger lathes often use larger tools and require more robust tool holders. The type of spindle taper (Morse taper, Jacobs chuck, etc.) on your lathe will also influence your choices for certain accessories.
- Types of Work Performed: Are you doing small hobbyist projects, production runs, or intricate metal art? If you switch tools frequently, a Quick Change Tool Post (QCTP) is almost non-negotiable for efficiency. If you mainly use one or two tools for extended periods, a simpler system might suffice.
- Budget: QCTPs and their associated tool holders can be an investment, ranging from a couple of hundred dollars for a basic set to over a thousand for high-end systems. Dedicated storage racks and organizers are generally much more affordable.
- Tooling Size and Quantity: Do you have a vast collection of different tool bits, or do you primarily work with a few standard sizes? The number and variety of tools you need to store will dictate the capacity and type of storage solution required.
- Workshop Space: How much room do you have? Wall-mounted racks save workbench space. Drawer inserts are great for existing tool chests.
Recommended Setup for Beginners
For most beginners on a metal or wood lathe, I highly recommend two things:
- A Quick Change Tool Post (QCTP): Even if it’s a more economical version to start, the ability to swap tools quickly is invaluable. It dramatically reduces setup time and frustration, allowing you to focus on learning the machining process itself. Look for a set that includes a few common tool holder types, like a T-nut holder for straight tools and a revolving or boring bar holder.
- A Dedicated Tool Rack or Drawer Inserts: Once you’ve got your QCTP, you’ll need somewhere to store the other tool holders and your various bits and inserts when they’re not in use. A simple metal tool rack that mounts to the wall behind your lathe or sturdy drawer inserts for your workbench are excellent choices.
You can find good QCTP sets from reputable online tool suppliers, often in various sizes to match your lathe’s swing. For storage, most hardware stores or online retailers offer versatile pegboards, magnetic strips, or foam insert kits suitable for workshop use. Popular Mechanics often has great articles on workshop organization that can give you broader ideas too.
DIY Tool Holder Solutions
You don’t always need to buy fancy systems to achieve good organization. Many effective tool holders and storage solutions can be made right in your workshop.
DIY Tool Bit Rack
This is a classic and super-functional project.
Materials You’ll Need:
- A sturdy piece of wood (e.g., hardwood, plywood) at least 3/4 inch thick.
- A drill with a drill bit slightly larger than the shank of your tool bits.
- A saw to cut the wood to size.
- Sandpaper for smoothing.
- Screws or mounting hardware if you plan to attach it to a wall.
- Optional: Wood finish (paint, varnish).
Steps:
- Cut to Size: Decide on the dimensions of your rack. A common size might be 18-24 inches long and 4-6 inches wide. Cut your wood to the desired size.
- Mark Drill Points: Lay out your unused tool bits on the wood to determine spacing. Mark the center of where each bit shank will sit. Ensure enough room between bits to easily grab them.
- Drill Holes: Using your drill and the appropriately sized bit, drill holes at your marked points. Aim for a depth of about 1/2 inch to 3/4 inch, enough to securely hold the shank but not so deep that the tool sits too low.
- Smooth Edges: Sand all edges and surfaces of the wood to remove splinters and create a professional finish.
- (Optional) Finish: Apply paint, varnish, or oil to protect the wood and give it a more finished look.
- Mount: You can leave it on your workbench or mount it securely to a wall using screws.
This simple rack will keep your tool bits upright, organized, and easy to identify.
Custom Foam Inserts for Drawers
If you have a tool chest or drawers, custom foam inserts offer excellent protection and organization for a variety of tools, including delicate inserts and boring bars.
Materials You’ll Need:
- Closed-cell foam (pick-and-pluck or solid sheets).
- A sharp utility knife or a hot wire foam cutter.
- A marker.
- Your tools for tracing.
Steps:
- Measure Drawer/Tray: Determine the dimensions of the area where you want to place the foam.
- Cut Foam Base: Cut a piece of foam to fit snugly into your drawer or tray.
- Arrange and Trace: Place your tools on top of the foam in their desired arrangement. Use a marker to trace the outline of each tool.
- Cut Cavities: Carefully cut out the traced shapes. For pick-and-pluck foam, you’ll remove the pre-scored squares. For solid foam, use a sharp knife or hot wire cutter to create precise cutouts. Make the cavities slightly deeper than the tool’s profile so it sits securely.
- Test Fit: Place your tools into their new custom-fit home. They should be snug and prevent movement.
This method not only organizes but also provides excellent shock absorption, protecting your valuable tooling.
Magnetic Strips for Small Accessories
While not for heavy cutting tools, magnetic strips are fantastic for organizing smaller items that are often used with a lathe.
What to Store:
- Allen wrenches (hex keys)
- Chucks keys
- Small measuring tools (calipers, rulers)
- Small files
- Center punches
Simply mount a strong magnetic strip to the side of your lathe cabinet or a nearby wall, and attach your metal accessories. This keeps them visible and within easy reach.
Maintaining Your Tool Holders and Tools
Organization is only half the battle; proper maintenance ensures your tools and their holders remain functional and effective.
Regular Cleaning
After each use, take a moment to wipe down your tools and the tool holders. Metal shavings, dust, and cutting fluid can build up, leading to corrosion or gumming up mechanisms. A clean tool is also easier to inspect for wear or damage.
- Use a brush or compressed air to remove chips.
- Wipe down with a clean, dry cloth.
- For persistent residue, use a mild degreaser and follow up with a dry cloth.
Inspection for Wear and Damage
Regularly check your tool holders for any signs of wear, such as:
- Cracks or Dents: Especially on QCTPs, damage can compromise alignment and rigidity.
- Worn Locking Mechanisms: Ensure that wedges or locking screws still engage securely.
- Bent or Damaged Tool Slots: This can prevent tools from seating correctly.
Similarly, inspect your cutting tools for:
- Chipped or Broken Edges: Indicates the tool needs sharpening or replacement.
- Bent Shanks: Serious damage that may mean the tool is no longer reliable.
- Worn Insert Flats: For inserts, check the seating surfaces for damage that could affect accuracy.
A well-maintained tool holder system and diligent inspection of your cutting tools are crucial for producing quality work and ensuring safety. For further insights into tool maintenance and machining best practices, resources like the OSHA standard for machine guarding provide important context on safety principles that extend to tool care.
Proper Storage Techniques
Even when using organized holders, consider the environment:
- Protect Edges: Ensure cutting edges aren’t rubbing against other metal objects.
- Prevent Rust: Store tools in a dry environment. Consider using anti-rust treatments or silica gel packets in enclosed spaces.
- Secure Heavy Items: Ensure heavy tool holders are stored where they won’t fall.
The Benefits of an Organized Lathe Workspace
Having a dedicated system for your lathe tools, including the right tool holders, profoundly impacts your machining experience. It goes beyond just looking neat; it’s about efficiency, safety, and the quality of your work.
Enhanced Productivity
When every tool has its place, you spend less time searching and more time cutting. This is especially true with a Quick Change Tool Post system that allows for rapid tool changes without losing your settings. Think about how much time is lost fumbling for a specific bit when you’re in the zone, compared to smoothly sliding in the next pre-set tool.
Improved Safety
Sharp tools are dangerous. Loose tools on the bench or floor are tripping hazards and can lead to accidental cuts. A well-designed tool holder system, whether it’s a QCTP holding the active tool rigidly, or storage racks keeping idle tools secure, minimizes these risks. A tidy workspace is inherently a safer workspace.
Extended Tool Life
Cutting tools, especially those with carbide or ceramic inserts, are precise and can be fragile at the cutting edge. Improper storage can lead to nicks, chips, or dulling before they’ve even been used. Storing them in dedicated slots or holders protects these delicate edges, making them last longer and perform better.
Better Machining Results
This might seem less direct, but it’s true. When you have quick access to the right tools and they are in good condition (thanks to proper storage), you can set up your cuts more precisely and effectively. This consistency leads to better finishes, more accurate dimensions, and less frustration with chatter or poor surface quality.
Increased Enjoyment of Machining
Ultimately, a well-organized workshop makes the entire process more enjoyable. Knowing where everything is, having tools readily available, and working in a safe, clean environment allows you to focus on the creative and technical aspects of machining rather than struggling with disorganization.
Frequently Asked Questions About Lathe Tool Holders
What is the main purpose of a lathe tool holder?
The main purpose of a lathe tool holder is to securely and rigidly hold a cutting tool in place during machining operations, ensuring accuracy and safety. For storage, tool holders organize and protect your cutting tools when they are not in use.

