Wood lathe chuck tightening issues fix can be a frustrating roadblock for woodturners, halting creativity and potentially leading to safety concerns. A loose chuck can wobble, creating imprecise cuts and, in the worst-case scenario, detach from the lathe spindle altogether. Fortunately, many common wood lathe chuck tightening issues fix are within the reach of most hobbyists and professionals alike, requiring a bit of understanding about how chucks work and some simple maintenance. Let’s delve into the common culprits and their effective remedies.
The fundamental principle behind a wood lathe chuck is its ability to grip a workpiece securely to the headstock spindle. Most chucks operate using a jaw system that moves in unison, either expanding within a hollow workpiece or contracting around a tenon. The tightening mechanism typically involves a geared system operated by a chuck key. When you encounter wood lathe chuck tightening issues fix, it often stems from a breakdown in this seemingly simple process.
Common Culprits Behind Wood Lathe Chuck Tightening Issues
Before we explore specific fixes, it’s crucial to identify why your chuck might be acting up. Here are the most frequent offenders:
Debris and Contamination: This is by far the most common cause of wood lathe chuck tightening issues fix. Tiny wood chips, dust, metal shavings, or even dried lubricant can get lodged in the gear mechanisms, chuck jaws, or even between the chuck body and the lathe spindle. This debris acts like grit, preventing smooth movement and full engagement of the jaws.
Worn or Damaged Jaws: Over time and with intensive use, the serrations on the chuck jaws can wear down. This reduces their gripping power, leading to slippage even when the chuck feels tight. Similarly, if a jaw is bent or chipped, it won’t meet the workpiece squarely, causing uneven pressure and potential loosening.
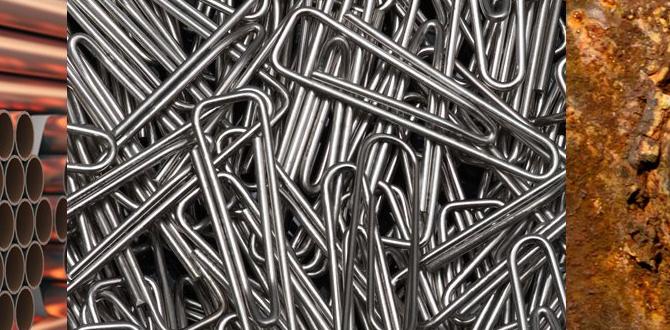
Corrosion and Rust: In humid environments or if the lathe is left uncovered, rust can form on internal metal components. Rust creates friction and can seize parts of the mechanism, making it difficult to tighten the chuck fully.
Insufficient Lubrication: While chucks don’t require constant lubrication, a lack of it can contribute to increased friction, especially in conjunction with other issues. Old, dried-up lubricant can actually attract more dust and debris.
Incorrect Chuck Key or Drive Pin: Using the wrong size chuck key can damage the keyway or lead to incomplete tightening. Similarly, if the drive pins on the chuck aren’t properly engaging with the lathe spindle (on some larger or older models), the chuck might not be seated correctly.
Thread Issues: Less common, but possible, are damaged threads on the lathe spindle or the chuck itself. Cross-threading or damaged threads will prevent the chuck from screwing onto the spindle properly or securely.
The Effortless Wood Lathe Chuck Tightening Fix: A Step-by-Step Guide
Now that we’ve identified the potential problems, let’s get to the remedies. For most wood lathe chuck tightening issues fix, a thorough cleaning and proper lubrication are the first and often most effective steps.
Step 1: Disassembly and Thorough Cleaning
1. Remove the Chuck: Safely detach the chuck from your lathe. For screw-mount chucks, simply unscrew it by hand or with the chuck key. For direct-thread or cam-lock systems, follow your manufacturer’s instructions.
2. Disassemble the Jaws: Most chucks allow for individual jaw removal. Locate the small screws holding each jaw in place and carefully remove them. Keep track of which jaw came from which position, as they are often matched sets.
3. Clean the Components: This is where the magic happens. Use a stiff brush (an old toothbrush works wonderfully) to meticulously clean all surfaces of the jaws, the chuck body, and the internal gear mechanism. Compressed air is excellent for blowing out loose debris. For stubborn gunk, a mild degreaser or even mineral spirits can be used cautiously, ensuring they are completely evaporated before reassembly. Pay special attention to the channels where the jaws slide and the teeth of the internal gears.
4. Inspect for Damage: While the chuck is apart, carefully examine the jaws for any chips, cracks, or excessive wear on the serrations. Check the gear teeth for damage or bending. Also, inspect the threads on the chuck body for any signs of damage.
Step 2: Lubrication – The Key to Smooth Operation
Once everything is clean and dry, proper lubrication is essential for a smooth and effective wood lathe chuck tightening issues fix.
1. Choose the Right Lubricant: Use a lubricant specifically designed for wood lathe chucks. These are typically a thick, greasy paste that adheres well and doesn’t easily attract dust. Avoid light oils, as they can drip and collect debris. Lithium grease or a specialized chuck grease is often recommended.
2. Apply Sparingly: Apply a small amount of grease to the sliding surfaces of the jaws and their corresponding channels within the chuck body. Also, apply a tiny dab to the gear teeth. The goal is lubrication, not to pack the chuck full of grease. Excessive lubricant will attract more dust and create its own problems.
Step 3: Reassembly and Testing
1. Reassemble the Jaws: Carefully reinsert each jaw into its original position and re-secure the retaining screws. Ensure they move freely when operated by the chuck key.
2. Mount the Chuck: Re-attach the chuck to your lathe spindle.
3. Test Tightening: Using your chuck key, test the tightening mechanism through its full range of motion. It should feel smooth, with no grinding or excessive resistance. The jaws should move in unison.
4. Grip a Test Piece: Mount a scrap piece of wood and test the chuck’s grip. Turn the lathe on at a low speed and gradually increase it, listening for any unusual sounds and observing for any wobble. If it feels secure, you’ve likely achieved your wood lathe chuck tightening issues fix.
Addressing More Persistent Issues
If cleaning and lubrication don’t resolve your wood lathe chuck tightening issues fix, consider these more advanced remedies:
Jaw Replacement: If your jaws are significantly worn or damaged, replacement is the only viable solution. Most chuck manufacturers sell replacement jaw sets.
Chuck Reconditioning/Replacement: In rare cases, there might be internal damage to the chuck body or gear mechanism that cannot be repaired. If your chuck is old, heavily used, or has sustained significant damage, replacement might be the most cost-effective and safest option.
* Spindle Inspection: If the chuck tightens correctly off the lathe but still has issues on it, inspect the lathe’s spindle threads for damage or nicks. Minor imperfections can sometimes be carefully cleaned up with a thread file, but significant damage may require professional assistance or replacement of the spindle.
By understanding the common causes and adopting a methodical approach to cleaning and maintenance, you can effectively address most wood lathe chuck tightening issues fix. This not only ensures a safer and more enjoyable turning experience but also prolongs the life of your valuable tooling. Regular attention to these details is the best defense against future frustrations.