Quick Summary: A wood lathe with a digital readout (DRO) is a game-changer for precision woodworking. It helps beginners and pros achieve exact measurements, repeat cuts, and turn complex shapes more easily, making it an essential upgrade for any serious woodturner.
Wood Lathe With Digital Readout: Proven Essential for Precision Turning
Are you tired of guesswork when it comes to turning perfect diameters on your wood lathe? Do you find yourself constantly micromanaging your cuts, hoping for the best? Many woodturners know the frustration of trying to achieve a specific size, only to find you’ve gone too far. It’s a common hurdle that can slow down your progress and dampen your creative flow. But what if there was a way to make every diameter precise, every replicate cut identical, and every intricate detail achievable with confidence? That’s where a wood lathe with a digital readout comes in. It’s a tool that transforms uncertainty into accuracy, making your woodworking experience smoother and more rewarding. In this guide, we’ll explore why a digital readout is an essential addition to your workshop and how it can revolutionize your woodturning. Let’s dive in and discover how to achieve perfect results, every single time.
What is a Digital Readout (DRO) on a Wood Lathe?
Think of a digital readout, or DRO, on your wood lathe as a high-tech measuring tape that’s always attached and always accurate. Instead of relying on visual cues or manual dial indicators, a DRO uses sensors mounted on your lathe’s moving parts. These sensors detect movement and display the precise position of your tool rest or tailstock in clear, easy-to-read numbers on a digital screen. This means you can know exactly how far you’ve moved your tool or how deep you’ve plunged into your workpiece down to a fraction of an inch or millimeter.
This technology isn’t new; it’s been a staple in metalworking shops for decades, where extreme precision is paramount. Lathe Hub has always championed making advanced tools accessible, and the DRO is no exception. Bringing this level of accuracy to woodturning opens up a world of possibilities for both beginners and seasoned craftspeople. It’s about taking the guesswork out of crucial steps, allowing you to focus on the design and the craft, rather than constant measuring and re-measuring.
Why a Digital Readout is Essential for Woodturning
For beginners, the learning curve on a wood lathe can be steep. Mastering the feel and visual estimation of diameters is a skill that takes time and practice. A DRO significantly smooths this process. For experienced woodturners, it unlocks new levels of precision, repeatability, and efficiency, especially for complex projects or when producing multiples of the same item.
Here’s a breakdown of why a wood lathe with a digital readout is truly essential:
- Unmatched Precision: The most obvious benefit. Achieve exact diameters for bowls, spindles, and decorative elements without the anxiety of over-turning.
- Repeatability: Need to turn ten identical table legs or create matching decorative bands on a vase? A DRO allows you to set a measurement and repeat it exactly, saving hours of tedious adjustment.
- Easier for Beginners: Takes the intimidation out of critical measurements. New turners can focus on tool control and form, guided by precise feedback.
- Complex Projects: For intricate designs, fine details, or specific joinery that requires exact dimensions, a DRO is invaluable.
- Efficiency Boost: Less time spent measuring, more time spent turning. This means more projects completed and a more enjoyable workshop experience.
- Reduced Material Waste: Fewer mistakes mean fewer ruined pieces of wood, saving you money and resources.
- Confidence Builder: Knowing you can hit precise measurements consistently builds confidence and encourages experimentation with more challenging projects.
How DROs Work on a Wood Lathe
The fundamental principle behind a DRO system involves sensors that track movement. On a wood lathe, these sensors are typically attached to the tool rest assembly and sometimes the tailstock. As you move these components along the lathe bed, the sensors send signals to a digital display unit.
Types of DRO Systems
While integrated DRO systems are available on some newer lathes, many woodturners add them as an aftermarket upgrade. There are a couple of common ways this is achieved:
- Magnetic Scale DROs: These use a magnetic strip and a read head. The magnetic strip is mounted along the lathe bed or the moving part, and the read head detects the magnetic field’s changes as it moves. These are generally robust and common for retrofitting.
- Glass Scale DROs: Similar to magnetic scales but use a precisely ruled glass strip. These are often found on higher-end metalworking machines and offer exceptional accuracy, though they might be less common for standard wood lathe retrofits due to cost and delicacy.
Regardless of the specific sensor technology, the goal is the same: to translate physical movement into digital information. The display unit then shows you the position in real-time. Some advanced DROs even offer features like:
- Zeroing out the display at any point.
- Presetting a target measurement.
- Switching between inch and millimeter units.
- Absolute vs. incremental positioning modes.
For most woodturners, a DRO that accurately tracks tool rest movement along the Z-axis (the length of the lathe bed) is the most beneficial. Some systems can also track tailstock movement or even spindle speed, but accurate Z-axis positioning is the core advantage.
Key Components of a Wood Lathe DRO System
If you’re considering retrofitting your lathe or want to understand what to look for, here are the main parts you’ll encounter:
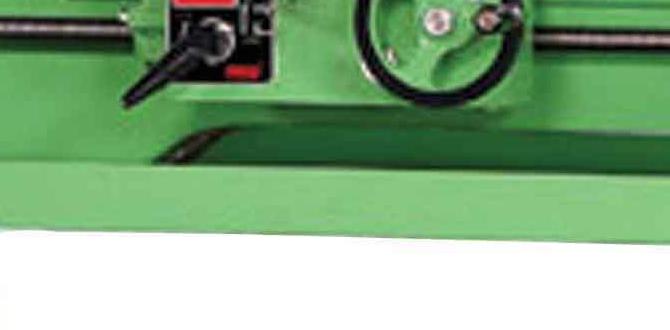
1. Scales/Sensors: These are the devices that actually measure the movement. They are mounted onto the moving parts of the lathe. For a typical tool rest setup, you’ll have a scale that runs parallel to the lathe bed and a sensor head that attaches to the tool rest. As the tool rest slides, the sensor reads the scale.
2. Readout Box (Display Unit): This is the digital screen that shows the measurements. It’s usually mounted in a convenient location on the lathe bed or banjo for easy viewing. This is where you’ll see the numbers change as you move your tool.
3. Mounting Hardware: This includes brackets, screws, arms, and clamps needed to securely attach the scales and the readout box to your lathe. The quality and adjustability of the mounting hardware are crucial for accurate readings and long-term reliability.
Step-by-Step: Installing a DRO System on Your Wood Lathe
While specific kits vary, the general process for installing a DRO on a wood lathe is quite manageable for a DIYer. Always refer to your kit’s specific instructions, as they will be tailored to the components you receive.
-
Preparation and Safety First
Unplug your lathe! Ensure it’s completely powered off. Clear the area around your lathe so you have plenty of working space. Gather your tools: screwdrivers, wrenches, possibly a drill and drill bits (if not using existing mounting points), measuring tape, and safety glasses. Read through the entire installation manual that came with your DRO kit.
-
Mount the Scale on the Lathe Bed
This is often the primary scale. It runs along the lathe bed. Carefully measure and align the scale. Many kits come with brackets that can be attached to existing mounting points on your lathe bed. If not, you may need to drill and tap new holes (ensure you know the correct drill bit size and tap size for your lathe’s material). The scale needs to be perfectly straight and run parallel to the ways (the part the tool rest slides on). Secure it firmly.
-
Mount the Sensor Head to the Tool Rest
The sensor head (read head) needs to be attached to the moving part, typically the tool rest assembly or its carriage. It should be positioned so that as the tool rest moves along the bed, the sensor head moves smoothly over the scale’s surface without any binding or wobbling. Again, use the provided brackets or fabricate them to ensure a solid, repeatable position.
-
Mount the Readout Box
Choose a convenient spot for the display unit. It needs to be easily visible while you work but out of the way of your hands and the turning workpiece. Many lathe beds have mounting points that can be used, or you might need to fabricate a simple bracket. Ensure the cable from the sensor head can reach the readout box without being too taut or getting caught.
-
Connect the Cables
Carefully connect the cable from the sensor head to the corresponding port on the readout box. Ensure the connection is secure. If your system includes a scale for the tailstock or other features, mount those scales and connect their respective cables to the readout box as well.
-
Power Up and Test
Once everything is securely mounted and connected, plug in your lathe (ensure it’s still off before powering up the DRO unit itself, if it has a separate power switch). Turn on the DRO display. It should light up. Test the system by sliding the tool rest manually along the bed. The numbers on the display should change accurately. Try moving it back and forth, and watch for any glitches or inconsistent readings.
-
Zeroing and Calibration
Most DROs have a “zero” button. Practice zeroing the display at different positions. This is key for many operations. For example, you can position your tool rest at the edge of your workpiece, zero the display, and then move it in by a specific amount, like 1/4 inch, to ensure it’s cutting to that exact depth. Check if your DRO has a calibration function, and if so, follow the manufacturer’s instructions.
-
Secure Cables and Final Checks
Ensure all cables are neatly secured using zip ties or cable wraps so they don’t snag on anything or interfere with the operation of the lathe. Double-check all mounting bolts and screws for tightness. Take a few more test movements, paying attention to the smoothness of the slide and the accuracy of the readings.
Remember, patience is key during installation. If you’re unsure at any step, consult your DRO kit’s manual, look for online tutorials specific to your lathe model and DRO kit, or seek advice from experienced woodturners or machinists.
Benefits of Using a Wood Lathe DRO for Specific Tasks
The advantages of a DRO aren’t just theoretical; they translate into tangible benefits for numerous woodworking tasks:
Creating Perfectly Sized Bowls
Turning wooden bowls requires precise control over the outer diameter and the wall thickness. With a DRO, you can:
- Set your desired rim diameter, slide the tool rest, and stop precisely when you hit the target.
- Easily create matching rims for a set of bowls.
- Control the depth of cuts for the exterior curve, ensuring consistency from base to rim.
- Measure the thickness of the bowl wall from the steady rest (if applicable) or by carefully moving the tool rest to touch the inside and outside of the wall.
Spindle Turning and Replication
For furniture legs, balusters, or decorative spindles, repeating dimensions is critical. Imagine turning a chair leg where every bead, taper, and straight section needs to be just so. A DRO allows you to:
- Mark out your design on paper with exact measurements.
- Move your tool rest to each dimension and make your cuts with confidence.
- If you need to turn multiple identical spindles, after turning the first one precisely, you can record the measurements for each feature and replicate them on the subsequent pieces.
- When using the tailstock, a DRO can tell you exactly how far the tailstock is extended or retracted, useful for fine-tuning support or registration.
Decorative Elements and Inlays
Achieving precise grooves for inlay strips, decorative bands, or segmented turning patterns demands accuracy. A DRO helps you:
- Cut grooves to a specific width and depth required for fitting inlay materials perfectly.
- Ensure decorative rings or beads are exactly the same size on all parts of a turning.
- Precisely position elements for segmented bowls or platters, ensuring tight joins.
Segmented Turning
This is an area where precision is absolutely paramount. In segmented turning, you glue rings of precisely cut wood segments together to form a blank, which is then turned to shape. The accuracy of each segment’s angle and facet length is critical for the final form to be smooth and gap-free. While the DRO primarily helps with the turning stage of the blank, it can also aid in:
- Ensuring the outer diameter of a finished segmented blank is a precise size before it’s removed from the lathe, which is crucial if it’s intended to be a part of a larger assembly.
- Checking the consistency of the overall shape after turning the segmented “lump.”
For a deeper dive into the precision woodworking techniques that benefit from accurate measurements, resources like Woodworking Network’s insights on segmented turning highlight the importance of exact joinery and form.
Comparing Lathe DROs: What to Look For in a System
When choosing a DRO system for your wood lathe, consider these factors:
| Feature | Consideration for Wood Lathes |
|---|---|
| Accuracy & Resolution | For woodturning, resolutions of 0.001″ (0.02mm) or 0.0005″ (0.01mm) are usually more than sufficient. Higher resolution isn’t always better if it comes at a higher cost and isn’t necessary for the task. |
| Durability & Robustness | Woodworking environments can be dusty. Look for sealed scales or systems designed to withstand dust and debris. Ensure mounting hardware is sturdy. |
| Ease of Installation | Does the kit include specific brackets for common lathe models, or will you need to fabricate custom mounts? Clear instructions are vital. |
| Axis Coverage | Most woodturners prioritize Z-axis (along the bed) for tool rest position. Some kits offer X-axis (crossfeed) or tailstock DROs. Decide which axes are essential for your needs. A Z-axis DRO is generally considered the most impactful upgrade. |
| Display Readability | A clear, bright digital display that’s easy to read in workshop lighting is important. Check for backlight options. |
| Power Source | Most operate on AC power (plug into wall, sometimes via a power strip) or battery. AC is generally more convenient for workshop use. |
| Brand Reputation & Support | Research reviews and look for brands known for reliable products and good customer support, especially for installation questions. |
Wood Lathe DRO vs. Traditional Measurement Methods
It can be tempting to think that traditional measurement skills are enough. While valuable, a DRO truly elevates precision over relying solely on calipers, tapes, and visual estimation.
Traditional Methods (Calipers, Tapes, Guesswork)
- Pros: Low initial cost, requires no installation, develops a tactile sense of measurement.
- Cons: Time-consuming, prone to human error, difficult to achieve exact repeatability, can lead to over-cutting and scrapped material, less precise for fine details.
Digital Readout (DRO)
- Pros: High accuracy and precision, excellent repeatability, significantly speeds up the measurement process, reduces material waste, builds confidence, enables complex designs.
- Cons: Initial cost of the system, requires installation (may involve drilling/fabrication), can become a crutch if traditional skills are neglected entirely.
Consider the National Institute of Standards and Technology (NIST) data on measurement uncertainty. Even with the best tools, there’s always a margin of error. A DRO minimizes this margin considerably in a woodworking context, providing a highly reliable digital reference. For anyone serious about consistent, high-quality results, especially in production or intricate work, the investment in a DRO pays for itself.
Maintaining Your Wood Lathe DRO System
A DRO system is a precision instrument and requires care, especially in a workshop environment. Proper maintenance ensures its longevity and accuracy:
- Keep it Clean: Regularly dust and wipe down the scales, sensor heads, and readout box. Wood dust, especially fine dust, can interfere with sensor readings. Use a soft cloth, and for magnetic scales, a soft brush to clean the magnetic strip. Avoid harsh solvents.
- Check Mounting: Periodically ensure all brackets and mounting hardware are tight. Vibrations can loosen screws over time, affecting accuracy.