Choosing between a wood lathe faceplate and a chuck is crucial for secure workpiece mounting. A faceplate is ideal for larger face-grain bowls and large circular items, while a chuck excels with spindle turning and smaller, more intricate work. Understanding their strengths ensures safety and efficient turning. This guide will clarify when to use each and why.
Hey there, fellow woodworkers! Daniel Bates here from Lathe Hub. If you’re getting into the wonderful world of woodturning, you’ve likely encountered a common question: faceplate or chuck? It might seem like a small detail, but knowing which one to use is a big part of turning safely and effectively. Don’t worry, it’s not as complicated as it sounds! We’ll break down exactly what each tool does, when it shines, and how to choose the right one for your project. Get ready to feel more confident at your lathe!
Understanding Your Holding Options: Faceplate or Chuck?

When you’re getting ready to turn a piece of wood on your lathe, the first thing you need to do is secure it. This is where your faceplate and chuck come in. Think of them as the grippers of your lathe, holding your wood steady while the lathe spins. While they both serve the same basic purpose – holding wood – they do it in very different ways and are best suited for different types of projects.
Many beginners start with a faceplate because it’s often included with a lathe or is a less expensive accessory. However, as you tackle more complex projects or want more versatility, a chuck becomes an invaluable tool. Grasping the fundamental differences will help you make the right choice every time, leading to smoother turning and better results.
What is a Wood Lathe Faceplate?
A wood lathe faceplate is quite simple. It’s a flat metal disc with a threaded hole in the center that screws onto the threaded end of your lathe’s spindle. You then attach your wood to the faceplate, usually by screwing directly through pre-drilled holes in the wood into the faceplate itself, or by using screws and sometimes wooden buttons or blocks.
Think of it like a metal Frisbee that attaches to your lathe. It’s best for turning large pieces of wood that are worked on the “face grain,” meaning the flat side of the wood is facing the tailstock and headstock. This is a common method for turning large, relatively shallow bowls.
How a Faceplate Works
- Attaching the Faceplate: The faceplate’s threaded center matches the thread size of your lathe’s spindle (e.g., 1″ x 8 TPI). You simply screw it onto the spindle clockwise. Make sure it’s snug against the spindle shoulder.
- Preparing Your Wood: You’ll typically drill pilot holes in the face of your workpiece. These holes should be the correct size for the screws you’ll use.
- Attaching the Wood: Align your wood with the faceplate. Use appropriate screws (often wood screws with washers, or specialized faceplate screws) to securely fasten the wood to the faceplate through the pre-drilled holes. For very large or heavy pieces, you might use multiple screws and wooden buttons for added support.
- Turning: Once securely mounted, you can begin turning. The faceplate provides a stable, direct connection for the wood.
Pros of Using a Faceplate
- Cost-Effective: Faceplates are generally much less expensive than chucks.
- Simple to Use: The concept is straightforward – screw it on, screw your wood to it.
- Ideal for Large Face-Grain Work: Perfect for very large bowls where chuck jaws might not grip effectively or safely.
- Direct Mounting: Provides a very secure and direct mount for large, flat projects.
Cons of Using a Faceplate
- Limited Versatility: Primarily suited for face-grain bowls and similar shapes.
- Screw Holes in Workpiece: You will have screw holes in your finished piece that need to be filled or incorporated into the design.
- Slower Setup for Smaller Items: Can be cumbersome for smaller spindle turnings or projects where you need to frequently remove and re-mount the wood.
- Balancing Issues: For very large, unbalanced pieces, careful consideration of screw placement and occasional balancing might be needed.
What is a Wood Lathe Chuck?
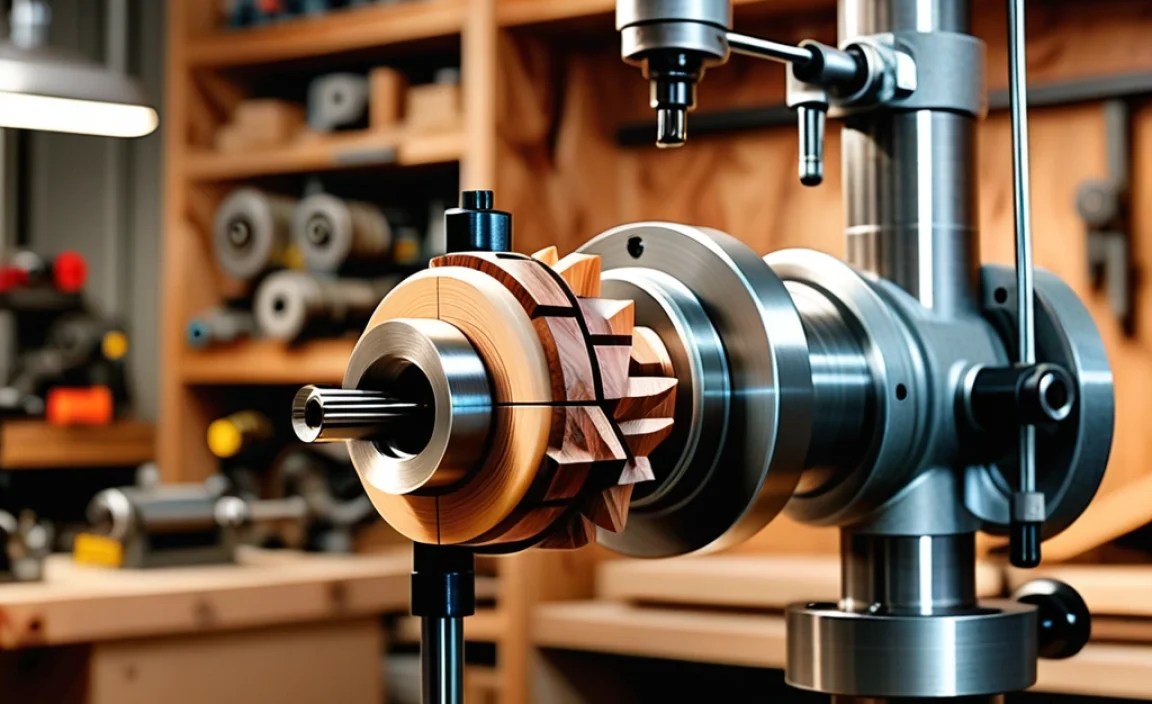
A wood lathe chuck is a more sophisticated workholding device. It consists of a body that screws onto the lathe spindle, and jaws that extend from the body. These jaws can move in and out, expanding or contracting to grip the workpiece. Most chucks are designed to grip both internally (expanding into a pre-drilled hole) and externally (contracting around a tenon or dowel).
Chucks are incredibly versatile. They are the go-to for spindle turning (making components like table legs, chair spindles, and balusters) and are also excellent for bowls, especially when combined with chuck jaws designed for specific tasks. The jaw system allows for easy mounting and removal of wood without needing to screw directly into your project.
How a Chuck Works
- Attaching the Chuck: Similar to a faceplate, the chuck body screws onto your lathe spindle. Many chucks also come with specific inserts to match different spindle thread sizes.
- Mounting the Wood: This is where the versatility shows.
- External Grip: You’ll often turn a “tenon” (a cylindrical protrusion) on your workpiece that the chuck’s jaws will grip around. You tighten the jaws using a wrench or T-handle, causing them to expand outwards and grip the tenon.
- Internal Grip: You can drill a hole in your workpiece. The chuck’s jaws will then expand inside this hole, offering a secure hold. This is common for hollowing out bowls.
- Faceplate Rings: Some chucks have optional accessories, like faceplate rings, that allow you to mount larger face-grain items more conventionally, while still using the chuck for secure, screw-free attachment.
- Turning: With the jaws securely holding the wood, you can begin turning. The beauty of a chuck is the quick and precise mounting and unmounting.
Pros of Using a Chuck
- Incredible Versatility: Can grip effectively for both spindle turning and bowl turning, using internal or external grip.
- No Screw Holes: Projects can be turned without screw holes, allowing for cleaner finishes.
- Quick Mounting and Dismounting: Saves time when you need to remove and re-mount work for operations like sanding or finishing.
- Precise Grip: Offers a strong, reliable, and often repeatable grip on various shapes and sizes.
- Safety: When properly used, a chuck provides excellent workholding, reducing the risk of pieces flying off the lathe.
- Range of Jaws: Many chucks have interchangeable jaws for specialized tasks, like gripping large bowls or holding very small spindles.
Cons of Using a Chuck
- Cost: Chucks are a significant investment, often costing much more than a faceplate.
- Learning Curve: Understanding how to use the different jaw sets and grip methods can take some practice.
- Size Limitations: While versatile, extremely large or irregularly shaped pieces might still be better suited for a faceplate.
- Requires Tenons: For external grip, you need to machine a tenon on your workpiece, which requires a bit of planning.
Wood Lathe Faceplate vs Chuck Holding Power: A Direct Comparison

When we talk about “holding power,” we’re really discussing how securely a tool can grip your workpiece under the forces of the spinning lathe. Both faceplates and chucks offer substantial holding power when used correctly, but their strengths lie in different areas.
The holding power of a faceplate comes from the direct mechanical connection using screws. The more screws you use, properly spaced and driven into solid wood, the stronger the hold. It’s a reliable method for large, flat pieces where the forces are distributed. A faceplate typically screws directly into the wood, creating a solid, unmoving bond. However, this relies heavily on the strength of the wood and the screws themselves.
A chuck, on the other hand, uses opposing jaws that exert controlled pressure. For external gripping around a tenon, the opposing forces of the jaws create immense pressure, essentially squeezing the tenon. For internal gripping, the jaws expand outwards against the inside of a hole. This mechanical advantage, driven by precision-engineered jaws and screw mechanisms, can deliver extremely strong and consistent holding power, often with greater security for spindle work and smaller items where a tenon or internal hole is feasible.
Here’s a table to help visualize the core differences in holding power and application:
| Feature | Wood Lathe Faceplate | Wood Lathe Chuck |
|---|---|---|
| Primary Holding Mechanism | Screws directly into wood. | Expanding/contracting jaws gripping tenon (external) or hole (internal). |
| Holding Power Strength | Reliable for large face-grain items, dependent on screw count and wood integrity. | Very strong and consistent, especially for spindle work and smaller bowls; leverages mechanical advantage. |
| Best For | Large face-grain bowls, platters, large circular face-mounted pieces. | Spindle turning (legs, balusters), smaller to medium bowls (internal or external grip), items requiring frequent removal. |
| Workpiece Preparation | Requires drilling pilot holes and screwing workpiece to faceplate. Creates screw holes in the finished piece. | Requires machining a tenon for external grip, or drilling a hole for internal grip. No screw holes in the finished piece. |
| Versatility | Lower. Primarily for face-grain work. | High. Handles a wide range of spindle and bowl turning, and various mounting methods. |
| Cost | Lower | Higher |
| Safety Consideration | Ensure adequate screws are used; avoid over-spinning very large, unbalanced pieces without proper balancing. | Ensure jaws are fully engaged and tightened; use appropriate jaw sets for the task. |
When to Use Which: Project Scenarios
Deciding between your faceplate and chuck should always come down to the specific project you have in mind. It’s not about one being superior to the other, but which one is the right tool for the job.
Scenario 1: Turning a Large Salad Bowl from a Faced Plank
Let’s say you have a beautiful 18-inch-diameter oak plank, and you want to turn it into a large salad bowl. The grain will be running across the face of the bowl (face grain). In this situation, your faceplate is likely your best friend. You’ll drill several pilot holes around the perimeter of your plank and screw it securely to the faceplate. This provides a wide, stable base for the large diameter. Trying to grip this with a standard chuck could be unstable or impossible without specialized, large bowl jaws and a very robust tenon or internal grip.
Scenario 2: Making a Table Leg (Spindle Turning)
Now, imagine you need to turn several identical table legs. These are long, relatively thin pieces of wood, rotated on their axis. This is classic spindle turning. A chuck is almost always the preferred tool here. You would typically prepare one end of the wood blank with a tenon and mount it in the chuck using an external grip. The other end can be supported by a live center from the tailstock. The chuck provides a secure, repeatable grip, allowing you to easily remove the leg to check dimensions or sand it, then remount it precisely. Using a faceplate for this would be incredibly awkward and unsafe.
Scenario 3: Turning a Small, Intricate Box Lid
You’re making a small, hinged box, and you need to turn the lid. This might be a few inches in diameter. You could use a faceplate with small screws, but it would leave holes in the lid that you’d need to fill. A much cleaner and often more secure method is to use a chuck. You could project a small tenon from the lid blank and grip it externally, or drill a shallow hole on the underside of the lid and grip it internally with specific jaws. This allows for easy access to the entire surface of the lid for shaping and sanding without leaving screw marks.
Scenario 4: Creating Decorative Finials or Small Doodads
For tiny projects like decorative finials for furniture or small novelty items, a chuck is invaluable. You can hold a small dowel or a precisely sized tenon with small jaws. The ability to precisely grip and easily remount such small pieces makes a chuck the clear winner for detailed work where leaving any mark would be undesirable.
Scenario 5: Turning a Medium-Sized Bowl (Face-Grain or End-Grain)
For a medium-sized bowl (say, 10-12 inches in diameter), you have options. If you’re working from face grain, you can either use a faceplate or a chuck with faceplate rings or large bowl jaws. If you’re working from end grain (which is generally slower and can be trickier for beginners), a chuck is excellent. You would typically machine a tenon on what will be the bottom of the bowl and grip it externally with the chuck. This is often preferred for end-grain bowls as it provides a very strong hold for the forces involved.
Tool Considerations and Safety
No matter whether you’re using a faceplate or a chuck, safety should always be your top priority. Woodturning involves high-speed rotation, and a workpiece coming loose can cause serious injury. Understanding the tools themselves and how they interact with your lathe is part of that safety process.
Faceplate Safety
- Screw Quality: Always use good quality screws of appropriate length. Screws that are too short won’t get a good bite, and screws that are too long can go through your workpiece and cause injury.
- Adequate Screws: For larger pieces, use enough screws. Don’t skimp! At least four screws is a good minimum for many face-grain bowls.
- Wood Condition: Ensure the wood is sound and free of cracks that could compromise the screw holes.
- Centering: While not always critical for face-grain bowls, ensuring the wood is reasonably centered on the faceplate can reduce vibration.
- Washers: Using washers with your screws helps distribute the load and prevents the screw heads from pulling through softer wood.
Chuck Safety
- Read the Manual: Every chuck is slightly different. Read your chuck manufacturer’s instructions carefully.
- Correct Threading: Ensure the chuck is screwed onto the spindle properly and is tight. For removable inserts, make sure the correct insert is installed.
- Jaw Engagement: Always ensure the jaws are fully engaged with the tenon or inside the workpiece.
- Tightening: Tighten the jaws sufficiently using the provided wrench. Don’t overtighten to the point of damaging the wood or the chuck, but ensure it’s firm.
- Appropriate Jaws: Use the jaw set designed for the task. Standard jaws might not be ideal for very large or awkwardly shaped pieces.
- Tenon Diameter: For external grip, the tenon diameter needs to be within the gripping range of your chuck and jaws. A tenon that’s too small or too large can compromise holding power.
- Speed: Always check your lathe’s manual for safe operating speeds based on the size and type of wood being mounted, especially using chucks. Larger pieces or less substantial tenons generally require slower speeds.
Many chuck manufacturers provide excellent resources. For example, Woodturner’s Association often has safety guidelines and forum discussions that are incredibly helpful for learning safe chuck practices.
Advanced Techniques and Accessories
Once you’ve mastered the basics of faceplates and chucks, you might want to explore accessories and advanced techniques that further enhance your capabilities.
Chuck Accessories
- Specialized Jaws: Beyond standard jaws, you can get jaws for gripping large bowls internally, holding small spindles precisely, or even for specialized tasks like gripping finials.
- Faceplate Rings: These attach to your chuck and provide a surface with screw holes, allowing you to mount larger face-grain items more like you would with a traditional faceplate, but with the added security and convenience of a chuck.
- Jaw Screw Plates: Some chucks have optional screw plates that attach to the jaws, providing a flat surface with screw holes for mounting specific items.
Faceplate Enhancements
- Wooden Buttons: For very large or delicate face-grain items, you might use small wooden or plastic buttons that attach to the faceplate with screws. Your workpiece is then screwed into these buttons, which can prevent screws from.
