Discover a proven, homemade wood lathe indexing plate system to precisely divide your workpiece accurately and affordably. This guide provides clear, step-by-step instructions for beginners to create and use this essential woodworking tool, unlocking new creative possibilities for your lathe projects.
Ever wanted to add perfect patterns to your turned wood projects? Maybe you’ve dreamed of creating intricate fluting or evenly spaced beads. Doing this accurately on a wood lathe often requires an indexing plate, but purpose-built ones can be pricey. For home workshop enthusiasts and beginners learning the ropes, the cost can be a barrier. But what if you could build a reliable system yourself? That’s where a well-designed, homemade wood lathe indexing plate comes in. It’s simpler than you might think, and it opens up a whole new world of precision woodworking.
This guide is your blueprint to understanding and building a practical, homemade indexing plate system. We’ll break down exactly what you need, how to assemble it, and most importantly, how to use it safely and effectively. Forget complicated setups; we’re focusing on an easy-to-understand, proven method that works. Let’s get your lathe ready for some precise fun!
Unlock Precision: The Homemade Wood Lathe Indexing Plate System


As woodturners, we’re always looking for ways to add detail and precision to our creations. The ability to divide a turning accurately is fundamental for many decorative techniques. This is where an indexing plate shines. While commercial indexing heads are fantastic, they can represent a significant investment, especially for those just starting or working with a limited budget. The good news is, you can create a highly functional and reliable indexing system right in your own workshop using readily available materials. This guide will walk you through creating your own “proven homemade system” that will serve you well for years to come.
Why is an indexing plate so important? Imagine trying to carve evenly spaced grooves around a bowl or create a symmetrical floral pattern on a spindle. Doing this freehand is incredibly difficult, if not impossible, to get just right. An indexing plate locks your workpiece at precise, repeatable intervals. This allows for consistent results every single time, transforming your ability to execute complex decorative turning operations.
For beginners, the concept might seem a bit daunting, but building and using a simple indexing system is remarkably straightforward. It’s about understanding the principle of dividing a circle into equal parts and then having a reliable mechanism to hold that division. We’ll focus on a system that’s both effective and approachable, ensuring you feel confident every step of the way.
What is a Wood Lathe Indexing Plate?
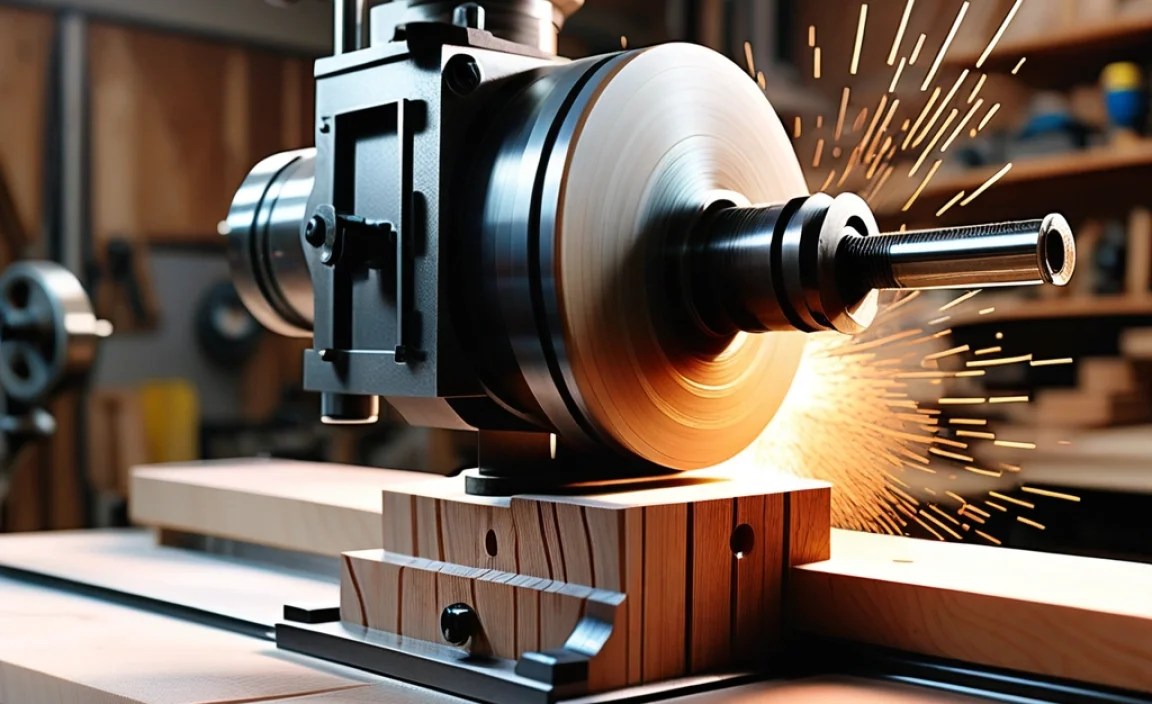
At its core, a wood lathe indexing plate is a device that attaches to your lathe’s headstock spindle. Its primary purpose is to allow you to lock the headstock spindle in specific, equally spaced positions. This is crucial for operations that require dividing the circumference of your workpiece into a set number of equal segments. Think of it like the gears on a bicycle, allowing you to precisely control your rotation for specific tasks.
The most common methods involve a plate with a series of holes (or notches) and a pin (or bolt) that engages these holes. The number of holes determines the divisions you can achieve. For example, a plate with 24 holes allows for divisions into 2, 3, 4, 6, 8, 12, and 24 equal parts. By rotating the spindle and engaging the pin in a different hole, you precisely position your workpiece for the next cut or operation.
Why Build a Homemade System?
There are several compelling reasons to consider building your own wood lathe indexing plate:
- Cost Savings: This is often the biggest motivator. Commercial indexing plates can cost hundreds of dollars. A DIY version can be built for a fraction of that, using materials you might already have or can acquire inexpensively.
- Customization: You can design your system to perfectly suit your lathe and your specific turning needs. Need certain divisions? You can engineer them into your homemade plate.
- Learning Experience: Building your own tools is incredibly rewarding. It deepens your understanding of how they work and fosters a sense of accomplishment.
- Accessibility: Sometimes, specific commercial models aren’t readily available or are out of stock. A DIY solution provides immediate access to this essential functionality.
- Repairability: If something wears out or breaks on a homemade system, you likely have the skills and materials to repair or replace the component yourself.
Understanding the Basic Principles of Division
Before we dive into building, let’s quickly touch on the math behind dividing a circle. A full circle has 360 degrees. To find the angle for each segment, you divide 360 by the number of divisions you want.
- To divide into 4 equal parts: 360 / 4 = 90 degrees per division.
- To divide into 8 equal parts: 360 / 8 = 45 degrees per division.
- To divide into 12 equal parts: 360 / 12 = 30 degrees per division.
An indexing plate with a set number of holes simplifies this. For example, a 24-hole plate:
- Moving one hole is 360 / 24 = 15 degrees.
- To get 8 divisions (360/8 = 45 degrees), you would advance 45/15 = 3 holes.
- To get 12 divisions (360/12 = 30 degrees), you would advance 30/15 = 2 holes.
The key is having a plate with a sufficient number of holes to facilitate the divisions you most commonly need. A plate with 24, 30, or 36 holes is typically very versatile for woodworking. For our homemade system, we’ll aim for a common and useful number that’s easy to achieve.
Building Your Proven Homemade Wood Lathe Indexing Plate System

This section outlines a popular and effective method for creating a homemade indexing plate. It uses a robust clamping system that attaches to your lathe’s faceplate or pulley. The design emphasizes simplicity in construction and reliability in use. We’ll cover the materials, tools, and steps needed.
Materials You’ll Need:
- Metal Plate: A sturdy piece of steel or aluminum plate. 1/8” to 1/4” (3mm to 6mm) thick is usually sufficient. The diameter depends on your lathe’s faceplate or pulley size, but typically 6” to 10” (150mm to 250mm). You can often find suitable stock at metal suppliers or even repurpose a thick, flat metal disc.
- Clamping Mechanism: This is what will lock the plate. A common and effective method uses a sturdy bar or angle iron, a bolt, a washer, and a wingnut or knob.
- Indexing Pin: A hardened steel pin or bolt. A simple bolt with a ground-down end or a precisely sized dowel pin works well.
- Hardware: Bolts, nuts, washers appropriate for attaching the clamping mechanism and for securing the plate to your lathe (if necessary).
- Optional: Paint or protective coating to prevent rust and improve appearance.
Tools You’ll Need:
- Drill Press: Essential for accurate, perpendicular hole drilling.
- Metal Drill Bits: A set of bits, including one for the precise diameter of your indexing pin and others for bolt clearances.
- Center Punch: For marking hole locations accurately.
- Metal File or Grinder: For deburring edges and shaping the clamping mechanism.
- Wrench Set or Socket Set: For tightening hardware.
- Measuring Tools: Tape measure, ruler, caliper (for precision).
- Protractor or Angle Finder: For marking out divisions if you’re not using a pre-calculated hole circle.
- Safety Gear: Safety glasses, gloves, hearing protection.
Step-by-Step Construction Guide:
Let’s assume you have a lathe with a standard threaded spindle. The goal is to create a system that bolts onto your existing faceplate or, in some cases, directly onto the spindle if you can adapt a mounting system. This example focuses on a plate that clamps onto the lathe’s drive pulley or a dedicated mounting plate bolted to the spindle.
Step 1: Prepare the Base Plate
If your metal plate isn’t already a perfect circle, cut or grind it to the desired diameter. A common size is 8 inches (200mm). Clean up the edges with a file to remove any sharp burrs. For this system, we’ll create a plate that doesn’t necessarily need to bolt directly to the spindle; it will be clamped onto something that is rotating with the spindle. A robust pulley or a simple mounting disc that you bolt to your faceplate threads would work. If attaching to a pulley, ensure it’s balanced as best possible.
Step 2: Determine Your Hole Pattern
Decide on the number of holes you want. A 24-hole pattern is very versatile. This allows for divisions of 2, 3, 4, 6, 8, 12, and 24.
To lay out 24 equally spaced holes on an 8-inch (200mm) diameter plate:
- Find the exact center of your plate. A center finder or carefully measuring diagonals works.
- Mark a circle where you want your holes to be drilled. For 24 holes, a diameter 4 to 5 inches (100mm to 125mm) in from the edge is typically good, away from the clamping mechanism area.
- Calculate the spacing: 360 degrees / 24 holes = 15 degrees per hole.
- Using a protractor or a digital angle finder mounted on your drill press (or carefully on the workpiece), start marking your hole positions around the circle. A good trick is to use a piece of paper with 24 equal segments drawn on it, centered and aligned, then transfer the marks. Or, use a jig that rotates precisely 15 degrees at a time.
Step 3: Drill the Indexing Holes
This is the most critical step for accuracy. You need to drill the holes perfectly perpendicular to the plate surface and precisely spaced.
- Secure the plate firmly on your drill press table.
- Use a center drill bit to create a pilot dimple at each marked location.
- Select a drill bit that matches the diameter of your indexing pin. It should be a snug, but not too tight, fit.
- Drill each hole. Take your time. If you don’t have a 15-degree indexing protractor for your drill press, consider making a simple jig. A common DIY jig method involves a base that attaches to your drill press table and a rotating arm that clicks into place every 15 degrees, using a pin and detent system. Precision here is key! For more advanced users, a rotary table on a milling machine offers the highest accuracy. Many woodworkers simplify this by printing a template and transferring holes using a very carefully aligned drill, or by purchasing a pre-drilled plate blank if their budget allows.
External Resource: For detailed instructions on creating accurate hole patterns, even for metalworking, the principles outlined at Machinery Magazine regarding marking out circles offer valuable techniques that can be adapted for this phase.
Step 4: Create the Clamping Mechanism
This mechanism will hold the indexing pin and pivot to engage/disengage the holes, and ideally, clamp the plate to your rotating mass.
- The Bar: Cut a piece of strong angle iron or flat bar stock. This bar will be mounted to your lathe’s pulley or mounting plate. It needs to be long enough to extend past the edge of your indexing plate and provide a place to mount the clamping bolt and indexing pin.
- Mounting the Bar: Drill bolt holes in the bar to match existing holes on your lathe’s pulley or a faceplate/mounting disc. Bolt this bar securely to the rotating part of your spindle. Ensure it’s very strong and doesn’t wobble.
- The Indexing Pin Pivot: Drill a hole in the bar where you want your indexing pin to pivot. This hole should be sized for a bolt that will act as the pivot.
- The Indexing Pin: Take a bolt (e.g., 1/2” or M12). Grind or file its end to a rounded or conical point that will easily slide into your indexing holes. This threaded part will go through the pivot hole on your bar.
- The Clamping Bolt: You’ll need another bolt, usually a longer one, that will pass through a slot in the bar and thread into another piece of metal (or directly into the bar if it’s thick enough). This is your clamping mechanism. The slot allows you to move this bolt in and out. A wingnut or a comfortable knob attached to this bolt will allow you to tighten it against a flat surface on your indexing plate, effectively clamping it.
- The Plate Engagement: The indexing pin itself, when locked in an indexing hole, provides the rotation lock. For added security, especially on larger lathes or heavier cuts, you can add a secondary clamp. This might involve a simple lever with a piece of hardwood that presses against the side of the indexing plate, or a second bolt that locks the plate directly to the mounting bar.
A simpler clamping method is to have a single bar attached to your pulley with a threaded hole. A bolt with a rounded end passes through a clearance hole in your indexing plate and threads into the bar. A wingnut on the bolt allows you to tighten it, clamping the plate to the pulley. The rounded end of the bolt then acts as your indexing pin.
Step 5: Mount the Indexing Pin
Install your prepared bolt/dowel pin into the pivot hole on your clamping bar. Add a washer between the bar and the head of the bolt if needed for smooth movement. Thread a nut onto the bolt and tighten it enough so the pin can pivot but doesn’t flop loosely. Now, test if the pin can reach into the drilled holes on your indexing plate.
Step 6: Create the Clamp Lock
The “clamp lock” is what secures the indexing plate to your headstock pulley or mounting plate. In our simplified version, the bolt that acts as the indexing pin might also be the clamp, tightened with a wingnut until snug. For more security, a second bolt that can slide in a slot and clamp against a stationary part of the pulley or mount is ideal. Wingnuts or comfortable knobs on these bolts make operation easy without tools.
Step 7: Mount and Test
Mount your homemade indexing plate onto your lathe’s headstock pulley or mounting disc. Ensure it’s securely fastened. Rotate the spindle and test the indexing pin. Does it drop into each hole smoothly? Can you engage it firmly? Can you tighten the clamp mechanism to hold the plate securely?
Initial Test: Ensure the pin goes into each hole. Check for any binding. With the pin engaged in a hole, check that the spindle cannot rotate. Release the pin and rotate the spindle to the next hole. Repeat for all holes.
Using Your Homemade Indexing Plate
Using your DIY indexing plate is straightforward once it’s attached.
- Attach the Plate: Secure your homemade indexing plate onto your lathe’s headstock pulley or mounting disc. Make sure all bolts and clamps are tight.
- Select Your Division: Decide how many equal divisions you need for your project. For example, if you need 8 equally spaced lines around a project, you’ll advance 3 holes on a 24-hole plate (since 45 degrees / 15 degrees per hole = 3 holes).
- Position the Pin: Unlock the indexing pin’s clamp (if separate) and pull the indexing pin out of its current hole.
- Rotate the Spindle: While keeping the indexing pin clear, carefully rotate the lathe’s headstock spindle until the next desired hole is aligned with the pin.
- Engage the Pin: Let the indexing pin drop into the new hole. This locks the spindle and your workpiece in the desired position.
- Perform Your Operation: Make your cut, carve, or mark as needed.
- Repeat: Unlock the pin, rotate to the next position, engage the pin, and repeat the operation.
Safety First: Always ensure the indexing pin is fully seated in a hole before initiating any cutting. Never engage the pin while the lathe is spinning at high speed. It’s best to move to the next division with the lathe turned OFF or at its lowest setting. Regularly check that all clamps and bolts securing the indexing plate to your lathe are tight.
Advanced Considerations and Variations

While the basic plate with holes and a pin is highly effective, there are variations and enhancements you might consider as you become more proficient.
