Need a wood lathe parting tool? Crafting your own is an achievable project that saves money and gives you a custom tool. This guide offers step-by-step instructions for beginners to make a reliable, homemade parting tool, ensuring accuracy and safety for your woodworking projects.
Wood Lathe Parting Tool Homemade: Your Essential Guide

Have you ever been in the middle of a turning project, only to find your store-bought parting tool just isn’t quite right? Maybe it’s too thin for that deep cut, or not sharp enough to give you that clean break. It’s a common frustration for woodturners, especially when you need a specific size or style to achieve a certain look. The good news is, you don’t always need to buy an expensive specialty tool. In this guide, we’ll walk you through making your very own wood lathe parting tool, right in your workshop. It’s a straightforward project that will give you a custom tool that fits your needs perfectly and boosts your confidence in the workshop.
Why Make Your Own Wood Lathe Parting Tool?
Before we dive into the “how,” let’s talk about the “why.” Making a homemade parting tool offers some fantastic benefits for any woodturner, especially those just starting out or looking to expand their toolkit without breaking the bank. It’s about more than just saving a few dollars; it’s about understanding your tools and having precisely what you need.
- Cost-Effectiveness: High-quality parting tools can be pricey, especially specialized ones. Using readily available materials like old files or scrap steel can significantly reduce the cost.
- Customization: You can tailor the width, thickness, and even the grind angle of your parting tool to perfectly suit your specific projects. Need a very thin kerf for delicate work? Or a wider blade for efficient stock removal? You can make it.
- Tool Re purposing: Old, worn-out files are often made of excellent tool steel that’s perfect for regrinding into cutting tools. It’s a great way to give old tools a new life.
- Understanding Tool Geometry: Building your own tool gives you a deeper appreciation for how cutting tools work. You’ll learn about bevels, angles, and how they affect the cut.
- Skill Development: It’s a practical project that hones your metalworking and sharpening skills, which are valuable in any workshop setting.
Understanding the Wood Lathe Parting Tool

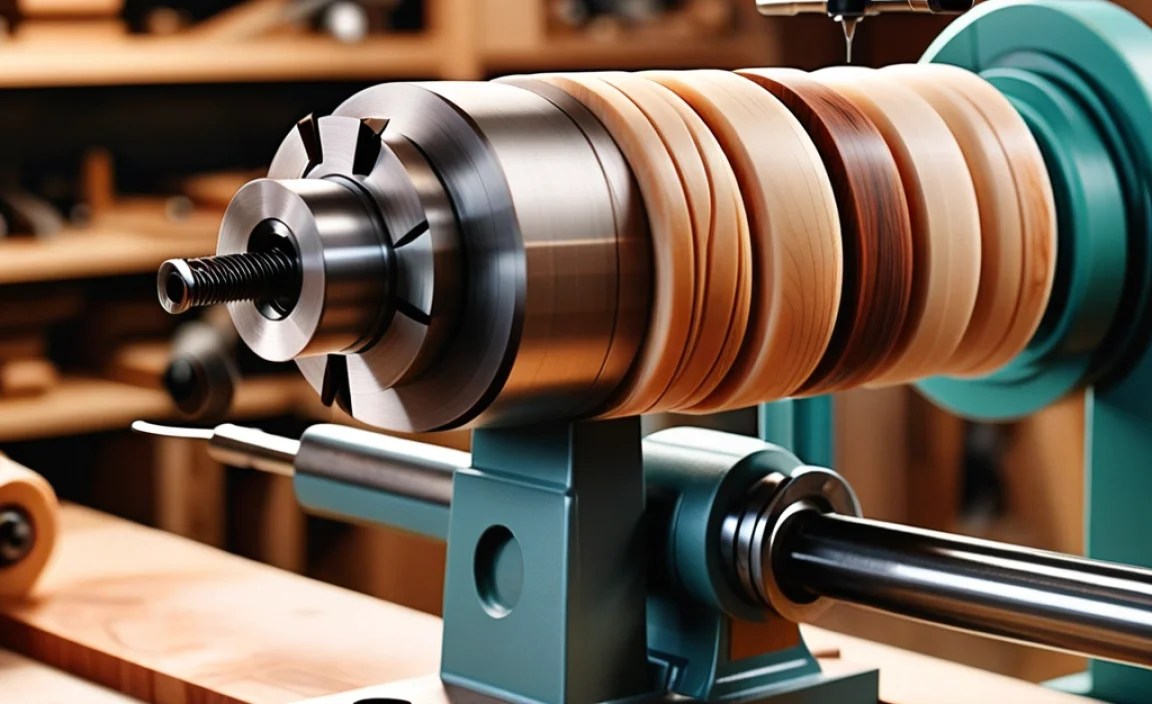
At its most basic, a parting tool (also known as a parting off tool or parting blade) is designed to cut a piece of wood completely off the lathe. It’s characterized by its thin, sturdy blade that cuts a narrow kerf (the width of the cut). This narrow kerf is crucial because it minimizes waste and allows for precise separation of your turned workpiece from the stock.
A key feature of a parting tool is its strength. The blade needs to be stiff enough not to flex or chatter when plunged into the spinning wood. Unlike other lathe tools, a parting tool is typically plunged straight into the wood, perpendicular to the workpiece’s axis of rotation. This is why the design and material are so important.
Key Components of a Parting Tool
A typical homemade parting tool will consist of three main parts:
- The Blade: This is the cutting edge. It’s usually a flat piece of steel, often with a slight hook or relieved geometry on the sides to prevent binding.
- The Shank: This is the part of the tool that you hold, which extends back to a comfortable grip. For homemade tools, this is often the original handle of a file or a separate piece of metal.
- The Handle (Optional/Integrated): Sometimes the shank extends directly into a wooden handle, or the original file handle serves this purpose.
Materials for Your Homemade Parting Tool
The material you choose for your blade is critical. You need something that can hold a sharp edge and is robust enough for the task. Here are the most common and effective options:
- Old High-Carbon Steel Files: This is the most popular choice for good reason. Files are made from hardened tool steel (often W1 or W2 carbon steel), which makes them tough and capable of taking a very sharp edge. Look for files in decent condition, though minor wear is fine.
- Scrap Tool Steel: If you have access to other pieces of tool steel, such as old saw blades (be cautious of thin saws that might be brittle), or other industrial scrap, these can also be excellent candidates.
- HSS (High-Speed Steel) Inserts: While not strictly “homemade” in the sense of forging from raw material, you can buy HSS inserts designed for parting tools and mount them on a homemade shank. This offers superior edge retention but is more complex to set up. For this guide, we’ll focus on making the blade from scratch.
For this guide, we’ll focus on using an old metal file, as it’s the most accessible and versatile option for beginners.
Choosing the Right File
Not all files are created equal for this purpose. Look for:
- Metal Files: These are generally made of higher carbon content steel than wood rasps.
- Larger Files: A larger file (e.g., 10-14 inches) will give you more material to work with, allowing for a wider or thicker blade.
- Single-Cut or Double-Cut: Either works. Single-cut files often have a cleaner surface to work with.
- Avoid “Bastard” Files for the Blade Edge: While Bastard files have coarser teeth, which are easier to grind into shape initially, they are often made of softer steel. Look for “smooth” or “second cut” files made from tool steel for better edge retention.
Tools and Materials You’ll Need
Gathering your supplies is the first step to success. Having everything ready will make the process smoother and safer.
Essential Tools:
- Safety Gear: Safety glasses are non-negotiable. Gloves are also highly recommended, especially when handling the hot metal or sharp edges. A respirator or dust mask is advisable when grinding.
- Angle Grinder: This is your primary tool for shaping the steel. Use appropriate grinding discs.
- Bench Grinder: Useful for refining the bevels and shaping the blade more precisely.
- Drill Press or Hand Drill: For creating a mounting hole if needed.
- Hacksaw: For initial cuts or if you don’t have an angle grinder.
- Files (metalworking files): For cleaning up edges and refining shapes.
- Honing Guides or Sharpening System: To achieve a razor-sharp edge. Diamond stones or high-grit sharpening stones are excellent.
- Vise: To hold the file securely while you work on it.
- Measuring Tools: Ruler or calipers for ensuring symmetry and desired dimensions.
- Marker or Scribe: For marking your cut lines.
- Pliers or a Vise Grip: For holding small pieces securely.
- Hammer (optional): For certain adjustments or shaping.
Materials:
- Old Metal File: The source of your blade steel.
- Steel Rod or Tubing (optional): For creating a new shank if the file’s tang isn’t suitable or you want a different handle design.
- Wood for Handle (optional): For crafting a custom handle.
- Epoxy or JB Weld (optional): For attaching a separate shank or handle.
Step-by-Step Guide: Making Your Parting Tool
Let’s get started on crafting your own reliable parting tool. We’ll focus on converting an old file into a functional blade. Please remember to prioritize safety at every step.
Step 1: Prepare the File
First, you need to remove the teeth from the file. The easiest way to do this is to grind them off, or if you’re careful, you can try to flatten the file’s surface. If the file has an original wooden handle, remove it carefully. If it has a tang, decide if you will use the tang as part of the shank or cut it off entirely.
Tip: If you’re grinding off the teeth, do it slowly and incrementally to avoid overheating the steel, which can soften it.
Step 2: Mark Your Design
Decide on the dimensions of your parting tool blade. Common widths range from 1/8 inch to 1/2 inch, depending on your needs. Thinner blades are good for precise cuts and delicate work, while wider blades are better for faster parting. Remember, the blade needs to be strong, so avoid making it excessively thin.
Using a marker or scribe, draw the outline of your desired blade onto the flat side of the file. You’ll essentially be cutting a long, narrow strip from the file. Mark the desired width and length. A typical length might be around 3-4 inches for the blade section.
Example Dimensions:
- Blade Width: 1/4 inch (6mm)
- Blade Length: 3 inches (75mm)
- Shank: Original file tang, or approximately 4-6 inches long
Step 3: Cut the Blade Blank
This is where the angle grinder comes in handy. Using a grinding disc, carefully cut along your marked lines to create the basic shape of your parting tool blade. Take your time and make multiple passes to avoid putting too much stress on the disc or overheating the steel. If you’re using a hacksaw, this will take longer and require more effort.
Safety Note: Wear your safety glasses and gloves. Ensure the workpiece is securely held in a vise. Angle the grinder to cut cleanly along the lines.
Here’s a way to think about the cutting process:
- Make an initial cut along one long edge of your desired blade width.
- Make a second cut along the other long edge.
- Cut off the end of the blade to your desired length.
- Refine the shape by grinding away excess material.
Step 4: Shape the Blade and Crease
Once you have a rough blank, you need to give it its proper shape. The cutting edge should be straight across. The sides of the blade are critical: they need to be relieved (tapered slightly away from the cutting edge) so that the tool doesn’t bind in the cut. This is often called “side relief.”
Use your bench grinder or angle grinder to create a slight taper on the sides of the blade, starting from the cutting edge and going back towards the shank. This taper should be very subtle – just enough to prevent the sides from rubbing against the wood.
You can also add a “crease” or “web” down the center of the blade if you want extra stiffness. This is a narrow land down the middle, with the relief tapering down on either side of it. This is common on commercial parting tools and significantly increases rigidity.
Advanced Tip: For a strong crease, grind a narrow flat down the center of the blade, about 1/16 inch wide. Then, relieve the sides of the blade down to this central flat.
Step 5: Grind the Cutting Edge
Now it’s time to create the sharp edge. Lay the blade on your bench grinder or a sharpening stone at a suitable angle. A common angle for the primary bevel is around 15-20 degrees. You can grind one or two bevels on the cutting edge. A single bevel is simpler; a double bevel (one on each side) can sometimes allow for easier sharpening.
Heat Management: Dip the blade in water frequently while grinding to prevent overheating the steel. Overheating will “draw the temper” and make the steel soft, ruining its ability to hold an edge. You want to keep the steel cool enough to touch comfortably between grinding passes.
Table of Typical Grind Angles:
| Bevel Type | Typical Angle | Purpose / Benefit |
|---|---|---|
| Primary Cutting Bevel | 15-20 degrees | Establishes the sharp edge for cutting. |
| Secondary Bevel (for double bevel grind) | 20-25 degrees | Adds a bit more strength to the cutting edge. |
| Side Relief Angle | Very slight taper (1-3 degrees) | Prevents the sides of the blade from binding in the cut. |
Step 6: Sharpen the Tool
Grinding creates the edge, but sharpening refines it to a razor’s edge. Use fine-grit sharpening stones (e.g., 1000 grit and higher) or diamond stones to hone the edge. A sharpening jig or honing guide can help you maintain a consistent angle. The goal is to remove any microscopic burrs left by the grinding process.
For a truly effective parting tool, you want it as sharp as possible. A common method is to use a series of stones, finishing with a leather strop loaded with honing compound. This process not only sharpens the edge but also polishes it, which helps it cut more cleanly and last longer.
Step 7: Create or Adapt the Shank and Handle
This is where your creativity can shine. You have a few options:
- Using the Original File Tang: If the tang is long and comfortable enough, you can simply use it as is. You might sheath it in a wooden handle for a better grip. Drill a hole through the tang or carefully shape it to accept a handle.
- Attaching a New Shank: You can cut the file tang off and braze or J-B weld a piece of steel rod or square stock to the back of your blade to create a longer, more robust shank. Ensure the attachment is very strong.
- Crafting a Wooden Handle: If you’re using a tang or a new shank, you can turn a wooden handle on your lathe (or carve one by hand) to fit. Drill a precise hole for the tang/shank, insert it, and secure it with epoxy or JB Weld. A well-fitted wooden handle makes the tool much more comfortable and controllable.
The key is to ensure the blade is securely attached to the shank and the shank is securely held in your hand (or chucked into a tool holder on the lathe for more advanced setups). For a beginner’s tool, a comfortable grip directly in hand is usually best.
Step 8: Tempering (Optional but Recommended for Durability)
If you’re working with a high-carbon steel file, the grinding process can soften it if it gets too hot. To ensure maximum hardness and edge retention, you can re-temper it. This is a delicate process:
- Heat the Steel: Gently heat the cutting edge of your parting tool until it turns a straw yellow or light brown color (around 400-450°F or 200-230°C). You can do this with a propane torch, holding the heat away from the edge and letting the heat soak in, or by using a block of metal heated to the correct temperature and placing the tool against it. Be careful not to overheat.
- Quench: Immediately quench the heated steel in oil (like motor oil or vegetable oil). This hardens the steel.
- Re-temper: The quenching process can make the steel brittle. To reduce brittleness, you need to temper it. Clean the steel so you can see the colors. Gently heat the back of the blade or the shank area (never the edge directly) until the straw yellow/light brown color returns to the edge. This is the tempering phase. This often requires very low, controlled heat. You can use an oven set to the correct temperature or a hot plate very carefully.
Important: Tempering is an art and requires practice. If you skip this step, your tool will still work, but it might not hold an edge as long or could be more prone to chipping if the steel was overheated during grinding. For a first attempt, careful grinding without overheating is often sufficient.
Testing and Refinement
Once your parting tool is assembled and sharpened, it’s time to test it! Start with a scrap piece of wood on the lathe. Plunge the tool slowly and steadily into the wood. Listen for any chatter or signs of binding. Observe how cleanly it cuts.
Troubleshooting:
- Binding: If the tool binds, your side relief might not be enough, or the kerf might be too thin for the depth you’re cutting. You may need to add more side relief or slightly widen the blade.
- Chatter: This can be caused by a dull edge, insufficient rigidity of the blade, or vibration from the lathe. Ensure your blade is sharp and that it’s as stiff as possible.
