A wood lathe sanding drum attachment smooths turned projects efficiently. Mastering its use involves understanding setup, safety, common grits, and techniques for various shapes, leading to a professional finish.
Getting that perfectly smooth finish on your turned wood pieces can sometimes feel like the final boss battle after hours of meticulous work. Using a sanding drum attachment on your wood lathe is a game-changer, letting you achieve a professional polish much faster than by hand. But like any tool, there’s a knack to using it effectively and safely. Don’t worry, it’s simpler than it looks! We’ll walk through everything you need to know, from getting it set up right to achieving those flawless surfaces.
Unlock a Luster: Mastering Your Wood Lathe Sanding Drum Attachment

Welcome to Lathe Hub! I’m Daniel Bates, and I love taking the mysteries out of tools like your wood lathe. Today, we’re diving deep into a fantastic accessory: the wood lathe sanding drum attachment. This simple yet powerful tool can transform your sanding process, saving you time and effort while delivering a showroom-quality finish. Whether you’re turning a delicate pen or a substantial bowl, understanding this attachment is key. We’ll cover its components, how to set it up securely, the best sandpaper choices, and proven techniques to tackle different shapes. Let’s get your projects looking their absolute best, safely and effectively.
What is a Wood Lathe Sanding Drum Attachment?

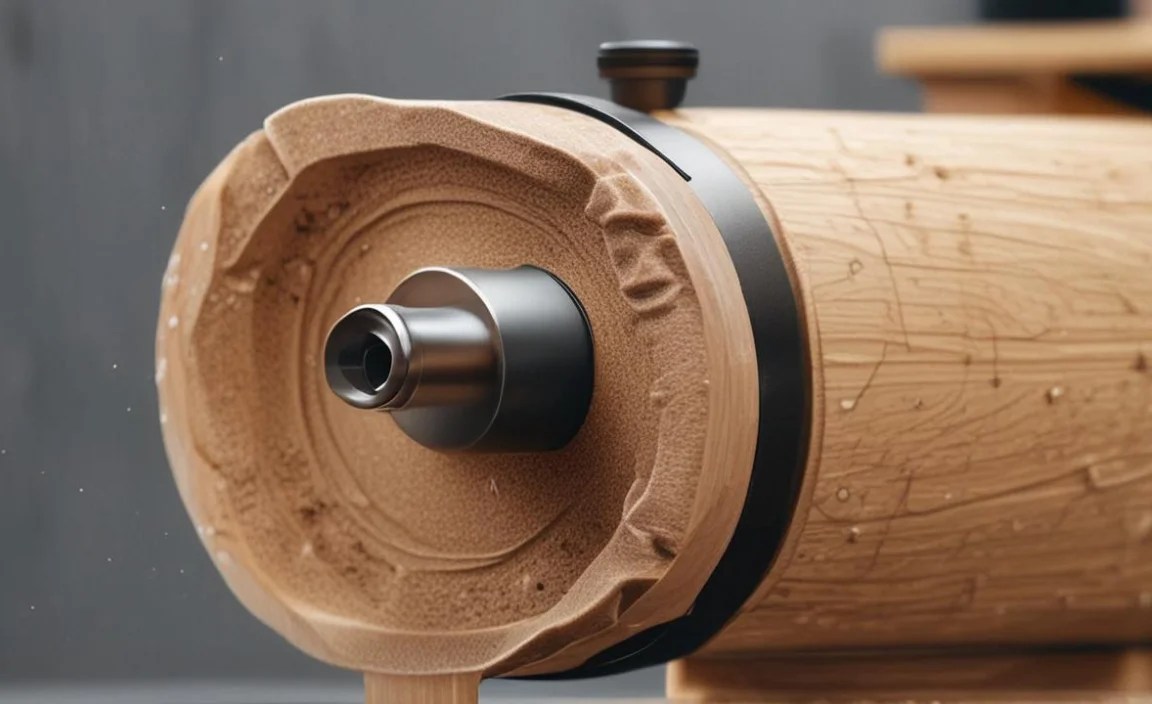
At its core, a wood lathe sanding drum attachment is a cylindrical drum that you fit onto your lathe. It typically spins at variable speeds, and you wrap sandpaper around it. As the attachment rotates, you bring your spinning wood piece into contact with the sandpaper-covered drum. This process removes tool marks and smooths the wood much more uniformly and quickly than trying to sand freehand or with flat sanding blocks. Think of it as a powered sanding belt, but adapted specifically for the rotational motion of your lathe.
Why Use a Sanding Drum Attachment? The Big Advantages

Why add another accessory to your workshop? The benefits of a sanding drum attachment are numerous for anyone using a wood lathe:
- Efficiency: It drastically speeds up the sanding process compared to manual methods.
- Uniformity: Creates a consistent surface finish across your entire workpiece, especially on curved areas.
- Reduced Fatigue: Less physical strain compared to holding sandpaper for extended periods.
- Versatility: Can be used on a wide range of projects, from small to large.
- Improved Results: Helps achieve a smoother, more professional finish that highlights the wood’s natural beauty.
Understanding the Components
Most wood lathe sanding drum attachments share a few common parts:
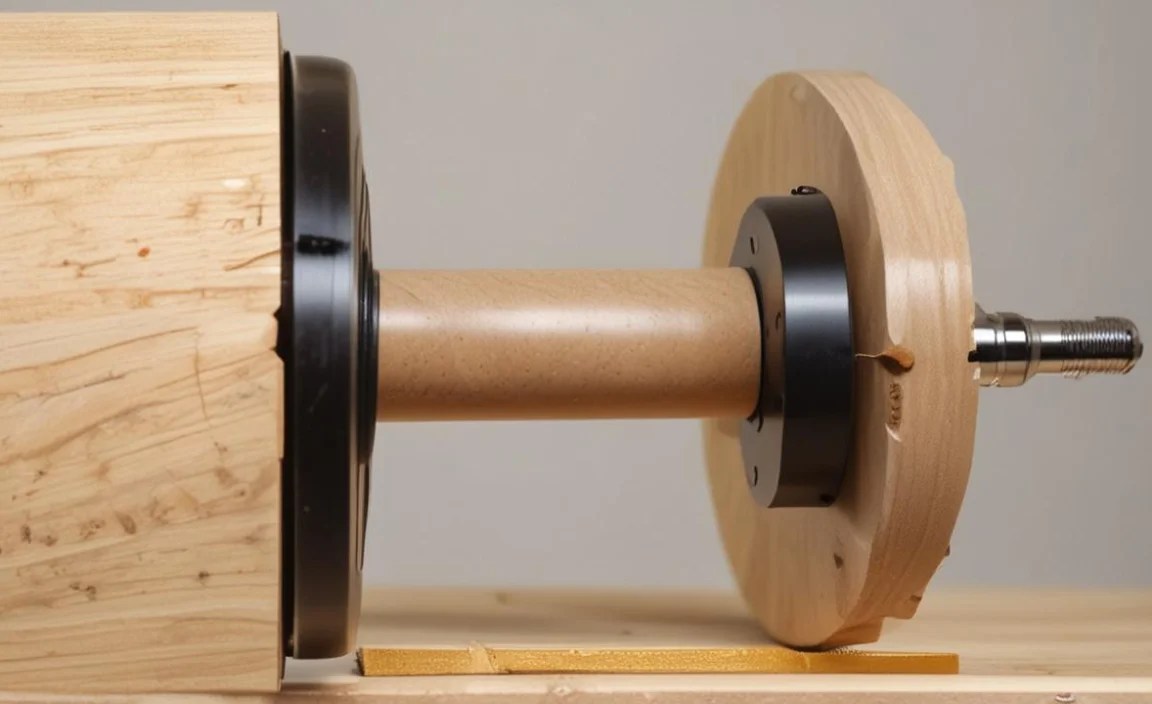
- The Drum: This is the main cylinder. It’s often made of rubber or metal and might have a ribbed surface to help grip the sandpaper. Some have a hollow core for dust extraction.
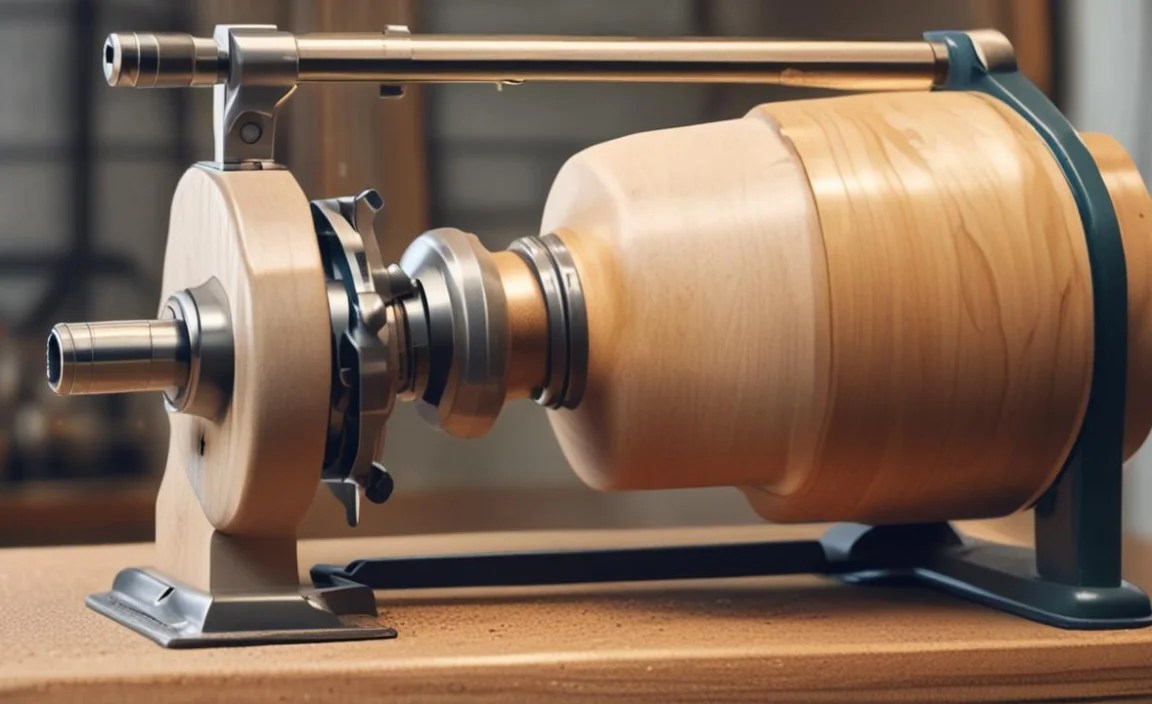
- Arbor/Shaft: This is the part that inserts into your lathe’s headstock or tailstock (depending on the design). It needs to securely mount the drum.
- Sandpaper Retention System: Different drums use various methods to hold the sandpaper in place. This could be a hook-and-loop (Velcro) system, a tensioning screw, or slots where the sandpaper is tucked and wedged.
- Dust Port (Optional): Some higher-end models include a connection for a shop vacuum to help manage the abundant dust created during sanding.
| Attachment Component | Description | Importance |
|---|---|---|
| Drum Body | The main cylindrical sanding surface. | Determines the overall diameter and contact area for sanding. |
| Arbor/Spindle | Connects the drum to the lathe spindle (usually Morse taper). | Ensures secure attachment and precise rotation. Must match your lathe’s mounting system. |
| Sandpaper Fastening | Method to hold sandpaper (e.g., hook-and-loop, screw clamps). | Crucial for safety and efficiency; loose sandpaper can be dangerous. |
| Dust Extraction Port | Hose connection for a vacuum system. | Significantly reduces airborne dust for a healthier and cleaner workspace. |
Getting Started: Safety First!
Before we even wrap sandpaper, let’s talk safety. This is non-negotiable in any workshop, especially when working with rotating machinery. Your lathe is powerful, and a sanding drum attachment adds another layer of potential hazards if not used correctly.
- Wear Safety Glasses: Always. Not just any glasses, but proper safety glasses that meet impact resistance standards. Wood dust and small debris can fly unexpectedly.
- Use a Face Shield: For an extra layer of protection, especially when sanding larger pieces or at higher speeds.
- Dust Mask or Respirator: Wood dust is harmful to your lungs. Use a good quality dust mask or, better yet, a respirator. A dust collection system connected to your lathe and drum attachment is the best defense. Check out resources from organizations like the Occupational Safety and Health Administration (OSHA) on respiratory protection for more information.
- Secure the Attachment: Ensure the arbor is fully and securely seated in the lathe’s spindle. Any wobble or looseness is a major safety risk.
- Secure the Sandpaper: This is critical. If sandpaper comes loose while the drum is spinning, it can whip around and cause serious injury or damage. Double-check that it’s firmly attached.
- Turn Off the Lathe: Always turn off the lathe and wait for it to stop completely before making any adjustments to the sandpaper or the attachment itself.
- Maintain Safe Speeds: Never exceed the recommended maximum RPM for your sanding drum attachment. This information is usually provided by the manufacturer. Start at a lower speed and gradually increase if needed.
- Keep Hands Clear: Maintain a safe distance between your moving workpiece and the stationary parts of the lathe, and never let your hands get close to the spinning sandpaper.
Choosing Your Sandpaper: Grits for Every Job

The type of sandpaper you use is just as important as the attachment itself. Sandpaper is graded by grit size, with lower numbers indicating coarser grits (for aggressive material removal) and higher numbers indicating finer grits (for smoothing and polishing).
For sanding drum attachments, you’ll typically use sandpaper cut into strips, often around 2-3 inches wide, depending on the drum’s design. Here’s a general guide to grits:
- Coarse Grits (e.g., 60-80 grit): Use these sparingly for removing heavy tool marks or reshaping. They will leave a rougher surface that needs further sanding.
- Medium Grits (e.g., 100-150 grit): Good for initial smoothing after tool marks are gone and for removing any scratches left by coarser grits.
- Fine Grits (e.g., 180-220 grit): These are your workhorses for general smoothing. They prepare the wood for higher grits.
- Very Fine Grits (e.g., 320-400 grit): Used for final smoothing before applying finishes. These create a silky-smooth surface.
- Super Fine Grits (e.g., 600+ grit): For a truly glass-like finish, often used for specific woods or when a very high-quality finish is desired.
Tip: For the best results and to prolong sandpaper life, it’s often more effective to progress through a series of grits. For example, go from 120 to 180, then to 220, and finally to 320. Skipping grits can leave scratches from the coarser paper that the finer grits won’t remove.
| Grit Range | Typical Use | Effect on Wood |
|---|---|---|
| 60-80 | Heavy tool mark removal, initial shaping. | Aggressive removal, leaves significant scratch pattern. |
| 100-150 | Removing coarser scratches, general smoothing. | Moderate removal, prepares for finer grits. |
| 180-220 | Standard finishing grit for most projects. | Effective smoothing, good surface for finishes. |
| 320-400 | Final smoothing before finish, high-quality finishes. | Minimal removal, creates a very smooth surface. |
| 600+ | Ultra-fine polishing, specific woods/finishes. | Polishing, enhances sheen and smoothness. |
Setting Up Your Sanding Drum Attachment

Proper setup is crucial for both safety and effectiveness. Here’s a step-by-step guide:
- Turn Off the Lathe: Make sure your lathe’s power is completely off and the spindle is stationary.
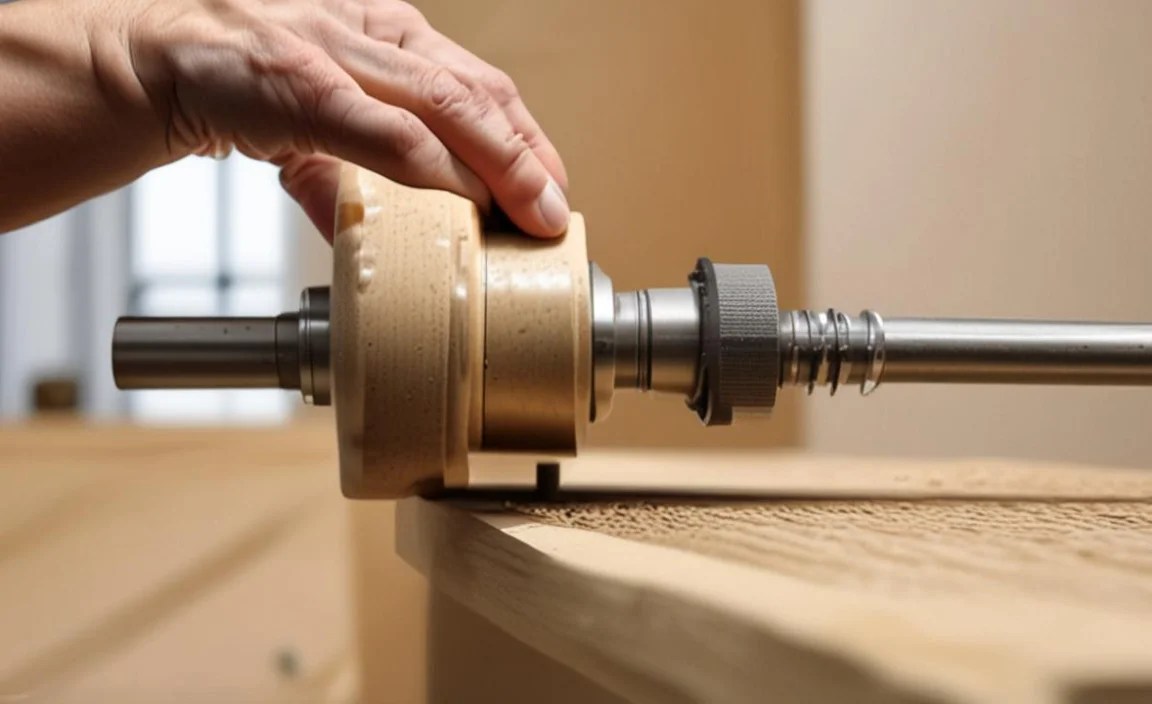
- Identify the Arbor: Locate the end of your sanding drum attachment that fits into the lathe spindle. This is usually a Morse taper.
- Insert the Arbor: Carefully insert the arbor into the lathe’s headstock or tailstock spindle. Ensure it’s seated fully. For headstock-mounted drums, you might use a live center in your tailstock to hold the other end of your workpiece. For tailstock-mounted drums, the headstock drives a spur or chuck holding your workpiece. Whichever setup you have, ensure both ends of the workpiece are securely supported.
- Prepare Your Sandpaper: Cut your chosen sandpaper to the correct width and length for your drum. The length will depend on how many wraps you plan to use around the drum.
- Apply the Sandpaper:
- Hook-and-Loop (Velcro): If your drum uses hook-and-loop, simply press the sandpaper firmly onto the drum surface. Overlap the ends slightly if needed.
- Tension Screw/Clamp: If your drum has a screw or clamp mechanism, insert one end of the sandpaper strip into its slot or under the clamp. Wrap the sandpaper tightly around the drum, then tuck the other end into the opposite slot or secure it with the screw/clamp. Ensure it’s taut – wrinkles can cause uneven sanding.
- Tucked/Wedged: Some older designs involve tucking the ends of the sandpaper into slots and relying on friction and tension. Make sure it’s tucked in very securely.
- Double-Check Security: Gently tug on the sandpaper to ensure it’s firmly attached and won’t come loose during operation.
- Connect Dust Collection (If Applicable): Attach your shop vacuum hose to the dust port on the drum attachment.
- Set Lathe Speed: Start with a relatively low speed. For a 3-inch diameter drum, speeds between 500-1500 RPM are often suitable, but always adhere to the manufacturer’s recommendations. More importantly, consider the wood’s speed. A common guideline is to keep the wood speed for sanding roughly half or even a third of the speed used for cutting. A slower wood speed means less chance of burning and a better sanding surface.
Mastering Sanding Techniques
Now for the fun part – actually sanding! Applying a sanding drum attachment effectively requires a gentle touch and understanding how it interacts with your spinning wood.
1. Sanding Cylindrical Pieces (e.g., Spindles, Pen Blanks)

For straight sections:
- Make sure the lathe is on and spinning at your chosen speed.
- Gently bring the spinning wood piece into contact with the stationary sanding drum. Correction: The sanding drum is spinning, and you are bringing the spinning wood to it. Let’s rephrase:
- Ensure the lathe is on and the sanding drum is spinning at your chosen speed.
- Gently bring the spinning workpiece into contact with the rotating sanding drum.
- Move the workpiece slowly and steadily along its length, allowing the sandpaper to abrade the surface. Apply light, even pressure.
- Work your way through the grits, moving from coarse to fine.
- Clean dust between grit changes.
Key: A steady hand and consistent movement are crucial. Avoid dwelling in one spot, as this can create flat spots or burn marks.
2. Sanding Contoured Pieces (e.g., Bowls, Hollow Forms)

This is where a sanding drum truly shines:
- Ensure your workpiece is securely mounted and spinning.
- Bring the spinning sanding drum attachment into contact with the exterior curve of your bowl or hollow form.
- Move the drum attachment slowly around the curve. You can often achieve good coverage by moving the drum in an arc that follows the curve’s natural shape.
- For internal sanding (in hollow forms), you might need a different type of attachment or use the drum on the inside if the opening is large enough and your lathe allows for that positioning. Often, specialized internal sanding tools are better suited for tight hollows.
- For the rim of a bowl, you can usually use the sanding drum against the spinning rim, moving it smoothly along the edge.
Tip: Keep pressure light. Let the sandpaper do the work. On convex curves, it’s easier to maintain even contact. For concave curves, you might need to slightly adjust the drum’s angle or use smaller sections of sandpaper if your drum allows.
3. Sanding Face-On Pieces (e.g., Platters)

For flat surfaces:
- Mount your workpiece securely with its face towards you.
- Bring the spinning sanding drum attachment into contact with the flat surface.
- Move the drum attachment across the face of the workpiece in a systematic pattern, similar to how you might use a random orbital sander. Overlap your passes to ensure complete coverage.
- Work from the center outwards or in controlled sweeps.
- Again, light pressure and steady movement are key.
Important Considerations for Sanding Drums
- Burning: Sanding too fast or applying too much pressure can generate heat, leading to wood burning. Reduce lathe speed, ease up on pressure, or use a slightly coarser grit if burning occurs.
- Dust Management: Sanding creates a lot of fine dust. Always use dust collection and wear respiratory protection.
- Wear Resistance: Sandpaper wears out. For very large projects or aggressive sanding, you might go through several strips of sandpaper. Inspect the sandpaper frequently and replace it when it becomes loaded with dust or the grit is no longer effective.
- Balancing: Ensure your workpiece and the sanding drum attachment are well-balanced, especially at higher speeds. An unbalanced setup can cause vibration and detract from the finish.
Alternative Sanding Methods and When to Use Them

While the sanding drum is fantastic, it’s not the only way to sand on a lathe. Understanding these alternatives helps round out your skillset:
- Hand Sanding with Paper: Still essential for tight corners, intricate details, or when you need a very specific feel. Use good quality sandpaper and fold it to create a firm sanding block.
- Sanding Pads/Foam Backed Discs: These attach to a chuck or faceplate and have a hook-and-loop surface for attaching large sanding discs. Great for flat surfaces like platters or large bowl exteriors.
- Shop-Made Sanding Devices: Many woodworkers create custom sanding tools for specific tasks.
Here’s a quick comparison:
| Sanding Method | Best For | Pros | Cons |
|---|---|---|---|
| Sanding Drum Attachment | Curved surfaces, general smoothing, faster material removal. | Efficient, uniform finish on curves, less fatigue. | Can be bulky for small items, potential for burning, requires setup. |
| Hand Sanding (Paper/Block) | Details, tight areas, final polish, large flat areas (with effort). | Precise control, low cost, accessible. | Time-consuming, physically demanding, can be inconsistent. |
| Sanding Discs (on Pad) | Large flat surfaces (platters, bowls). | Fast coverage of flat areas, good dust extraction. | Limited use on curves, can be expensive, requires disc changes. |
Upgrading Your Finish with the Drum Attachment

Once you’ve achieved a smooth surface with your sanding drum, it’s time to think about the finish. Even a perfectly sanded piece benefits from protection and enhancement.
