Wood lathe vibration dampening DIY doesn’t have to be complicated! With simple materials and proven techniques, you can significantly reduce unwanted shaking, leading to smoother cuts, better finishes, and a safer, more enjoyable woodworking experience. This guide will show you exactly how.
Hey makers, Daniel Bates here from Lathe Hub! Ever get that unsettling shimmy from your wood lathe? You know, the kind that makes your chisels chatter and turns a beautiful piece of wood into a wobbly mess? It’s a super common issue, especially for beginners, and it can really throw a wrench in your projects. But don’t worry, getting a smoother, more stable lathe is totally achievable right in your own workshop. We’ll go through some straightforward, proven methods you can use to tackle wood lathe vibration head-on, no fancy tools required. Let’s get your lathe running like a dream!
Why Does My Wood Lathe Vibrate? Understanding the Causes
That rocking and rolling from your wood lathe isn’t just annoying; it can actually harm your workpiece, dull your tools faster, and even be a safety hazard. Understanding why it happens is the first step to fixing it. Think of it like a car with unbalanced tires – it’s going to shake!
Several factors can contribute to this vibration:
- Unbalanced Workpiece: This is the most frequent culprit. When the wood isn’t perfectly centered on the lathe, or if it has an irregular shape, the spinning creates an unbalanced force that causes shaking. Think of a lopsided washing machine load.
- Worn or Loose Components: Over time, parts of your lathe, like the headstock, tailstock, or even the bed, can become loose or develop wear. Any play in these main components will translate directly into vibration.
- Improper Tool Rest Setup: If your tool rest is too far away from the workpiece, or if it’s not securely locked, it can vibrate itself, adding to the overall shaking.
- Uneven Floor or Bench: Yes, even the ground your lathe sits on can be a cause! If your workshop floor or the bench holding your lathe is uneven or flimsy, it will amplify any existing vibrations.
- Motor Issues: While less common for beginners, sometimes a problem with the lathe’s motor itself can cause unusual vibrations.
- Centrifugal Force: As the workpiece spins faster, the centrifugal force increases. If there’s any imbalance, this force gets magnified, leading to more pronounced shaking.
The good news is that many of these issues are quite straightforward to address. We can often fix them with simple DIY solutions that make a huge difference.
DIY Solutions: Proven Wood Lathe Vibration Dampening Methods
Now for the fun part – tackling that vibration! We’ll go through some user-friendly DIY methods that you can implement to get your wood lathe humming smoothly. Most of these require simple materials you might already have, or can get easily and affordably.
Method 1: The Rubber Mat or Anti-Vibration Pads
This is perhaps the simplest and most effective first step you can take. Placing something between your lathe and the surface it rests on can absorb a significant amount of vibration.
What You’ll Need:
- Heavy-duty rubber mat (like an old tire mat, industrial anti-vibration mat, or a thick stall mat)
- Or, purpose-made anti-vibration pads (available online or at hardware stores)
How To Do It:
- Assess Your Lathe’s Base: Look at how your lathe sits on its stand or bench. Does it have rubber feet already? Even if it does, adding a layer beneath can help.
- Cut to Size (If Necessary): If you’re using a large rubber mat, cut a piece that is slightly larger than the footprint of your lathe’s base. This ensures the entire base is supported.
- Position the Mat/Pads: Place the cut rubber mat directly onto your sturdy workbench or the floor. If you’re using pads, position one under each corner of the lathe’s base.
- Place the Lathe: Carefully move your wood lathe onto the rubber mat or the pads. Ensure it sits firmly and evenly.
- Test and Observe: Turn on your lathe (without a workpiece yet) and listen for any changes. Then, with a piece of balanced scrap wood, observe the vibration levels.
Why it works: Rubber is excellent at absorbing shock and dampening vibrations. It acts as a buffer, preventing the lathe’s natural movements from transferring to the bench or floor, and stopping external floor vibrations from affecting the lathe. For a deeper dive into the physics of vibration dampening materials, you can explore resources on soundproofing and vibration isolation, which often discuss the properties of rubber and other dense, flexible materials.
Method 2: Counterweights and Balancing Techniques
As mentioned, an unbalanced workpiece is a massive driver of vibration. Learning to balance your work correctly is crucial.
What You’ll Need:
- Your lathe tools
- A piece of scrap wood
- A pencil
- Measuring tape or ruler
How To Do It:
- Rough Shape First: Before putting wood on the lathe for final shaping, rough out its basic form. If you’re turning a spindle, make it as symmetrical as possible on the ends where it will be mounted.
- Secure the Workpiece: Ensure your wood is securely held between centers or in a chuck. There should be no play.
- Low Speed Test: Start your lathe at its lowest speed. At this stage, any significant imbalance will be very apparent as a strong knocking or vibration.
- Marking Imbalance: While the lathe is slowly turning, carefully use a pencil to mark the “heavy” spot. This is the point where the wood feels like it’s pulling away from the pencil. You’ll see a distinct line appear where the pencil touches the wood.
- Adjusting the Workpiece:
- For between centers: If the wood is too long and wobbles, you might need to trim a tiny bit off the ends to make them more uniform. For a slightly out-of-round turning, you might be able to reposition it slightly to get a better center.
- For chucks: Ensure the jaws of your chuck are gripping the wood evenly. If the wood is irregularly shaped, consider adding small, balanced blocks (or even clay, though less permanent) to the opposite side of the chuck jaws to help even out the weight distribution.
- Gradually Increase Speed: Once the vibration at low speed is minimal, gradually increase the lathe speed. Continue to observe and listen. If vibrations reappear, slow down and refine your balancing.
- Chainsaw Carving Balancing (Advanced): For very rough turning from large logs, some woodturners use specialized balancing techniques, sometimes involving carefully placed counterweights attached to the outboard faceplate if turning very large, irregular pieces. This is an advanced technique, but the principle is to add mass opposite the heavy spot to make the overall assembly more balanced.
Why it works: Balancing is all about minimizing the uneven distribution of mass around the axis of rotation. When mass is consistent, the centrifugal forces are even, and the turning is smooth. This is similar to how a car tire balancer works by adding small weights to offset imbalances.
Method 3: Reinforcing Your Lathe Stand or Bench
A flimsy stand or bench will act like an amplifier for vibrations. Strengthening it can be a game-changer.
What You’ll Need:
- Your lathe’s stand or workbench
- Scrap wood (plywood, solid lumber)
- Wood screws or bolts
- Optional: Metal L-brackets, clamps, wood glue
How To Do It:
- Inspect the Structure: Examine your lathe’s stand or workbench. Is it made of thin metal tubing, lightweight wood, or particleboard? Look for any wobbly joints or flexing panels.
- Add Bracing:
- For Metal Stands: You can add triangular braces made from scrap wood or metal L-brackets at key joints – where the legs meet the top, or where the motor mounts. Secure them with screws or bolts. For a more robust solution, you could even weld or bolt metal plates to reinforce joints.
- For Wooden Benches: Add diagonal bracing between the legs and the apron (the horizontal piece connecting the legs). Use plywood gussets at corner joints for extra rigidity. You can also add a heavier top or a second layer of thick plywood to the existing top.
- Dampen Panels: If parts of the stand or bench are large, thin panels (like the sides of a cabinet stand), you can sometimes add mass by attaching a layer of thick plywood or even a sheet of mass-loaded vinyl (MLV) to dampen resonance.
- Secure the Lathe Tightly: Once reinforced, ensure your lathe is bolted down as securely as possible to the strengthened stand or benchtop. Use carriage bolts with washers and nuts for the best grip.
- Check for Stability: Give the stand or bench a good push. It should feel solid and stationary.
Why it works: A more rigid and heavier structure has a higher natural frequency and is less susceptible to resonating with the vibrations from the lathe. It essentially makes the whole assembly much heavier and less prone to movement.
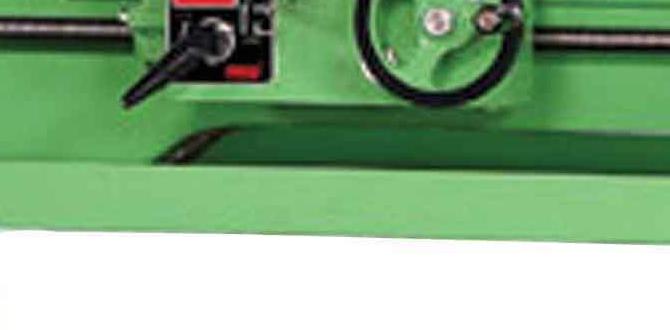
Method 4: Tool Rest Height and Position Adjustment
The tool rest is where you guide your cutting tool. If it’s not set up correctly, it can lead to vibration.
What You’ll Need:
- Your lathe’s tool rest
- Your woodworking tools
How To Do It:
- Tool Rest Height: The top of your tool rest should generally be positioned at or very slightly below the center line of your workpiece. This provides good support for the tool without encouraging it to dig in. If it’s too high, it can encourage catching and vibration. If it’s too low, you have less control and support.
- Tool Rest Proximity: Position the tool rest as close to the workpiece as safely possible without actually touching it as it turns. There should be a gap of just a few millimeters (or about 1/8 inch). The closer it is, the more support it offers and the less room there is for the tool to vibrate or ‘chatter’ against the wood.
- Secure the Tool Rest: Ensure the tool rest locking mechanism is very tight. Any wobble in the tool rest itself will directly translate to your cuts. Re-tighten it periodically as you work.
- Tool Angle: While not strictly vibration dampening, how you present your tool to the wood can affect chatter. Generally, you want a shearing cut, not a scraping one.
Why it works: Proper positioning of the tool rest minimizes the leverage and distance your tool has to move erratically. Tightening it ensures tool interaction is predictable and controlled, reducing chatter and vibration.
Method 5: Utilizing Sandbags or Weight Boxes
Adding mass to the base of your lathe stand can significantly reduce vibration by increasing its overall inertia and dampening resonant frequencies.
What You’ll Need:
- Heavy-duty sandbags (or sturdy boxes filled with sand, gravel, or lead shot)
- Optional: A stable shelf or platform on your lathe’s stand
How To Do It:
- Identify Placement Areas: Look for flat, stable areas on the lower part of your lathe’s stand or base. If your stand has a built-in shelf, that’s often an ideal spot.
- Fill and Place: Fill sturdy bags (the kind used for landscaping or even heavy-duty contractor bags) with sand, gravel, or other dense material. Don’t overfill them to the point they become rigid; some flexibility is good for dampening. Alternatively, fill sturdy wooden or metal boxes.
- Position the Weights: Place the sandbags or weighted boxes onto the designated areas of the stand. Distribute the weight as evenly as effectively possible around the base for stability. Aim to add weight low down to help with stability, not just vibration.
- Secure (Optional but Recommended): If possible, use straps or bungee cords to secure the bags or boxes to the stand so they don’t shift during operation.
- Test: Run the lathe at different speeds, both with and without a workpiece, to feel the difference.
Why it works: Adding mass increases the inertia of the lathe and its support structure. This means it takes more force to get it moving or vibrating. Dense materials also absorb and dissipate vibrational energy.
Table: Pros and Cons of Dampening Methods
To help you choose which methods suit your situation best, here’s a quick comparison:
| Method | Pros | Cons |
|---|---|---|
| Rubber Mat/Pads | Very easy to implement, low cost, immediately effective, portable. | Can sometimes make fine adjustments to lathe position tricky, may not solve deep structural issues. |
| Balancing Workpiece | Essential for all turning, improves finish, reduces tool wear, free (if balancing existing work). | Requires skill and practice, only addresses workpiece imbalance, can be time-consuming for irregular shapes. |
| Reinforcing Stand/Bench | Addresses core structural wobble, offers long-term stability, can make a significant difference for heavy turning. | Requires tools and some woodworking/metalworking skill, can be permanent. |
| Tool Rest Adjustment | Free, easy to adjust, directly impacts tool contact, essential for good technique. | Only addresses this specific point of contact, requires consistent checking. |
| Sandbags/Weight Boxes | Adds mass effectively, relatively low cost if using common materials, can be adjusted. | Can be cumbersome, might look less tidy, needs to be secured, only works if there’s a place to put them. |
Advanced Techniques and Considerations
Once you’ve mastered the basics, you might consider some slightly more involved approaches:
Using a Solid Concrete Base
For dedicated workshops, creating a solid concrete base for your lathe is one of the most effective ways to eliminate vibration. This involves building a sturdy form and pouring concrete. This is a significant undertaking but offers unparalleled stability.
You can find detailed guides on creating concrete bases for machinery by searching terms like “concrete machine base construction” from reputable engineering or DIY resources. For example, resources from architectural or construction forums often detail best practices for concrete pouring and reinforcement.
Isolation Casters
Some professional machinists opt for heavy-duty isolation casters that are designed to absorb vibrations. These are fitted to the lathe’s legs and offer the dual benefit of portability and vibration dampening. Brands like Torqued or specific industrial caster manufacturers offer options designed for heavy machinery.
The key is to look for casters with integrated rubber or polyurethane dampening elements, not just standard steel or solid rubber wheels. These are more expensive but provide a sophisticated solution.
Structural Analysis of Your Workshop Floor
If your lathe is on an upper floor or a less-than-perfectly rigid floor, the floor itself might be the primary source of vibration amplification. Understanding the structural capabilities of your floor joists and subfloor can be important. Resources on home construction or home renovation often have sections on floor stiffness and how to improve it, which could involve adding bracing or thicker subflooring.
Safety First! Always.
No matter what dampening methods you choose, remember that safety is paramount:
- Wear Safety Glasses: Always protect your eyes.
- Secure Your Workpiece: A vibrating lathe can throw off unsecured pieces.
- Keep Guards in Place: If your lathe has safety guards, use them.
- Don’t Wear Loose Clothing: Keep loose sleeves, jewelry, and hair tied back to avoid getting caught in rotating parts.
- Listen to Your Machine: Unusual noises or excessive vibration are warning signs. Stop and investigate.
- Unplug When Adjusting: Always turn off and unplug your lathe before making adjustments.
Vibration dampening isn’t just about a nicer finish; it’s about safe operation. A stable machine is a predictable machine.
Frequently Asked Questions (FAQ)
Q1: Can I just put my lathe on a really heavy workbench and ignore vibration?
A: A heavy workbench is a great start! But even heavy surfaces can transmit vibrations. Adding a layer of rubber matting or anti-vibration pads underneath even a heavy bench can further improve dampening by isolating the bench from the floor and absorbing residual shaking.
Q2: What’s the cheapest way to reduce wood lathe vibration?
A: The cheapest and
Related Posts
- This keyword is not related to the topic. Please provide a keyword that is relevant to “how to cancel car wash subscription”.

Lathe Turning Beginner Bowl Project: A Step-By-Step Guide
Milling Cutter Interface Design Evolution: A Modern Journey
Metal Lathe Tool Steel Comparison: Find Your Perfect Match!