Is your wood lathe shaking things up? Learn how to stop wood lathe vibration for smoother turning, better finishes, and increased safety. This guide will show you simple, effective ways to identify and fix those annoying shakes. Get ready for more enjoyable woodworking!
Ever find your wood lathe dancing across the workshop floor? That unsettling vibration can be more than just annoying; it can ruin your workpiece, damage your tools over time, and even pose a safety risk. As a seasoned machinist who loves making tools accessible, I understand the frustration. The good news is that most wood lathe vibrations are fixable with a few simple checks and adjustments. Let’s dive into how you can get your lathe running smooth as silk, so you can focus on creating beautiful pieces. We’ll cover everything from balancing to securing, step-by-step.
Why Does My Wood Lathe Vibrate?
It’s a question many woodworkers ask, and the answer usually lies in a few common culprits. Vibration on a wood lathe isn’t just a minor inconvenience; it’s a signal that something isn’t quite right. Ignoring it can lead to a host of problems:
Poor Surface Finish: Vibrations transfer directly to your spinning wood, creating chatter marks and an uneven surface that’s difficult to sand.
Tool Damage: Constant shaking can stress your cutting tools, leading to nicks, dullness, and premature wear.
Workpiece Issues: The spinning wood itself can become unbalanced or even break apart if the vibration is severe.
Machine Wear and Tear: Over time, vibrations can loosen parts, damage bearings, and generally reduce the lifespan of your lathe.
Safety Hazards: A vibrating lathe is less stable. It can move unexpectedly, potentially causing accidents.
Understanding why it vibrates is the first step to fixing it. Let’s break down the most frequent reasons.
Common Causes of Wood Lathe Vibration
The good news? Most vibration issues have straightforward solutions. The key is to systematically check each potential cause.
1. Workpiece Imbalance
This is the most common offender. If the wood you’re turning isn’t perfectly centered or has uneven density, it will naturally create an imbalance.
Roughly Shaped Blanks: A square or irregularly shaped blank will always vibrate more at the start of turning than a round one.
Unseasoned or Wet Wood: Wood that has uneven moisture content can lead to imbalances as it dries.
Knots and Irregular Grain: Large knots or areas with very irregular grain can throw off the balance.
2. Loose or Improperly Mounted Workpiece
Even a perfectly balanced blank can vibrate if it’s not securely attached to the lathe.
Faceplate or Screw Chuck Issues: If your workpiece is mounted on a faceplate or screw chuck, ensure it’s tightened securely and that the screws are fully engaged.
Drive Center Protrusion: The drive spur or drive center digs into the wood. If it doesn’t penetrate deeply enough, or if the wood splits around it, the workpiece can become loose.
Live Center Issues: The tailstock live center should hold the wood firmly but without excessive pressure that could crack it. Ensure the live center is properly lubricated and spinning freely.
3. Drive and Tailstock Alignment (Headstock/Tailstock Alignment)
If the headstock and tailstock aren’t perfectly aligned in parallel, the workpiece will be put under uneven stress at the drive and live centers, causing vibration.
Bed Casting or Ways: The lathe bed itself needs to be level and stable.
Tailstock Lock: If the tailstock isn’t locked down firmly, it can shift slightly during turning.
4. Tool Rest Position and Type
An improperly positioned or unsuitable tool rest can exacerbate existing vibrations or even create new ones.
Too Far from Workpiece: A rest that’s too far away offers less support and can amplify any roughness.
Incorrect Height: The tool rest should be at the center height of your turning blank.
Wrong Type of Rest: Some heavier cuts may require a sturdier tool rest.
5. Tool Chatter and Technique
The cutting tool itself, and how you use it, plays a significant role.
Dull Tools: A dull tool requires more force, leading to chatter and vibration.
Incorrect Tool Angle: Using the tool at the wrong angle can cause it to dig or skip.
Taking Too Deep a Cut: For beginners, it’s tempting to remove material quickly. However, deep cuts on an unbalanced blank or with less than ideal support will almost always result in heavy vibration.
6. Center of Gravity Issues (Especially with Larger Pieces)
As you turn larger or irregularly shaped pieces, the center of gravity can shift, leading to imbalances that are more pronounced.
7. Lathe Itself (Less Common, but Possible)
In rarer cases, the issue might be with the lathe itself.
Loose Components: Motor mounts, headstock bearings, or cone pulleys could be loose.
Worn Bearings: Worn bearings in the headstock or tailstock spindle can cause significant vibration.
Unbalanced Motor or Drive Pulley: While less common on well-maintained lathes, these can sometimes be the source.
Step-by-Step Guide to Wood Lathe Vibration Reduction
Now that we know why it happens, let’s tackle how to fix it. Follow these steps systematically.
Step 1: Secure and Balance Your Workpiece
This is where most vibration problems are solved.
1. Proper Blank Preparation:
Cut to Rough Round: Before mounting, use a bandsaw or jigsaw to cut your blank into a rough octagon or at least knock off the sharp corners. This significantly reduces initial imbalance.
Center Your Blank: If you’re drilling a hole for a spigot or tenon, ensure the drill bit is precisely centered on your blank. A wandering hole means an off-center mount.
Check for Cracks: Inspect your wood for existing cracks that could worsen and cause imbalance or failure during turning.
2. Secure Mounting:
Faceplates and Screw Chucks:
Ensure the faceplate or screw chuck is screwed firmly onto the headstock spindle.
When attaching your wood blank to the faceplate/screw chuck, use appropriate screws (often lag screws for faceplates). Ensure they are biting into solid wood and are long enough for good purchase, but not so long they poke through the other side.
Tighten all screws evenly.
Drive Center:
Make sure the drive spur or center is securely installed in the headstock.
Position the blank so the drive spur digs into solid wood.
Apply moderate pressure from the tailstock with a live center. Don’t overtighten, which can split the wood.
Live Center:
Ensure the live center rotates freely but holds the workpiece firmly. Proper tailstock adjustment is key. It should feel snug, not like you’re crushing the wood.
3. Initial Balancing (Rough Turning):
Start at the lowest speed setting on your lathe.
Turn on the lathe and let the piece rotate slowly.
Observe how violently it shakes. If it’s severe, stop and re-check your mounting and blank preparation.
Gradually increase the speed only when the vibration is manageable.
Begin “rounding” the blank. The goal here is to remove excess material and create a reasonably round shape. Focus on removing the high spots gently. As the blank becomes rounder, the vibration should naturally decrease.
Step 2: Check and Adjust Headstock/Tailstock Alignment
Misalignment is a less common but critical cause of vibration, especially noticeable when turning longer pieces.
1. Leveling the Lathe:
Ensure your lathe is sitting on a stable, level surface. Use shims under the lathe’s feet if necessary. A slight tilt can cause issues.
External Link: For guidance on leveling machinery, consult the National Institute of Standards and Technology (NIST) publications on industrial equipment maintenance. While specific to industrial settings, the principles of precise leveling apply to any workshop tool. Search for “NIST precision measurement leveling” for relevant guidelines.
2. Tailstock Alignment Test:
With the lathe OFF: Mount a live center in the tailstock spindle and a drive center in the headstock spindle.
Bring the tailstock up to the headstock and engage the centers. They should meet perfectly.
Paper Test: Place a piece of thin paper (like bond paper) between the tailstock center and the headstock center. Push the tailstock up to the headstock to grip the paper. Try to pull the paper out. If it pulls out easily, the alignment is likely good. If it’s difficult or impossible to pull out, the tailstock is probably misaligned.
Lathe Bed Alignment: Most lathes have adjustment screws or slots on the tailstock base that allow you to pivot the tailstock slightly left or right to achieve parallel alignment with the headstock. Consult your lathe’s manual for specific instructions.
If Testing with a Piece: Mount a reasonably long piece of stock. Turn it down to a cylinder. If you see “banding” or varying diameters at the headstock end versus the tailstock end (even if you think you’re turning it straight), it’s a strong indicator of misalignment.
Step 3: Optimize Tool Rest and Tools
Your tools and how you present them to the wood are crucial.
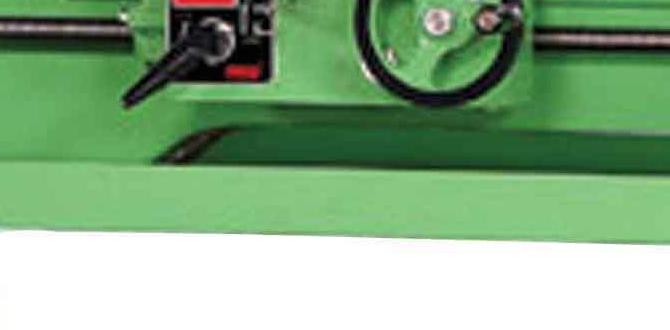
1. Tool Rest Setup:
Position: The tool rest should be positioned as close to the workpiece as possible without touching it. A gap of about 1/8 inch (3mm) is usually ideal. This minimizes leverage that can amplify vibrations.
Height: The top of the tool rest should be at the exact center height of the workpiece. For irregularly shaped blanks or large diameter pieces, aim for the center of the average diameter you’ll be turning. Use a marked ruler or a jig to find center height accurately.
Type: For heavy roughing or spindle turning, a sturdy tool rest is essential. Avoid thin, flimsy rests that can flex and contribute to vibration.
2. Tool Condition:
Sharpness: Always use sharp tools. A dull tool requires more force, bounces more, and leads to chatter. Learn how to sharpen your gouges, skew chisels, and scrapers effectively. A well-sharpened tool will glide through the wood with less effort.
Tool Grinding: Ensure your tools are ground to the correct angles for the type of wood and the operation you’re performing. For instance, a different grind is used for roughing gouges versus spindle gouges.
Tool Creep: Be aware of “tool creep,” where the tool tends to slide along its bevel and ride up into the wood. Proper technique and sharp tools help prevent this.
3. Technique:
Avoid Digging: Don’t force the tool. Let the sharpness of the tool and the speed of the lathe do the work.
Smooth Cuts: Aim for smooth, controlled cuts rather than aggressive hogging. When roughing, take lighter cuts, especially on uneven blanks.
Support the Tool: Always ensure the tool is properly supported on the tool rest and held firmly in your hand. Avoid letting it pivot or wobble excessively.
Step 4: Reduce Vibration with Lathe Stabilization/Base Solutions
If your lathe is still vibrating, it might be moving around the shop floor. This is especially true for lighter benchtop models.
1. Add Weight to the Lathe:
Sandbags or Weights: For temporary use, place heavy sandbags or dedicated weights on the lathe stand or bed. This lowers the center of gravity and absorbs some vibration.
Bolt to a Heavy Bench: Permanently mounting the lathe to a substantial workbench can significantly dampen vibrations. The bench itself should be heavy and stable.
2. Vibration-Dampening Mats:
Thick Rubber Mats: Place a thick, dense rubber mat under your lathe stand. Materials like specialized anti-vibration matting (often used for appliances or industrial equipment) can make a noticeable difference. You can find these at hardware stores or online.
Ensure Stability: While mats absorb vibration, ensure they don’t make the lathe unstable. Some mats have a grippy surface to prevent sliding.
3. Dedicated Mobile Bases (with Caution):
If you use a mobile base, ensure it’s robust and has features to lock the lathe firmly in place once positioned. A wobbly mobile base can worsen vibrations. The legs of the lathe should feel firmly seated.
External Link: Look for mobile bases designed for stationary tools. Websites like Rockler or specific woodworking tool suppliers often have detailed descriptions of what to look for in a stable mobile base.
4. Secure the Lathe to the Floor (More Permanent):
For heavy-duty floor-standing lathes, you can bolt them directly to the concrete floor using anchor bolts. This is the most effective method for maximum stability.
External Link: Guidance on anchoring machinery to concrete can be found through construction or industrial safety resources. For example, look for guides from concrete suppliers or industrial safety organizations that discuss proper anchor bolt installation.
Step 5: Inspect Lathe Components (If Problems Persist)
If you’ve tried everything above and still have excessive vibration, it’s time to look at the lathe itself. This might require a bit more mechanical familiarity.
1. Motor and Pulleys:
Belt Tension: Check the drive belt tension. It should be snug but not overly tight. A loose belt can slip and cause erratic operation, while a too-tight belt can strain bearings.
Pulley Balance: Visually inspect drive pulleys (on the motor and headstock spindle). Are they warped or damaged? Are they securely attached?
Motor Mounts: Ensure the motor is securely bolted to its mount.
2. Headstock and Tailstock Bearings:
Listen: With the lathe OFF, give the headstock spindle a gentle spin. Listen for any grinding, rumbling, or rough noises, which could indicate worn bearings.
Rotation: The spindle should spin smoothly and freely.
Tailstock Spindle: Similarly, check the tailstock spindle for smooth rotation and any signs of wear or damage.
Lubrication: Ensure bearings are properly lubricated if your lathe model calls for it.
Repair/Replacement: If bearings are suspected to be the issue, they will likely need professional replacement. This is a more involved repair.
3. Lathe Bed and Connectors:
Cleanliness: Ensure the ways (the bed ways the headstock and tailstock slide on) are clean and free of debris.
Tightness: Check that all bolts and connections, especially those connecting the headstock and tailstock assemblies to the main bed, are tight.
Troubleshooting Table: Common Lathe Vibrations and Solutions
Here’s a quick reference to help you diagnose and fix common issues.
| Problem | Likely Cause(s) | Primary Solution(s) | Secondary Solution(s) |
| :—————————————– | :—————————————————————————— | :————————————————————————————————————————– | :————————————————————————————————– |
| Severe Shake on Startup | Heavily unbalanced blank, poorly mounted workpiece, overly aggressive initial cut. | Prepare blank for rough round; ensure secure mounting (faceplate/drive center); start at lowest speed; take lighter cuts. | Check headstock/tailstock alignment. |
| Consistent Hum or Buzzing | Loose components, motor issues, specific RPM resonance. | Check all bolts and connections on lathe; inspect motor mounts. | Test different speeds to identify resonant RPM. |
| Vibration When Digging Tool In | Dull tool, incorrect tool angle, taking too deep of a cut. | Sharpen tools; use correct tool geometry; take lighter cuts. | Ensure tool rest is close and at center height; firm grip on tool. |
| Vibration Primarily at Tailstock End | Tailstock misalignment, live center issues, workpiece flexing. | Align headstock and tailstock; ensure live center is properly lubricated and tightened; reduce cut depth near tailstock. | Check for cracks in workpiece around live center. |
| Lathe “Walking” Across Floor | Lightweight stand, unstable base, no leveling/anti-vibration measures. | Place lathe on dense rubber mat; add weight to stand; use leveling shims. | Bolt to workbench or floor; use a robust mobile base with locking features. |
| Intermittent or “Choppy” Vibration | Loose chuck jaws, chuck not seated properly, irregular wood density. | Re-seat chuck on spindle nose; ensure chuck jaws are tight on workpiece; use faceplate/screw chuck if possible. | Inspect wood for internal voids or inconsistencies. |
Wood Lathe Vibration Reduction System Considerations
When we talk about a “wood lathe vibration reduction system,” it’s often not a single component but a combination of elements working together. Think of it as a holistic approach.
Workpiece Centering & Balancing Tools: Jigs for drilling center holes, templates for rough turning, even balancing compound (though less common for wood) can be part of this.
Mounting Hardware: High-quality faceplates, screw chucks, chucks with precisely machined jaws, and robust drive/live centers are crucial. This is your direct connection to the work.
* Tool Rests and Toolholders: Sturdy, well-positioned tool rests designed for the type of turning you do. The stability of your