For cutting cast iron, a stub-length carbide end mill, often with a 1/8 inch or 1/4 inch shank and MQL-friendly design, offers superior rigidity and chip clearance, dramatically reducing tool breakage and improving surface finish.
Working with cast iron on a mill can feel a bit daunting, especially when you’re just starting out. It’s a tough material, and if you’re not careful, you can end up with broken tools and a lot of frustration. The good news is, choosing the right tool makes a world of difference. Many beginners find themselves battling tool chatter, poor chip evacuation, and ultimately, broken end mills. This is often down to using tools that aren’t specifically suited for cast iron. But don’t worry, because with the right knowledge, you can overcome these challenges. We’re going to explore a specific type of end mill that’s a real champ for cast iron: the stub-length carbide end mill. Stick around, and you’ll learn exactly why this tool is so reliable and how to get the best results from it for your projects.
Why Stub-Length Carbide End Mills Conquer Cast Iron
When you’re machining cast iron, the material itself presents unique challenges. It’s abrasive and can be brittle, meaning it can wear down standard tools quickly and chip unexpectedly. This is where a well-chosen end mill shines. Let’s break down why a stub-length, carbide end mill is your best friend for this material.
The Power of Carbide
First off, let’s talk about carbide. Unlike High-Speed Steel (HSS) tools, carbide is much harder and can withstand higher cutting temperatures. Cast iron machining generates a good amount of heat, and HSS tools can soften and dull rapidly under these conditions. Carbide, however, holds its edge much longer, which translates into:
- Improved Tool Life: You’ll get more parts out of a single carbide end mill compared to an HSS one in cast iron.
- Higher Cutting Speeds (Sometimes): While you still need to be careful with cast iron, carbide generally allows for faster material removal rates.
- Better Surface Finish: A sharp, hard-wearing tool leaves a cleaner cut.
The Stub-Length Advantage
Now, why “stub-length”? This refers to the overall length and, more importantly, the length of the cutting flutes on the end mill. Standard end mills have longer shanks and flutes. A stub-length end mill is shorter overall and has shorter flutes. This design offers several key benefits when machining cast iron:
- Increased Rigidity: Less overhang means less chance of the tool deflecting under cutting forces. This is crucial for preventing chatter and vibrations, which lead to poor finishes and tool breakage in abrasive materials like cast iron.
- Reduced Vibration: The shorter, stouter design inherently vibrates less. This stability is a huge win for getting a smooth cut and extending tool life in tough materials.
- Better Chip Ejection: Although the flutes are shorter, for certain materials and operations, the reduced tool pressure and improved rigidity can actually lead to better chip control and evacuation, especially when combined with MQL.
The MQL-Friendly Factor
MQL stands for Minimum Quantity Lubrication. It’s a system that delivers a very fine mist of coolant and lubricant directly to the cutting zone. This is incredibly effective for cast iron machining because:
- Cooling: It keeps the cutting edge cool, which is vital for carbide’s performance and longevity.
- Lubrication: It reduces friction between the tool and the workpiece, leading to cleaner cuts and less tool wear.
- Chip Evacuation: The tiny mist can help blow chips away from the cutting area, preventing re-cutting and improving chip flow.
- Cleaner Operation: Compared to flood coolants, MQL uses very little fluid, making cleanup easier and reducing environmental impact.
When an end mill is described as “MQL-friendly,” it usually means its flute design (including chip breaker features or specific coatings) is optimized to work well with this type of lubrication system, ensuring the mist reaches the cutting edge effectively.
Key Features of a Good Cast Iron Carbide End Mill
Not all carbide end mills are created equal, especially when you’re targeting cast iron. Here’s what to look for to ensure you pick a winner:
1. Material: Solid Carbide
As we discussed, solid carbide is the go-to. It offers the hardness and heat resistance needed. Ensure it’s high-quality carbide, often with a specific grade that’s optimized for abrasive materials.
2. Geometry:
- Stub Length: Look for end mills explicitly labeled “stub” or with shorter flute lengths relative to their diameter. This is your primary defense against deflection and chatter.
- Number of Flutes: For cast iron, you’ll often find 2-flute or 4-flute end mills are recommended.
- 2-Flute: Generally preferred for slotting and pocketing because they offer better chip clearance. This is crucial in cast iron to prevent chips from packing and causing tool breakage.
- 4-Flute: Can be used for peripheral milling (around the outside) and offer a better surface finish due to more teeth engaging the material. However, they can have poorer chip clearance than 2-flute tools, making them less ideal for deep pockets unless you have excellent chip evacuation.
- Helix Angle: A moderate helix angle (often around 30-45 degrees) is common. Very high helix angles can be too aggressive, chatter-prone, and prone to breakage in brittle materials. Low helix angles might not clear chips as well.
- Corner Radius/Chamfer: Some end mills have a small radius or a chamfer on the cutting edge. A slight radius can strengthen the cutting edge and reduce chipping. A small chamfer can also help with edge strength and chip control.
3. Coating:
While not always necessary for cast iron, some coatings can further enhance performance. However, for cast iron specifically, a sharp, uncoated carbide end mill can often perform exceptionally well. If you do see coatings, look for ones known for high-temperature resistance or lubricity. The most common recommendation for general carbide end mills, even for tough materials, is often an Uncoated finish (bright). This provides the sharpest edge and is ideal for softer, non-ferrous materials, but also performs well in cast iron where a sharp edge is paramount. For harder materials or higher speeds, TiCN or TiAlN might be considered, but for beginner-friendly cast iron milling, sharp uncoated carbide is a great starting point.
4. Shank:
Look for end mills with a ground shank, often with a “weldon flat.” This flat provides a secure grip for set screws in your tool holder, preventing the end mill from slipping under heavy cutting loads. For MQL, the shank design is less critical than the flute design itself, but a good shank ensures your tool stays put.
Selecting the Right Size: 1/8 Inch vs. 1/4 Inch Shank
The common sizes mentioned, 1/8 inch and 1/4 inch shank, refer to the diameter of the end mill’s shank. The choice depends on your milling machine’s capabilities and the type of work you’re doing.
1/8 Inch Shank
Pros:
- Allows for very small diameter end mills, ideal for intricate details or small pockets.
- Can fit into smaller spindle collets.
Cons:
- Less rigid than a 1/4 inch shank end mill of the same cutting diameter.
- More prone to deflection and vibration, especially with longer reach.
- Tool holders and collets for very small shanks can be less common or more delicate.
1/4 Inch Shank
Pros:
- Significantly more rigid than a 1/8 inch shank for the same cutting diameter.
- Better resistance to deflection and vibration, leading to more stable cuts.
- More common in general machining setups.
Cons:
- Limited to larger cutting diameters or requires larger collets.
- May not be suitable for extremely fine detail work where smaller end mills are required.
For cutting cast iron, a 1/4 inch shank stub-length end mill offers a significant advantage in rigidity over a 1/8 inch counterpart, especially if you can use a 1/4 inch cutting diameter. If your project requires a very small cutting diameter, you might be forced to use a 1/8 inch shank, but be extra mindful of your machining parameters and tool rigidity.
Step-by-Step: Machining Cast Iron with Your Carbide End Mill
Let’s walk through the process. Remember, safety first! Always wear safety glasses. Ensure your workpiece is securely fixtured.
Step 1: Prepare Your Machine and Workpiece
Machine Setup:
- Ensure your milling machine is clean and in good working order.
- Make sure your spindle bearings are in good condition – excessive play can lead to chatter.
- If not already installed, fit the correct collet for your end mill shank into your spindle.
Workpiece Fixturing:
- Securely clamp your cast iron workpiece to the milling machine table. Use appropriate clamps and vise jaws. Never rely on just one clamp.
- Ensure the surface you are milling is accessible and not obstructed.
Step 2: Install Your End Mill
Collet and Holder:
- Insert the end mill into the collet. Ensure the shank is seated properly.
- Tighten the collet nut firmly. If your tool holder has a Weldon flat, ensure the set screw engages with it.
- Double-check that the end mill is securely held and perfectly centered.
Set Z-Height:
- Carefully set your Z-axis zero point. This is often done by bringing the tip of the end mill down to the top surface of the workpiece (or a known height reference) and setting your DRO (Digital Readout) to zero. Be precise here.
Step 3: Set Up Lubrication (MQL)
If you are using an MQL system:
- Ensure the MQL nozzle is positioned correctly to direct the mist precisely at the cutting edge where the tool enters the material.
- Turn on your MQL system. A light mist is usually all that’s needed.
If NOT using MQL:
- You can use a high-quality cutting fluid applied sparingly with a brush or squirt can, but MQL is highly recommended for cast iron if possible.
- Avoid using water-based coolants as they can cause rust on cast iron.
Step 4: Determine Your Cutting Parameters
This is crucial. For cast iron, using conservative parameters is a good starting point. Here’s a general guide; always refer to tool manufacturer recommendations if available.
Recommended Cutting Parameters for Cast Iron (Solid Carbide Stub End Mill)
These are approximate starting points. Adjust based on machine rigidity, coolant, and specific cast iron alloy.
| Parameter | Typical Range (for 1/4″ Shank End Mill) | Notes |
|---|---|---|
| Surface Speed (SFM) | 150 – 300 | Cast iron varies. Start conservative. |
| Spindle Speed (RPM) | 1800 – 3600 | Calculated by SFM 3.82 / Diameter. |
| Feed Rate (IPM) | 0.002 – 0.005 inches per tooth | For a 1/4″ diameter tool. |
| Chip Load (IPR) | 0.001 – 0.0025 inches per revolution | Feed per tooth divided by spindle speed. |
| Depth of Cut (Axial) | 0.1 x Diameter to 0.5 x Diameter | e.g., 0.025″ to 0.125″ for a 1/4″ end mill. Do not exceed 0.5x D. |
| Width of Cut (Radial) | 25% – 75% of Diameter | Full slotting (100%) is very demanding. |
Example Calculation: For a 1/4″ (0.25″) diameter end mill at 200 SFM:
Spindle Speed (RPM) = (200 SFM 3.82) / 0.25″ diameter = 764 / 0.25 = 3056 RPM. Let’s round down to 3000 RPM to be safe initially.
With 2 flutes, and targeting a chip load of 0.003″ per tooth:
Feed Rate (IPM) = 3000 RPM 2 flutes 0.003″ / tooth = 18 IPM.
Step 5: Perform the Cut
Engage the Spindle:
- Once your spindle speed is set, engage the spindle. Ensure it’s running smoothly.
Begin the Feed:
- Slowly engage the feed rate. You can start with manual jogging if you’re feeling uncertain.
- Listen to the cut. A healthy cut will sound like a consistent “shhhk” or “zip.”
- Avoid sudden changes in feed speed.
Plunging:
- If you need to plunge the end mill vertically into the material (not recommended for cast iron if avoidable), do so slowly. Use a helical interpolation (a spiral path down) if your machine and CAM software support it.
Slotting and Pocketing:
- For slotting, feed straight through. For pockets, use a climbing cut if possible (tool rotation direction matches feed direction). This generally produces a better finish and lighter chip load. If climbing is not feasible, conventional milling is acceptable.
- Watch chip evacuation closely. If chips are packing or the cut sounds harsh, stop the machine.
Step 6: Monitor and Adjust
Listen for Changes: Any change in the cutting sound can indicate a problem. A rise in pitch might mean the tool is rubbing, while a deeper thud could signal tool deflection or a packed chip.
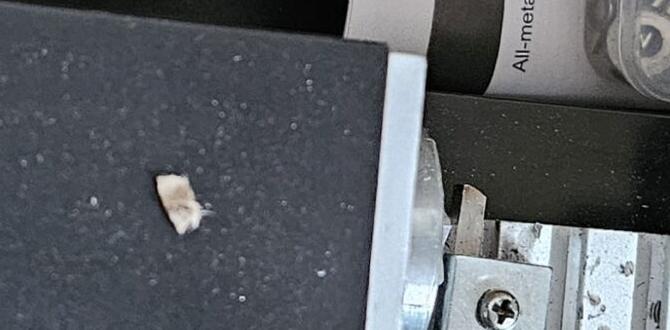
Observe Chip Formation: Chips should be small and well-formed, not long, stringy, or powdery. If they look like powder, your feed rate might be too low, or you’re rubbing. If they are large and packed, your feed rate might be too high, or you have poor chip clearance.
Check Tool Condition: Periodically, and especially after a significant amount of material removal, stop the machine and inspect the end mill for wear, chipping, or signs of overheating.
Adjust Parameters if Needed: If you’re getting a good cut, you might be able to slightly increase feed rate or spindle speed. If cuts are rough or the tool seems to be struggling, reduce these parameters.
Step 7: Finishing and Inspection
- Once machining is complete, retract the end mill and stop the spindle.
- Carefully remove the workpiece from the machine.
- Inspect the machined surface for finish and accuracy.
- Clean your machine and tools.
Troubleshooting Common Issues
Even with the right tool, challenges can arise. Here’s how to tackle them.
Problem: Tool Chatter / Vibration
- Possible Causes: Tool overhang too long, insufficient spindle speed or feed rate relationship, worn tool holder, loose workpiece fixture, dull tool, incorrect helix angle.
- Solutions: Use a stub-length end mill if not already. Reduce tool overhang. Ensure workpiece is rigidly clamped. Tighten tool holder and collet. Try slightly different spindle speeds or feed rates. Inspect and replace worn tooling.
Problem: Poor Surface Finish
- Possible Causes: Tool chatter, incorrect feed rate or spindle speed, worn tool, inadequate lubrication, tool deflection.
- Solutions: Address tool chatter issues. Ensure chip load is appropriate (not too low, not too high). Use a sharp, new tool. Improve MQL or cutting fluid application. Reduce depth of cut or width of cut. Ensure tool is running true.