Carbide End Mill for PVC: The Extra Long Solution for Clean, Efficient Cuts.
Discover how an extra-long shank carbide end mill simplifies dry cutting PVC, preventing melting and ensuring precise results for beginners and experienced makers alike. Get ready for smoother projects!
Working with PVC can sometimes feel like a bit of a puzzle, especially when you want those perfectly clean cuts. Many beginners find that their tools can heat up the plastic, causing it to melt and gum up the works. This not only ruins the cut but can also damage your workpiece and your tools. It’s a common frustration that can stop your project dead in its tracks. But what if there was a specific tool designed to tackle this exact problem? I’m here to show you how a particular type of carbide end mill can be your secret weapon for effortless PVC machining. We’ll dive into why it works so well and how you can use it to achieve fantastic results on your very next project.
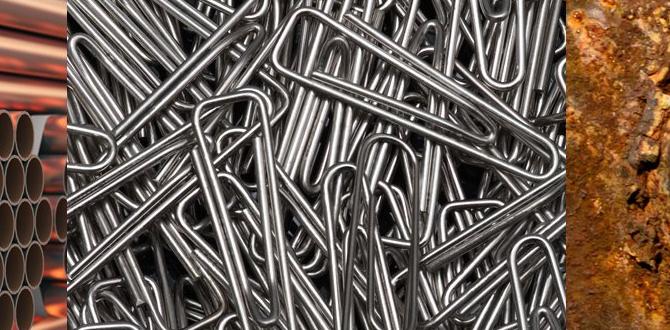
Understanding the Challenge: Why PVC Cuts Can Be Tricky
Polyvinyl chloride (PVC) is a fantastic material for many projects, from home improvement to DIY creations. It’s affordable, water-resistant, and easy to work with. However, when it comes to machining, PVC has a low melting point. This means that the friction generated by a cutting tool can quickly raise the temperature, causing the plastic to soften, melt, and stick to the cutting edges rather than being cleanly removed. This phenomenon is often called “chip recasting” or “gumming up.”
Regular end mills, especially those designed for metal, can struggle with PVC. They might have too few flutes, flutes that are too deep, or simply not be made of a material that can handle the heat and abrasion effectively without transferring too much energy to the plastic. The result is often a rough, melted edge, inconsistent cut quality, and the frustrating need to clean your tool constantly. For anyone just starting out with a milling machine or CNC, this can be a discouraging experience.
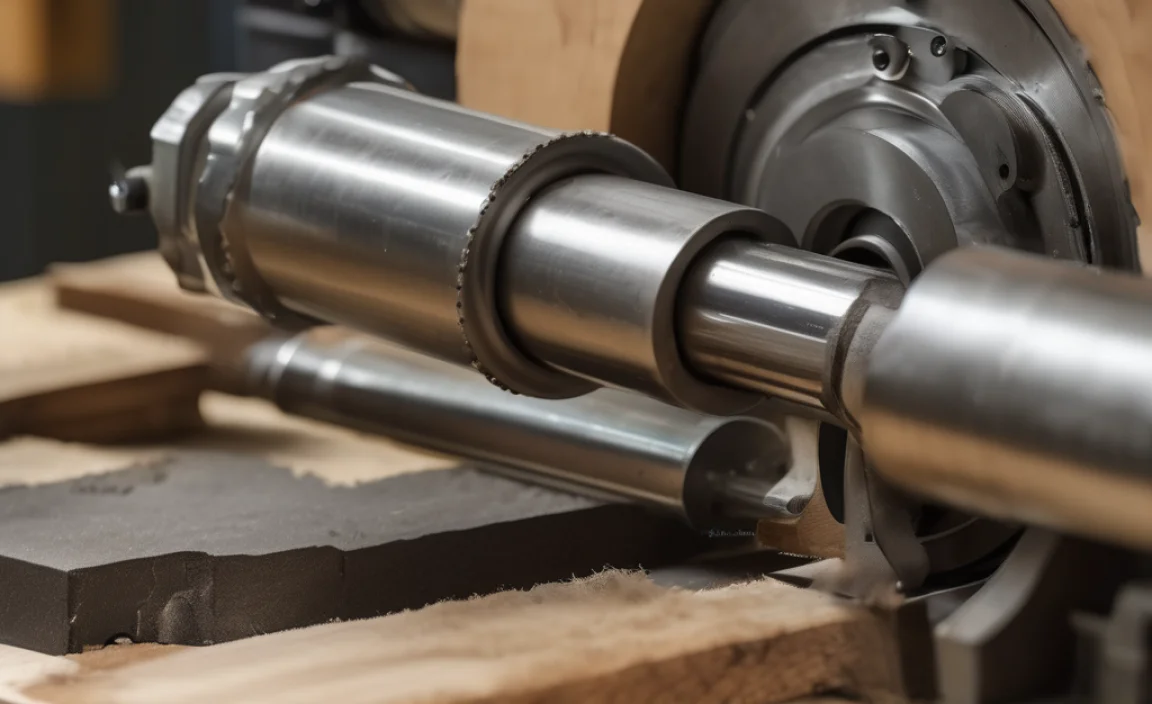
Introducing the Extra-Long Shank Carbide End Mill for PVC
The solution often lies in a specialized tool: an extra-long shank carbide end mill, specifically designed for dry cutting PVC. But what makes this tool so effective? Let’s break it down.
Why “Carbide”?
Carbide, or tungsten carbide, is an extremely hard and durable compound. Tools made from carbide are significantly harder and more wear-resistant than those made from high-speed steel (HSS). This hardness means they can maintain a sharp cutting edge for longer, even under demanding conditions. For PVC, this translates to a tool that can cut cleanly without accumulating heat as quickly, and without dulling rapidly.
Why “End Mill”?
An end mill is a type of rotary cutting tool used in milling operations. Its cutting edges are located on the periphery and the end. This versatility allows it to perform a wide range of operations, including slotting, profiling, and contouring, making it ideal for shaping PVC.
Why “Extra-Long Shank”?
This is a key feature for PVC cutting. An extra-long shank provides several advantages:
Increased Reach: It allows you to reach deeper into your workpiece or to position your setup in a way that’s more convenient, especially when working with larger sheets or fixtures.
Improved Chip Clearance: For dry cutting, it’s crucial to get the chips away from the cutting zone quickly. The longer shank can help by providing more space between the workpiece and the tool holder, reducing the chance of chips getting packed into the flutes or recasting onto the PVC.
Reduced Heat Transfer: By having a longer reach, the vibration and heat generated from the cut are further away from the spindle and the machine’s bearings. While this effect is minor, it contributes to keeping the overall system cooler.
Why “1/8 Inch 10mm Shank”?
You’ll often see these tools specified with shank diameters. A 1/8 inch (approximately 3.175mm) or 10mm shank refers to the diameter of the tool holder end that fits into your collet or chuck. The important aspect here is ensuring your machine’s collets can accommodate the shank size. While specific sizes like 1/8 inch or 10mm are common, the principle of selection is based on your machine’s compatibility. For clarity, let’s focus on the design features that make it good for PVC.
Designed for Dry Cutting PVC
Many extra-long shank carbide end mills intended for plastics like PVC feature specific flute geometries:
High Helix Angle: This helps to evacuate chips more effectively and reduces the tendency for the tool to “grab” the material.
Polished Flutes: Smoother flutes mean chips are less likely to stick to the tool surface.
Few Flutes (e.g., 2-Flute): For softer plastics like PVC, fewer flutes can provide better chip clearance, which is vital to prevent melting. More flutes are generally better for harder materials or when a very fine finish is needed, but for PVC, clearing chips is paramount.
The combination of these features makes a carbide end mill with an extra-long shank a powerful tool for tackling PVC projects cleanly and efficiently.
When to Use an Extra-Long Shank Carbide End Mill for PVC
This specialized end mill shines in scenarios where standard tools fall short. If you’re encountering any of these issues, it’s time to consider this upgrade:
Melting and Gumming: Your primary indicator that heat buildup is too high and chip evacuation is poor.
Rough, Jagged Edges: A sign of inefficient cutting, often due to dulling or poor chip removal.
Inconsistent Cut Depth: Can occur when melted plastic re-solidifies or jams the flutes.
Excessive Tool Cleaning: Constantly needing to stop and clean melted plastic off your end mill.
Working with Larger PVC Sheets: The extra reach can be invaluable for setting up your work.
Achieving a High-Quality Finish: For projects where aesthetics matter, a clean cut is essential.
For hobbyists looking to improve the quality of their CNC-cut PVC parts, or for makers working on detailed projects, this end mill is a game-changer. It’s particularly beneficial when dry cutting, avoiding the mess and potential complications of using coolants with plastics.
How to Select the Right Extra-Long Shank Carbide End Mill for PVC
Choosing the right tool ensures you get the best performance. Here are the key factors to consider:
1. Material Suitability
Ensure the end mill is explicitly rated or recommended for cutting plastics. While many carbide end mills can cut plastic, those designed for it will have optimized flute geometry and coatings.
2. Flute Count
For PVC, 2-flute end mills are generally preferred for dry cutting. This allows for maximum chip clearance. Single-flute designs can also work but might offer less stability. Avoid 3 or 4-flute end mills for roughing or general cutting of PVC, as they can lead to chip packing.
3. Shank Diameter and Length
Shank Diameter: Match this to your machine’s collet. Common sizes include 1/8 inch (3.175mm), 1/4 inch (6.35mm), 6mm, 8mm, and 10mm. Ensure you have the correct collet for your spindle.
Shank Length: Extra-long is relative, but look for shanks that offer significantly more reach than a standard end mill. A good rule of thumb is a shank length that is at least 2-4 times the cutting diameter, or simply longer than you think you’ll need.
4. Cutting Diameter
This is the diameter of the end mill itself. Common sizes for hobbyist and DIY projects include 1/8 inch, 1/4 inch, or 3mm, 6mm. Choose a diameter appropriate for the detail and size of your cuts.
5. Coating
While not always necessary for PVC, some specialized coatings can further improve performance by reducing friction and heat. For plastics, coatings that enhance lubricity and hardness are beneficial.
6. Helix Angle
A higher helix angle (30-45 degrees is common) aids in chip evacuation.
Recommended Specifications for PVC
A good starting point for an extra-long PVC end mill would be:
Type: Solid Carbide
Flutes: 2
Shank Diameter: Compatible with your machine (e.g., 1/4 inch or 6mm)
Shank Length: Extended/Extra Long (e.g., 2-4 inches or 50-100mm total length)
Cutting Diameter: Appropriate for your project (e.g., 1/8 inch or 3.175mm)
Helix Angle: 30-40 degrees
Coating: Uncoated (often works well for plastics) or a specialized plastic-cutting coating.
Example Tooling Specification Table:
| Feature | Recommended for PVC | Notes |
| :————— | :—————— | :—————————————— |
| Material | Solid Carbide | High hardness, wear resistance |
| Flutes | 2 | Optimal for chip evacuation in plastics |
| Shank Diameter | Common Sizes (e.g., 1/4″, 6mm) | Must match your machine’s collets |
| Shank Length | Extra-Long | Provides reach and improves chip clearance |
| Cutting Diameter | Project Dependent | e.g., 1/8″, 1/4″, 3mm, 6mm |
| Helix Angle | 30-45 Degrees | Aids in chip removal and smoother cutting |
| Coating | Uncoated or Specific Plastic | Uncoated is often fine; specialized coatings can help |
Example of an extra-long carbide end mill specification. Always check product details for suitability for plastics.
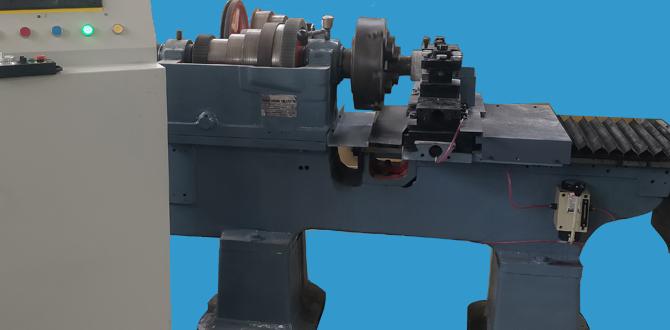
Setting Up Your Machine for Success
Proper machine setup is just as crucial as selecting the right tool. Here’s what you need to do before you start cutting:
1. Secure Your Workpiece
PVC can be slippery. Ensure your workpiece is firmly clamped or held down using vacuum. Double-sided tape can work for smaller pieces, but clamps are generally more secure. Use soft jaws in your vise if necessary to avoid damaging the PVC.
2. Install the End Mill Correctly
Collet: Use the correct size collet for your end mill’s shank diameter. Ensure the collet and collet nut are clean.
Insertion Depth: Insert the end mill into the collet so that at least 75% of the shank is engaged in the collet. Avoid having too much of the tool sticking out (“stick-out”) if unnecessary, as this can lead to vibration and chatter, reducing cut quality. However, with an extra-long shank, some stick-out is inherent for reach.
Tighten Securely: Ensure the collet nut is tightened firmly but do not overtighten, which could damage the collet or collet nut.
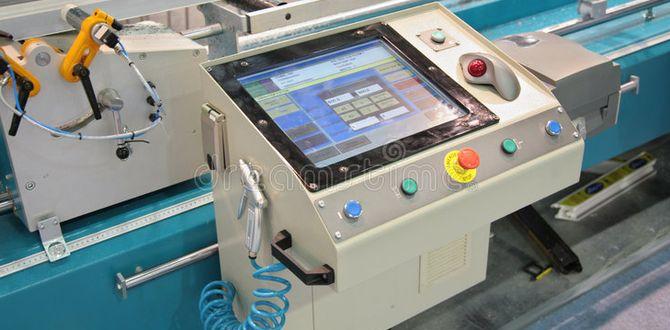
3. Zero Your Axes
Carefully set your X, Y, and Z zero points according to your CAD/CAM software or design. For Z zero, it’s often best to use a touch plate or to carefully touch off on the surface of the PVC.
4. Set Spindle Speed and Feed Rate (Speeds and Feeds)
This is where the magic happens for PVC. Because PVC melts easily, you need to balance cutting speed with feed rate to minimize heat.
Spindle Speed (RPM): For PVC, slightly higher spindle speeds can sometimes be beneficial, but it’s a delicate balance. A good starting point for 1/8″ or 1/4″ carbide end mills might be 12,000 to 20,000 RPM. However, always test on a scrap piece first.
Feed Rate (IPM or mm/min): This is more critical. You want to feed fast enough so that the tool takes a decent chip, but not so fast that you overload it. For 1/8″ to 1/4″ carbide end mills in PVC, a starting range might be 20 to 60 Inches Per Minute (IPM) or 500 to 1500 mm/min. Again, testing is key.
Chip Load: This is the thickness of the material removed by each cutting edge. A general guideline for plastics is to aim for a chip load that is not too thin (which generates more heat) nor too thick (which can overload the tool). For a 2-flute end mill, a chip load of 0.002″ to 0.005″ per flute is a reasonable starting point.
Speeds and Feeds for PVC (General Guideline):
| Tool Diameter (in) | Spindle Speed (RPM) | Feed Rate (IPM) | Depth of Cut (in) | Chip Load Per Flute (in) |
| :—————– | :—————— | :————– | :—————- | :———————– |
| 1/8″ (3mm) | 12,000 – 18,000 | 20 – 40 | 0.02 – 0.10 | 0.002 – 0.003 |
| 1/4″ (6mm) | 15,000 – 20,000 | 30 – 60 | 0.04 – 0.15 | 0.003 – 0.005 |
Note: These are starting points. Always test on a scrap piece of your specific PVC material and adjust based on the sound of the cut, appearance of chips, and quality of the edge. For extensive information on CNC speeds and feeds, the Machinery’s Handbook is an invaluable resource.
5. Consider Climb Milling vs. Conventional Milling
Climb Milling: The tool rotates in the same direction as the material is fed. This generally results in a smoother finish, less heat generation, and better chip evacuation for plastics. This is usually the preferred method for PVC.
Conventional Milling: The tool rotates against the direction of the material feed. This can cause more chatter and heat.
For PVC, using climb milling is highly recommended when your CNC machine and CAM software support it.
Step-by-Step: Machining PVC with Your Extra-Long End Mill
Let’s walk through a typical project. Imagine you need to cut a custom shape out of a 1/4″ thick PVC sheet.
Step 1: Design and CAM
Create your design in CAD software.
Import your design into CAM software.
Select your extra-long shank 2-flute carbide end mill as your tool.
Define your cutting strategies (e.g., profile cut, pocketing).
Input your calculated or tested speeds and feeds. Ensure climb milling is selected if possible.
Set your depth of cut. For thicker PVC, it’s often best to take multiple shallow passes rather than one deep pass. A depth of cut of 0.05″ to 0.10″ is a good starting point for a 1/4″ end mill.
Generate your G-code.
Step 2: Machine Preparation
Clean the Machine: Ensure your spoilboard and machine bed are clean.
Secure PVC: Clamp your PVC sheet firmly to the spoilboard.
Install End Mill: Load the extra-long shank carbide end mill into your spindle collet, ensuring it’s properly seated and tightened.
Verify Zero Points: Double-check that your X, Y, and Z zero points are accurately set.
Step 3: Perform a Dry Run (Air Cut)
Before the end mill touches the material, run the program with the Z-axis raised sufficiently so the tool doesn’t actually cut anything. This is a crucial safety step to check for any unexpected movements or collisions.
Step 4: Cutting the PVC
You’ll be dry cutting, meaning no coolant is needed. However, ensure your dust collection system is active. PVC dust can be harmful if inhaled, and also a fire hazard.
Start the spindle and begin the cutting process.
Listen Carefully: Pay attention to the sound of the cut. A smooth, consistent sound is ideal. Grinding, screaming, or chattering indicates an issue with speeds, feeds, or depth of cut.
Observe the Chips: You should see small, clear chips being produced, not melted strings of plastic. If you see melting:
Increase Feed Rate: Try feeding faster.
Decrease Depth of Cut: Take shallower passes.
Check Spindle Speed: Experiment by slightly increasing or decreasing RPM. Sometimes a slightly higher RPM can help “outrun” the heat buildup.
Monitor the Tool: Occasionally glance at the cutting area. The end mill should look clean and free of melted plastic.
Step 5: Remove the Part
Once the cutting is complete, allow the spindle to stop completely.
Carefully remove the finished PVC part from the machine.
Inspect the edges. They should be clean and smooth, with minimal signs of melting.
Clear any dust or debris from the machine and the workpiece.
Advantages of Using This Specialized End Mill
Investing in an extra-long shank carbide end mill designed for plastics like PVC offers significant benefits:
Superior Cut Quality: Achieve smooth, clean, and precise edges without the melting, burring, or tearing often associated with other tools.
Increased Efficiency: Reduce your cutting time by taking more aggressive cuts without sacrificing quality and by minimizing tool cleaning.
Longer Tool Life: Carbide’s hardness means the end mill stays sharp for longer, saving you money and reducing downtime.
**Reduced