Get ready to experience flawless PMMA machining! This guide unlocks the secret to superior chip evacuation using a specialized carbide end mill, making your plastic projects a breeze. Discover how the right tool banishes melting and ensures clean, precise cuts every time.
Machining PMMA, or acrylic, can be a bit tricky. It loves to melt when you try to cut it! This is a super common problem for anyone working with plastics, from hobbyists making cool custom parts to pros needing perfect finishes. That sticky, melted mess can ruin your workpiece and even damage your tools. But what if I told you there’s a simple solution designed specifically to tackle this? We’re going to dive into how a specific type of carbide end mill, often called a “chip breaker” or designed for plastic, can dramatically improve chip evacuation. Let’s learn how to make PMMA machining smooth sailing!
This guide will show you exactly why certain end mills are so good at handling PMMA and how to use them effectively. We’ll cover what makes them special, how to pick the right one, and the best ways to set up your machine for success. Get ready to say goodbye to melted plastic!
Understanding the PMMA Melting Challenge
When your cutting tool spins and cuts into PMMA, friction is created. This friction generates heat. PMMA has a relatively low melting point, meaning it doesn’t take much heat to start softening and eventually melting. As the material melts, it tries to stick to the cutting edges of your end mill.
This sticking and melting leads to a few frustrating issues:
- Poor Surface Finish: Instead of a clean cut, you get a rough, gummy surface.
- Tool Loading: Melted plastic builds up on the end mill, making it less effective and can even break it.
- Inaccurate Dimensions: The tool can “walk” or push the material around when it gets clogged, leading to parts that don’t fit.
- Increased Heat: A clogged tool generates even more heat, creating a vicious cycle of melting.
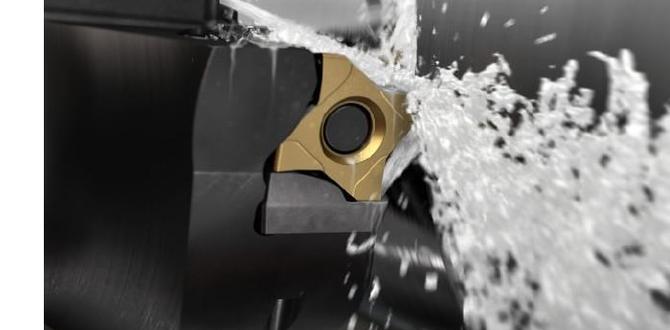
The key to machining PMMA successfully is to get the heat away as quickly as possible. This is where smart chip evacuation comes into play. Efficient evacuation means removing the hot chips of plastic from the cutting zone before they have a chance to re-melt and cause trouble.
The Genius of Specialized Carbide End Mills for PMMA
Not all end mills are created equal, especially when it comes to plastics. For PMMA, you need a tool that’s designed to do more than just cut; it needs to move the material away. This is where the “genius” of specialized carbide end mills truly shines.
What Makes Them Special?
These particular carbide end mills often have features that work together to achieve excellent chip evacuation. Let’s break down the key design elements:
- High Helix Angle: This is a big one. A high helix angle (often 45 degrees or more) means the flutes spiral around the tool more steeply. Think of it like a screw with a finer thread – it’s designed to lift and move material away quickly. This steep spiral helps to “pull” the chips up and out of the cut path much faster than a standard end mill.
- Polished Flutes: The flutes (the spiral grooves) on these cutters are often highly polished. This smooth, slick surface prevents the molten plastic from sticking. It’s like giving the melted material less surface to grip onto as it’s being evacuated.
- Sharp Cutting Edges: A very sharp edge is crucial for any plastic machining. Sharp edges slice through the material rather than rubbing and creating excessive heat. For PMMA, this means a cleaner cut and less tendency to melt.
- Fewer Flutes (Often 2): While milling metals often benefits from more flutes for smoother finishes, for plastics like PMMA, a 2-flute design is often preferred. This design provides more “open space” in the flutes. With more open space, there’s more room for the chips to travel up and out of the cut, further aiding in evacuation.
- Specific Coating (Sometimes): While not always present, some end mills designed for plastics might have specialized coatings (like ZrN or TiAlN) that can help reduce friction and heat. However, for PMMA, the geometry and polish are often more critical than the coating.
These combined features create a tool that actively works to keep the cutting zone clear, reducing melting and leading to significantly better results. You’re not just cutting; you’re efficiently removing material.
The Ideal Tool: Carbide End Mill 1/8 Inch 10mm Shank Extra Long for PMMA Chip Evacuation
When searching for the perfect tool, a specific description like “carbide end mill 1/8 inch 10mm shank extra long for PMMA chip evacuation” tells you a lot about its intended purpose. Let’s dissect what each part means for your PMMA cutting success:
Carbide End Mill: This tells us the material. Carbide is hard, durable, and can handle higher cutting speeds and temperatures than High-Speed Steel (HSS), making it excellent for demanding materials like plastics and metals.
1/8 Inch: This is the diameter of the cutting flutes. A small diameter like 1/8″ (approximately 3.175mm) is versatile for detailed work, smaller parts, and intricate designs. It’s a common size for PCB depaneling or creating small engraved features.
10mm Shank: This is the diameter of the non-cutting end of the tool that fits into your machine’s collet or holder. A 10mm shank is a standard industrial size, offering good rigidity and compatibility with many milling machines.
Extra Long: This indicates that the tool has a longer reach than a standard end mill of the same diameter. This can be incredibly useful for reaching into deeper pockets or cutting thicker materials without needing multiple setups or specialized tooling. For PMMA, it allows you to make deeper cuts in fewer passes, potentially reducing accumulated heat.
For PMMA Chip Evacuation: This is the most critical part. It confirms that the end mill has been specifically designed with features (like those discussed above – high helix, polished flutes, etc.) to excel at cutting PMMA and managing its unique challenges, primarily by facilitating efficient chip removal.
Key Features to Look For
When selecting your carbide end mill for PMMA, keep these features at the top of your checklist:
- Material: Solid Carbide
- Number of Flutes: 2-flute (ideal for plastics)
- Helix Angle: High helix angles (35° to 45° or even higher) are best.
- Flute Finish: Highly polished or mirror-finish flutes.
- Specific Design: Look for descriptions like “plastic router bit,” “acrylic end mill,” or explicitly mentioning “chip evacuation.”
You might see terms like “single flute” used for some plastics. While a single flute can offer excellent chip clearance, a “high-performance 2-flute” end mill with polished flutes and a high helix angle is often the sweet spot for versatility and effectiveness on PMMA. The two flutes can also provide a slightly better surface finish than a single flute in some applications.
Setting Up Your Machine for Success
Even with the perfect tool, proper machine setup is vital. Here’s how to get your mill ready for PMMA:
1. Spindle Speed (RPM)
This is crucial for managing heat and material removal. Too slow, and you’ll rub and melt; too fast, and you risk melting and burning.
For a 1/8″ carbide end mill in PMMA, a common starting point is:
- RPM: 18,000 – 25,000 RPM
The exact RPM will depend on your machine’s capabilities and the specific end mill. It’s always best to consult the tool manufacturer’s recommendations if available. A good rule of thumb: listen to the cut, and watch the chips. If you’re getting wispy, almost vaporized chips, you might be too fast. If you’re getting melted, gummy material, you’re likely too slow or feeding too fast.
2. Feed Rate
The feed rate is how fast the cutting tool moves through the material relative to its rotational speed (RPM). Consistent, appropriate feed rates are key to allowing the cutting edges to actually cut rather than rub.
Feed rate is often expressed in surface feet per minute (SFM) or inches per minute (IPM) per tooth. Calculating the exact feed rate can be complex, but for a beginner, a good starting point for a 1/8″ end mill in PMMA might be:
- Feed Rate (IPM): 10 – 25 IPM
Start at the lower end and gradually increase. You’re looking for a clean, slicing sound and consistently formed chips. Aggressive feed rates will push the material faster than the tool can effectively remove it, leading to melting. Too slow a feed rate will cause rubbing and heat buildup.
A helpful formula to estimate your feed rate in Inches Per Minute (IPM) is:
Feed Rate (IPM) = RPM x Number of Flutes x Chip Load (inches)
Chipot_load_ is a critical factor; it’s the amount of material each cutting edge removes per revolution. For PMMA with a 1/8″ end mill, a typical chip load might be between 0.001″ and 0.003″.
Example:
Feed Rate (IPM) = 20,000 RPM x 2 Flutes x 0.0015 inches/flute = 60 IPM
This calculation is a starting point. Always adjust based on observation.
3. Depth of Cut (DOC)
When machining PMMA, it’s usually best to take lighter depths of cut. This reduces the amount of material the tool has to remove at any given moment, making it easier for the chips to evacuate and minimizing heat buildup. Taking multiple shallow passes is far better than one deep, aggressive pass.
- Radial Depth of Cut (Stepover): A smaller stepover (e.g., 25-50% of the tool diameter) helps maintain better control and surface finish, especially in tricky areas.
- Axial Depth of Cut (DOC): For beginners, start with a shallow DOC, perhaps 0.1x to 0.3x the tool diameter. For a 1/8″ end mill, this means 0.012″ to 0.036″ per pass.
This strategy ensures that the cutting load is spread out over more passes, allowing the specialized end mill to do its job of evacuating chips effectively on each pass.
4. Air Blast or Coolant (Optional but Recommended)
While great chip evacuation reduces melting, adding a little help can make a big difference. An air blast directed at the cutting zone is highly effective for blowing chips away and cooling the material.
Compressed air nozzles are readily available for most milling machines. Position the nozzle so it blows directly into the cut, pushing chips away from the tool and workpiece. This is often sufficient for PMMA and is cleaner than using liquid coolant.
If you have a liquid coolant system, a flood coolant can also be used, but be aware that it can make chip clearing more difficult if not managed properly. For DIY setups, compressed air is often the easiest and most effective solution for PMMA.
5. Clamping and Workholding
Securely clamping your PMMA is essential. Because PMMA can be prone to flexing and has a lower melting point, it can grab or break if not held firmly. Use clamps that distribute pressure evenly and avoid overtightening, which can crack the material.
Consider using spoil boards or sacrificial layers underneath your PMMA if you’re doing full-depth cuts. This protects your machine bed and provides a stable surface.
Step-by-Step Guide to Machining PMMA
Let’s walk through the process of cutting PMMA using your specialized carbide end mill.
-
Design Your Part
Create your design in CAD software (like Fusion 360, Vectric Aspire, or similar). Ensure your design accounts for the tool diameter and any necessary tolerances. For beginners, simpler shapes without sharp internal corners are easier to start with.
-
Generate Toolpaths in CAM
In your CAM software (which is part of most CAD programs), define your tool as a 1/8″ carbide end mill with the appropriate flute count and helix angle. Set your cutting parameters:
- Spindle Speed: Start around 20,000 RPM.
- Feed Rate: Begin with 15-20 IPM.
- Axial Depth of Cut (DOC): Start at 0.020″ for a 1/8″ end mill.
- Radial Depth of Cut (Stepover): Use 30-50% of the tool diameter (0.0375″ to 0.0625″).
Simulate your toolpaths to check for any potential collisions or issues. Make sure your CAM software is set up to retract the tool when moving between cuts to avoid marring the surface.
-
Set Up Your Machine
Double-check that your collet is clean and properly tightened in your spindle. Insert the 1/8″ carbide end mill, ensuring it’s seated securely. Clamp your PMMA workpiece firmly to the machine bed or a fixture.
-
Establish Zero and Tool Length Offset
Carefully set your X, Y, and Z zero points according to your CAM program. The Z-zero is critically important for achieving the correct depth. Use a touch probe, paper method, or edge finder to accurately set your Z-zero on the surface of the PMMA.
Tip: For PMMA, setting Z-zero slightly above the actual surface (e.g., 0.001″ to 0.002″) can sometimes help prevent the tool from rubbing on the surface during the first pass if there are minor imperfections or slight inaccuracies in your Z-setting.
-
Activate Air Blast (If Used)
Turn on your compressed air system before the cutting begins. Aim the nozzle precisely at the area where the end mill will enter the material.
-
Run the Job
Start the machining process. Stand by and listen to the sound of the cut. You’re listening for a consistent, clean “slicing” sound, not a rubbing or grinding noise.
- Observe Chip Formation: Are the chips thin and light, or are they thick and gummy?
- Watch for Melting: Is the material building up on the end mill or around the cut?
- Monitor for Vibration: Excessive vibration can indicate dull tooling, too much depth of cut, or poor clamping.
If you notice any of the problematic signs (gummy chips, melting, excessive noise), be ready to pause or stop the machine. You may need to adjust your feed rate (increase slightly if melting due to rubbing, decrease if vibrating excessively), spindle speed, or depth of cut. A common adjustment is to temporarily increase the feed rate if the tool is clearly “rubbing” and producing fuzz. For more information on machining best practices, you can refer to resources like the National Institute of Standards and Technology (NIST) Manufacturing Extension Partnership for general guidance on material processing and manufacturing technologies.
-
Inspection and Refinement
Once the job is complete, remove the part. Inspect it thoroughly for surface finish, dimensional accuracy, and any signs of heat damage. If the results aren’t perfect, make small adjustments to your feed rate, speed, or depth of cut for the next attempt. Iterative refinement is a key part of mastering any machining process.
Comparison: Standard vs. Specialized End Mill for PMMA
To really appreciate the difference, let’s look at what you might expect with different types of end mills on PMMA.
| Feature | Standard End Mill (e.g., 4-flute, unpolished) | Specialized PMMA End Mill (e.g., 2-flute, high helix, polished)
|
|---|


