A 1/8 inch carbide end mill with a 3/8 inch shank, especially an extra-long version, offers proven precision for cutting acrylic with tight tolerances. It’s ideal for achieving clean, chip-free cuts and intricate details on this popular material, making it a go-to tool for hobbyists and professionals alike.
Working with acrylic can be a bit tricky. It’s a fantastic material for all sorts of projects, from signs and displays to custom parts. But it can also chip, melt, or crack if you’re not using the right tools and techniques. One common challenge is getting clean, precise cuts, especially when you need to hold very exact dimensions. This is where a specific tool really shines: the 1/8 inch carbide end mill.
This little powerhouse, especially when designed for acrylic and sometimes featuring a longer reach, can make a world of difference. It’s built to handle the unique properties of plastic, helping you achieve those smooth edges and accurate shapes you’re aiming for. We’ll dive into why this particular end mill is so great for acrylic and how you can use it to get fantastic results for your projects.
Why a 1/8 Inch Carbide End Mill is Your Go-To for Acrylic
Acrylic, also known by brand names like Plexiglass or Lucite, is a thermoplastic. This means it softens and melts when heated. This behavior is great for some fabrication processes but presents challenges for machining. Traditional cutting tools can generate a lot of heat, leading to melting and a gummy mess on your workpiece. They can also be prone to chipping the brittle acrylic.
This is where carbide tools, and specifically the 1/8 inch carbide end mill, come into play. Carbide is an incredibly hard and stiff material, much harder than high-speed steel (HSS). This hardness allows it to cut cleanly and efficiently without excessive heat buildup. For acrylic, this translates to:
- Reduced Melting: Carbide’s hardness means it can cut through acrylic quickly, minimizing the time the tool is in contact with the material and thus reducing heat generation.
- Clean Cuts: The sharp edges of a well-ground carbide end mill slice through acrylic, leaving a smooth, polished surface with minimal chipping or fraying.
- Durability: Carbide tools last much longer than HSS tools, especially when working with abrasive materials.
- Precision: The rigidity of carbide allows for very accurate cutting, essential for achieving tight tolerances.
The 1/8 inch size is particularly useful for detailed work. It’s small enough to create intricate patterns, cut thin lines, engrave text, and work on smaller parts where larger tools would be too destructive or unable to fit. When combined with the specific geometry designed for plastics, a 1/8 inch carbide end mill becomes an indispensable tool for anyone working with acrylic.
Understanding the “Carbide End Mill 1/8 Inch 3/8 Shank Extra Long for Acrylic”
Let’s break down that keyword phrase to understand what makes this tool so special for acrylic work:
- Carbide: As discussed, this is the material of the cutting edge, known for its hardness and heat resistance. It’s crucial for clean acrylic cuts.
- End Mill: This is a type of milling cutter. Unlike a drill bit that primarily cuts axially (downward), an end mill can cut axially and radially (sideways), making it versatile for shaping, profiling, and slotting.
- 1/8 Inch: This refers to the diameter of the cutting flutes. A 1/8 inch end mill is excellent for fine details, small radii, and intricate designs in acrylic.
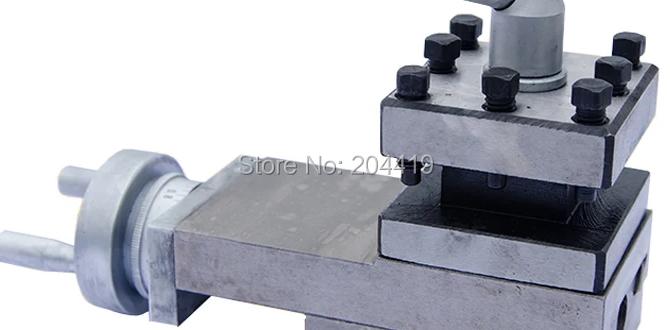
- 3/8 Shank: The shank is the non-cutting part of the end mill that fits into the milling machine’s collet or tool holder. A 3/8 inch shank is a common size, providing a solid fit for many machines.
- Extra Long: This describes the flute length and/or overall length of the end mill. An extra-long end mill allows you to cut deeper into a workpiece or machine features that are recessed or require longer reach. This can be very useful for certain acrylic fabrication tasks, like cutting deep pockets or creating features on the inside of tubes or housings.
- For Acrylic: This typically means the end mill has specific flute geometry, such as fewer flutes (often 2-flute) and polished flutes. Fewer flutes are designed for better chip evacuation in softer, melt-prone materials like acrylic, while polished flutes reduce friction and prevent material from sticking.
- Tight Tolerance: This refers to the ability of the end mill to cut with high accuracy, meeting very precise dimensional requirements. This is especially important for parts that need to fit together perfectly or function in a specific way.
When you combine these features, you get a tool that is purpose-built for achieving excellent results in acrylic, even for demanding applications that require precision.
Choosing the Right 1/8 Inch Carbide End Mill for Acrylic
Not all carbide end mills are created equal, especially when it comes to cutting plastic. Here’s what to look for:
Key Features to Consider:
- Number of Flutes: For acrylic, 1-flute or 2-flute end mills are generally preferred.
- 1-Flute: Offers excellent chip clearance, minimizing the risk of chips getting recut and causing melting. Great for softer plastics.
- 2-Flute: A good balance between chip clearance and tool rigidity. This is often the best all-around choice for acrylic.
Avoid end mills with 3 or 4 flutes, as they tend to pack chips more easily in plastics.
- Flute Finish: Look for end mills with polished or mirror-finish flutes. This reduces friction, prevents plastic from sticking to the cutting edge, and results in a smoother surface finish on the acrylic.
- Helix Angle: A higher helix angle (e.g., 30-45 degrees) is generally better for plastics. It provides a sharper cutting action and helps to eject chips more effectively away from the cut.
- Coating: While not always necessary for acrylic, some coatings can further enhance performance. For example, a TiCN coating can increase hardness and wear resistance. However, for many acrylic applications, uncoated, polished carbide is perfectly sufficient and often preferred to avoid any potential for increased friction.
- End Type:
- Square End: Creates sharp 90-degree corners.
- Ball End: Creates rounded profiles and can be used for 3D contouring.
- Corner Radius: A square end mill with a small corner radius (e.g., 0.010″ or 0.020″) can help prevent chipping at the corners of your cuts.
For general cutting and profiling, a square end mill is common. For specific design elements, ball end or radius end mills are necessary.
- Material: Ensure it’s solid carbide. Some end mills have carbide tips brazed onto a steel body, which are not ideal for precise, high-speed acrylic cutting.
Shank Diameter and Length:
While the 1/8 inch diameter is for cutting, the shank size (like 3/8 inch) is about how it fits into your machine. The shank must match the collet you are using. The “extra long” designation is important if your project requires deeper cuts than a standard end mill can achieve. Always check the total length and flute length specifications to ensure it meets your needs.
For example, a common and highly regarded tool for acrylic is a 2-flute, solid carbide, highly polished end mill with a 1/8 inch cutting diameter and a 3/8 inch shank, specifically designed for plastics. Often, finding “extra long” versions of these in 1/8 inch diameter can be more challenging, but when found, they offer added versatility.
Setting Up Your Mill for Success with Acrylic
Even with the best tool, proper machine setup is crucial for cutting acrylic. Here’s what you need to consider:
Feeds and Speeds: The Golden Rule
This is arguably the most critical factor. Cutting acrylic too slowly or too fast can lead to melting, chipping, or tool breakage. There’s no single magic number, as it depends on your specific machine, the type of acrylic, and the end mill.
However, as a starting point, you’ll typically want to use:
- High Spindle Speed (RPM): Acrylic benefits from faster rotation. Start in the range of 10,000-20,000 RPM, depending on your machine’s capabilities.
- Moderate to Fast Feed Rate: You want to remove material quickly enough to prevent heat buildup but not so fast that you overload the tool or chip the acrylic. A good starting point might be 20-50 inches per minute (IPM).
Tip: Always perform a test cut on a scrap piece of acrylic. Listen to the sound of the cut and observe the chips. If it sounds like it’s melting or the chips are stringy and gummy, adjust your feed rate or speed. If the acrylic is chipping aggressively, you might need to increase feed rate slightly or decrease the depth of cut.
Resources like the Engineering Toolbox offer general guidance on cutting speeds and feeds for various materials, which can be helpful, though dedicated plastic machining resources are often more specific.
Depth of Cut (DOC) and Stepover
For best results, take light passes:
- Depth of Cut (DOC): For a 1/8 inch end mill, a shallow DOC is recommended. Start with a DOC of around 0.020″ to 0.040″ (0.5mm to 1mm). Avoid trying to cut too deep in a single pass. Multiple shallow passes are far better than one aggressive pass for preventing heat and stress.
- Stepover: This is the amount the tool moves sideways between passes when performing contouring or pocketing. A stepover of 20-40% of the tool diameter (0.025″ to 0.050″ for a 1/8″ end mill) is a good starting point. For very fine surface finishes, you might reduce this further.
Workholding
Securely holding the acrylic is vital. It should not move at all during the cutting process. Common methods include:
- Clamps: Use clamps that do not interfere with the cutting path. Consider using clamps made of softer materials if you are worried about marring the acrylic surface.
- Double-Sided Tape: For thin sheets, high-strength double-sided tape can work but is less secure for aggressive cuts.
- Vacuum Table: If your CNC machine is equipped, a vacuum table is an excellent way to hold thin sheets of acrylic securely without surface marks.
Cooling and Lubrication (Optional but Recommended)
While carbide reduces heat, acrylic can still get warm. Some form of cooling can improve cut quality and tool life:
- Compressed Air: A blast of compressed air directed at the cutting zone is highly effective. It blows chips away and provides cooling. Many CNC machines have an integrated air blast system.
- Mist Coolant: A fine mist of coolant can provide more substantial cooling and lubrication. However, ensure the coolant is compatible with acrylic and easy to clean up.
- Avoid Liquid Coolants: Standard liquid coolants can sometimes react with acrylic or leave residue that’s difficult to remove. Compressed air is often the cleanest and most practical solution for acrylic.
Chip Evacuation
As mentioned, keeping chips flowing away from the tool is paramount. Use a vacuum or brush to remove any accumulated chips after the tool has finished a cutting cycle and before it starts a new one, if your machine doesn’t clear them itself. This prevents the tool from recutting chips, which causes melting.
Step-by-Step Guide: Cutting Acrylic with a 1/8 Inch Carbide End Mill
Here’s a general process for achieving precise cuts in acrylic using your 1/8 inch carbide end mill:
- Design Your Part: Create your design in CAD software. Ensure your design accounts for the tool radius if you’re cutting internal corners (a 1/8″ end mill will leave a 1/16″ radius). If you need sharp internal corners, you might need a process like laser cutting or rely on manual finishing.
- Generate Toolpaths: In your CAM software, create the toolpaths for your design. Select your 1/8 inch carbide end mill for acrylic. Set your parameters based on the recommendations below (or your own tests). Ensure you’ve set the correct depth of cut per pass and stepover.
- Prepare Your Material: Clean your sheet of acrylic and ensure it’s free of dust and debris.
- Secure the Acrylic: Mount the acrylic sheet firmly to your CNC machine’s bed using your chosen workholding method (clamps, tape, vacuum). Double-check that it cannot shift.
- Load the Tool: Insert your 1/8 inch carbide end mill into your machine’s collet. Ensure it’s securely tightened.
- Set Zero and Tool Length: Carefully set your machine’s X, Y, and Z zero points according to your CAM program and material setup. Accurately measuring the tool length (or using a tool setter) is critical for the Z-axis.
- Test Cut (Highly Recommended): Perform a shallow test cut on a scrap piece of the same acrylic. Use your target speeds and feeds. Observe the cut quality, listen for unusual sounds, and check for melting or chipping. Adjust parameters as needed.
- Run the Job: Once you’re confident with your test cut, run the main job. Ensure your cooling (like compressed air) is active.
- Monitor the Cut: Keep an eye and ear on the machining process. If you hear a change, see excessive melting, or notice erratic tool behavior, be ready to pause or stop the machine.
- Clean Up: After the cut is complete, carefully remove the finished part. Clean any chips or dust from the acrylic and your machine.
- Post-Processing (if needed): You may need to lightly sand edges or polish surfaces to achieve a perfectly clear, smooth finish, especially on internal corners.
Common Problems and Solutions
Working with acrylic can sometimes present issues. Here’s how to troubleshoot:
| Problem | Cause | Solution |
|---|---|---|
| Melting/Gummy Cuts | Tool speed too slow, feed rate too slow, depth of cut too deep, not enough chip clearance. | Increase spindle speed, increase feed rate, decrease depth of cut per pass, use a 2-flute end mill, ensure good chip evacuation or use air assist. Start with high RPM and moderate-to-fast feed. |
| Chipping/Cracking | Feed rate too fast, tool entering material too aggressively, brittle acrylic, dull tool. | Decrease feed rate, use a climb cut (if appropriate for your CAM setup), take lighter passes, ensure tool is sharp and designed for plastic. Check workholding – if the acrylic can vibrate, it’s more prone to chipping. |
| Poor Surface Finish | Stepover too large, tool not sharp, excessive vibration, chips getting recut. | Reduce stepover, use a polished flute end mill, ensure rigid setup and good workholding, use air assist for chip clearing. |
| Tool Breakage | Feed rate too fast, depth of cut too deep, material binding, insufficient rigidity in setup. | Reduce feed rate and depth of cut. Ensure material is properly supported. Use a robust tool holder and collet. |
| Tool Not Cutting to Full Depth | Incorrect Z-axis zero setting, tool length offset error. | Verify Z-axis zero point and tool length measurement. Ensure the depth in your CAM program is accurate. |
| Corners Not Sharp | End mill radius leaves a rounded corner. | Use a ball end mill for round features or accept the radius left by a square end mill. For sharp internal corners, manual cleanup (files, sandpaper) or alternative cutting methods (laser cutting) may be required. |
When to Consider “Extra Long” Versions
The “extra long” feature on a 1/8 inch carbide end mill isn’t just for show. It opens up specific possibilities:
- Deep Pockets: If you need to create a pocket that is deeper than a standard end mill’s flute length allows, an extra-long end mill is essential. This is common in mold making or creating deeper cavities for inserts.