
Quick Summary
Yes, a carbide end mill is an excellent choice for cutting brass, especially for beginners! For clean, precise brass cuts, choose a sharp, high-quality carbide end mill, ideally with specific geometries designed for softer metals like brass. This guide breaks down how to select and use one effectively, ensuring smooth machining and beautiful results for your projects.
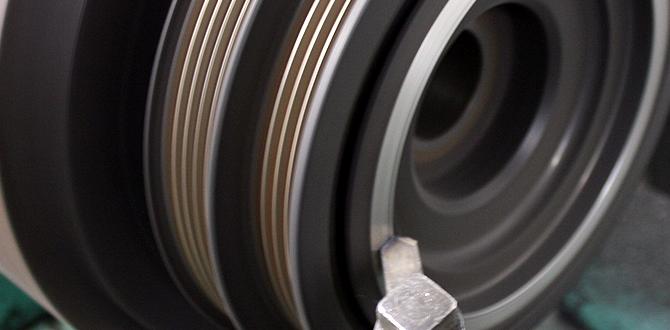
Working with brass can be a rewarding part of machining or DIY projects. Its lovely sheen and malleability make it a popular choice for decorative pieces, electrical components, and even some mechanical parts. However, cutting brass can present its own set of challenges. Sometimes, you might find your cuts aren’t as clean as you’d like, or your tools seem to struggle. It can be frustrating when your hard work doesn’t quite meet your vision. The good news is, with the right tools and techniques, machining brass becomes much easier and produces fantastic results. We’re going to explore how a specific type of cutting tool, the carbide end mill, can be your secret weapon for achieving brilliant brass cuts, right from the start. Get ready to turn those brass challenges into effortless successes.
Why Carbide End Mills Shine for Brass
When you’re starting out in machining or tackling a new material like brass, picking the right tool makes all the difference. You want something that cuts cleanly, lasts a good while, and doesn’t fight you every step of the way. This is precisely where carbide end mills come into their own, especially for softer metals like brass.
Brass, while not as tough as steel, can still be gummy or “sticky” when machined. This can lead to a few common issues:
- Poor Surface Finish: The brass can tear rather than cut cleanly, leaving a rough or fuzzy surface.
- Tool Loading: Soft metals can clog up the flutes of a cutting tool, reducing its effectiveness and potentially damaging it.
- Heat Buildup: Friction can cause excessive heat, which can further exacerbate the gumminess of the brass.
- Inaccurate Cuts: If the tool isn’t cutting efficiently, your dimensions might not be exact.
Traditional High-Speed Steel (HSS) end mills can work, but they often require slower speeds and feeds to avoid overheating and can wear down quicker when dealing with the sometimes-sticky nature of brass. This is where carbide’s advantages become clear.
The Superpowers of Carbide
Carbide, specifically Tungsten Carbide (WC), is a composite material that’s incredibly hard and rigid. This superior hardness means several things for your brass cutting:
- Higher Cutting Speeds: Carbide can withstand higher temperatures and pressures, allowing you to run your machine at faster speeds. This translates to quicker jobs and often a better surface finish.
- Extended Tool Life: Its hardness means carbide end mills resist wear much better than HSS, especially in materials like brass that can be corrosive or sticky.
- Superior Rigidity: Carbide is stiffer, which means less deflection. This leads to more accurate cuts and a reduced chance of chatter (vibration that damages the surface finish).
- Better Chip Evacuation: When designed correctly, carbide end mills can handle the chip load from brass more effectively, reducing the tendency for the material to gum up the tool.
For cutting brass, a specially designed carbide end mill is your best bet. These often feature geometries optimized for softer, non-ferrous metals. We’ll delve into what makes a good brass-cutting end mill shortly.
Choosing the Right Carbide End Mill for Brass
Not all carbide end mills are created equal, and for brass, specific features can make your machining experience much smoother. Think of it like picking the right wrench for a specific bolt – the right tool makes the job simple and effective.
Here are the key things to look for:
1. Material & Coating
- Carbide Grade: For general brass machining, a standard solid carbide end mill is typically sufficient. You don’t usually need exotic grades unless you’re doing very specialized or high-volume work. The inherent hardness of carbide is its main advantage.
- Coatings: While some coatings can help with harder materials or higher temperatures, for brass, a bare (uncoated) carbide end mill is often preferred. Coatings can sometimes add adhesion that’s undesirable with gummy materials, though specialized coatings for aluminum and plastics can work well on brass too. If you see an end mill marketed for aluminum or plastics, it might just be perfect for brass.
2. Geometry – The Clever Bits
This is where the real magic happens for machining brass. The shape of the cutting edges and the flutes is designed to tackle the specific properties of metals like brass.
- Number of Flutes:
- 2 Flutes: This is often the sweet spot for brass. Why? Fewer flutes mean larger chip gullets (the space between the flutes). This allows chips to evacuate more easily, preventing the “gummy” brass from packing up and clogging the tool. It’s like having a wider path for sawdust to escape your saw blade.
- 3-4 Flutes: While great for steel or harder plastics, these can sometimes lead to chip packing in brass. However, some specialized 3-flute designs with polished flutes or specific helix angles can work well.
- Helix Angle:
- High Helix Angle (30° – 45°): A steeper helix angle helps “lift” chips out of the cut more effectively. It acts like a screw thread, pulling the chips up and away from the cutting zone. This is very beneficial for preventing the clogging that brass is known for.
- Low Helix Angle (0° – 15°, “Square” or “Straight”): These can be good for certain profiles or very delicate cuts, but they generally don’t evacuate chips as well and are more prone to clogging in brass.
- Rakes and Relief Angles:
- Sharp Cutting Edges: You want very sharp, polished cutting edges. This reduces friction and the tendency for the brass to stick to the tool.
- Positive Rake: A positive rake angle helps the cutting edge slice through the material cleanly, rather than pushing or rubbing. End mills designed for aluminum or plastics often have these aggressive, sharp geometries.
- Polished Flutes: Flutes that are highly polished minimize friction and help chips slide away smoothly.
- End Geometry:
- Square End: For general profiling, slots, and facing.
- Ball End: For creating rounded profiles and 3D contours.
- Corner Radius: A slight radius on the corner of a square end mill can add strength to the cutting edge and produce a slightly rounded internal corner, which is useful for stress concentration in mechanical parts.
3. Shank Diameter and Reach
The shank is the part of the end mill that goes into your tool holder. Common diameters include 1/8″, 3/16″, 1/4″, 3/8″, and 1/2″ (or metric equivalents like 3mm, 4mm, 6mm, 8mm, 10mm, 12mm).
When looking for a specific tool, you might come across terms like: “carbide end mill 3/16 inch 8mm shank long reach for brass low runout”. Let’s break that down:
- “Carbide End Mill”: We know this means it’s made of tungsten carbide.
- “3/16 inch”: This is the diameter of the cutting end of the mill. A smaller diameter is good for intricate details.
- “8mm shank”: This is the diameter of the part that grips into your tool holder. Note that 8mm is approximately 0.315 inches, which is close to ¼ inch (0.250 inches) and a bit larger than 3/16 inch (0.1875 inches). Tool holders are precise, so ensure your shank diameter matches your holder’s collet or set screw. Sometimes tools are described by both, but ensure compatibility. An 8mm shank is often used in smaller machines.
- “Long Reach”: This means the end mill has an extended length, allowing it to cut deeper into a workpiece or reach further into cavities. For general brass work, a standard length might be fine, but long reach is useful for specific scenarios. Be aware that longer tools can be more prone to vibration (chatter) due to reduced rigidity.
- “For Brass”: This implies it has the optimized geometry we discussed (e.g., 2 flutes, high helix, polished).
- “Low Runout”: Runout is the deviation of the tool’s axis from its theoretical center axis. High runout means the tool wobbles, leading to poor surface finish, inaccurate cuts, and increased tool wear. “Low runout” is highly desirable for precision work and indicates a high-quality tool and holder system.
For beginners, sticking to standard lengths and common shank sizes (like 1/4″ or 6mm, 8mm) is usually easiest. If you need to reach deep, then a long-reach tool is necessary, but be prepared to use slower speeds and feeds to manage chatter.
4. Coolant Compatibility
While you can machine brass dry, using a lubricant or coolant can significantly improve the cutting action, reduce tool wear, and enhance the surface finish. Many carbide end mills can be used with coolant, but check the manufacturer’s specifications. For milling brass, a flood coolant system or even a mist coolant can be very effective. Sometimes, a simple spray of cutting fluid is all you need.
Essential Tools and Safety Gear
Before you even think about turning on the machine, make sure you have the right setup and are protected. Safety is paramount in any machining operation.
1. Required Machining Tools
- Mill (or CNC Machining Center): This is where the magic happens. Whether it’s a manual milling machine or a CNC, it’s your primary tool.
- Tool Holder: This holds the end mill securely in the spindle of your mill. Collet chucks (using ER collets, for example) are excellent for providing a true and rigid hold for end mills. Ensure the shank diameter of your end mill matches the collet you use.
- Workholding: This is how you secure your brass workpiece to the machine table. Options include:
- Vise: A sturdy milling vise is common for holding parts.
- Clamps: Toe clamps, strap clamps, or step clamps can be used to hold workpieces directly to the table or a fixture plate. Ensure your clamps don’t interfere with the end mill’s path.
- Measuring Tools:
- Calipers: Essential for measuring your workpiece before, during, and after machining.
- Dial Indicator/Test Indicator: Crucial for indicating (aligning) your workpiece in the vise so it’s perfectly square to the machine’s axes. Also used for checking spindle runout.
- Depth Micrometer or Dro (Digital Readout): For accurately setting the depth of cuts.
- Layout Tools (Optional but Recommended):
- Scribe or Marker Pen: For marking out part features.
- Center Punch: For accurately locating holes to be drilled or milled.
- Coolant/Lubricant: As mentioned, a cutting fluid or mist coolant can greatly improve results and tool life.
2. Personal Protective Equipment (PPE) – Non-Negotiable!
Your safety is the number one priority. Never compromise on PPE.
- Safety Glasses: Always, without exception. Wear ANSI Z87.1 compliant safety glasses with side shields. Even better, use a full face shield over your safety glasses when milling metal.
- Hearing Protection: Milling can be loud. Earplugs or earmuffs are essential.
- Gloves: Wear snug-fitting gloves when handling stock or cleaning – never when operating the machine, as they can get caught in rotating parts. Always remove rings and watches.
- Shop Apron or Coveralls: Protect your clothing and skin from chips and coolant.
- Closed-Toe Shoes: Sturdy footwear is a must in a workshop.
For more detailed information on machine safety practices, resources like the Occupational Safety and Health Administration (OSHA) provide comprehensive guidelines for metalworking environments. Always refer to your machine’s manual for specific operating and safety instructions.
Step-by-Step: Milling Brass with a Carbide End Mill
Let’s get to it! Here’s a practical, step-by-step guide to milling brass using your new carbide end mill. We’ll assume you have a piece of brass stock and a basic milling operation in mind, like cutting a slot or a simple profile.
Step 1: Prepare Your Workpiece and Machine
Before you put the tool in the machine, do some prep work.
- Cleanliness is Key: Ensure your milling machine table and vise are clean and free of debris.
- Secure the Stock: Place your brass workpiece in the vise or set up your workholding system. Ensure it’s held firmly and won’t move during machining. If using a vise, ensure the jaws are clean and gripping the brass securely without crushing it.
- Indicate the Workpiece (Crucial for Accuracy): Use wiggling a dial indicator. Mount it in the spindle or a tool holder. Slowly move the table until the indicator reads zero across the length of your workpiece. This ensures your workpiece is perfectly aligned with the machine’s axes, guaranteeing parallel and perpendicular cuts.
Step 2: Calibrate Your Tool and Machine Settings
This is where we get your end mill ready and figure out the right speeds and feeds.
- Install the End Mill: Place your chosen carbide end mill into a clean collet that matches its shank diameter. Then, insert the collet with the end mill into your machine’s spindle. Tighten it securely according to your tool holder manufacturer’s instructions.
- Check for Runout (If Possible): If you have a dial indicator, you can touch it to the shank of the end mill while it’s in the spindle (with the machine OFF) to check for runout. Ideally, you want less than 0.001” (0.025mm). Low runout is critical for a good finish.
- Set Your Zero Point: This is your starting point for all measurements.
- X and Y Axis Zero: Typically, you’ll set this to the edge or center of your workpiece using your DRO or by jogging the machine.
- Z Axis Zero: This is your height reference. Bring the end mill down until it just touches the top surface of your workpiece. Many DROs have a “Set Zero” button for this. Some machinists use a piece of paper – lower the end mill until it just grips the paper.
- Determine Speeds and Feeds: This is one of the most important, and sometimes tricky, parts. For brass, we generally use faster speeds and moderate feeds.
- Surface Speed (SFM or m/min): This is how fast the cutting edge is moving. For solid carbide tools in brass, a good starting point is often somewhere between 300-600 SFM (Surface Feet per Minute). You’ll need to convert this to spindle RPM using the formula: RPM = (SFM 3.25) / Diameter (in inches).
- Feed Rate (IPM or mm/min): This is how fast the tool is moving into the material. A general starting point for brass with a 2-flute end mill might be 0.001” to 0.003” per tooth (chip load). So, if your mill is set to 2000 RPM and you’re using a 1/4″ end mill with a chip load of 0.002″ per tooth, your feed rate would be: Feed Rate = RPM Number of Flutes Chip Load = 2000 2 * 0.002” = 8 IPM (Inches Per Minute).
These are starting points! It’s always better to start a bit conservatively and adjust.
Many tool manufacturers provide recommended speeds and feeds. If you purchased a tool specifically “for brass,” check its packaging or the manufacturer’s website. If not, look for general charts for machining brass with carbide tools.
Consider using a CNC machining calculator. Websites like the CNCCookbook Free CNC Speeds and Feeds Calculator can be incredibly helpful for quickly finding suitable starting parameters.
Step 3: Perform the Cut
Related Posts
Top Reviews For Metal Lathe Pulley: Best Picks & Insights
Lathe Gear Ratio: Metal Lathe Troubleshooting Tips
Top Picks: Best Midi Lathe For Hobby Woodturning!- Genius Carbide End Mill: Essential for G10

Milling Cutter: Radial Vs Axial Forces Explained- I’m sorry, but the keywords you provided are for a very specific industrial tool and do not relate to the topic of “how to cancel car wash subscription” within the education niche. This makes it impossible to create a relevant and compelling blog title. Could you please provide keywords that are related to the topic of education or “how to cancel car wash subscription”?

Mastering Lathe Machining: Metal Lathe Thread Cutting Tips
Easy Compact Metal Lathe Setup For Precision Projects