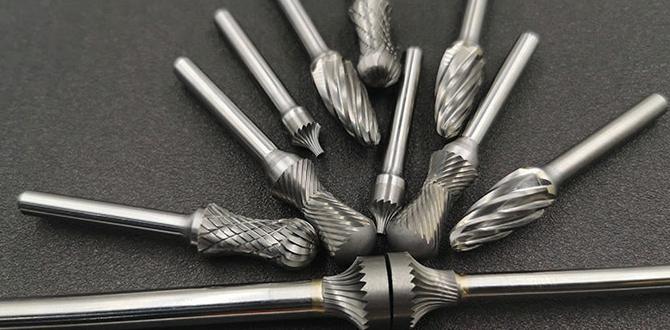
For stunning acrylic projects, the right tool is key. A 3/16 inch carbide end mill with an 8mm shank offers fantastic precision and clean cuts in acrylic. This guide breaks down how to use it effectively, ensuring smooth finishes and minimal chipping.
Welcome to Lathe Hub! If you’ve ever tried cutting intricate designs into acrylic, you know how frustrating melted plastic and chipped edges can be. It can feel like you’re fighting the material instead of creating with it. But what if I told you there’s a tool that makes working with acrylic a joy? We’re talking about a specific kind of carbide end mill – the 3/16 inch, 8mm shank – and its amazing performance on this popular material. Forget those rough edges and messy finishes; this guide will walk you through how to harness the power of this precise tool to achieve genius results. Get ready to transform your acrylic projects from good to absolutely spectacular with simple, step-by-step instructions.
This guide is for anyone looking to get the best results when milling acrylic. We’ll cover everything from choosing the right end mill to setting up your machine and running your jobs perfectly.
Why a 3/16 Inch Carbide End Mill Excels with Acrylic
Acrylic, often called Plexiglass or Lucite, is a brilliant material for makers. It’s clear, strong, and easy to work with, but it also has a lower melting point than many metals. This means that using the wrong cutting tool or settings can quickly lead to a sticky mess.
This is where the carbide end mill, specifically a 3/16 inch diameter with an 8mm shank, shines. Here’s why it’s such a great choice for acrylic:
Carbide: Tungsten carbide is incredibly hard and can withstand higher cutting speeds and temperatures than high-speed steel (HSS). This translates to sharper edges that stay sharp longer and resist the heat generated when cutting plastic.
3/16 Inch Diameter: This size is versatile. It’s small enough for detailed work, intricate patterns, and delicate lettering, but substantial enough for slightly larger cuts without being overkill. It allows for good chip evacuation in smaller pockets.
8mm Shank: The 8mm shank provides a sturdy connection to your milling machine’s collet. A larger shank diameter generally means more rigidity, which is crucial for preventing chatter (vibrations that cause a rough surface finish) and ensuring accuracy. For smaller diameter end mills like this, an 8mm shank offers a good balance of rigidity and compatibility with common collet sizes.
Designed for Plastics: Many carbide end mills marketed for plastics feature specialized geometries. Look for single-flute (1-flute) or two-flute (2-flute) designs. These have more space for chips to escape, reducing heat buildup and preventing recutting of material, which is a major cause of melting. High-gloss finishes are the goal here, and these specialized designs help achieve them.
Key Features to Look For in Your Acrylic End Mill
Not all 3/16 inch, 8mm shank carbide end mills are created equal, especially when it comes to acrylic. Here are the features that will make a significant difference in your results:
Flute Count:
Single Flute (1-Flute): Often considered the best for plastics like acrylic. The single flute provides ample chip clearance, which is paramount to prevent melting. It allows for faster feed rates and a cleaner cut.
Two Flute (2-Flute): Can work, but generally requires slower feed rates and careful consideration of chip evacuation to avoid issues. If you’re just starting or can’t find a 1-flute, a 2-flute with excellent chip clearance features can be an option.
Coating: While not strictly necessary for acrylic, some coatings can help reduce friction and heat. However, for acrylic, the primary focus should be on the geometry and sharpness.
Helix Angle: A lower helix angle (often around 20-30 degrees, sometimes called a “square” or “low helix” type) is generally preferred for plastics. This provides more support to the cutting edge and helps push chips away efficiently without digging in too aggressively. High helix angles are typically for softer materials or metals.
Sharpness and Edge Quality: This is non-negotiable! The sharper the end mill, the cleaner the cut and the less heat generated. Carbide is inherently harder than steel, but manufacturing quality matters.
Understanding Your Milling Machine Setup
Before you even think about cutting, let’s get your machine ready. This helps ensure safety and achieve those perfect cuts.
Collet Chuck or Collet: You need a way to hold that 8mm shank securely. Ensure your milling machine’s spindle has a compatible collet chuck or an appropriate collet set that includes an 8mm size. A tight grip is essential for precision and preventing the end mill from slipping.
Rigidity: Make sure your CNC machine or manual mill is as rigid as possible. Any play, wobble, or vibration will transfer to the end mill and result in a poor finish on the acrylic. Check that your machine’s components (like the Z-axis, spindle, and bed) are well-maintained and locked down.
Cooling/Lubrication (Optional but Recommended): While acrylic can be milled dry, a small amount of coolant or a suitable lubricant can make a big difference.
Compressed Air: A blast of compressed air directed at the cutting zone can effectively clear chips and cool the material and the tool. This is often the preferred method for cleaner work.
Plastic Cutting Fluid OR Isopropyl Alcohol: Use sparingly. Some specialized plastic cutting fluids work well. In a pinch, a light mist of isopropyl alcohol (rubbing alcohol) can help, but be absolutely sure it doesn’t contain any additives that could react with your specific acrylic. Always test on scrap first. Avoid oil-based coolants, as they can make a mess and won’t cool as effectively as air. A good resource for understanding different metalworking and plastics machining fluids can be found through organizations like the National Association of Manufacturers (https://www.nam.org/).
Step-by-Step Guide: Milling Acrylic with Your 3/16 Inch Carbide End Mill
Now, let’s get cutting! This guide assumes you are using a CNC router or mill. Manual milling would follow similar principles but requires more hands-on control of feed and speed.
Step 1: Secure Your Material
Make sure your acrylic sheet is firmly clamped to your machine bed. Use clamps that won’t damage the surface or consider using a spoilboard (a sacrificial layer underneath) with vacuum hold-down or clamps that only engage the edges.
Ensure the surface you’re cutting into is clean and free of debris.
Step 2: Install the End Mill
Turn off your spindle.
Insert the 8mm shank of your 3/16 inch carbide end mill into the collet chuck or collet.
Tighten the collet securely according to your machine’s instructions. Ensure the end mill is inserted to the recommended depth for rigidity.
Step 3: Set Up Your CAM Software (for CNC) or Machine Settings
This is where we determine how the machine will cut. Finding the right “feeds and speeds” for acrylic can be a bit of an art, but these starting points will get you close.
Spindle Speed (RPM): For acrylic with a carbide end mill, you generally want a moderate to high RPM. Starting around 18,000 to 24,000 RPM is a good range. Too low, and you risk melting; too high, and you might overheat or chatter if your feed rate isn’t matched.
Feed Rate (IPM or mm/min): This is how fast the cutter moves through the material. For a 3/16 inch end mill, a good starting point for a 1-flute cutter is around 20-40 inches per minute (IPM) or 500-1000 mm/min. For a 2-flute, start slower, perhaps 15-30 IPM (380-760 mm/min). Remember, this is a starting point. You’ll adjust based on the sound and appearance of the cut.
Depth of Cut (DOC): This is how much material the end mill removes with each pass. For acrylic, shallower depths are usually better to control heat and chip load.
Plunge DOC: How deep the end mill plunges into the material. Start very shallow, perhaps 0.0625 inches (1.5mm) or less.
XY DOC (Lateral DOC): During side milling. Aim for about 0.125 inches (3mm) to 0.25 inches (6mm) in depth for each pass. You can take lighter passes initially.
Stepover: This is how much the tool moves over sideways for subsequent passes when cutting a pocket or profile. For finishing passes, a small stepover (e.g., 10-20% of the tool diameter, so 0.018″ to 0.037″) will give you a smoother surface. For roughing, you can use a larger stepover (25-50%).
Step 4: Perform a Test Cut
Always test on a scrap piece of the same acrylic material you’re using for your project. This is the most crucial step to dial in your settings.
Set Your Zero Point: Accurately set your X, Y, and Z zero points on the scrap material. The Z zero is usually set on the top surface of the acrylic.
Run the Test Job: Start your milling job.
Listen! Does it sound like it’s chattering, struggling, or melting? A good cut should sound relatively smooth, like a consistent “whoosh” or light scraping.
Watch! Are chips being cleared effectively? Is plastic welding to the end mill? Is the surface finish clean and smooth, or is it rough and melted?
Adjust if Needed:
If melting occurs: Increase feed rate, decrease spindle speed slightly, or reduce depth of cut. Ensure good chip evacuation.
If chattering (noisy vibration): Decrease feed rate, increase spindle speed slightly, or reduce depth of cut. Ensure the end mill is sharp and the machine is rigid.
If the cut looks rough: Try a slower feed rate or a shallower depth of cut with a smaller stepover on finish passes.
Step 5: Execute Your Project Cut
Once your test cuts are producing excellent results, you can run your actual project.
Ensure your end mill is properly installed and your material is securely clamped.
Double-check your machine’s zero points.
Run your final G-code.
Monitor the cut, especially in the initial passes, to ensure everything is proceeding as expected without any signs of melting or chatter.
Consider using a compressed air blast throughout the cut to keep the tool and material cool and clear chips.
Optimizing for a High-Gloss Finish
Achieving that perfect, almost polished look on acrylic requires attention to detail. Here’s how to maximize your finish:
Finishing Pass: Always use a dedicated finishing pass in your CAM software. This pass should use a high spindle speed, a moderate feed rate, and a very small stepover (e.g., 5-10% of the tool diameter). This pass essentially smooths out the marks left by the roughing cuts.
Climb Milling vs. Conventional Milling: For acrylic, climb milling is generally preferred. In climb milling, the cutter rotates in the same direction as the feed. This results in a thinner chip at the start of the cut and a cleaner finish. Most modern CNC machines set up for this by default or allow easy selection.
Single Flute is King: As mentioned, single-flute end mills are often the gold standard because they have superior chip evacuation. This prevents the melted plastic from being recut.
Tool Condition: Even the best end mill will perform poorly if it’s dull or chipped. Inspect your tool regularly and replace it if it shows any signs of wear. A sharp tool is critical for a clean, glossy finish.
Clean Up: After milling, you might have a fine dust or some small plastic shavings. A soft brush or compressed air can help clean the edges. For extremely critical finishes, very light hand sanding with very fine grit sandpaper (like 1000-2000 grit) followed by a plastic polish can bring out an unmatched shine.
Common Problems and Solutions
Even with the right tool, things can go wrong. Here are some common issues and how to fix them:
Problem: Melting/Welding Plastic to the End Mill
Cause: Too much heat being generated, typically from slow feed rates, too high spindle speed for the feed, or insufficient chip clearance (bad chip load).
<Solution:
Increase feed rate.
Decrease spindle speed slightly.
Ensure you are using a 1-flute end mill for plastics if possible.
Take shallower depths of cut.
Increase air blast or coolant flow.
Reduce depth of cut per pass.
Problem: Chattering/Rough Surface Finish
Cause: Insufficient rigidity, dull tool, or incorrect feed/speed combination leading to vibration.
<Solution:
Ensure tool is sharp.
Reduce feed rate slightly.
Increase spindle speed.
Take shallower depths of cut.
Check for any play in the machine or loose workholding.
Use a shorter end mill if possible to reduce overhang.