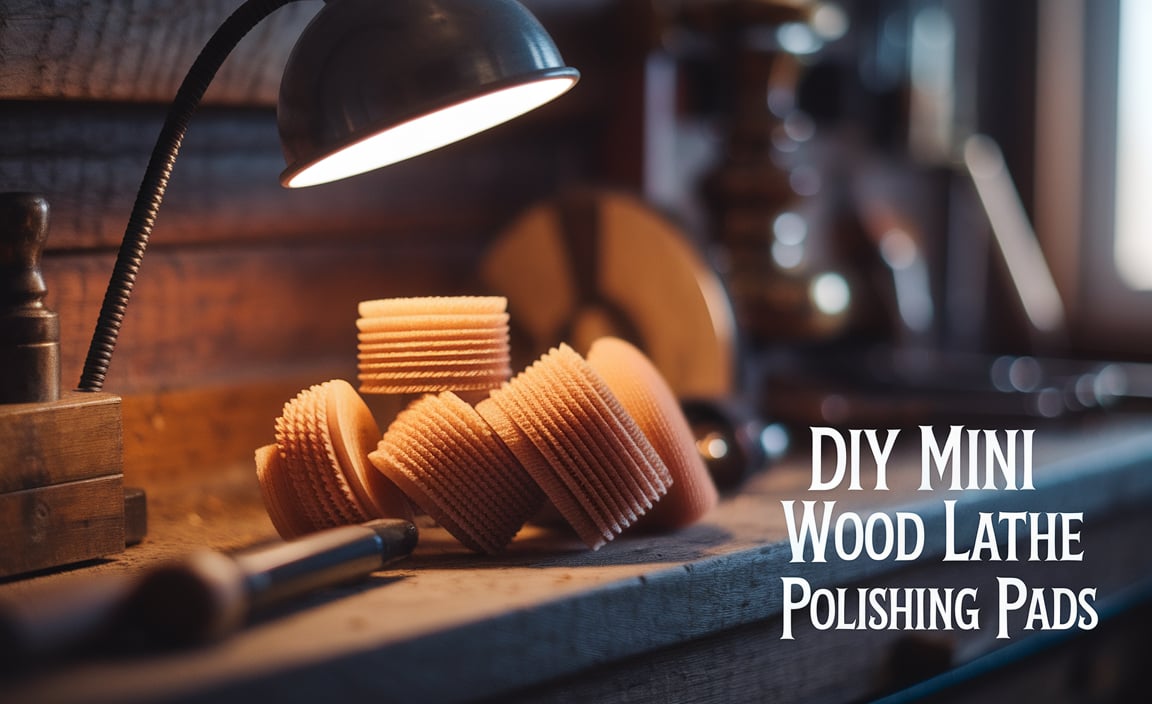
DIY mini wood lathe polishing pads are a cost-effective, customizable solution for achieving a professional finish on your turned projects, allowing you to tailor grit and material to your specific needs for flawless results.
Hey there, fellow makers and woodturners! Ever finish a beautiful piece on your mini wood lathe, only to find yourself frustrated with the final polish? Getting that buttery-smooth, mirror-like finish can be tricky, and sometimes store-bought polishing pads just don’t cut it or come with a hefty price tag. You’ve spent hours shaping your wood, and the last step shouldn’t be a roadblock. But what if I told you that you can easily make your own, perfectly suited to your project and your lathe? That’s right! We’re diving deep into creating your own DIY mini wood lathe polishing pads that are not only effective but also super budget-friendly. Get ready to elevate your finishes, because we’re about to unlock a simple, genius way to polish your turned masterpieces.
Why Make Your Own Mini Wood Lathe Polishing Pads?
Making your own polishing pads for your mini wood lathe might sound like an extra step you don’t need, but trust me, the benefits are huge, especially when you’re just starting out. It’s all about control and saving money!
- Cost Savings: Commercially made polishing pads and buffing wheels can add up. By making your own, you use materials you might already have or can buy in bulk for much less.
- Customization is Key: You can choose the exact materials and grits that work best for the type of wood you’re using and the finish you desire. Need a super-fine grit for a delicate finish? No problem! Need something more robust for initial sanding? You got it.
- Specific Applications: Sometimes, you need a particular shape or size that isn’t readily available. DIY gives you the freedom to create pads perfectly matched to the contours of your work or the specific needs of your lathe chuck.
- Learning Experience: Understanding how polishing pads are constructed gives you a deeper appreciation for the finishing process and can even inspire new techniques. It’s a great way to learn more about your tools and materials.
- Reduced Waste: You can often use scrap materials, turning what might have been trash into valuable workshop assets.
Understanding Polishing Pad Basics for Your Mini Lathe
Before we start cutting and gluing, let’s quickly cover what makes a good polishing pad. It’s essentially layers of abrasive material and cushioning, all attached in a way that allows it to spin safely and effectively on your lathe.
Key Components of a Polishing Pad:
- Backing Material: This is the base that holds everything together. It needs to be stiff enough to maintain shape but not so rigid that it can’t conform to your workpiece. Heavy-duty cardboard, thin plywood, and even plastic discs can work.
- Abrasive Material: This is where the magic happens. You can use sandpaper, abrasive cloth, or even specialty polishing cloths. The grit size will determine how aggressively you polish.
- Cushioning (Optional but Recommended): A layer of foam or felt between the backing and the abrasive can help the pad conform to curves and distribute pressure evenly, leading to a smoother finish.
- Attachment Method: How will you attach it to your lathe? This usually involves a screw, a bolt, or an arbor that fits into your lathe’s headstock or tailstock.
Grit Progression for a Smooth Finish:
Just like sanding, polishing involves a progression of finer and finer abrasive materials. For a beginner, aiming for a super smooth finish might involve starting with a mid-range grit and working your way up to very fine grits. A common progression looks something like this for wood:
- Initial Smoothing: Start with something like 220 or 320 grit sandpaper to remove any minor imperfections left from your final turning cuts.
- Intermediate Polishing: Move to finer grits like 400, 600, or even 800 grit sandpaper.
- Fine Polishing: For a truly smooth feel, you’ll want to go higher, perhaps to 1200, 1500, or 2000 grit.
- Final Buffing: For that showroom shine, consider using specialized polishing compounds on a very soft cloth or felt pad.
Remember, the “best” grit depends heavily on the wood type and the tools you used for turning. Softer woods might require finer grits sooner than hardwoods.
Materials and Tools You’ll Need
Gathering the right supplies is the first step to success. Don’t worry, most of these are common workshop items, and you can adapt them based on what you have on hand.
Essential Materials:
- Backing Discs:
- High-quality cardboard (from shipping boxes)
- Thin plywood (1/8″ or 3mm is good)
- Old plastic lids or cutting boards
- Abrasive Material:
- Sandpaper (various grits, from 220 up to 2000 grit or higher for automotive finishes)
- Adhesive-backed sandpaper is easiest.
- Sanding cloth (more durable, good for higher grits)
- Cushioning Material (Optional):
- Craft foam sheets (various thicknesses)
- Felt pads
- Old mousepads
- Adhesive:
- Spray adhesive (strong, even application)
- Contact cement (very strong bond)
- Wood glue (for plywood backing, might take longer to dry)
- Metal Hardware for Mounting:
- Bolt with a washer and nut (specific size depends on your lathe’s spindle or faceplate)
- Threaded insert (if you want to screw directly into the backing)
- Screw with a flat head and countersink
- A simple faceplate arbor (if you have one)
Helpful Tools:
- Cutting Tools:
- Scissors or a craft knife for cardboard/foam
- Jigsaw or scroll saw for plywood
- Rotary tool (like a Dremel) with cutting discs for precise cuts
- Measuring and Marking:
- Ruler or tape measure
- Compass or large circular object (to draw circles)
- Pencil or marker
- Drilling:
- Drill and drill bits (sized correctly for your hardware)
- Optional: Drill press for accuracy
- Clamps: To hold pieces while glue dries.
- Safety Gear! Always wear safety glasses and consider gloves when working with adhesives and cutting.
Step-by-Step Guide: Creating Your DIY Mini Wood Lathe Polishing Pads
Let’s get down to business! This guide will walk you through making a basic, yet highly effective, DIY polishing pad. We’ll aim for a pad that can be attached using a bolt through the center, a common method for mini lathes.
Step 1: Determine Your Pad Size and Shape
The size of your pad depends on your lathe and what you’re polishing. For mini lathes, a disc between 3 and 6 inches (7.5 to 15 cm) in diameter is usually a good starting point. You want it large enough to cover a decent area but small enough to manage easily and not put too much strain on your lathe.
- Decide on a diameter for your pad (e.g., 4 inches / 10 cm).
- Using a compass, ruler, or a pre-made circle template, draw a clean circle on your chosen backing material (cardboard, plywood, or plastic).
- If you’re using plywood, you’ll need to use a jigsaw, scroll saw, or even a router with a circle jig to cut out the disc accurately. For thinner materials like cardboard or thick plastic, scissors or a craft knife will suffice.
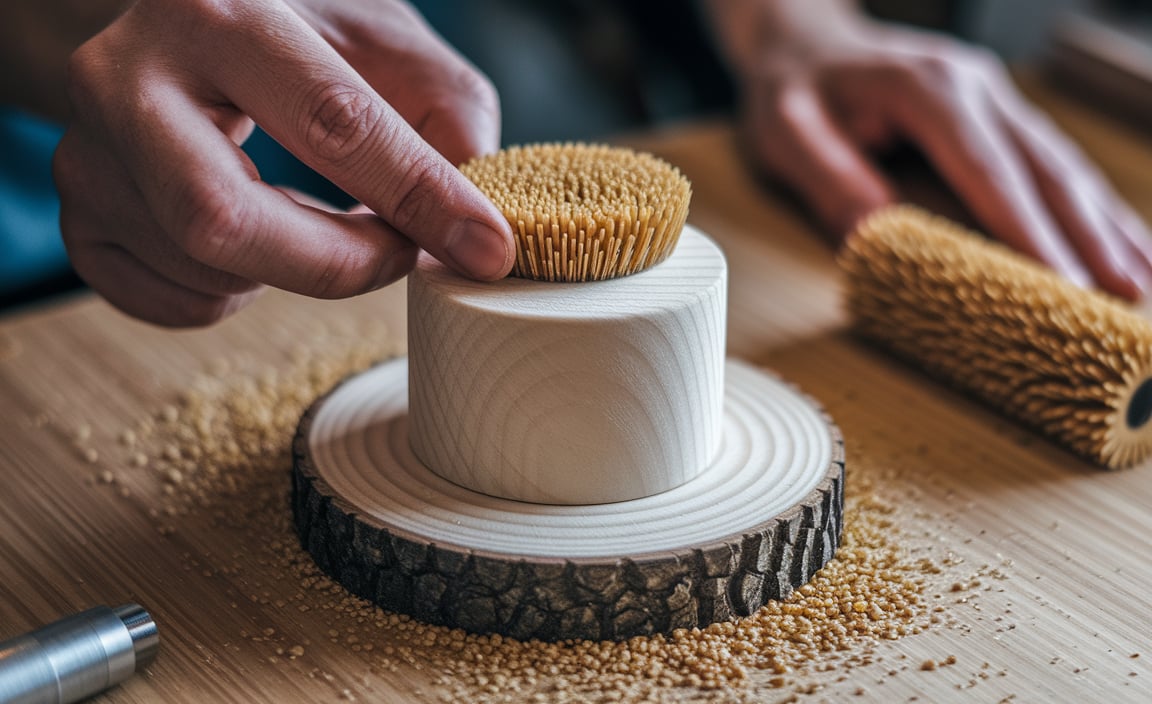
Step 2: Prepare the Backing Disc
The backing needs a hole in the center for mounting. The size of this hole depends on the bolt or arbor you plan to use. A common bolt size might be 1/2 inch (12mm) or M8/M10. If you’re unsure, measure the bolt you’ll use.
- Find the exact center of your cut disc.
- Mark this center point clearly.
- Drill a hole through the center. If using a drill press, this ensures a perfectly perpendicular hole. If using a hand drill, try to keep it as straight as possible.
- Important: If you plan to use a bolt with a flat head that will sit flush, you might want to countersink the hole on one side so the bolt head sits level with the surface.
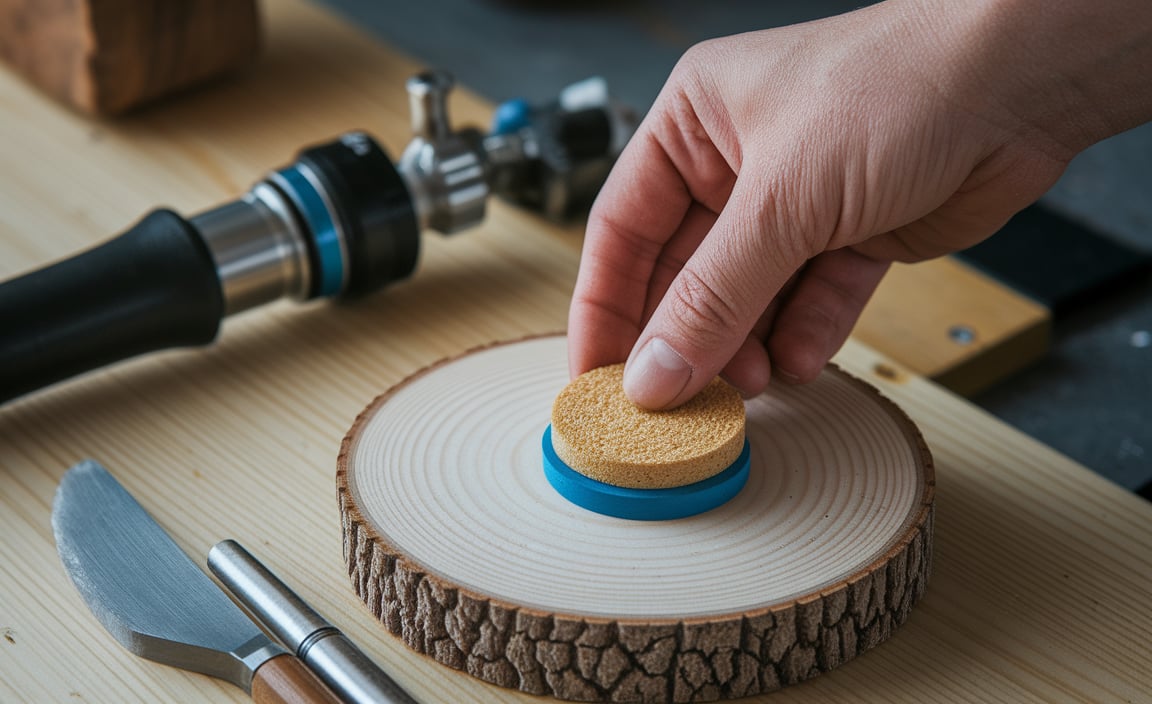
Step 3: Add Cushioning (Optional but Recommended)
A layer of cushioning makes your pad much more forgiving and helps it conform to the shape of your workpiece. This is especially helpful for rounded projects.
- Cut a piece of your cushioning material (foam, felt) to the same diameter as your backing disc.
- If your backing disc has a countersunk hole, ensure your cushioning material can accommodate this, or cut a matching hole in the cushioning. Some people prefer the cushioning to extend slightly beyond the backing for a softer edge, but keeping it the same size is generally easier.
- Apply your chosen adhesive (spray adhesive or contact cement works well here) to one side of the backing disc or one side of the cushioning material. Follow the adhesive manufacturer’s instructions for application and drying time.
- Carefully align the cushioning material onto the backing disc and press firmly. If using clamps, ensure even pressure. Let it dry completely according to the adhesive instructions.
Step 4: Attach the Abrasive Material
This is where you add the polishing power. You can use multiple grits on one pad if you’re careful, or make several pads for different stages.
Method A: Using Adhesive-Backed Sandpaper
- Cut a piece of your chosen grit sandpaper slightly larger than your backing disc. If it’s adhesive-backed, you’ll peel off the backing. If not, you’ll use spray adhesive or contact cement.
- Apply adhesive to the cushioning (or directly to the backing if not using cushioning), or peel the backing from the sandpaper.
- Carefully align the sandpaper onto the cushioned or backing disc, starting from the center and working outwards to avoid wrinkles and air bubbles.
- Press firmly and evenly all over.
- Trim any excess sandpaper that extends beyond the edge of your backing disc using a sharp craft knife or scissors. A clean edge prevents the sandpaper from catching and tearing.
Method B: Using Sanding Cloth or Regular Sandpaper with Adhesive
- Cut your sanding cloth or regular sandpaper to the size of your backing disc, or slightly larger for trimming.
- Apply spray adhesive or contact cement evenly to the cushioning material. Allow it to become tacky as per the adhesive instructions.
- Carefully lay the sandpaper or cloth onto the adhesive-coated surface, smoothing out wrinkles as you go.
- Press firmly all over.
- Trim any excess material around the edge with a sharp craft knife.
Pro Tip: Layering Grits: You can layer sandpaper grits. For example, glue a coarser grit (e.g., 220) to the backing, then glue a finer grit (e.g., 600) on top of that. This allows you to switch grits by simply removing the top layer. Just be sure to trim edges cleanly to avoid snagging!
Step 5: Mount Your DIY Polishing Pad to the Lathe
Now it’s time to attach your creation to your mini wood lathe. The most common method for DIY pads is a bolt through the center.
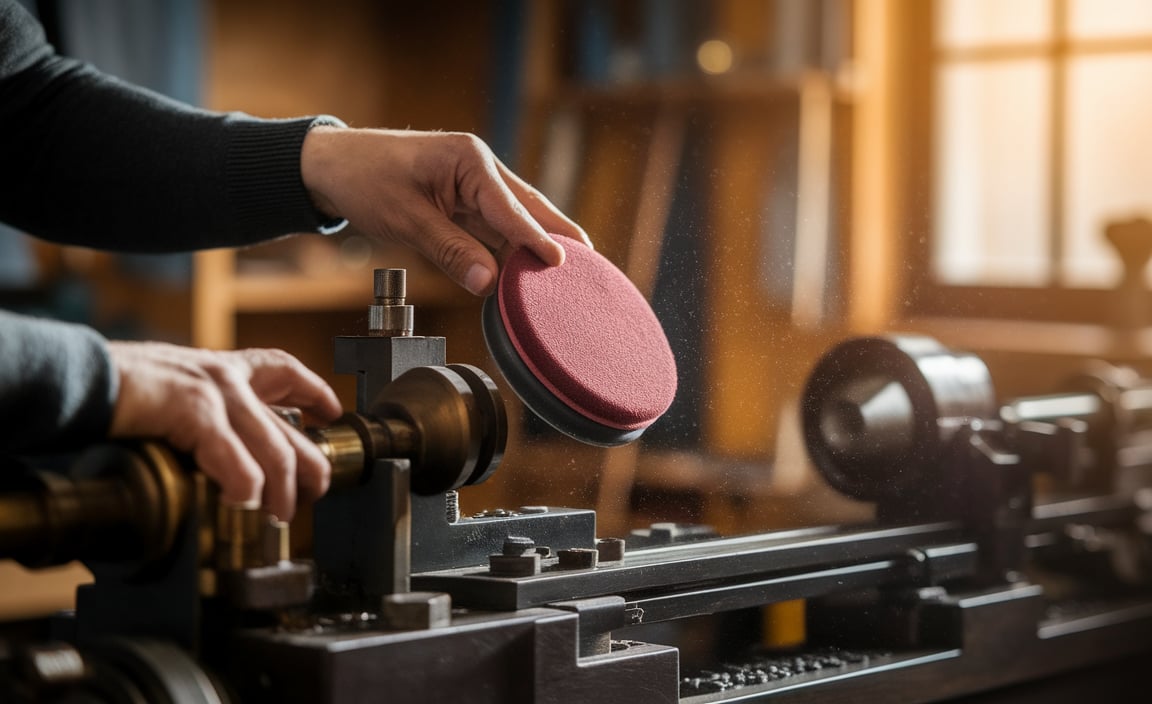
- Select a bolt that fits snugly through the hole you drilled. Ensure it has enough thread to securely fasten.
- Place a washer on the bolt, then insert it through the hole in your DIY pad.
- Thread a nut onto the bolt on the other side. Tighten securely.
- If your lathe has a faceplate, you might be able to screw your pad directly onto it using threaded inserts you’ve installed in the backing.
- Alternative: If you have a specific lathe chuck adapter or sanding disc arbor, you can adapt your backing disc to fit that. This might involve drilling and tapping your backing material or using a specific mounting plate.
Step 6: Final Touches and Attachment
Once the pad is assembled and hardware is attached:
- Ensure all edges are smooth and that no sandpaper is peeling off anywhere.
- Inspect the hardware for any sharp edges.
- Mount your DIY polishing pad onto your lathe—this could be on the headstock spindle (if it’s a direct drive and you’re using a strong enough backing) or, more commonly, on the tailstock end when turning between centers or using a drive center. If you’re using a drive center, the bolt on your pad will thread into the drive center.
- Important Safety Check: Before spinning at high speeds, give the pad a gentle tug to ensure it’s securely attached.
Advanced Techniques & Customization
Once you’ve mastered the basic DIY polishing pad, you can explore more advanced options to fine-tune your finishing process.
Using Different Abrasive Materials:
- Sanding Belts: You can cut sections from worn-out sanding belts and glue them to your discs. These are typically robust and designed for heavy use.
- Abrasive Wheels/Pads: Some materials designed for bench grinders or orbital sanders can be cut down and adapted. Always check their intended RPM limits.
- Buffing Compounds: For that ultimate shine, you can glue a layer of soft felt or cotton cloth to your finest grit pad. Then, apply commercial buffing compounds (like Tripoli, rouge, or ZM on a spindle). Check out resources like Woodworking Network’s finishing techniques for guidance on compounds.
Variations in Backing and Cushioning:
- Stiffer Backing: For flatter surfaces or when using power to push the pad, a thin piece of MDF or a slightly thicker plywood can provide more rigidity.
- Softer Cushioning: Experiment with different types of foam or thicker felt to see how it affects the finish and how well the pad conforms.
- Multiple Layers: You can create a pad with a stiff backing, a soft cushioning layer, and then your abrasive material for the best of both worlds.
Creating Mandrel-Style Adapters:
If your lathe has a threaded spindle on the tailstock or an available chuck adapter, you can create pads designed to screw onto these. This often involves drilling and tapping your backing material or using a pre-made threaded insert.
Safety First with Speed:
Always be mindful of the maximum RPM your materials can safely handle. Cardboard and glue might not be as robust as commercially manufactured items. Start at lower speeds and gradually increase as you gain confidence. Ensure your lathe is stable. For reference on lathe safety tips, check out resources from organizations like the Woodturners Guild of Western Australia (PDF Download)
Table: DIY Polishing Pad Grit Comparison
Here’s a quick guide to help you choose grits for different stages of polishing. Remember, these are general guidelines and may need adjustment based on your wood and tools.
| Stage | Typical Woodworking Grit Range | Purpose | DIY Pad Material Suggestion |
|---|---|---|---|
| Pre-Polish | 220 – 320 | Remove minor tool marks, prepare for finer sanding. | Standard sandpaper glued to a firm backing. |
| Initial Polish | 400 – 600 | Smooth out scratches from coarser grits, begin to feel smoother. | Adhesive sandpaper for ease, or cloth-backed sandpaper for durability. |
| Fine Polish | 800 – 1500 | Achieve a very smooth surface, ready for finishing compounds. | High-grit adhesive sandpaper or sanding cloth. Cushioning becomes more valuable here. |