Quick Summary
For Tool Steel A2, a face mill offers superior material removal and a smoother finish, making it ideal for roughing and achieving flatness. A fly cutter is simpler, cheaper, and excellent for light cuts, deburring, and creating precise flat surfaces with minimal heat, though slower. Choosing the right one depends on your project’s needs.
Hey everyone, Daniel Bates here from Lathe Hub! Ever stared at a block of tough Tool Steel A2 and wondered which cutter to grab for your milling project? It’s a common question, especially when you’re just starting out. Tool Steel A2 is fantastic for making durable parts, but it can be a bit stubborn to machine. Getting the right finish and efficiently removing material is key to a successful outcome. We’re going to break down the differences between two essential milling tools: the face mill and the fly cutter. By the end of this, you’ll know exactly which one to reach for, ensuring your A2 steel projects turn out perfectly. Let’s get those gears turning!
Understanding Tool Steel A2: Why It’s Special (and Tricky!)
Tool Steel A2 is a popular choice for many machinists and makers. Why? It’s a versatile, air-hardening tool steel known for its excellent toughness, good wear resistance, and relatively easy heat treatment. This makes it perfect for making dies, punches, cutters, and other components that need to withstand impact and abrasion. Think of it as the material that holds its edge and shape under pressure.
However, this “toughness” also means A2 can be challenging to machine. It’s harder than mild steel or aluminum, and if you don’t use the right tools and techniques, you can end up with:
- Excessive heat buildup, leading to tool wear and workpiece distortion.
- Rough surfaces that require a lot of secondary finishing work.
- Slow material removal rates, making your projects take much longer.
- Damage to your cutting tools.
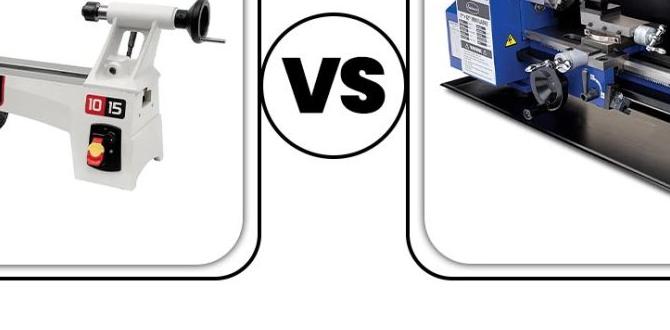
That’s where choosing the right milling cutter becomes crucial. Today, we’re focusing on two common types: the face mill and the fly cutter. Both can mill flat surfaces, but they do it in very different ways. Let’s dive into what makes each one tick.
What is a Face Mill?
A face mill is a type of milling cutter designed to machine flat surfaces, or “faces,” of a workpiece. Imagine a disc-shaped tool with multiple cutting edges (inserts) mounted around its periphery and often on its underside. When you use a face mill, the cutting action happens primarily on the lead edge of these inserts as the tool rotates and moves across the surface of the material.
Think of it like a set of tiny, extremely sharp knives arranged in a circle. As the face mill spins, these knives take bite after bite out of the workpiece, peeling away material in a controlled manner. The multiple cutting edges allow for a much higher rate of material removal compared to single-point tools or some other milling methods. This makes them incredibly efficient for larger surfaces.
Key Features of a Face Mill:
- Multiple Inserts: Most face mills have several indexable carbide or other tough material inserts. This is their superpower for efficient material removal.
- Large Diameter: They are typically larger in diameter than the workpiece surface you’re trying to flatten.
- Cutting Action: The primary cutting occurs on the side and sometimes the bottom of the inserts, removing material in swaths.
- Versatility: Can be used for roughing (fast material removal) and finishing (creating smooth surfaces).
For Tool Steel A2, a face mill is often the go-to for tackling larger areas where you need to establish a precise, flat surface quickly, especially before moving to more intricate operations. The ability to remove material rapidly means less time spent battling that tough A2.
What is a Fly Cutter?
A fly cutter is a much simpler milling tool. At its core, it’s essentially a single cutting tool (often a carbide or HSS bit) mounted on a shank that rotates. As the fly cutter spins, this single cutting edge sweeps across the workpiece, removing material in a circular path. It’s like a single chisel doing all the work.
The “fly” in fly cutter refers to the way the tool “flies” around the workpiece. Because it has only one cutting edge, the material removal rate is significantly lower than with a face mill. However, this simplicity has its own set of advantages, particularly when dealing with harder materials like A2 steel at lighter depths of cut.
Key Features of a Fly Cutter:
- Single Cutting Edge: Usually a single, often adjustable, hardened steel or carbide bit.
- Simplicity: Fewer moving parts, making it easy to set up and use.
- Cutting Action: The single edge sweeps in a circle, milling a flat surface.
- Good for Light Cuts: Excels at taking small depths of cut to achieve a very flat and smooth finish.
- Less Heat: Often generates less heat than a face mill, which is beneficial for some materials or situations.
For Tool Steel A2, a fly cutter is your friend when you need to achieve a pristine, perfectly flat surface with minimal material removal, or when you want to be very gentle with the workpiece to avoid heat buildup. It’s also a favorite for touching up surfaces or creating shallow pockets.
Face Mill vs. Fly Cutter for Tool Steel A2: The Showdown
Now, let’s get down to the nitty-gritty of how these two tools stack up when it comes to machining Tool Steel A2. Both can create flat surfaces, but their best-use cases are quite different.
Material Removal Rate (MRR)
This is where the face mill really shines. With its multiple cutting edges, a face mill can remove a significantly larger volume of material per pass than a fly cutter. For roughing out a large surface or taking deep cuts in A2 steel, a face mill is the clear winner for efficiency.
A fly cutter, with its single edge, is much slower. If you try to take aggressive cuts with a fly cutter, you risk overheating the tool and workpiece, creating excessive chatter, and generally making a mess of things. It’s designed for lighter, more precise work.
Surface Finish
When it comes to surface finish, it’s a bit of a nuanced competition. A well-maintained face mill with sharp inserts can leave a very smooth finish, especially when used for finishing passes (light depth of cut). The multiple edges, when properly engaged, overlap to create a continuous cutting action.
A fly cutter, especially one with a precisely set and sharp bit, can achieve an exceptionally smooth and flat surface with minimal scalloping (the slight ridges left by overlapping passes). Because it’s a single point, it can often be “dialed in” for a glass-like finish. However, achieving this often requires slower spindle speeds and very careful adjustment of the cutter.
Heat Generation
Tool Steel A2 is sensitive to heat. Excessive heat can lead to warping or changes in the material’s hardness if not properly managed. Face mills, due to their higher MRR and multiple cutting edges working simultaneously, can generate more heat. This means you’ll likely need robust coolant systems and appropriate cutting parameters to keep A2 in check.
Fly cutters, by their nature of taking lighter cuts with a single edge, generally generate less heat. This can be a significant advantage when you’re concerned about thermal distortion or when working on smaller parts where a powerful coolant setup might be impractical.
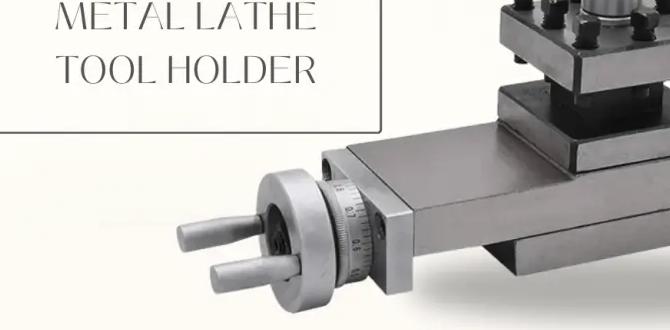
Tooling Cost and Complexity
Face mills are typically more expensive. You’re buying a robust tool holder and usually purchasing multiple carbide inserts. While these inserts are often indexable (meaning you can rotate them to a fresh edge when one gets dull, or replace them individually), the initial investment is higher.
Fly cutters are generally much simpler and more affordable. You might buy a basic shank and a single bit. The bit itself might need sharpening or replacement, but overall, they are a more budget-friendly option, especially for home shops or hobbyists. They also require less complex setup.
Setup and Ease of Use
Setting up a fly cutter is usually quite straightforward. You mount the shank, secure the cutter bit (sometimes with an adjustment screw to fine-tune its extension), and you’re ready to go. It’s very intuitive.
Face mills can be a bit more involved. You need to ensure the mill is securely mounted to the machine’s spindle or an adapter, and that the inserts are correctly seated and tightened. For larger face mills, handling them can also be more physically demanding due to their weight.
When to Choose Which Tool for Tool Steel A2
Based on their strengths and weaknesses, here’s a practical guide for using a face mill versus a fly cutter on Tool Steel A2:
Use a Face Mill When:
- You need to remove a lot of material quickly. This is their primary advantage for roughing operations.
- You’re flattening large surfaces. Their diameter allows them to cover significant area efficiently.
- You need a strong foundation for further machining. Establishing a good flat surface early on is crucial.
- You have adequate coolant and machine rigidity. A2 requires this to handle aggressive cuts.
- You are looking for high productivity. Time is money, and face mills save time.
Use a Fly Cutter When:
- You need a very precise, flat surface with minimal material removal. Think finishing passes or light touching up.
- You are concerned about heat buildup. The lighter cut generates less heat, which can be critical for A2.
- You are working with a smaller, less rigid machine. A fly cutter demands less from the machine.
- Budget is a major consideration. Fly cutters are more economical.
- You need to mill shallow features or deburr edges. Their controlled cutting action is ideal here.
- You want to achieve a mirror-like finish. With careful setup, they excel at this.
Essential Considerations for Machining Tool Steel A2
Regardless of whether you choose a face mill or a fly cutter, machining Tool Steel A2 demands respect. Here are some crucial tips to keep in mind:
1. Tooling Selection
- Inserts/Cutters: For face mills, use high-quality carbide inserts designed for ferrous metals. For fly cutters, a sharp, high-speed steel (HSS) or carbide bit is essential. Consider coatings for better wear resistance.
- Sharpness is Paramount: Dull tools cause heat, chatter, and poor surface finish, especially with tough materials like A2.
2. Cutting Parameters
- Spindle Speed: This is critical. For A2, you’ll generally use slower spindle speeds than you would for softer metals. Consult tooling manufacturer charts for specific recommendations based on your insert/cutter material and diameter. A good starting point for a 2-inch face mill on A2 might be around 150-250 RPM. Fly cutters often run slower still.
- Feed Rate: Similar to speed, use moderate to slow feed rates. For face mills, this allows the multiple inserts to effectively remove material without overwhelming them. For fly cutters, a slow, steady feed rate is key to a good finish and preventing tool breakage.
- Depth of Cut: Be conservative with A2. For face mills in roughing, you might start with 0.050″ to 0.100″ (1.2mm to 2.5mm) depending on machine power and rigidity. For finishing, much less, maybe 0.010″ to 0.020″ (0.25mm to 0.5mm). With a fly cutter, keep depths of cut very shallow, often under 0.020″ (0.5mm), especially for finishing.
3. Coolant (Flood Coolant is Highly Recommended)
Machining A2 without adequate coolant is asking for trouble. Flood coolant is essential for:
- Cooling the cutting edge and the workpiece: Prevents overheating, which can harden the steel prematurely or cause distortion.
- Lubricating the cut: Reduces friction between the tool and material.
- Flushing away chips: Prevents chip recutting and buildup, which can ruin the finish and damage the tool.
Use a good quality cutting fluid designed for ferrous metals. For more information on machining fluids, the Performance Fluid Technical Articles offer some great insights into their importance.
4. Machine Rigidity and Stability
Tool Steel A2 is unforgiving of machine flex or chatter. Ensure your milling machine is:
- Sturdy and well-maintained: No excessive play in the ways or spindle bearings.
- Properly set up: Workpiece clamped securely, machine is on a stable base.
- Free from vibration: Consider vibration damping pads if your workshop floor is prone to it.
A truly rigid machine is a prerequisite for successfully machining tough materials like A2 using any milling cutter.
5. Chip Evacuation
Proper chip evacuation is vital. Ensure your coolant flow is directed effectively to wash chips away from the cutting zone. If using a fly cutter, you might need to manually clear chips more frequently, especially if working with deeper cuts than recommended.
Table: Face Mill vs. Fly Cutter for Tool Steel A2 – At a Glance
Here’s a quick comparison table to help you decide:
| Feature | Face Mill | Fly Cutter |
|---|---|---|
| Primary Use Case | Rapid material removal, flattening large surfaces (roughing) | Precision surface milling, light cuts, finishing, deburring |
| Material Removal Rate (MRR) | High | Low |
| Surface Finish Quality | Good to Excellent (with proper setup) | Excellent (high precision) |
| Heat Generation | Moderate to High | Low |
| Tooling Cost | Higher (multiple inserts) | Lower (single bit) |
| Complexity & Setup | More involved | Simpler |
| Best For A2 Roughing | Yes | No (too slow, risks heat/damage) |
| Best For A2 Finishing | Yes (light pass) | Yes (precision and minimal heat) |
FAQ: Your Top Questions Answered
Q1: Can I use a fly cutter to mill a whole block of A2 steel?
A: While you can mill a whole block with a fly cutter, it would be extremely slow and inefficient for anything more than very shallow material removal. A fly cutter is best for taking light “cleanup” passes or achieving a final flat surface after roughing with a more aggressive tool like a face mill.
Q2: Is a face mill better for Tool Steel A2 than a fly cutter?
A: “Better” depends on what you’re trying to achieve. For fast, efficient material removal and flattening large areas, a face mill is superior. For high-precision finishing with minimal heat and complexity, a fly cutter can be better. They serve different primary purposes.
Q3: How do I prevent chipping or breaking my fly cutter bit in A2 steel?
A: Always use a sharp bit, take very shallow depths of cut (e.g., less than 0.020 inches), use a slow, steady feed rate, plenty of coolant, and ensure your machine is rigid and free from chatter. Avoid aggressive plunging or side loads.
Q4: What kind of inserts should I use on a face mill for A2?
A: You’ll want carbide inserts with excellent toughness and wear resistance. Look for grades specifically recommended for medium to high-alloy steels. A PVD (Physical Vapor Deposition) coating, like TiAlN or AlTiN, can significantly improve performance and tool life when milling A2.
Q5: Does it matter if my fly cutter bit is HSS or carbide for A2?
A: Carbide is generally preferred for its hardness and ability to hold an edge at higher temperatures, which is beneficial even with light cuts in A2. However, a high-quality, hardened HSS bit can also work effectively if the cuts are kept very light and coolant is used consistently.
Q6: How does heat affect Tool Steel A2 during milling?
A: Excessive heat can cause localized hardening or softening of the