A floating reamer holder lets your reamer find its own way into a hole, spinning freely to correct misalignment. This prevents reamer damage, makes cleaner holes, and saves you frustration on your lathe. It’s a brilliant, simple tool that every beginner machinist needs!
Ever struggled with making perfectly straight holes on your lathe? You know, the kind where the reamer just doesn’t want to go in smoothly, or it feels like it’s fighting you every millimeter of the way? It’s a common headache that can lead to damaged reamers and less-than-perfect work. Thankfully, there’s a clever little tool that can make this job much, much easier: the floating reamer holder. It’s like a universal joint for your reamer, allowing it to self-align as it enters the workpiece. We’ll walk through exactly what it is, why it’s a game-changer, and how to use one confidently. Get ready to say goodbye to misaligned holes and hello to precision!
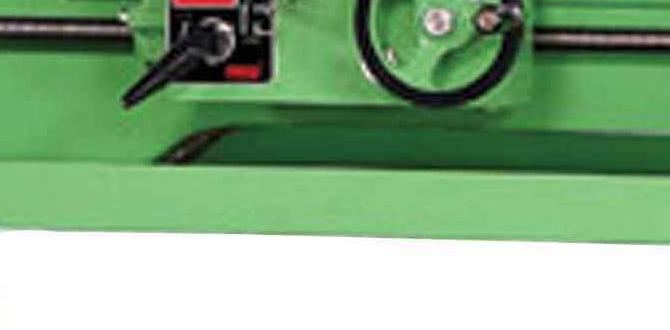
What Exactly is a Floating Reamer Holder?
Think of a floating reamer holder as a special attachment for your lathe’s tailstock that lets the reamer move a little bit. Normally, if you drill and then ream a hole, the drill bit and the reamer have to be perfectly aligned with the lathe’s spindle. If they aren’t, the reamer can bind, break, or cut an oversized, out-of-round hole.
A floating reamer holder has a mechanism that allows the reamer to “float” or swivel slightly. This means if the hole isn’t perfectly centered with the tailstock quill, the holder lets the reamer wiggle into the correct path without forcing it. It basically absorbs any small misalignment between the tailstock and the spindle.
Why is it a “Genius” and “Essential” Tool?
The “genius” part of this holder is its simplicity and effectiveness. It solves a common problem with a few moving parts. The “essential” label comes from how much it improves your work and protects your tools, especially when you’re starting out.
Here’s why it’s such a big deal for beginner machinists:
Prevents Reamer Damage: Reamer bits are often made of brittle high-speed steel. Forcing a misaligned reamer can easily snap off the cutting edges or even break the entire reamer shank. A floating holder protects your investment.
Improves Hole Quality: By allowing the reamer to self-align, it cuts a much straighter and rounder hole. This is crucial for precision parts and any assembly where tight tolerances are needed.
Reduces Operator Frustration: No more fighting with a stubborn reamer! The holder makes the process smoother, quicker, and less stressful. This means you can focus on getting great results.
Compensates for Minor Errors: We all make small mistakes. A floating holder forgives minor errors in drilling or tailstock positioning, saving a perfectly good workpiece from being ruined.
Versatile Application: While primarily used for reaming, some holders can adapt to other tools like center drills or even taps (though specialized tap holders are often preferred for tapping).
Understanding the Mechanics of a Floating Reamer Holder
At its core, a floating reamer holder is designed to allow linear and/or angular freedom of movement for the tool it holds. Most common designs allow for a certain amount of float in two directions:
1. Axial Float: This is the ability for the reamer to move along its own axis (in and out). This is crucial for allowing the reamer to naturally enter an slightly off-center hole.
2. Radial Float: This allows the reamer to pivot or swivel slightly around a point. This helps it follow the path of the drilled hole, even if it’s not perfectly perpendicular to the face of the workpiece.
Common Types of Floating Reamer Holders
While the principle is the same, you’ll see a few variations. The most common ones for a lathe beginner will be:
Simple Jaw-Type Holders: These often have jaws, similar to a chuck, that grip the reamer shank. The floating mechanism is usually a pivot point or a flexible coupling between the jaws and the part that holds into the tailstock.
Ball-Joint Holders: These use a ball-and-socket design to allow for the angular freedom needed for radial float.
Universal Joint (U.J.) Style: These use small universal joints to allow for movement in two planes, offering both axial and radial float.
Often, the holder will have a shank that fits directly into your lathe’s tailstock quill. You’ll then adjust the holder to grip the reamer.
When to Use a Floating Reamer Holder
The floating reamer holder isn’t for every single reaming job, but it shines in specific situations where precision and tool protection are key.
Ideal Scenarios for Use:
Reaming Holes That Need to Be Straight: This is the primary reason. If the concentricity and straightness of a hole are important for the function of your part, a floating holder is highly recommended.
When Drilling Was Slightly Off-Center: Even with careful drilling, sometimes the drill bit doesn’t bore a hole perfectly perpendicular to the surface or perfectly on the center line. The holder compensates for this.
Reaming Larger Diameter Holes: Larger reamers are more expensive and more susceptible to breaking if forced. The added safety margin is invaluable.
When Using Hand Reamers: While machine reamers are designed for use in machines, hand reamers are often used with floaters to ensure straightness and prevent damage, especially if you are a beginner.
Long, Thin Workpieces: These can be more challenging to align precisely.
When You Want the Best Possible Finish: A smooth, true hole often results from a self-aligning reamer.
When You Might NOT Need One:
Very Small Reamer Diameters: For tiny reamers (e.g., under 1/8 inch or 3mm), they are less prone to breaking if slightly misaligned. They are also very delicate and might be harder to grip securely in some floating holders.
When the Hole is Premely Misaligned: If the hole is massively out of alignment, even a floating holder might not be enough, and you may need to re-evaluate your drilling process or consider boring the hole instead.
Through- Holes with No Critical Alignment: If a hole is just a clearance hole and a little bit of roundness or straightness isn’t critical, a standard reaming setup might suffice.
How to Use a Floating Reamer Holder: A Step-by-Step Guide
Using a floating reamer holder is straightforward, but it requires a few key steps to ensure it works correctly and safely. Make sure you have the correct size holder with a shank that fits your tailstock.
Step 1: Prepare Your Reamer and Workpiece
Drill the Hole: First, drill the hole to the correct size for your reamer. Follow the reamer manufacturer’s recommendations for the correct drill size; this is crucial. A hole that is too small or too large will make reaming difficult and can damage the reamer. Use a sharp drill bit and peck drilling if necessary to clear chips, especially in deep holes. Lubrication is also important.
Chamfer (Optional but Recommended): Slightly chamfering the lead-in edge of the hole can help guide the reamer and prevent it from catching or chipping on sharp edges.
Step 2: Select and Secure the Reamer in the Holder
Choose the Right Holder: Ensure your floating reamer holder is compatible with the shank diameter of your reamer.
Insert the Reamer: Open the jaws or collet of the floating holder just enough to insert the reamer shank.
Center the Reamer: Position the reamer shank so it’s as close to the center of the holder as possible.
Tighten the Reamer: Securely tighten the jaws or collet on the reamer shank. It needs to be held firmly so it doesn’t slip during operation.
Step 3: Mount the Holder in the Tailstock
Clean the Tailstock Quill: Make sure the inside of your tailstock quill is clean and free of debris.
Insert the Holder: Insert the shank of the floating reamer holder into the tailstock quill, just like you would a drill chuck or center drill.
Advance the Quill: Move the tailstock quill forward a small amount, bringing the reamer tip close to the workpiece.
Step 4: Align and Engage the Reamer
Position the Tailstock: Carefully position the tailstock so the reamer tip is aimed directly at the drilled hole.
Initial Contact: Advance the tailstock quill slowly. You want the point of the reamer to just touch the surface of the hole.
Engage the Float: As you continue to advance the quill, apply a small amount of downfeed. The floating holder will allow the reamer to find its own path into the hole. You might feel a slight “give” as it self-aligns.
Important Note on Alignment: While the holder provides float, it’s still best practice to get your tailstock as well-aligned as possible. The float is there to compensate for small errors, not massive ones.
Step 5: Ream the Hole
Apply Consistent Feed: Once the reamer is engaged, apply a slow and steady feed rate by turning the tailstock handwheel. Don’t force it.
Use Lubricant: Use appropriate cutting fluid or lubricant for the material you are working with. This is critical for a good finish and to prevent overheating and galling. For example, use a sulfurized oil for steel and a lighter oil or even water-based coolant for aluminum. You can find excellent guides on machining lubricants from resources like the Precision Tools and Services Association (PTSA).
Clear Chips: For deeper holes, periodically back the reamer out slightly (while still rotating) to clear chips. Don’t completely withdraw it from the hole while spinning, as this can ruin the finish. Continue feeding until the reamer has passed completely through the hole by a small amount (e.g., 1/8″ or 3mm).
Step 6: Withdraw the Reamer
Stop Rotation (Optional but Safer): Some machinists prefer to stop spindle rotation just before reversing the tailstock. Others continue to rotate in reverse. Both can work, but stopping rotation can sometimes prevent chip recutting on withdrawal.
Reverse Tailstock: Slowly retract the tailstock quill. The reamer will follow the path it cut.
Remove the Holder and Reamer: Once clear of the workpiece, remove the floating reamer holder from the tailstock and then remove the reamer from the holder. Clean everything thoroughly.
Maintenance and Care of Your Floating Reamer Holder
Like any precision tool, your floating reamer holder will perform best and last longer if it’s cared for properly.
Keep it Clean: Always clean the holder after use. Remove any swarf, cutting fluid, or debris. A soft brush and a clean rag are your best friends here.
Lubricate Moving Parts: Periodically, apply a light machine oil to the floating mechanism (if accessible) to ensure smooth movement. Avoid over-lubrication, which can attract dirt.
Inspect for Wear: Regularly check the jaws, collets, and the floating mechanism for any signs of wear, damage, or looseness. A worn holder can introduce inaccuracies.
Store Properly: Store the holder in a dry place, ideally in its original case or a separate toolbox compartment to prevent damage.
Troubleshooting Common Issues
Even with a floating reamer holder, you might run into a few snags. Here’s how to address them.
| Problem | Possible Cause | Solution |
| :————————– | :————————————————- | :—————————————————————————————————— |
| Reamer binding or chattering | Incorrect drill size (too small) | Verify drill size. Use a quality drill bit that makes the correct size hole. |
| | Reamer dull or damaged | Sharpen or replace the reamer. |
| | Not enough lubricant | Use appropriate cutting fluid consistently. |
| | Forcing the reamer; tailstock feed too fast | Apply slow, steady feed. Let the reamer do the work. |
| | Workpiece material is too hard or gummy | Ensure you’re using the right fluid and feed rate for the material. Consider a different reamer type. |
| Hole is oversized/out-of-round | Reamer not properly seated in the holder | Ensure the reamer shank is securely and centrally gripped in the holder. |
| | Excessive wear in the floating holder mechanism | Inspect holder for looseness or wear. If worn, it may need replacement. |
| | Reamer spinning freely and not cutting effectively | Check grip on reamer shank; ensure it’s not slipping. Reamer might be dull. |
| Reamer breaks | Severe misalignment not compensated by holder | Ensure tailstock is reasonably aligned to start. Use lighter feed rates. |
| | Forcing the reamer | Back off pressure, use slower feed, ensure proper drill size and lubrication. |
| | Holder mechanism is seized or not floating | Check that the floating components are moving freely. Clean and lubricate if necessary. |
Comparing Floating Reamer Holders vs. Fixed Holders
For beginners, understanding why a floating holder is superior often comes from comparing it to its opposite: a fixed holder.
| Feature | Floating Reamer Holder | Fixed Reamer Holder (e.g., Drill Chuck, Standard Tool Holder) |
| :———————– | :—————————————————————————————————————– | :——————————————————————————————————- |
| Primary Function | Allows tool to self-align to correct for minor inaccuracies between spindle and tailstock axis. | Holds tool rigidly. Requires near-perfect alignment between spindle and tailstock axis. |
| Accuracy Improvement | Excellent for ensuring hole straightness and roundness when minor alignment errors exist. | Can achieve excellent accuracy if alignment is perfect. |
| Tool Protection | High. Significantly reduces the risk of binding, chipping, or breaking reamers. | Low. High risk of reamer breakage if any misalignment occurs. |
| Operator Ease | Easier for beginners. More forgiving of minor setup errors. Smooth operation. | More difficult for beginners. Requires precise alignment adjustments, which can be tricky. |
| Cost | Generally more expensive than a simple drill chuck. Can range from $30-$150+ depending on quality and type. | Drill chucks are inexpensive. Standard fixed tool holders can be similar in price to floating holders. |
| Applications | Precision reaming, sensitive materials, when perfect hole quality is paramount. | Tapping (with correct holder), drilling, any operation where rigid tool holding is essential. |
| Risk of Misalignment | Low. Designed to absorb and compensate for small misalignments. | High. Any significant misalignment will stress the tool and potentially damage the workpiece or tool. |
As you can see, for the specific task of reaming on a lathe, especially for those new to the trade, the benefits of a floating reamer holder far outweigh working with a rigidly held reamer. It’s an investment in your success.
Real-World Examples and Benefits (From the Workshop Floor)
Imagine you’re making a custom bracket for a project. It has several holes that need to be accurately reamed for bolts to pass through smoothly. You drill them carefully, but when you go to ream, you notice the tailstock isn’t exactly perfect.
Without a floating holder: You grit your teeth and try to force the reamer. It binds, the levers on the tailstock feel strained, and you hear that dreaded scraping sound. You might end up with a hole that’s slightly oval, or worse, you snap off the tip of your expensive reamer. Now you have to start over, replace the reamer, and you’re frustrated.
With a floating holder: You mount your reamer in the holder, chuck it into the tailstock, and bring it up to the hole. As you feed it in, you feel a slight give – the holder is compensating for that tiny bit of misalignment. The reamer slides in smoothly, cutting a clean, round hole with a beautiful finish. You’re happy, your reamer is intact, and the part is perfect.
This scenario plays out countless times in workshops. It’s not just about making one good part; it’s about building confidence, saving money on tooling, and developing good machining habits. This tool empowers you to achieve professional results more consistently. For more on achieving precision in machining, resources from organizations like the National Institute of Standards and Technology (NIST) offer insights into metrology and accuracy standards.
Conclusion
So, that’s the lowdown on the floating reamer holder. It’s one of those simple, elegant solutions in machining that makes a world of difference, especially for beginners. It takes the stress out of reaming, protects your valuable tooling, and ensures you get those clean, accurate holes your projects demand.
Don’t let the simple appearance fool you; this tool is a genuine workhorse in any well-equipped home or professional workshop. By understanding how it works and following the steps we’ve outlined, you’ll be using it like a seasoned pro in no time. It’s an affordable investment that pays dividends in quality, safety, and sheer machining satisfaction. If reaming is part of your workflow, make sure a good floating reamer holder is part of your toolbox. Happy machining!
Frequently Asked Questions (FAQ)
What is the main purpose of a floating reamer holder?
The