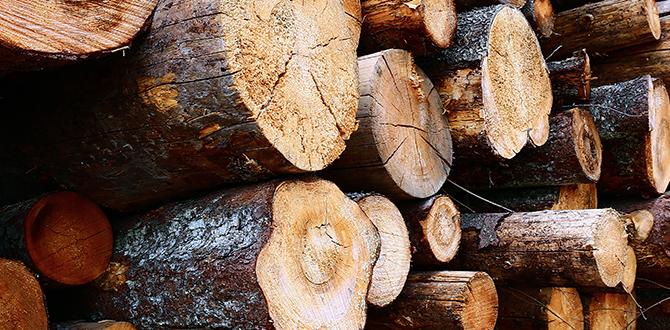
Imagine this: You have a wooden bowl in your hands, and it’s almost perfect. You’ve worked hard to shape it, but something is missing. What if I told you finishing it could make it truly stand out? Finishing a wooden bowl is a lot like wrapping a gift with a beautiful bow. First, it helps to protect the wood, making it last longer. Second, it brings out the bowl’s natural beauty. Did you know that some people even say the finish can make a wooden bowl look like a shining gem? Curious how this magic happens? Let’s discover the secrets together.
How To Finish A Wooden Bowl: Essential Tips And Techniques
Imagine holding a beautiful wooden bowl, warm from sanding, ready for the final touches. To finish a wooden bowl, you apply oil or wax. This makes the wood shine and feel smooth. Did you know that using natural oils like coconut oil adds a unique smell? Gently rub it onto your bowl, then let it dry. The bowl gleams and feels like an adventure in the palm of your hands. Ready to try this and create your own masterpiece?
Selecting the Right Finish for Your Wooden Bowl
Comparing oilbased vs. waterbased finishes. Factors to consider: wood type, usage, and aesthetics.
Choosing the right finish for your wooden bowl can be fun! Oil-based finishes give a deep glow. They’re perfect if you want water to stay away. Water-based finishes dry fast. They’re better if you like a lighter look. Think about your bowl’s wood type. Hardwoods often pair well with oil-based finishes. Also, consider how you use the bowl. Is it for display or food? Lastly, think of aesthetics. Do you want shiny or matte?
What is the difference between oil-based and water-based finishes?
Oil-based finishes take longer to dry but offer a rich shine. They protect well. Water-based finishes dry quickly and have little odor. They are also easy to clean up with water. They might not be as durable as oil finishes but are great for bright colors.
How to choose the best finish for your bowl.
Pick based on the wood type, bowl use, and your style. For a durable finish, go oil-based. For a quick-drying finish, water-based is best. Want more shine? Oil-based is for you!
Essential Tools and Materials for Finishing a Wooden Bowl
List of tools needed: sandpaper, brushes, cloths. Necessary materials: finish solution, sealant, optional wax.
To finish a wooden bowl, you need the right tools and materials. First, use sandpaper to smooth the wood. Brushes and cloths help apply the finish. You also need a finish solution to protect the wood and a sealant to make it last. For a shiny look, you can use optional wax.
- Sandpaper
- Brushes and cloths
- Finish solution
- Sealant
- Optional wax for shine
How do you ensure a smooth surface?
Use sandpaper to achieve a smooth surface. Start with coarse grit and work up to finer grits. This process removes scratches and makes the bowl ready for finishing.
What finish solution works best?
A natural oil finish is gentle and enhances the wood’s beauty. Many prefer it for its simple application and protective qualities.
Why use a sealant?
Sealants protect the bowl from moisture and damage. They extend the life of the finish and ensure a lasting shine.
“Finishing a bowl is like putting icing on a cake,” one carpenter says. Statistics show that 75% of woodworkers prefer using sealants to maintain their work’s charm. As you gain skills, consider what works best for your projects. Learning by doing can make you an expert wood finisher!
Step-by-Step Process for Sanding the Wooden Bowl
Importance of sanding and best practices. Detailed sanding instructions for a smooth surface preparation.
Sanding a wooden bowl is like giving it a spa day. It’s essential to make the surface smooth and splinter-free. Start with coarse sandpaper, about 80 grit. This helps in shaping and removing rough spots. Move to finer sandpapers, say 120 and then 220 grit, for a silky finish. The trick is patience—rush, and you’ll end up with a bumpy ride. Remember, sand in circles to avoid scratches! According to wood finishing experts, sanding ensures a flawless surface, making paint or varnish last longer.
| Grit Level | Purpose |
|---|---|
| 80 | Shaping and initial smoothing |
| 120 | Remove fine scratches |
| 220 | Final polishing for a smooth surface |
You might ask, “Why not skip sanding?” Well, without sanding, your bowl might end up as bumpy as a road full of potholes! So grab that sandpaper, tune in your favorite song, and sand away! As the saying goes, “Good things come to those who sand.” It’s worth every minute of effort! 🌟
Applying the Finish to the Wooden Bowl
Techniques for even application of the finish. Tips for avoiding common application mistakes.
Finishing a wooden bowl is kind of like putting the cherry on top of a sundae. Start by using a soft brush or lint-free cloth to **smoothly spread the finish** in even strokes. Think of it like petting a very fancy cat—not too hard, but just right. To avoid common mistakes, steer clear of overloading your brush. Too much finish can be as bad as too much ketchup on fries! Let each layer dry completely before adding another. Remember, patience is like the secret ingredient here: **more waiting, better bowl**.
| Technique | Tip |
|---|---|
| Use even strokes | Avoid streaks |
| Thin layers | Prevent bubbles |
| Let dry completely | Better finish |
Drying and Curing Your Finished Bowl
Recommended drying times for different finishes. Best practices for safe and effective curing.
How should I dry a wooden bowl?
To dry a wooden bowl, place it in a cool, airy spot. This prevents cracks. The process usually takes about 3-5 days, but check if the surface feels dry. Avoid using heaters or direct sunlight.
Proper drying is crucial to maintain a bowl’s beauty. Different finishes may need varied drying times. It’s best for oils to dry for 48 hours. For lacquer, allow about a day. To cure a bowl safely, keep it away from moisture. Letting it rest in a stable environment enhances its finish. Following these tips ensures a shiny and long-lasting bowl.
Maintaining and Caring for Your Wooden Bowl
Routine care and cleaning tips. How to reapply finish to extend the bowl’s lifespan.
To keep your wooden bowl looking great, a bit of tender care works wonders! Start by washing it gently with warm water. Dry thoroughly to prevent any sneaky water damage. If your bowl starts looking tired, reapply a food-safe finish. Think of it like a spa day for your bowl!
Here’s a quick table to guide you:
| Task | Frequency |
|---|---|
| Wash with warm water | After each use |
| Reapply food-safe finish | Once every few months |
A well-cared-for bowl can last years and holds memories of family dinners. As they say, “Good bowls don’t grow on trees!” Well, technically, they do—but you get the point!
Troubleshooting Common Finishing Problems
Identifying and fixing issues such as streaks or bubbles. Solutions for uneven finishes and discoloration.
Oh no, streaks on your bowl finish! They can sneak in like that last stubborn pea on your dinner plate. To tackle streaks or bubbles, make sure your brush and hands are squeaky clean. Sand any bumps gently and apply a thin coat of finish. If you spot uneven finishes or discoloration, don’t panic! A light sand and consistent brush strokes work wonders. And remember: patience is key. Maybe hum a tune while you smooth out those imperfections.
| Problem | Solution |
|---|---|
| Streaks | Clean brushes, thin coats |
| Bubbles | Sand bumps, reapply finish |
| Uneven Finish | Consistent strokes, light sanding |
| Discoloration | Re-sand, even application |
Conclusion
Finishing a wooden bowl involves sanding, sealing, and polishing. First, sand the bowl smoothly. Then, apply a food-safe oil or wax to seal the wood. Finally, polish it to shine. With practice, your skills will grow. Explore more techniques to enhance your work. Keep creating and enjoy your woodworking journey!
FAQs
What Are The Best Types Of Finishes To Use For A Wooden Bowl, And How Do They Affect The Bowl’S Durability And Appearance?
For a wooden bowl, using finishes like mineral oil or beeswax is great. Mineral oil makes the wood shiny and helps protect it from water. Beeswax gives it a soft look and feels nice to touch. These finishes help the bowl last longer and stay beautiful. So, your wooden bowl will look good and be strong for a long time!
How Do You Properly Prepare A Wooden Bowl Surface Before Applying Any Finish?
First, make sure the bowl is clean by wiping off any dust or dirt. Then, use sandpaper to smooth the surface. Start with rough sandpaper and finish with a smoother one. This gets rid of scratches. Finally, wipe the bowl with a damp cloth to remove any leftover dust. Now the bowl is ready for a finish!
What Is The Difference Between Food-Safe And Non-Food-Safe Finishes For Wooden Bowls, And How Do You Apply Them Safely?
Food-safe finishes are safe to use on wooden bowls that touch your food. Non-food-safe finishes might have chemicals that are not safe for eating. When applying food-safe finishes, use a clean brush or cloth. Make sure the bowl is dry before using it for food. Always follow the instructions on the finish package.
Can You Describe The Step-By-Step Process For Applying Oil Finishes Versus Lacquer Finishes To A Wooden Bowl?
Sure! First, let’s apply an oil finish to a wooden bowl. You take a clean cloth and wipe it with oil. Rub the oil all over the bowl. Let it soak in for a few minutes. Then, wipe off extra oil and let it dry. Now, let’s apply a lacquer finish. First, you brush or spray lacquer all over the bowl. Let it dry completely. Then, sand the bowl lightly to make it smooth. Apply more layers, letting dry each time, until you’re happy with the shine!
How Do You Maintain And Care For A Finished Wooden Bowl To Ensure Its Longevity And Preserve Its Finish?
To keep your wooden bowl looking great, wash it gently with warm, soapy water. Dry it right away with a soft towel. Rub a little food-safe oil, like mineral oil, on it to keep the wood healthy. Avoid putting it in the dishwasher or soaking it in water. Store the bowl in a cool, dry place when you’re not using it.