Have you ever wondered how metal parts are made with perfect threads? The answer often lies in a lathe threading tool setup. This setup allows craftsmen to create precise threads on various materials. Imagine a world where every bolt, screw, and nut fits perfectly. That’s the magic of threading tools!
Setting up a lathe might sound tricky, but it can be fun. Picture yourself in a workshop filled with machines. A lathe stands in the center, ready to transform a simple metal rod into something amazing. What if you could master that tool? You’d impress your friends and make awesome projects!
Many people think threading tools are only for expert machinists. But with the right setup, anyone can learn. Even beginners can enjoy the satisfaction of creating threaded pieces. So, are you curious about how to get started with lathe threading tool setup?
Optimal Lathe Threading Tool Setup For Precision Cuts

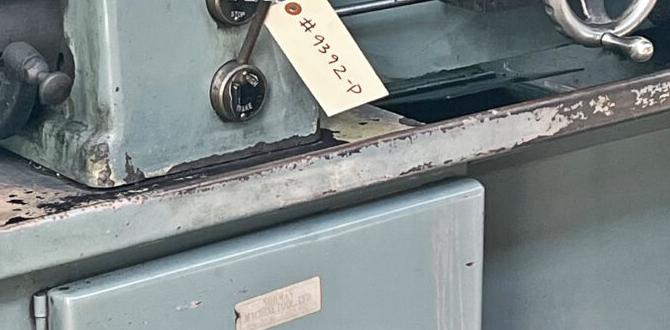
Lathe Threading Tool Setup
Setting up a lathe threading tool can feel tricky, but it’s easier than it sounds! Start by selecting the right tool based on your project. Then, carefully adjust the tool’s position for accurate cuts. Did you know that a small mistake can affect threading precision? Proper alignment and settings ensure perfect threads. This setup allows for strong, clean threads on metals or plastics. Soon, you’ll create products that fit perfectly together. Get ready to thread like a pro!Understanding Lathe Threading Tools
Types of threading tools for lathes. Material composition and their relevance in threading.Lathe threading tools come in various shapes and sizes, each with a unique job. Common types include single-point tools and multi-point tools. Single-point tools are great for making custom threads, while multi-point tools speed things up when you need lots of threads in a row. The materials these tools are made from, like high-speed steel or carbide, matter too. Stronger materials can keep your tools sharp and working longer. After all, nobody wants a dull tool—it’s like trying to cut a birthday cake with a spoon!
| Type of Tool | Material | Best Use |
|---|---|---|
| Single-Point Tool | High-Speed Steel | Custom Threads |
| Multi-Point Tool | Carbide | Mass Production |
Essential Tools and Equipment for Setup
List of required tools for proper setup. Importance of tool maintenance and calibration.Having the right tools is vital for an effective lathe threading tool setup. Here’s a short list of what you need:
- Lathe machine
- Threading tool holder
- Cutting tools
- Measuring tools (like calipers)
- Toolbox for organization
Regular maintenance of tools is key. This keeps them sharp and precise. Calibration helps maintain accuracy in your work. Remember, the better the tools, the better the results!
Why is tool maintenance important?
Regular maintenance keeps tools functioning well and extends their lifespan.What tools are essential for setup?
- Lathe machine
- Cutting tools
- Measuring instruments
Step-by-Step Procedure for Lathe Threading Tool Setup
Preparing the lathe and workspace. Installation and alignment of the threading tool.First, clear your workspace. Remove all items that may cause trouble during the setup. Safety first! Next, check your lathe for any missing parts. If everything looks good, it’s time to install the threading tool. Make sure it’s aligned properly, so it doesn’t wiggle around like a jelly on a plate. Use a level tool to ensure everything is straight. This way, your threading will be smooth like butter!
| Step | Action |
|---|---|
| 1 | Clear workspace |
| 2 | Check lathe parts |
| 3 | Install threading tool |
| 4 | Align with level tool |
Common Challenges and Solutions during Setup
Identifying misalignment and vibration issues. Troubleshooting common threading problems.Setting up a lathe threading tool can feel like herding cats—lots of chaos and maybe a few scratches! One common problem is misalignment. If your tool isn’t straight, you’ll end up with messy threads. Check the alignment with a simple ruler or a laser. Vibration issues? They can shake things up quite literally! To calm things down, ensure the machine is securely mounted. Troubleshoot threading problems by checking the tool’s sharpness. Dull tools are like dull jokes—they just don’t cut it!
| Issue | Solution |
|---|---|
| Misalignment | Use a ruler or laser to check straightness. |
| Vibration | Securely mount the lathe. |
| Dull Tool | Sharpen or replace the tool. |
Safety Precautions and Best Practices
Personal protective equipment (PPE) recommendations. Safe operation protocols during threading.Before you dive into your lathe threading tool adventures, putting on your personal protective equipment (PPE) is a must. Think of it as your superhero costume, complete with safety glasses and gloves! Always check your gear before starting work. Follow safe operation protocols like maintaining a clean workspace and keeping your hands away from moving parts. Remember, that lathe isn’t a friendly pet—it’s more of a cranky dragon! Keeping calm and focused while working can save you from unfortunate surprises.
| Personal Protective Equipment | Purpose |
|---|---|
| Safety Glasses | Protects eyes from debris |
| Gloves | Prevents cuts and abrasions |
| Ear Protection | Reduces noise exposure |
| Steel-Toed Boots | Protects feet from heavy materials |
Maintenance Tips for Longevity of Threading Tools
Cleaning and storage best practices. Signs of wear and when to replace tools.Taking care of threading tools is crucial for a long life. First, keep them clean. Wipe off any metal shavings like you’re cleaning up after a kitchen party! Store them in a dry place to avoid rust. If you notice any cracks or chips, it’s time to say goodbye to that tool and get a new one. Tools should be as reliable as your best buddy.
| Signs of Wear | What to Do |
|---|---|
| Visible cracks or chips | Replace the tool |
| Worn cutting edges | Sharpen or get a new one |
| Inconsistent threading | Check for damage, then replace |
Keeping an eye on your tools can save you from big headaches. Remember, a little maintenance goes a long way in the workshop!
Comparative Analysis of Manual vs. CNC Threading Tools
Advantages and disadvantages of each approach. Use cases for manual and CNC threading setups.Manual threading tools are great for hands-on work, letting you feel like a wizard at the lathe. They’re cheaper and perfect for smaller jobs. You get a workout too! But, they can be slow and messy—like trying to eat spaghetti with chopsticks. On the other hand, CNC threading tools snap into action like a superhero. They are fast and perfect for big projects, but they come with a hefty price tag. Think of them as fancy robots that can make incredible threads in half the time. Here’s a quick comparison:
| Feature | Manual Tools | CNC Tools |
|---|---|---|
| Cost | Low | High |
| Speed | Slow | Fast |
| Complexity | Simple | Advanced |
| Use Cases | Small projects | Mass production |
In short, choose manual for fine-tuning your skills, and CNC when you need to unleash the threading beast!
Conclusion
In conclusion, setting up a lathe threading tool is essential for precise work. You need to check tool height, align it correctly, and adjust the speed. Practice makes perfect, so don’t hesitate to experiment on scrap material. We encourage you to read more about lathe tools and threading techniques to sharpen your skills. Happy machining!FAQs
Here Are Five Related Questions On The Topic Of Lathe Threading Tool Setup:Setting up a lathe threading tool is like preparing to draw a line. First, make sure the tool is sharp and clean. Then, you need to adjust the tool to the right angle for the thread. After that, check the speed of the lathe, so it spins just right. Finally, start the lathe and move the tool along slowly to cut the thread.
Sure! Please give me the question you’d like me to answer.
What Are The Essential Considerations For Selecting The Appropriate Threading Tool For A Lathe?When you choose a threading tool for a lathe, consider the material you are working with. You need a tool that can cut through it well. Think about the size of the thread you want to make, too. Finally, make sure the tool fits your lathe so it works safely and easily.
How Do You Properly Set The Tool Height And Alignment For Accurate Threading On A Lathe?To set the tool height on a lathe, you want the cutting tool to be at the same level as the center of the workpiece. You can use a ruler or a tool height gauge to check this. For alignment, make sure the tool is straight and facing the right direction. You can adjust it by moving the tool holder until it’s perfect. This helps you make clean and accurate threads.
What Factors Should Be Taken Into Account When Determining The Correct Feed Rate For Threading Operations?When choosing the right feed rate for threading, you should think about a few things. First, consider the type of material you are working with. Softer materials can go faster, while harder ones need a slower speed. Also, check the tool you’re using; some tools work better at different speeds. Lastly, make sure to look at the machine’s power to handle the threading correctly.
How Can You Adjust The Lathe’S Spindle Speed For Optimal Threading Results Based On The Material Being Threaded?To get the best threading results, you need to change the lathe’s spindle speed. First, look at the material you’re using. Soft materials like aluminum need a higher speed. Hard materials like steel need a lower speed. Always remember to test the speed before starting your work.
What Troubleshooting Steps Can Be Taken If The Threads Produced On A Lathe Do Not Meet The Desired Specifications?If the threads on your lathe don’t look right, first check the settings. Make sure the numbers are correct for the size you want. Next, look at the tool you’re using. If it’s dull or damaged, replace it. Finally, try changing the speed of the lathe. Sometimes, going slower helps make better threads.
{“@context”:”https://schema.org”,”@type”: “FAQPage”,”mainEntity”:[{“@type”: “Question”,”name”: “Here Are Five Related Questions On The Topic Of Lathe Threading Tool Setup:”,”acceptedAnswer”: {“@type”: “Answer”,”text”: “Setting up a lathe threading tool is like preparing to draw a line. First, make sure the tool is sharp and clean. Then, you need to adjust the tool to the right angle for the thread. After that, check the speed of the lathe, so it spins just right. Finally, start the lathe and move the tool along slowly to cut the thread.”}},{“@type”: “Question”,”name”: “”,”acceptedAnswer”: {“@type”: “Answer”,”text”: “Sure! Please give me the question you’d like me to answer.”}},{“@type”: “Question”,”name”: “What Are The Essential Considerations For Selecting The Appropriate Threading Tool For A Lathe?”,”acceptedAnswer”: {“@type”: “Answer”,”text”: “When you choose a threading tool for a lathe, consider the material you are working with. You need a tool that can cut through it well. Think about the size of the thread you want to make, too. Finally, make sure the tool fits your lathe so it works safely and easily.”}},{“@type”: “Question”,”name”: “How Do You Properly Set The Tool Height And Alignment For Accurate Threading On A Lathe?”,”acceptedAnswer”: {“@type”: “Answer”,”text”: “To set the tool height on a lathe, you want the cutting tool to be at the same level as the center of the workpiece. You can use a ruler or a tool height gauge to check this. For alignment, make sure the tool is straight and facing the right direction. You can adjust it by moving the tool holder until it’s perfect. This helps you make clean and accurate threads.”}},{“@type”: “Question”,”name”: “What Factors Should Be Taken Into Account When Determining The Correct Feed Rate For Threading Operations?”,”acceptedAnswer”: {“@type”: “Answer”,”text”: “When choosing the right feed rate for threading, you should think about a few things. First, consider the type of material you are working with. Softer materials can go faster, while harder ones need a slower speed. Also, check the tool you’re using; some tools work better at different speeds. Lastly, make sure to look at the machine’s power to handle the threading correctly.”}},{“@type”: “Question”,”name”: “How Can You Adjust The Lathe’S Spindle Speed For Optimal Threading Results Based On The Material Being Threaded?”,”acceptedAnswer”: {“@type”: “Answer”,”text”: “To get the best threading results, you need to change the lathe’s spindle speed. First, look at the material you’re using. Soft materials like aluminum need a higher speed. Hard materials like steel need a lower speed. Always remember to test the speed before starting your work.”}},{“@type”: “Question”,”name”: “What Troubleshooting Steps Can Be Taken If The Threads Produced On A Lathe Do Not Meet The Desired Specifications?”,”acceptedAnswer”: {“@type”: “Answer”,”text”: “If the threads on your lathe don’t look right, first check the settings. Make sure the numbers are correct for the size you want. Next, look at the tool you’re using. If it’s dull or damaged, replace it. Finally, try changing the speed of the lathe. Sometimes, going slower helps make better threads.”}}]}