Live centers for lathes are rotating pointed accessories that support the workpiece from the tailstock end, allowing it to spin freely with the headstock’s drive, preventing friction and wobbling for precise machining.
Ever stared at your lathe, a sleek piece of metal waiting to be shaped, and wondered how to get that perfect support from the tailstock end? It’s a common puzzle for anyone starting out. You need something that spins with your workpiece, not against it, to avoid annoying friction that ruins finishes and can even damage your tools. That’s where live centers come in! They’re your silent partners in achieving smooth, accurate turns. Don’t worry if you’re feeling a bit lost; this guide is designed to break it all down, making live centers easy to understand and use confidently on your lathe. We’ll cover what they are, why you need them, and how to pick the right one for your projects.
What Exactly Are Live Centers for Lathe?
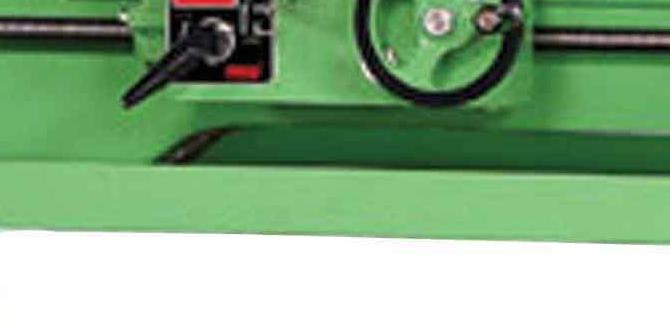
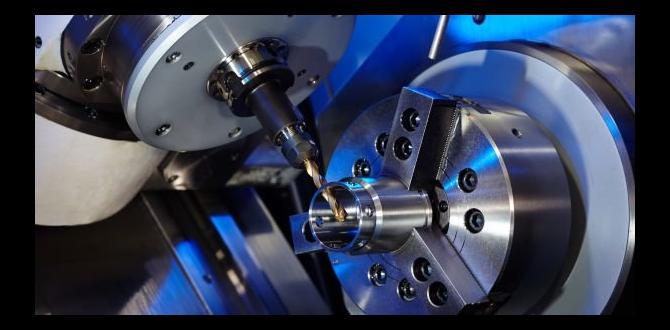
Imagine you’re turning a long, slender piece of wood or metal on your lathe. The headstock, with its chuck, grips one end and makes it spin. But what about the other end? If you just rest it on a fixed, non-rotating point (that’s a “dead center”), the friction would be immense! It would quickly heat up, scorch your workpiece, and make turning impossible. This is where the genius of a live center shines.
A live center is an accessory that attaches to your lathe’s tailstock. Unlike a dead center, a live center has bearings inside that allow its pointed tip to rotate along with the workpiece. This means the end of your workpiece is supported and spins freely, drastically reducing friction and heat. Think of it like a tiny, super-smooth spinning top supporting the far end of your spinning project. This ability to rotate is what makes them “live.”
They come in various forms, but the core principle is the same: support without resistance. This makes them absolutely essential for anyone looking to achieve a good finish and maintain accuracy, especially when working with longer or more delicate pieces.
Why Are Live Centers So Important for Lathe Work?
Using a live center isn’t just a nice-to-have; it’s a fundamental step for many lathe operations. Here’s why they’re so crucial:
- Reduced Friction: This is the primary benefit. By rotating with the workpiece, live centers minimize the rubbing between the tailstock support and the material. Less friction means less heat buildup.
- Improved Surface Finish: Less heat and friction translate directly into a smoother, cleaner finish on your workpiece. Scorching and marring are significantly reduced.
- Enhanced Accuracy and Stability: A securely supported, freely rotating workpiece is a stable workpiece. This stability is vital for maintaining precise dimensions and achieving repeatable results. It reduces wobbles and vibrations.
- Extended Tool Life: When your workpiece is stable and turning smoothly, your cutting tools experience less strain. This can help them last longer and perform better.
- Allows for Longer Workpieces: Without a live center, turning long, slender pieces would be practically impossible due to the friction issues. Live centers enable you to tackle these more ambitious projects.
- Safety: While a dead center can cause dangerous heat buildup and potential workpiece ejection, a live center provides a more stable and controlled turning experience, contributing to a safer workshop environment. Always remember to follow proper safety precautions when operating any lathe. You can find excellent safety guidelines from organizations like the Occupational Safety and Health Administration (OSHA) on their machine safeguarding page.
Types of Live Centers
Not all live centers are created equal! They come in different configurations, each suited for specific tasks and workpiece types. Understanding these variations will help you choose the right one.
Standard Live Centers
This is your workhorse, the most common type you’ll encounter. It features a pointed spindle supported by bearings (usually ball bearings or roller bearings). It’s perfect for general-purpose turning when you need to support the end of your workpiece from the tailstock.
Ball-Bearing Live Centers
These are a type of standard live center that specifically uses ball bearings. They offer excellent rotational accuracy and can handle moderate to high speeds. They are very common and a great choice for most DIY and light industrial applications.
Combination Live Centers
These are versatile! A combination live center typically has a removable point. You can use it as a standard live center with the point installed, or remove the point to expose a revolving cup or a receptacle for tooling, like a drill bit. This makes them handy for operations where you might need to drill into the end of your workpiece.
Pipe Centers (or Pipe Live Centers)
Designed specifically for holding hollow workpieces like pipes or tubes. Instead of a sharp point, they often have a slightly rounded or flared tip that sits inside the hollow end of the pipe, providing stable support without piercing the material.
Bullnose Live Centers
These are designed for supporting the bore of a workpiece. They have a slightly tapered, blunt nose that fits into a hole or recess, providing support from the inside. They are useful when you need to turn the outside of a bell-shaped object or a piece with a large bore.
Heavy-Duty Live Centers
For those really demanding jobs, heavy-duty live centers are built with robust bearings and a sturdier construction to handle heavier loads and higher torque applications. They are often used in industrial settings for larger machines and tougher materials.
Parts of a Live Center
Understanding the different parts helps you appreciate how they work and how to use them correctly. While designs vary, most live centers share these core components:
- Spindle: This is the rotating shaft that holds the point or tip. It’s supported by the bearings.
- Point/Tip: This is the part that contacts the workpiece. On standard live centers, it’s a sharp, conical point.
- Bearings: These are the heart of the live center, allowing the spindle to rotate smoothly with minimal friction. Common types include ball bearings and roller bearings.
- Housing/Body: This is the main C-shaped or cylindrical part that encloses the bearings and spindle. It’s the part that attaches to the tailstock.
- Shank: This is the tapered or straight end of the live center that fits into the tailstock’s quill. Morse taper shanks are the most common for lathe tailstocks.
How to Choose the Right Live Center
Selecting the correct live center is key to a successful machining project. Consider these factors:
- Lathe Size and Taper: Your lathe’s tailstock will have a specific taper (usually Morse taper numbers like MT1, MT2, MT3, MT4). You need a live center with a shank that matches this taper. Check your lathe’s manual or measure the tailstock bore to determine the correct taper size.
- Workpiece Material and Size: For general-purpose wood or soft metal turning, a standard ball-bearing live center is usually sufficient. For heavier metals or larger pieces, you might need a more robust or heavy-duty model.
- Type of Operation: Are you just doing basic turning? A standard center is fine. Need to drill into the end of your workpiece? A combination center with a drill bit holder might be ideal. Working with pipes? Look for a pipe center.
- Speed Requirements: If you plan on running your lathe at higher speeds, ensure the live center is rated for those speeds. Higher-quality bearings and good lubrication are crucial for high-speed operation.
- Budget: Live centers range in price from affordable options for hobbyists to more expensive, high-precision units for professionals. Determine what you need and what fits your budget.
How to Use a Live Center: A Step-by-Step Guide
Using a live center is straightforward once you understand the process. Here’s how to get it done safely and effectively.
Step 1: Identify Your Tailstock Taper
First, confirm the taper size of your lathe’s tailstock. Most smaller to medium lathes use Morse Taper #2 (MT2). Larger lathes might use MT3 or MT4. If you’re unsure, consult your lathe’s manual or look up “Morse taper sizes” online to compare with your machine.
Step 2: Select the Correct Live Center
Based on your tailstock taper and the type of work you plan to do (as discussed in the “How to Choose” section), select your live center. Ensure its shank matches your tailstock taper.
Step 3: Mount the Drive Center (Headstock End)
Before you can use a live center, you need a way to drive your workpiece from the headstock. This is typically done with a “drive center” or “spur drive.
For woodturning, you’ll usually use a drive center – a screw-in point that bites into the end of your workpiece.
For metal turning, you’ll often use a chuck with jaws that grip the workpiece, or a different type of drive setup. Let’s assume you’re using a common drive center for this guide.
Insert the drive center into your lathe’s spindle (or chuck) and tighten it securely.
Step 4: Prepare Your Workpiece
If you’re using a drive center that screws into the workpiece, you might need to start a pilot hole in the end of your stock. For wood, this is usually done with a drill bit. For metal, a center drill is often used.
Ensure the end where the live center will contact is relatively flat and clean. It doesn’t need to be perfectly smooth, but free of major debris.
Step 5: Mount the Workpiece
Attach your workpiece to the headstock via the drive center. Screw the drive center into your workpiece until it’s firmly seated. Ensure it’s centered as best as possible.
Step 6: Insert the Live Center into the Tailstock
Clean the inside of your tailstock quill (the part that extends and retracts). Insert the shank of your live center into the quill. The taper should seat firmly.
Tip: If your tailstock uses a drawbar mechanism or the taper doesn’t feel secure, you may need to use a tang or a knockout bar to push it out if it gets stuck. For general use, it should simply slide in and stay put.
Step 7: Advance the Tailstock and Apply Pressure
Carefully swing the tailstock towards the headstock and the workpiece. Bring the point of the live center into contact with the end of your workpiece. You want to apply just enough pressure to support the workpiece firmly, but not so much that it deforms soft materials or puts excessive strain on the bearings.
A good rule of thumb is to apply pressure until the workpiece can’t be easily wiggled at the tailstock end, but you should still be able to slightly turn the workpiece by hand (though it might be stiff). If the workpiece spins very freely by hand, you might not have enough pressure. If it’s impossible to turn by hand, you might have too much.
Ensure the tailstock is locked in place securely.
Step 8: Check Alignment and Clearance
With the tailstock advanced, check that the workpiece lines up correctly with the headstock. Make sure there is clearance for your cutting tools to pass over the entire length of the workpiece without hitting the live center (unless you intend to). Also, check that the live center bearings are spinning freely as you begin to turn the lathe on at a very low speed.
Step 9: Start Turning (Slowly!)
Begin turning your lathe at a slow speed, especially when first engaging the cutting tool. Listen for any unusual noises and watch for excessive vibration. Gradually increase the speed as appropriate for your material and the operation, keeping an eye on the finish and the temperature of the live center (it should not get excessively hot).
Step 10: Retract and Re-adjust if Necessary
Periodically, you may need to retract the tailstock slightly to apply more pressure as the workpiece may be subject to slight compression or wear. If you notice any wobbling or instability, stop the lathe and re-adjust the tailstock pressure.
Maintenance for Your Live Centers
To ensure your live center performs reliably for years to come, a little maintenance goes a long way.
- Keeping them Clean: Always keep live centers clean and free from dust, chips, and debris. Wipe them down after each use.
- Lubrication: Many live centers have a grease fitting (a Zerk fitting) for lubrication. Periodically add a small amount of appropriate grease. Consult the manufacturer’s recommendations for the type of grease. For centers without fittings, a light application of machine oil on the spindle can help, but be careful not to over-lubricate, as it can attract debris.
- Checking for Wear: Occasionally inspect the point for any damage and check the bearings for smooth rotation. If you feel roughness or hear grinding, it might be time for service or replacement.
- Storage: Store live centers in a clean, dry place, preferably in a protective case or box to prevent damage and contamination.
Live Center vs. Dead Center: What’s the Difference?
We’ve touched on this, but it’s worth a clear comparison. The fundamental difference lies in rotation.
| Feature | Live Center | Dead Center |
|---|---|---|
| Rotation | Point rotates with the workpiece (has bearings). | Point is fixed and does not rotate. |
| Friction | Very low friction; minimal heat buildup. | High friction; significant heat buildup. |
| Use Case | General turning, especially longer/slender pieces; for good finish & accuracy. | Limited use, primarily for very short/sturdy pieces where friction is negligible, or for specific drilling operations from the tailstock. |
| Workpiece Finish | Excellent, no scorching. | Poor, risk of scorching and burning. |
| Stability | High. | Lower, can cause wobble due to friction. |
| Commonality | Extremely common and essential for most lathe work. | Less common for general turning; sometimes used for facing or simple drilling. |
In essence, if you’re doing any significant turning from the tailstock end to support your workpiece, you’ll almost always want to use a live center. A dead center is generally only suitable for very short, stubby workpieces, or specific tasks where friction is less of a concern.
Common Issues and Troubleshooting
Even with the right tools, you might run into a few hiccups. Here’s how to deal with common problems:
- Workpiece Wobbles:
- Cause: Insufficient tailstock pressure, workpiece not centered on the drive, bent workpiece, or worn live center bearings.
- Solution: Increase tailstock pressure gradually. Re-center the workpiece on the drive center. Inspect the workpiece and drive center for damage. Check the live center for bearing play.
- Excessive Heat at the Live Center:
- Cause: Too much tailstock pressure (binding the bearings), insufficient lubrication, or running at very high speeds without proper cooling/lubrication.
- Solution: Reduce tailstock pressure. Ensure the live center is properly lubricated. If heat persists at normal speeds, the bearings might be damaged or the center might be a low-speed model.
- Live Center Seized or Difficult to Rotate:
- Cause: Lack of lubrication, debris in the bearings, or damage to the bearings.
- Solution: Clean thoroughly. Try adding a small amount of appropriate lubricant. If it still doesn’t spin freely, the bearings may need replacement or the entire center may need to be replaced.
- Scorching on Workpiece End:
- Cause: Using a dead center instead of a live center, or insufficient pressure from a live center allowing slippage and friction.
- Solution: Ensure you are using a live center. Check and increase tailstock pressure if needed while the lathe is stopped.
Frequently Asked Questions (FAQ)
What is the main purpose of a live center?
The main purpose of a live center is to support the workpiece from the tailstock end while allowing it to rotate freely along with the headstock. This prevents friction and heat buildup, leading to a better surface finish and increased accuracy.
How tight should a live center be against the workpiece?
You want enough pressure to support the workpiece firmly without wobbling, but not so much that it binds the bearings or deforms soft materials. The workpiece should be difficult to turn by hand but ideally still possible. If it feels impossibly stiff, you’re likely applying too much pressure