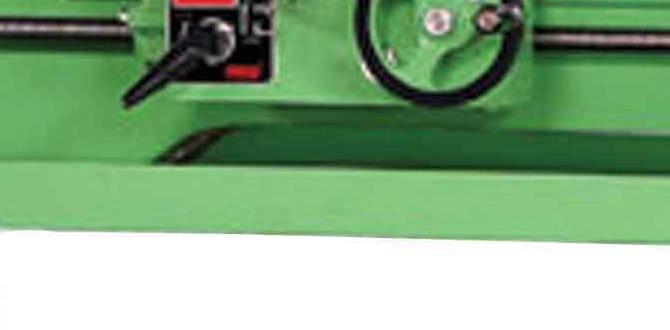
Have you ever wondered how to make your metal lathe work perfectly? A well-adjusted metal lathe can transform the way you create. One secret to success is the metal lathe shimming technique. This method helps ensure the lathe is level and aligned. It can make a big difference in your projects.
Imagine trying to cut metal with a lathe that isn’t set up right. Your pieces could end up uneven or even ruined. But, with the shimming technique, you can prevent this frustration. The shimming process is simple. It involves placing thin pieces of material, or shims, to stabilize your lathe.
Interestingly, many beginners overlook shimming. They might think it’s not necessary. But even a small adjustment can lead to better results. The right technique can help you achieve smooth, precise cuts.
Mastering The Metal Lathe Shimming Technique For Precision

Metal Lathe Shimming Technique
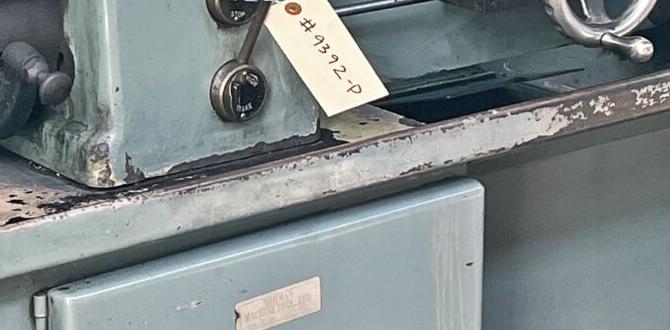
The metal lathe shimming technique is essential for accurate machining. This method involves placing thin shims between the machine base and the floor. It helps to level the lathe, ensuring proper alignment. Have you ever wondered why precision matters? A well-leveled lathe creates smoother cuts and better finishes. By understanding shimming, you can improve your projects. This simple technique can transform your work quality, leading to successful results in metal crafting.Understanding Metal Lathe Shimming
Definition and purpose of shimming in metal lathe operation. Common materials used for shims and their properties.Shimming is a method used in metal lathe operation to ensure everything is level and straight. This helps machines work better and cuts more accurately. Common materials for shims include:
- Metal: Strong and sturdy, great for heavy machines.
- Plastic: Lightweight and resistant to moisture.
- Cardboard: Easy to cut and adjust, but less durable.
Each type has special qualities that make it useful in different situations. Using the right shim can help avoid problems.
What is the purpose of using shims in metal lathe operations?
The purpose is to align and level the lathe components, ensuring precision in machining.
Importance of Proper Shimming
Impact of shimming on machining accuracy and surface finish. Consequences of improper shimming on tool wear and workpiece quality.Shimming matters more than you think! Proper shims can make a big difference in a lathe’s accuracy. They help keep everything aligned. This means better parts and smoother surfaces. On the flip side, if shims are off, it can cause tool wear and ruined workpieces. You won’t win any awards for wonky circles! Did you know that just 0.01 inches can throw off your precision? So, always double-check those shims!
| Impact of Proper Shimming | Consequences of Improper Shimming |
|---|---|
| Better machining accuracy | Increased tool wear |
| Smoother surface finish | Poor workpiece quality |
Identifying the Need for Shimming
Signs indicating a lathe requires shimming. Diagnostic methods to assess lathe alignment.When using a metal lathe, you might notice some warning signs. These signs show that shimming may be necessary. Look for inaccurate cuts or excessive vibration. Misalignment can cause these issues. To check for proper alignment, you can:
- Measure the distance between the spindle and tailstock.
- Use a straightedge to see if the bed is level.
- Inspect for any wear or damage on the lathe.
Identifying these issues early can save time and materials.
How can you tell if your lathe needs shimming?
Look for signs like uneven surfaces or difficulties in cutting. A rough finish can also suggest a problem. Checking your lathe regularly can prevent bigger issues later.
Step-by-Step Shimming Process
Tools and materials required for effective shimming. Detailed procedure for shimming a metal lathe accurately.To shim your metal lathe like a pro, you’ll need a few tools and materials. Grab shim stock, a feeler gauge, and a wrench. These are your metal lathe’s best friends! Start by turning off your lathe. Measure the gap with the feeler gauge and choose the right shim thickness. Slide it into place. Tighten everything back up, and give it a spin. It should work smoother than a penguin on ice!
| Tools/Materials | Purpose |
|---|---|
| Screwdriver | To adjust screws |
| Feeler Gauge | To measure gaps |
| Shim Stock | To create shims |
| Wrench | To tighten or loosen bolts |
Follow these steps, and you’ll have a lathe that runs smoother than a cat on a warm laptop!
Common Mistakes and How to Avoid Them
Typical errors made during the shimming process. Best practices for ensuring effective and precise shimming.Shimming can be tricky. Many people make common mistakes that hurt their results. Here are some errors to avoid:
- Not cleaning surfaces before shimming.
- Using incorrect shim thickness.
- Failing to check level frequently.
To do better, follow these best practices:
- Always clean your tools first.
- Use the right shim size for your machine.
- Double-check your level often.
These tips help ensure precise and effective shimming. Remember, a small mistake can lead to big problems later. Take your time!
What are some common mistakes in the shimming process?
The most common errors include not cleaning the surfaces, wrong shim thickness, and inconsistent leveling. Avoiding these mistakes will lead to better results.
What are the best practices for shimming?
Use right size shims, clean parts beforehand, and frequently check the level. These steps make your work smoother and more accurate!
Maintenance of Shims
Guidelines for inspecting and maintaining shims over time. When to replace shims to ensure optimal lathe performance.Shims play a crucial role in keeping your lathe smooth and efficient. Regular checks can help you spot any issues early. Here are some easy tips:
- Check for wear and tear regularly.
- Look for any cracks or bends in the shims.
- Ensure all shims fit snugly without gaps.
If shims show signs of damage, it’s time to replace them. This will help keep your machine running at its best.
When Should You Replace Shims?
You should replace shims if you notice any damage or improper fit. New shims ensure smooth lathe performance.
A well-maintained metal lathe can last many years. Remember, regular checks make a big difference!
Troubleshooting Shimming Issues
Common problems related to shimming and their solutions. Tips for improving shimming outcomes in complex machining tasks.Shimming can sometimes be tricky. Here are some common problems and their solutions:
- Uneven surfaces can lead to poor fitting. Check the surfaces and clean them well.
- Using the wrong shim material can cause issues. Choose the right type based on the machine.
- Incorrect shim sizes can lead to gaps. Measure carefully to ensure accuracy.
Improve shimming results with these tips:
- Always double-check measurements.
- Use high-quality shims for better support.
- Practice regularly to build confidence and skill.
With these steps, you can tackle shimming problems effectively!
What are common shimming issues?
Common issues include uneven fitting and using incorrect materials. Proper measurements and choosing the right shim can fix most problems. Always inspect your setup carefully.
Resources and Tools for Enhanced Shimming
Recommended tools and equipment to aid in the shimming process. Useful books, tutorials, and online communities for further learning.Finding the right tools can make shimming much easier. Here are some helpful items:
- Shim stock in various thicknesses
- Precision level for accurate measurements
- Calipers for checking sizes
- Dial indicator to measure alignment
Additionally, many resources are available for learning:
- Books: Look for guides on metalworking.
- Tutorials: YouTube has great videos.
- Online communities: Forums can provide valuable tips.
These tools and resources will help you master shimming!
What tools do I need for shimming?
You need shim stock, a precision level, calipers, and a dial indicator. These will help you achieve the best results.
Conclusion
In conclusion, mastering the metal lathe shimming technique improves your machining accuracy. Shimming helps align parts for smoother operation and better results. Remember to check levels and make adjustments as needed. If you’re new, start practicing with small projects. We encourage you to explore more about lathes and shimming techniques to enhance your skills. Happy machining!FAQs
What Is The Importance Of Shimming A Metal Lathe, And How Does It Affect Machining Accuracy?Shimming a metal lathe helps make sure everything lines up correctly. This means the parts you make will fit together better. When we shim properly, we get more accurate shapes and sizes. So, shimming is important for creating high-quality parts. It helps prevent mistakes in our work!
What Materials Are Commonly Used For Shimming A Metal Lathe, And What Are Their Properties?You can use several materials for shimming a metal lathe. Common ones include plastic, brass, and metal sheets. Plastic is lightweight and won’t rust. Brass is strong and helps with tight fits. Metal sheets are durable and can hold heavy loads. Each material helps to make the lathe run better and more smoothly.
How Can One Determine The Correct Thickness Of Shims Needed For Leveling A Lathe?To find the right thickness of shims for leveling a lathe, you start by checking the lathe’s current position. Use a level tool on the lathe bed. If it isn’t straight, measure how far off it is. Then, select shims that match that distance to lift it up. Make sure to test again after placing the shims to see if it’s level!
What Step-By-Step Procedure Should Be Followed For Applying Shims To A Metal Lathe?To apply shims to a metal lathe, first, you need to turn off the machine. Next, find the parts that need adjustment. Carefully remove the part and clean the surface. Then, pick the right shims to fill gaps. Finally, place the shims in place, reattach the part, and check if everything moves smoothly.
What Common Mistakes Should Be Avoided When Shimming A Lathe To Ensure Optimal Performance?When shimming a lathe, avoid using the wrong materials. Make sure you choose shims that are strong and flat. Don’t make the shims too thick; a little goes a long way. Always check for tightness after you adjust. Finally, remember to keep everything clean and free of dust.
{“@context”:”https://schema.org”,”@type”: “FAQPage”,”mainEntity”:[{“@type”: “Question”,”name”: “What Is The Importance Of Shimming A Metal Lathe, And How Does It Affect Machining Accuracy? “,”acceptedAnswer”: {“@type”: “Answer”,”text”: “Shimming a metal lathe helps make sure everything lines up correctly. This means the parts you make will fit together better. When we shim properly, we get more accurate shapes and sizes. So, shimming is important for creating high-quality parts. It helps prevent mistakes in our work!”}},{“@type”: “Question”,”name”: “What Materials Are Commonly Used For Shimming A Metal Lathe, And What Are Their Properties? “,”acceptedAnswer”: {“@type”: “Answer”,”text”: “You can use several materials for shimming a metal lathe. Common ones include plastic, brass, and metal sheets. Plastic is lightweight and won’t rust. Brass is strong and helps with tight fits. Metal sheets are durable and can hold heavy loads. Each material helps to make the lathe run better and more smoothly.”}},{“@type”: “Question”,”name”: “How Can One Determine The Correct Thickness Of Shims Needed For Leveling A Lathe? “,”acceptedAnswer”: {“@type”: “Answer”,”text”: “To find the right thickness of shims for leveling a lathe, you start by checking the lathe’s current position. Use a level tool on the lathe bed. If it isn’t straight, measure how far off it is. Then, select shims that match that distance to lift it up. Make sure to test again after placing the shims to see if it’s level!”}},{“@type”: “Question”,”name”: “What Step-By-Step Procedure Should Be Followed For Applying Shims To A Metal Lathe? “,”acceptedAnswer”: {“@type”: “Answer”,”text”: “To apply shims to a metal lathe, first, you need to turn off the machine. Next, find the parts that need adjustment. Carefully remove the part and clean the surface. Then, pick the right shims to fill gaps. Finally, place the shims in place, reattach the part, and check if everything moves smoothly.”}},{“@type”: “Question”,”name”: “What Common Mistakes Should Be Avoided When Shimming A Lathe To Ensure Optimal Performance? “,”acceptedAnswer”: {“@type”: “Answer”,”text”: “When shimming a lathe, avoid using the wrong materials. Make sure you choose shims that are strong and flat. Don’t make the shims too thick; a little goes a long way. Always check for tightness after you adjust. Finally, remember to keep everything clean and free of dust.”}}]}