A mini wood lathe is an essential tool for any small shop, offering a compact yet powerful way to shape wood projects with precision. It’s perfect for hobbyists and DIYers who want to create beautiful turned items without needing a large workspace.
Working with wood can be incredibly rewarding, allowing you to craft everything from decorative bowls to functional furniture. Sometimes, though, the tools needed seem too big or too complex for a cozy home workshop. If you’ve ever dreamed of turning wood into art but felt limited by space, you’re not alone. Many makers find themselves wishing for a way to enjoy the craft of turning without a massive footprint. The good news is, there’s a perfect solution. In this guide, we’ll explore why a mini wood lathe is a truly essential tool for small shops and how it can unlock your creative potential. Get ready to discover how to bring your woodworking visions to life, right in your own space!
Why a Mini Lathe Is Ideal for Small Shops
When you think of a wood lathe, maybe you picture a sprawling workshop with industrial-sized machines. But for many of us, space is a precious commodity. This is where the “mini” in mini wood lathe becomes a game-changer. These machines are designed with compact spaces in mind, offering fantastic functionality without hogging all your valuable workshop real estate.
A mini wood lathe is essentially a scaled-down version of its larger counterparts. It still provides the core function: spinning a piece of wood at high speed so you can shape it with chisels and other tools. The beauty lies in its efficiency. They typically have smaller swings (the diameter of the workpiece they can handle) and shorter bed lengths, making them perfect for smaller projects like pens, bottle stoppers, small bowls, and spindle work. Think of it as a precision instrument perfectly suited for detailed, smaller-scale turning.
Space-Saving Design
The most obvious benefit is the footprint. Mini lathes are incredibly compact. Many can even be stored on a workbench or in a corner when not in use. This is a huge advantage for anyone working in a garage, a spare room, or a small dedicated woodworking space. You don’t need a dedicated large room to get started with woodturning. This allows you to maximize your existing space for other tools and tasks.
Affordability
Generally, mini wood lathes are more budget-friendly than full-sized lathes. This makes them an excellent entry point for beginners who want to try woodturning without a significant financial commitment. You can often find a capable mini lathe for a few hundred dollars, allowing you to invest in some basic turning tools and still stay within a reasonable budget. This accessibility is key for many hobbyists starting out.
Ease of Use and Portability
Mini lathes are often lighter and simpler in design than larger machines, which can make them easier to set up and operate. If you need to move your lathe around your shop or even take it to a woodworking class, their smaller size and weight make this considerably more manageable. Many are designed with portability in mind, perhaps with a carrying handle or a compact form factor that’s easy to maneuver.
Perfect for Specific Projects
- Pen turning
- Bottle stoppers
- Small bowls and boxes
- Spindles for small furniture or decorative items
- Craft items
Key Features to Look For in a Mini Wood Lathe
Choosing the right mini wood lathe involves looking beyond just the price tag. Several key features will determine its performance, durability, and suitability for your needs. Focusing on these will help you make a smart investment that will serve you well. Think of these as the building blocks of a good turning experience.
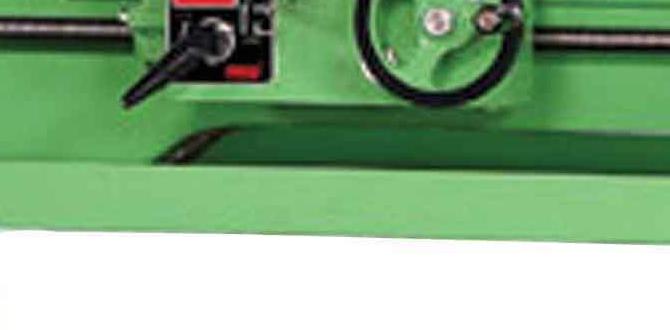
Motor Power and Speed Control
This is crucial for how well your lathe can handle different wood types and turning tasks. Most mini lathes have motors ranging from 0.5 to 1 HP. For beginners, a 0.5 HP motor is often sufficient for smaller projects. More power will help if you plan to work with larger or harder woods occasionally, or if you want to reduce chatter.
Variable Speed Control: This is arguably the most important feature for a beginner. The ability to adjust the lathe’s speed is essential for safety and for achieving a smooth finish.
- Lower speeds: are safer for initial shaping, roughing out, and working with unbalanced or green wood.
- Higher speeds: are great for fine finishing and sanding.
Look for a lathe with a decent speed range, typically starting from around 500 RPM and going up to 3500-4000 RPM. This range provides excellent versatility.
Bed Construction and Length
The bed of the lathe is the main structural component it rests on. It needs to be sturdy to absorb vibrations. Look for models with a solid cast iron bed if possible, as this offers the best stability. Cheaper models might use steel or composite materials, which can work but may be more prone to vibration.
Bed Length: This determines the maximum length of workpiece you can turn. For a mini lathe, bed lengths typically range from 12 to 20 inches. For projects like pens and small spindles, this is usually plenty. If you envision turning slightly larger items, look for a lathe with the longest bed you can manage in your space.
Tool Rest Design
The tool rest is where you support your turning tools as you shape the wood. A good tool rest is adjustable and sturdy. Look for solid metal construction that won’t flex or vibrate. The ability to easily adjust its height, angle, and position is vital for comfortable and safe turning.
Headstock and Tailstock Tapers
These are the points where your drive center (headstock) and live center (tailstock) mount. Most mini lathes use a standard Morse Taper (MT), usually MT1. This is important because it dictates the types of accessories and chucks you can use. MT1 is common on mini lathes and readily available accessories will fit.
Spur Drive Center: This is mounted in the headstock and digs into the wood to drive it. Look for a sharp, well-made spur center.
Live Center: This is mounted in the tailstock and supports the other end of the workpiece. A live center spins with the wood, reducing friction and heat.
Swing Capacity
The swing is the maximum diameter of a workpiece the lathe can accommodate. This is often specified in two ways: the swing over the bed and the swing over the tool rest. For a mini lathe, the swing over the bed might be around 10-12 inches, and the swing over the tool rest might be 7-8 inches. This is perfectly adequate for most small projects. If you plan to turn shallow, wide bowls, you might need to consider a lathe with a larger swing or one that can be enhanced with bed extensions (though this is less common for mini lathes).
Weight and Stability
A heavier lathe generally means more stability and less vibration, leading to a smoother finish. While mini lathes are designed to be compact, their weight is still a factor. Look at the overall weight of the machine. It’s also a good idea to place your mini lathe on a sturdy workbench or use a dedicated stand designed to absorb vibrations. Adding a layer of dense rubber matting underneath can also help.
Essential Mini Lathe Accessories for Beginners
Once you have your mini wood lathe, you’ll need a few key accessories to get started. Think of these as your essential toolkit. While you can expand your collection over time, these items will allow you to begin turning safely and effectively.
Turning Tools
You can’t turn wood without tools! For beginners, a small set of essential turning tools is usually sufficient. These typically include:
- Spindle Gouge: Used for creating concave shapes and smoothing.
- Roughing Gouge: A robust tool for removing material quickly to create a cylindrical or basic shape.
- Skew Chisel: Versatile for scraping, slicing, and smoothing.
- Scrapers: Useful for smoothing difficult grain or creating flat surfaces.
Many tool manufacturers offer beginner sets that provide a good starting point. It’s worth investing in good quality tools as they will hold an edge longer and be easier to sharpen, which is crucial for safe and effective turning.
Chucks and Faceplates
While you can mount wood using just centers and spurs, a chuck offers much greater versatility and security, especially for bowl turning. A scroll chuck with interchangeable jaws is a popular choice. For a mini lathe, a smaller chuck designed for compact machines is ideal.
- Faceplate: This is a flat disc that screws onto the lathe’s spindle. You then attach your workpiece (like a bowl blank) to the faceplate using screws. It’s a simple and secure way to mount face-grain bowl blanks.
- Scroll Chuck: A more advanced accessory that grips the workpiece from the inside or outside of a tenon. It’s essential for hollowing out bowls and offers a safer grip than just screws. For a mini lathe, look for chucks with a ¾” x 16 TPI or 1” x 8 TPI spindle thread, depending on your lathe.
Safety Gear (Always!)
Safety is paramount when woodworking, and woodturning is no exception. Always wear appropriate safety gear:
- Safety Glasses or Face Shield: Essential to protect your eyes from flying chips and dust. A full face shield is highly recommended as it covers your entire face. You can find excellent full-face shields designed for woodworking, such as the Aegis face shield, which offers great clarity and protection.
- Dust Mask or Respirator: Wood dust can be harmful. Wear a good quality dust mask or respirator, especially when sanding.
- Hearing Protection: Lathes can be noisy. Earplugs or earmuffs are a good idea.
- No Loose Clothing or Jewelry: Anything that can get caught in the spinning lathe must be removed.
Sharpening Equipment
Sharp tools are not only safer but also make your work much easier and produce better results. You’ll need a way to sharpen your turning tools. This could include:
- Sharpening stones (water stones or oil stones)
- Diamond sharpening plates
- A grinding wheel with appropriate jigs (e.g., a Wolverine grinding jig)
Learning to sharpen your tools properly is a skill that will significantly improve your turning experience.
Micro-Jigs and Other Useful Items
- Workbench or Sturdy Stand: To ensure the lathe is stable and at a comfortable working height.
- Tailstock Die Grinder Adapter: For those interested in grinding metal parts on their lathe. (Less common for pure woodturning but shows versatility).
- Vacuum Cleaner: For cleaning up dust and shavings.
- Measuring Tools: Calipers and rulers for precise measurements.
Getting Started with Your Mini Lathe: A Step-by-Step Approach
You’ve got your mini lathe and your essential accessories. Now it’s time to turn some wood! Don’t be intimidated; breaking down the process into simple steps makes it manageable and enjoyable. Remember, your first few projects are about learning the feel of the tools and the lathe. Safety first, always!
Step 1: Set Up and Safety Check
Before you even plug in the lathe, ensure it’s set up correctly. It should be on a stable, level surface. If it has rubber feet, make sure they are gripping the surface. Check that the headstock and tailstock align properly. Ensure all locking knobs are tight. Turn on the lathe with no wood on it for a minute to check for any unusual noises or vibrations. Confirm your safety gear is on and accessible.
Step 2: Selecting and Mounting Your Wood
For your first project, choose a piece of medium-density softwood like pine or poplar. These are easier to cut and less likely to splinter. Make sure your wood is relatively square or round and free of major cracks or defects. A good beginner method is to use a faceplate:
- Find the center of your wood blank.
- Securely screw the wood blank to a faceplate, ensuring at least three screws are used for stability.
- Mount the faceplate onto the lathe’s spindle (usually at the headstock end).
- Support the other end of the wood with the tailstock live center. This helps stabilize the blank during initial shaping.
Alternatively, you can use a spur drive center. Mount this on the headstock spindle. For your wood blank, drill a pilot hole into the end grain, then tap the spur center into the wood. Again, use the tailstock live center to support the other end.
Step 3: Roughing the Wood to Shape
Start with the lathe turned to a slow speed, perhaps 500-1000 RPM. This is where the roughing gouge comes in handy. Position the tool rest very close to the wood, but not touching. Lower the speed further if you feel any significant wobble. With your roughing gouge held firmly, engage the wood with a slicing motion, gradually removing material to create a basic cylinder or to round over the corners of your square blank. Gradually increase the speed as the wood becomes more balanced and round. For a beginner, it’s often best to aim for a manageable diameter for your first project.
Step 4: Shaping Your Piece
Once the wood is roughly cylindrical, you can switch to other tools like the spindle gouge or skew chisel to refine the shape. Work from the slowest practical speed up to a faster speed as your shape refines. Constantly ensure your tool rest is correctly positioned and that your tools are sharp. Experiment with different cuts and angles. For example, a skew chisel held at an angle can create smooth concave and convex surfaces.
Step 5: Sanding and Finishing
This is often done at higher speeds (2000-3500 RPM, depending on the wood and lathe). Start with a coarser grit sandpaper (e.g., 100-120 grit) and work your way up to finer grits (e.g., 220, 320, or even 400+). Apply sandpaper by holding it against the spinning wood, often wrapping it around a sanding block or using a sanding jig. Be careful not to create flat spots. Once sanded smooth, you can apply a finish like mineral oil, shellac, or a polyurethane. Apply finishes while the lathe is spinning slowly, or turn it off and apply to a stationary surface, then spin up slowly to distribute.
Step 6: Releasing the Workpiece
Turn off the lathe. Ensure the spindle has completely stopped. Carefully remove the tailstock center, then you can unscrew the faceplate or remove the wood from the spur center. Congratulations, you’ve made your first turned piece!
Safety Best Practices for Mini Lathe Users
Woodturning can be incredibly safe and enjoyable when you follow good practices. Mini lathes, like all power tools, demand respect. Here are essential safety tips to make sure you have a great experience:
Always Wear Proper PPE
This cannot be stressed enough. Your eyes are irreplaceable. Always wear safety glasses or a full face shield. Use hearing protection. Wear a dust mask or respirator when creating fine dust. Avoid loose clothing, long sleeves, jewelry, or anything that could get caught in the spinning wood or lathe.
Ensure Tool Rest is Secure and Close
The tool rest should be positioned as close to the workpiece as possible without touching it. This prevents tools from catching and digging into the wood unexpectedly. Never turn