Quick Summary:
Thread cutting tools for your lathe are essential for creating precise external and internal threads on metal or wood. Understanding the different types, how to use them safely, and proper setup ensures you can confidently tackle any threading project, from simple nuts to custom machine parts.
Hey there, fellow makers! Daniel Bates here from Lathe Hub. Ever looked at a bolt or a threaded hole and thought, “How did they do that?” It’s all about thread cutting. This is a fundamental skill, but getting it right on your lathe can feel a bit daunting at first. Don’t worry, though! Many beginners struggle with getting clean, accurate threads. Today, we’re going to break down the “genius essentials” – the thread cutting tools for your lathe that you absolutely need to know about. With a little guidance, you’ll be threading like a pro in no time.
Understanding Thread Cutting: The Basics
Creating threads on your lathe involves a carefully controlled turning process. It’s not just about spinning a piece of material; it’s about a precise, repeatable movement of the cutting tool along or into the workpiece. This creates the helical groove we call a thread. Getting good threads is crucial for many projects, whether you’re making fasteners, assembling components, or creating decorative elements.
Imagine trying to screw a nut onto a bolt, but the threads don’t quite line up. Frustrating, right? Accurate thread cutting ensures that parts fit together smoothly and securely. It’s a hallmark of good craftsmanship and a skill that opens up a whole new world of project possibilities on your lathe.
Why Thread Cutting Tools Are “Genius Essentials”
Think of thread cutting tools as the specialized keys that unlock the ability to create functional, precise screw threads. They are designed to do one job exceptionally well: to cut the specific profile of a thread. Without them, you’d be trying to approximate threads with standard turning tools, which is an almost impossible task for achieving accuracy and repeatability.
These tools are “genius” because they simplify a complex process. Instead of trying to manually form each single thread groove, a thread cutting tool, guided by the lathe’s lead screw and change gears, automatically creates the perfect helix. They are essential because they are the correct tools for the job, ensuring the threads you cut are functional, strong, and meet standard specifications.
Types of Thread Cutting Tools for Your Lathe
When we talk about thread cutting tools for lathes, we’re primarily referring to threading inserts or solid tooling specifically designed for this purpose. These fall into a few main categories based on the type of thread they produce:
1. External Threading Tools (For cutting threads on the outside of a workpiece)
These are perhaps the most commonly used. They are designed to cut threads onto rods, shafts, or bolts. An external threading toolbit has a pointy profile that matches the angle and pitch of the specific thread you want to cut.
- Solid Threading Tools: These are single pieces of tool steel ground to a specific thread profile. They can be sharpened but require skill to maintain the correct profile.
- Insert Threading Tools: These tools hold small, replaceable inserts that are pre-ground to specific thread profiles. This is often the preferred method for beginners as it’s easier to get a sharp cutting edge and switch between different thread types by simply swapping the insert.
2. Internal Threading Tools (For cutting threads inside a hole)
These tools are shaped differently because they need to reach inside a pre-drilled hole to create internal threads, like those found in nuts or tapped holes. They are often narrower and have a different clearance angle.
- Internal Threading Bar with Inserts: Similar to external tools, these use a bar to reach into a hole and hold replaceable inserts. The inserts are designed for internal threading.
- Boring Bar Style Internal Threaders: Some internal threading tools are essentially modified boring bars that hold specialized threading inserts.
3. Specialized Threading Tools
Beyond basic external and internal threads, there are tools for specific thread types:
- Acme Thread Tools: Used for general-purpose machine screw threads that require more strength and reduced friction than standard V-threads. They have a squarer profile.
- Metric Thread Tools: These are designed to cut threads according to ISO metric standards (e.g., M6x1.0, M10x1.5). The pitch is measured in millimeters.
- Unified National Coarse (UNC) and Fine (UNF) Tools: These cut threads according to inch-based standards. UNC is for general use, while UNF is for applications requiring finer adjustments or higher tensile strength.
- Pipe Thread Tools (NPT/NPTF): These tools cut tapered threads specifically designed for sealing pipes. They require a specific angle of taper in addition to thread pitch.
Essential Thread Cutting Tools You Need to Start
As a beginner, you don’t need every single type of threading tool out there. Start with the essentials. These will cover the majority of common threading tasks you’ll encounter.
The Absolute Must-Haves:
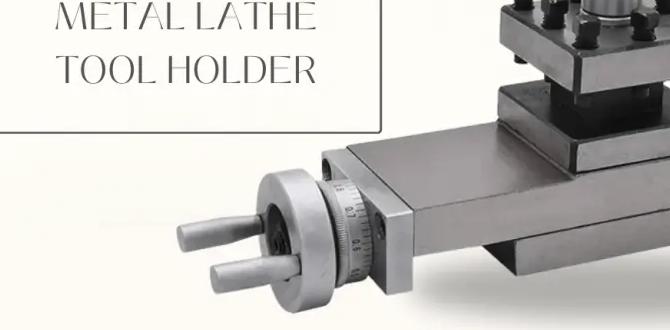
- A Versatile External Threading Tool Holder: This is your workhorse. Look for one that accepts standard indexable inserts.
- A Set of Common Threading Inserts: For inch-based machines, start with 60-degree inserts for threads like UNC/UNF. For metric machines, get inserts for common metric pitches. A good starting point is often a set that includes inserts for 11, 14, 18, and 20 TPI (Threads Per Inch) if you’re on an inch machine, or common metric pitches like 1.0, 1.5, and 2.0 if you’re on a metric machine.
Highly Recommended Additions:
- An Internal Threading Tool Holder with Inserts: Once you’ve mastered external threading, you’ll want to create internal threads.
- A Left-Hand External Threading Tool: While most threading is done by moving the carriage left, sometimes you need to cut a thread on the face of a part that will turn opposite to the main spindle direction. A left-hand tool is set up for this.
- A Parting Tool (Optional but useful): While not strictly a threading tool, a good parting tool is invaluable for preparing stock and facing off finished threaded parts, often used in conjunction with threading.
Setting Up for Successful Thread Cutting
Proper setup is arguably more important than the tool itself. Even the best tool will produce poor results if not set up correctly. Here’s what you need to focus on:
1. Lathe Preparation:
- Ensure Your Lathe is Clean and Lubricated: Ditch any chips or debris around the ways and lead screw. Proper lubrication is vital for smooth operation.
- Check Your Change Gears: Thread cutting requires specific gear changes to engage the lead screw correctly with the spindle rotation. Consult your lathe’s manual to set the correct gears for your desired thread pitch. This is critical. Mistake here means no thread or the wrong thread.
- Select the Correct Feed Rate: Thread cutting typically uses a slow feed rate. This is often achieved by setting the half-nuts to engage a slower gear ratio or by using a slower spindle speed.
2. Tool Setup:
- Tool Height: This is one of the most common areas for error. The cutting tip of your threading tool must be at the exact centerline height of your workpiece. Too high or too low will result in deformed threads and poor fit. Use a center gauge or your lathe’s tailstock center to verify.

Tip: Most lathes have a division line on the tailstock or carriage for setting tool height. A center gauge held against the workpiece helps you visually align.
- Tool Angle/Rake: The angle at which the threading tool is presented to the workpiece is also crucial. For most V-threads (like UNC/UNF/Metric V-threads), the tool is set perpendicular to the workpiece axis. However, when cutting threads on a taper, you might need to offset the toolpost or compound rest.
3. Workpiece Setup:
- Secure Mounting: Ensure your workpiece is securely held in the chuck or between centers. Any vibration or movement will ruin the thread.
- Accurate Diameter: The stock diameter is critical. Most threading charts specify the correct starting diameter for a given thread. It’s usually the major diameter of the thread minus the thread depth. Too large and the tool won’t cut, too small and the tool will cut too deep.
Threading: Step-by-Step Guide (External Threads)
Let’s walk through cutting a common external thread. We’ll assume you’ve already selected your gears for the desired thread pitch, set the tool height, and have your workpiece ready.
Step 1: Set Up Your Lathe
- Mount the workpiece securely.
- Ensure the correct change gears are engaged for your desired thread pitch.
- Set the lead screw half-nuts to the engaged position.
- Ensure the thread cutting dial (if your lathe has one) is set to engage on the correct revolution if you are not using power feed for the cross-slide.
Step 2: Position the Tool
- Bring the threading tool tip to touch the end of the workpiece.
- Set your carriage stop or carriage travel.
- Engage the cross-slide feed to the correct depth for the first pass. This is usually very shallow, especially for the first few passes.
Step 3: The First Cut
- Start the lathe spindle in the correct direction for threading (usually forward).
- As the spindle rotates, engage the lead screw by closing the half-nuts.
- Let the tool make its pass.
- At the end of the thread length, disengage the lead screw half-nuts before the tool reaches the chuck or end of the workpiece.
- Ensure the tool clears the workpiece.
Step 4: Reset and Recut
- Withdraw the tool using the cross-slide.
- Now, you have two options for your next pass:
- Using the Threading Dial: If your threading dial is set up, you can re-engage the half-nuts on the same line as your first engagement. This works well for threads with an even number of TPI or when using specific gear ratios.
- Using the Carriage Stop/Repositioning: You can manually back the carriage to the start position (using the carriage stop or by feel), or slightly disengage and re-engage the half-nuts at the very beginning of the thread path, ensuring you land on the same thread groove. Many modern lathes allow you to re-engage the half-nuts at any point and still land on an existing thread if your gears are set correctly, thanks to the controlled backlash. If you’re unsure, check your lathe’s manual, or err on the side of caution and always return the carriage to the exact start position.
- Advance the cross-slide by a small, predetermined amount for the second pass. The exact depth depends on the thread profile and material, but typically the first few passes are very shallow (e.g., 0.002″ – 0.005″ for steel).
- Start the lathe and engage the lead screw again.
- Disengage the half-nuts at the end of the pass and withdraw the tool.
Step 5: Repeat and Measure
- Repeat Step 4, gradually increasing the depth of cut with each pass.
- Use a thread gauge or a comparator with a known thread form to periodically check your progress. This is crucial for ensuring accuracy.
- Stop cutting when the thread profile matches your gauge and the diameter is correct.
Step 6: Finishing Touches
- A final light pass can help clean up the threads.
- For some materials, a light chamfer at the start of the thread can make it easier to start a mating part.
Important Safety and Best Practices
Thread cutting carries its own set of risks. Always prioritize safety. Here are some key points.
- Read Your Lathe Manual: Every lathe is different. Your manual is the ultimate guide for gear changes, threading dial usage, and specific safety features.
- Use Sharp Tools: Dull threading tools require more force, can lead to chatter, and produce poor-quality threads.
- Appropriate Depth of Cut: Don’t try to take large bites. Threading cuts are generally shallow. Taking too deep a cut can overload your lathe, break the tool, or ruin the workpiece.
- Lubrication: Use appropriate cutting fluid for the material you are threading. This cools the tool, lubricates the cut, and helps clear chips. You can find good recommendations from resources like NASA’s Machining Guidelines, which often detail such practices.
- Carriage Stop: Use a carriage stop to reliably return the tool to the same starting point for each pass, ensuring consistent thread depth and pitch.
- Never Reverse Spindle Mid-Thread: If you need to stop, disengage the half-nuts, then stop the spindle. Reversing the spindle while the half-nuts are engaged can damage the lead screw and gears.
- Clear Chips Regularly: Threads generate small, sharp chips. Clear them frequently with a brush to prevent them from interfering with the cut or causing injury.
- Wear Safety Glasses: Always wear eye protection.
Thread Cutting Speed and Feed Rates
Speed and feed are critical for good threads. Generally, you want to run your lathe slower for threading than for general turning.
- Spindle Speed: Lower spindle speeds allow you more time to monitor the process and make accurate adjustments. A good starting point for steel might be 100-200 RPM, and for softer materials like aluminum or brass, you might go slightly faster, but always err on the slower side when learning.
- Feed Rate: As mentioned, the feed rate is controlled by the lead screw engagement. The depth of cut is controlled by the cross-slide. The depth of each successive cut should be small.
General Guidelines for Depth of Cut:
These are approximate and depend on material hardness and thread pitch.
| Material | First Few Passes (in/rev) | Subsequent Passes (in/rev) | Final Passes (finishing) |
|---|---|---|---|
| Mild Steel | 0.003 – 0.005 | 0.002 – 0.004 | 0.001 |
| Aluminum | 0.005 – 0.008 | 0.003 – 0.005 | 0.001 – 0.002 |
| Brass | 0.004 – 0.006 | 0.002 – 0.003 | 0.001 |
| Tool Steel | 0.002 – 0.004 | 0.001 – 0.002 | 0.0005 |
Note: These values are for the cross-slide feed, which controls the perpendicular depth into the material. (1 rev = 1 spindle revolution). Always consult machining handbooks for more precise values for specific thread types and materials. Resources like Machinist Next Door’s Thread Charts can be very helpful for finding exact diameters and depths.
Troubleshooting Common Threading Problems
Even with careful setup, you might run into issues. Here’s how to fix some common ones:
- Threads Not Matching: This is almost always a problem with the lead screw gears or engaging the half-nuts at the wrong time. Double-check your gear selection and how you re-engage the half-nuts. Ensure you’re not reversing the spindle with the half-nuts engaged.
- Poor Fit (Too Loose/Too Tight): This is usually due to incorrect stock diameter or incorrect depth of cut. Ensure your starting diameter is accurate for the thread you’re cutting, and measure your progress carefully with a thread gauge or caliper.
- Chatter or Rough Threads: This can be caused by:
- Dull toolbit
- Tool not set at exact centerline height
- Too deep a cut
- Worn lead screw or gears
- Loose workpiece in the chuck
- Excessive backlash in the cross-slide or carriage
Start by ensuring your tool is sharp and at the correct height, then try