The Tialn Ball Nose End Mill with a 35-degree helix angle is your go-to tool for achieving smooth, high-quality finishes on PVC. It simplifies complex contours and provides exceptional detail, making it essential for any serious PVC finishing project.
Working with PVC can sometimes leave rough edges or unwanted marks, especially when you need a really clean, professional look. Achieving that perfect surface finish on curved or intricate PVC parts can feel like a real challenge. But don’t worry, there’s a tried-and-true solution that machinists and makers love! We’re going to dive into how a specific tool, the Tialn Ball Nose End Mill with a 35-degree helix angle, can expertly handle your PVC finishing needs. It opens up a world of smooth contours and detailed work. Stick around, and we’ll show you exactly how to use it to get fantastic results, step-by-step.
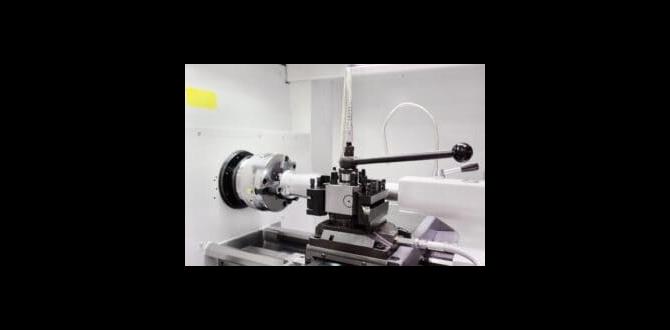
Understanding the Tialn Ball Nose End Mill (35 Degree Helix)
So, what exactly is a Tialn ball nose end mill, and why is the 35-degree helix so special for PVC? Let’s break it down simply.
What is a Ball Nose End Mill?
Imagine a regular end mill, which usually has a flat or slightly rounded tip designed for cutting pockets or slots. A ball nose end mill is different – its tip is shaped like a perfect sphere. This spherical tip is its secret weapon for creating curved surfaces, fillets, and detailed 3D shapes. It can cut in multiple directions, not just down, which is key for complex geometries.
The Significance of the 35-Degree Helix Angle
The “helix angle” refers to the angle at which the cutting flutes twist around the tool. For a Tialn ball nose end mill, a 35-degree helix angle offers a fantastic balance for finishing materials like PVC:
- Smooth Cutting Action: A 35-degree angle provides a more gradual engagement with the material compared to higher helix angles (like 45 degrees or more). This means less vibration and chatter, which is crucial for achieving a mirror-like finish on softer plastics like PVC.
- Reduced Heat Build-up: Slower engagement and quicker chip evacuation (thanks to the flute design) help keep the tool and the PVC cooler. Overheating PVC can lead to melting, gummy chips, and a poor finish.
- Excellent Surface Finish: The combination of the ball nose shape and the moderate helix angle is ideal for sweeping across the surface of PVC to remove material smoothly, leaving behind a clean, polished look.
- “Tialn” Coating: While not always standard, many high-performance end mills come with specialized coatings. Tialn” often refers to a Titanium Aluminum Nitride coating. This coating adds hardness, reduces friction, and increases the tool’s lifespan, especially when dealing with materials that can be abrasive or prone to welding to the tool.
In essence, the 35-degree helix angle on a Tialn ball nose end mill is engineered to give you control, precision, and a superior finish on PVC. It’s the sweet spot for many plastic machining applications where surface quality is king.
Why Choose a Ball Nose End Mill for PVC Finishing?
When you’re aiming for that show-quality finish on PVC, especially on curved surfaces or intricate details, a ball nose end mill is often the best tool for the job. Let’s look at why it’s so effective:
- Achieving Contoured Surfaces: PVC is often used for decorative trim, model-making, or custom fixtures that require smooth, flowing curves. A ball nose end mill’s spherical tip is designed precisely for this, allowing it to cleanly cut concave and convex shapes.
- Detailing and Engraving: For adding fine details, text, or decorative patterns to PVC, the precise control offered by a ball nose end mill is invaluable. It can trace intricate paths without leaving sharp, unwanted corners.
- Smooth Transitions: When you need to blend surfaces or create fillets (rounded internal corners), a ball nose end mill is ideal. It naturally creates a smooth, consistent radius.
- Reduced Finishing Work: Using the right tool from the start means less time spent on secondary operations like sanding or polishing. A good cut often means most of the finishing work is already done by the end mill.
- Minimizing Melt and Chip Welds: PVC can be a bit tricky – it can melt or stick to the tool if you’re not careful. A well-designed ball nose end mill, especially one with a suitable coating like Tialn, helps to efficiently remove chips and reduce friction, minimizing these problems.
Think of it this way: trying to get a perfectly smooth curve with a flat-ended tool is like trying to draw a circle with a ruler – it just isn’t the right shape for the job. The ball nose is the “compass” for your milling operations.
Essential Setup and Safety Precautions
Before we even think about cutting, setting up your machine and taking safety precautions are super important. Machining PVC is generally safer than metal, but it still requires respect for the tools and the process.
Machine Setup Essentials
Getting your CNC mill or manual milling machine ready for PVC is key to a good outcome:
- Secure Workholding: PVC can be light, so make sure your workpiece is clamped down firmly. Use clamps, double-sided tape specifically designed for machining, or a vacuum table. Anything that prevents the PVC from moving during the cut is essential. A shaky workpiece leads to bad cuts and potential hazards.
- Clean Machine Environment: Ensure your machine’s spindle and tool holder are clean and free of debris. This ensures the end mill runs true and prevents wobbling.
- Chip Management: PVC dust and chips can fly. Make sure you have a system in place to manage them. This could be an extraction system (dust collector) or simply ensuring the area around the machine is clear.
Safety First, Always!
Your well-being is the number one priority. Always follow these safety guidelines:
- Eye Protection: Always wear safety glasses or a face shield. Flying chips, even from plastic, can cause serious eye injury.
- Hearing Protection: Milling can be noisy. Earplugs or earmuffs are a good idea, especially during longer operations.
- Clothing: Avoid loose clothing, dangling jewelry, or anything that could get caught in the spinning tool or machine parts. Tie back long hair.
- Tool Handling: Always use a tool release or collet wrench when inserting or removing the end mill. Never try to stop a spinning spindle by hand.
- Machine Guarding: Ensure any safety guards on your machine are in place and functioning correctly.
- Ventilation: While PVC isn’t as toxic as some other plastics, it’s good practice to work in a well-ventilated area, especially when milling. This helps to clear away any plastic fumes or dust.
- Read Your Machine Manual: Always refer to your specific machine’s operation manual for detailed safety instructions.
Taking these steps before you start ensures a smoother, safer machining experience. It’s an important part of being a good machinist.
Step-by-Step Guide: Using Your Tialn Ball Nose End Mill on PVC
Now for the exciting part – actually using your Tialn ball nose end mill to get that fantastic PVC finish! We’ll walk through the process, focusing on clarity and ease.
Step 1: Preparing Your CAD/CAM Design
If you’re using a CNC machine, your design in CAD (Computer-Aided Design) software is the first step. Then, in CAM (Computer-Aided Manufacturing) software, you’ll generate the toolpaths.
- Define the Geometry: Ensure your model has the desired curves and details.
- Tool Selection: In your CAM software, select your Tialn 35-degree ball nose end mill from the tool library. Input its exact diameter.
- Toolpath Strategy: For finishing, common strategies include:
- 2D Contour (for edges): If you’re trimming an edge to a specific radius.
- 3D Adaptive/Pocket (for surfaces): For clearing out material to a certain depth on a surface.
- 3D Parallel/Contour (for finishing surfaces): These are key for smooth surface finishes. “Parallel” cuts step over the surface, while “Contour” follows the shape of the surface. For your specific goal of finishing, a 3D contour strategy that follows the curves of your part will likely yield the best results.
- Stepover: This is the distance between each pass of the tool. For a smooth finish, use a small stepover. Start with something around 0.010″ to 0.020″ (0.25mm to 0.5mm) and adjust based on your test cuts. Smaller stepover = smoother finish, but longer machining time.
- Depth of Cut: For finishing passes on PVC, take light depth of cuts. You’re not trying to hog material; you’re refining the surface. A depth of cut around 0.010″ to 0.050″ (0.25mm to 1.27mm) is usually sufficient.
Step 2: Setting Up Your CNC Machine
Once your toolpaths are generated and verified, it’s time to set up the physical machine.
Material Probing/Setting Z-Zero: Accurately set your Zero point (Z=0) on the top surface of your PVC workpiece. This is critical for ensuring the tool cuts to the correct depth.
Tool Length Measurement: You’ll need to measure the length of your ball nose end mill to tell the CNC machine how far it is from the spindle face to the tip of the tool. This is usually done with a tool probe or a manual height gauge.
Secure Fixturing: As mentioned in safety, ensure your PVC is clamped down tightly. Double-check all clamps and hold-downs.
Step 3: Machining Parameters (Speeds and Feeds)
This is perhaps the most crucial part for plastics like PVC. Getting the speeds and feeds right prevents melting, chatter, and ensures a good finish.
PVC isn’t a metal, so its optimal parameters are different. Here’s a general guideline; always perform test cuts to fine-tune:
- Spindle Speed (RPM): Start with a moderate to high spindle speed. For 1/4″ (6mm) or 1/8″ (3mm) ball nose end mills, speeds between 10,000 and 20,000 RPM are common. Higher speeds often mean you can feed faster, which helps clear chips and reduce heat.
- Feed Rate: This is how fast the tool moves through the material. It’s often expressed in inches per minute (IPM) or millimeters per minute (mm/min). For PVC, a good starting point for a 1/4″ (6mm) ball nose end mill might be around 20-40 IPM (500-1000 mm/min). For a 1/8″ (3mm) tool, you’ll feed slower, maybe 10-20 IPM (250-500 mm/min).
- Chip Load: This is the thickness of the chip each flute is supposed to cut. It’s related to spindle speed and feed rate. For plastics, you want a chip load that’s not too thin (which generates a lot of heat and dust) but not too thick (which can overload the tool or cause poor finish). A common target for small end mills in plastics is around 0.001″ to 0.003″ per flute.
Example Parameters for PVC (1/4″ Ball Nose End Mill)
Here’s a table that outlines some common starting points. Remember, these are guidelines, and your specific PVC type, machine rigidity, and cutter geometry can affect optimal settings.
| Parameter | Typical Value (Imperial) | Typical Value (Metric) | Notes |
|---|---|---|---|
| Tool Diameter | 0.250″ | 6 mm | Your ball nose end mill size |
| End Mill Type | Tialn Ball Nose, 35° Helix | Tialn Ball Nose, 35° Helix | Crucial for finish |
| Spindle Speed (RPM) | 12,000 – 18,000 RPM | 12,000 – 18,000 RPM | Higher speeds help with chip evacuation. |
| Feed Rate (IPM / mm/min) | 25 – 35 IPM | 635 – 890 mm/min | Adjust based on test cuts. |
| Depth of Cut (per pass) | 0.015″ – 0.040″ | 0.38 mm – 1.02 mm | Light cuts for finishing. |
| Stepover (for surface finishing) | 0.010″ – 0.020″ | 0.25 mm – 0.50 mm | Smaller stepover = smoother finish. |
Tip: It’s always better to start with conservative, slower speeds and feeds and gradually increase them while listening to the cut and observing chip formation. If the PVC starts to melt or turn stringy, you’re likely feeding too slow or not removing chips effectively enough. If you hear squealing or chatter, it could mean you’re feeding too fast or the spindle speed is wrong.
Step 4: Performing Test Cuts
Before committing to your final part, always make test cuts on a scrap piece of the same PVC material.
- Test Geometry: Cut a simple curve or a small section of your intended geometry.
- Check the Finish: Examine the surface finish carefully. Look for smoothness, absence of melting, and crisp detail.
- Evaluate Chips: Are the chips small and uniform, or are they long, stringy, and melting? Ideally, you want small, brittle chips.
- Adjust Settings: Based on your test, adjust your feed rate or spindle speed. If the finish is rough, try a slightly smaller stepover or a slower feed rate. If it’s melting, try increasing the spindle speed or feed rate (while being mindful of chip load).
Step 5: The Final Machining Pass
Once your test cuts are perfect, load your final workpiece and run the machining program.
- Supervise the Cut: Stay with the machine during the entire operation. Listen for any unusual sounds and watch for signs of trouble (e.g., excessive smoke, melting, tool breakage).
- Gentle Removal: Let the machine do its work. Avoid the temptation to rush it.
- Clean-up: After the machining is complete, use compressed air or a soft brush to carefully clear away any remaining chips or dust from the workpiece.
With careful setup and these steps, your Tialn 35-degree ball nose end mill will produce beautifully finished PVC parts.
Maintaining Your Tialn Ball Nose End Mill
A good tool is an investment, and with proper care, your Tialn ball nose end mill will last a long time and continue to deliver excellent results.
- Clean After Each Use: After every machining session, thoroughly clean the end mill. Use a soft brush, compressed air, or a mild solvent (if recommended by the manufacturer) to remove all PVC chips and dust. Pay attention to the flutes, as this is where chips can get packed.
- Inspect for Wear: Regularly examine the cutting edges and the ball tip for any signs of chipping, dulling, or excessive wear. Look for discoloration, which can indicate overheating.
- Inspect the Coating: Check the Tialn coating for any areas that have worn away. While some wear is normal over time, significant loss of coating can reduce performance.
- Proper Storage: Store your end mills in a designated tool holder or case to protect them from damage, moisture, and corrosion. Keep them organized so you can easily find the right tool and prevent them from banging against each other.
- Avoid Collisions: Accidental crashes into the workpiece or clamps can quickly damage or break an end mill, especially delicate ball nose geometry. Always double-check your toolpaths and machine zero points.
- Recalibrate if Necessary: If you suspect a tool is damaged or vibrating unusually, it might be time to inspect it closely or consider replacement. For critical applications, if the coating is significantly degraded, you might consider professional re-coating services, though for hobby