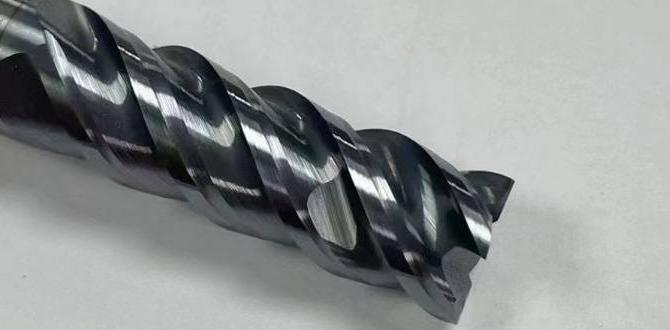
TiAlN Ball Nose End Mills are essential for achieving smooth, precise finishes on hard materials like tool steel, especially for complex shapes. Their specialized coating handles high heat and reduces friction, making them ideal for detailed work and extending tool life.
Machining Smooth Finishes: Your TiAlN Ball Nose End Mill Guide for Beginners
Ever struggled to get that perfectly smooth finish on your metal projects? You’re not alone. Achieving fine detail and a flawless surface can be tricky, especially when working with tougher materials like tool steel. It often feels like your tools just aren’t cooperating, or you’re spending way too much time polishing. But what if there was a tool designed to make this process easier and give you professional results? This guide is all about a specific hero in the machining world: the TiAlN ball nose end mill. We’ll break down exactly why this tool is your secret weapon for those crucial finishing passes. Get ready to discover how it works and how to use it effectively to elevate your machining game.
What Exactly is a TiAlN Ball Nose End Mill? Let’s Break It Down
Think of a ball nose end mill as a specialized cutting tool for milling machines. Unlike flat-end mills that cut with a sharp edge, a ball nose end mill has a rounded, hemispherical tip. This rounded shape is key for creating smooth, contoured surfaces, fillets, and detailed 3D shapes without sharp corners.
Now, let’s talk about the “TiAlN.” This stands for Titanium Aluminum Nitride. It’s a special coating applied to the surface of the end mill. This coating is a game-changer in machining for several big reasons:
Heat Resistance: TiAlN is incredibly tough and can withstand very high temperatures. This is crucial because friction during cutting generates a lot of heat. The coating helps the tool stay cooler, preventing it from softening or degrading.
Hardness: The coating itself is very hard, which means it can cut through tough materials more effectively and last much longer than uncoated tools.
Reduced Friction: It acts as a lubricant, reducing the friction between the tool and the workpiece. This leads to cleaner cuts and less material buildup on the tool itself.
Corrosion Resistance: It also helps protect the tool from corrosion.
So, when you combine the shape of a ball nose end mill with the benefits of a TiAlN coating, you get a powerful tool perfect for:
Creating smooth, flowing surfaces.
Machining complex 3D geometries.
Achieving excellent surface finishes, especially on harder metals.
Working with materials that generate a lot of heat during cutting.
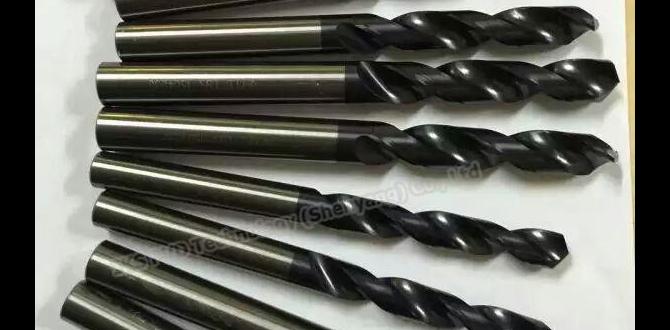
You’ll often see these specified with a diameter (e.g., 1/4 inch, 6mm) and sometimes a “flute count” (the number of spiraled cutting edges). For finishing, a higher flute count (like 3 or 4) can sometimes provide a smoother finish by taking lighter, more frequent cuts.
Why You Need a TiAlN Ball Nose End Mill for Finishing
Finishing passes are the final cuts made on a workpiece to achieve the desired surface finish, accuracy, and detail. This is where imperfections are smoothed out, and the part really starts to look polished. A TiAlN ball nose end mill is particularly brilliant for this stage, especially when you’re working with materials that can be a challenge, like D2 tool steel at 35 HRC.
Here’s why it’s a finishing essential:
Superior Surface Finish: The ball shape is designed to leave almost no sharp corners behind. When used correctly for finishing, it glides over the surface, blending tool marks and creating a beautifully smooth, almost polished look. This is especially important for parts that need to look good or require tight tolerances where sharp internal corners can be weak points.
Handles Tough Materials: Materials like D2 tool steel (especially when hardened to around 35 HRC) are notoriously difficult to machine. They are hard, abrasive, and can quickly wear down standard cutting tools. The TiAlN coating’s exceptional hardness and heat resistance make it far more capable of cutting these materials cleanly and for a longer lifespan than uncoated or less advanced coated tools.
Reduced Heat Buildup: Machining hard steels generates significant heat. High heat can damage the workpiece, weaken the tool, and lead to poor surface finish. TiAlN’s thermal barrier properties keep the tool cooler, allowing for more consistent cutting and preventing thermal degradation of the material.
Less Chatter and Vibration: A well-chosen and properly used ball nose end mill can help reduce chatter (unwanted vibrations during cutting). This leads to a smoother finish and prevents defects like step-over marks from being too prominent. The continuous radius at the tip can help it “flow” over the surface.
Versatility in Complex Geometries: For 3D carving, mold making, or intricate parts, the ball nose shape is indispensable. It can follow complex curves and contours without digging in, making it perfect for achieving a uniform finish across all surfaces.
Imagine you’re making a custom mold for a hobby project. You’ve roughed out the basic shape, but now you need to create those smooth, flowing cavity walls. Using a TiAlN ball nose end mill for your final passes will give you a finish that would otherwise require hours of tedious hand polishing.
Choosing the Right TiAlN Ball Nose End Mill: Key Considerations
Not all TiAlN ball nose end mills are created equal, and picking the right one for your specific task makes a huge difference. When you’re looking to buy, especially for a particular job like finishing tool steel, consider these points:
1. Diameter
This is the most obvious spec. The diameter of your end mill will determine the largest feature you can create and how quickly you can cover an area. For finishing, you’ll often use smaller diameters to get into tight spots and achieve finer detail. Common sizes range from very small (e.g., 0.020 inches) up to 1 inch or more.
2. Radius (Tip Curvature)
Ball nose end mills have a radius at their tip. This radius corresponds to the diameter. For example, a 1/4 inch ball nose end mill has a 1/8 inch radius. For detailed finishing, a smaller radius can be beneficial for intricate work. For broader surface finishing, a larger radius may be used, but the key is matching the radius to the contour you need.
3. Number of Flutes
Flutes are the spiral grooves on the cutting tool that carry chips away from the cutting edge.
2-Flute: Generally better for softer materials and slotting, as they provide more space for chips. Can be used for finishing if chip evacuation isn’t an issue.
3-Flute: A good balance for many materials. Offers more cutting edges than a 2-flute for a smoother finish and good chip evacuation.
4-Flute: Provides the smoothest finish due to more cutting edges. However, it can lead to chip packing in deep cuts or softer, “gummier” materials. Ideal for finishing tougher, brittle materials where chip evacuation is less of a problem because the material breaks away cleanly with smaller chips.
For finishing tough materials like hardened D2 tool steel, a 3 or 4-flute end mill is often preferred to maximize surface finish quality.
4. Material of the Substrate
While the TiAlN is the coating, the underlying material of the end mill also matters. For heavy-duty applications and high-performance cutting, you’ll often find end mills made from solid carbide. Carbide is extremely hard and wear-resistant, making it the ideal base for a TiAlN coating, especially when dealing with tool steels. Tungsten carbide is the most common.
5. Helix Angle
The helix angle refers to the angle of the flutes.
High Helix (e.g., 45-60 degrees): These end mills provide a shearing action, leading to smoother finishes and reduced cutting forces. They’re excellent for finishing applications and can help minimize chatter.
Standard Helix (e.g., 30 degrees): A good all-around choice, balancing cutting performance and chip evacuation.
For finishing, a higher helix angle often yields superior results.
6. Coating Specifics (TiAlN vs. AlTiN, TiCN, etc.)
While TiAlN is excellent, you might also see other coatings.
AlTiN (Aluminum Titanium Nitride): Similar to TiAlN but can handle even higher temperatures. Often considered slightly more advanced for extreme heat applications.
TiCN (Titanium Carbonitride): Offers good abrasion resistance and is suitable for medium-speed machining.
TiN (Titanium Nitride): The classic gold coating, good for general-purpose machining and wear resistance, but not as high-heat resistant as TiAlN.
For finishing hardened steels where heat is a major factor, TiAlN or AlTiN are generally your top choices.
7. Manufacturer and Quality
Reputable tool manufacturers invest in quality control and materials. While it might be tempting to go for the cheapest option, a higher-quality tool from a known brand will usually perform better, last longer, and give you more consistent results.
Example Scenario: You need to achieve a mirror finish on a cavity in a hardened D2 tool steel mold insert (around 35 HRC). You’d likely look for:
A small diameter (e.g., 1/8 inch or 3mm) for detail.
A 4-flute end mill for the smoothest possible finish.
A high helix angle if available.
A solid carbide substrate.
The TiAlN coating is a must.
A tool specification might look like this: “1/8″ Carbide Ball Nose End Mill, 4 Flutes, 0.062″ Radius, High Helix, TiAlN Coated.”
Your choice here directly impacts the quality of your final part.
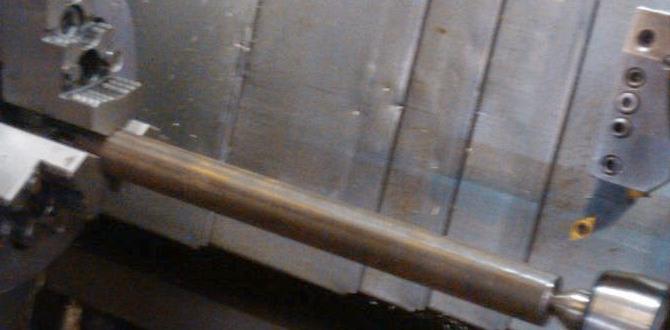
Setting Up Your Machine for Success
Getting the best out of your TiAlN ball nose end mill isn’t just about the tool itself; it’s about how you use it. Proper setup is critical for both performance and safety.
1. Secure the Workpiece
Vise: For most operations, a sturdy milling vise is your best friend. Ensure the workpiece is firmly clamped, preventing any movement during cutting. Use appropriate workholding materials like soft jaws if you need to protect the surface.
Clamps: For larger or irregularly shaped parts, use hold-down clamps. Make sure they don’t interfere with the tool path.
Table: For very large or flat pieces, clamping directly to the machine table might be necessary.
Safety Tip: Loose workpieces are a major hazard and can cause tool breakage or catastrophic machine damage. Always double-check your clamping.
2. Mount the End Mill Correctly
Collet Chuck: Use a high-quality collet chuck for the most accurate and secure tool holding. Ensure the collet size matches your end mill shank diameter.
Collet: Insert the end mill into the correctly sized collet.
Tighten Securely: Tighten the collet nut firmly in the machine’s spindle. Stick out (how far the end mill extends from the spindle) should be as short as possible to maximize rigidity and minimize vibration. A general rule is to keep it to 3-4 times the tool diameter.
3. Understand Your Machine’s Capabilities
Spindle Speed (RPM): This is how fast the tool rotates. It depends on the tool diameter, material, and coating. You’ll need to calculate this.
Feed Rate: This is how fast the tool moves through the material (e.g., inches per minute or mm per minute). It’s closely related to spindle speed.
Depth of Cut (DOC): How deep each pass of the tool is. For finishing, this is usually very small.
Stepover: For areal finishing (covering a surface), this is how much the tool overlaps from one pass to the next. A smaller stepover gives a smoother finish but takes longer.
4. Setting Machine Parameters (Speeds and Feeds)
This is where things can get technical, but the goal is to find a sweet spot that allows the tool to cut efficiently without excessive wear or damage.
Starting Point: Many tool manufacturers provide recommended speeds and feeds for their tools. If not, you can use online calculators or general guidelines.
Material Specifics: The material you are cutting (e.g., D2 tool steel at 35 HRC) is critical for calculating speeds and feeds.
Tool Diameter: Larger diameter tools generally run at slower speeds and faster feed rates (per tooth) than smaller tools.
Rough Calculation: A common formula to start with for RPM is:
RPM = (Surface_Speed 12) / (Pi Diameter)
Where Surface Speed is a value for the material/tool combination (e.g., 200-400 SFM for carbide tooling in hardened steel) and Diameter is in inches.
Feed Per Tooth: This is how much material each cutting edge removes.
Feed_Per_Tooth (IPT) = (Feed_Rate_IPM) / (RPM Number_of_Flutes)
Adjusting for Finishing: For finishing passes with a TiAlN ball nose end mill:
Spindle Speed: You might run at a moderate to high RPM, depending on the tool diameter and machine capability.
Depth of Cut (DOC): Keep this very shallow. For finishing steels, you might only be taking off 0.001″ to 0.005″ (0.025mm to 0.125mm). This is where the tool really shines.
Stepover: For a smooth finish, use a small stepover. This can range from 10% of the tool diameter for a coarser finish to as little as 1-5% for a very fine, almost polished surface.
Feed Rate: Adjust the feed rate so that the feed per tooth is appropriate for the material and tool. Listen to the cut – it should sound like a “hissing” or “scraping” sound, not a loud “rattling” or “screaming.”
External Resource: For understanding cutting speeds, the National Institute of Standards and Technology (NIST) provides valuable data and formulas that form the basis of many machining calculations. You can find resources on their Manufacturing Extension Partnership (MEP) pages. [Example: While direct links to specific documents can change, searching “NIST Machining Data Handbook” will yield relevant information.]
How to Use Your TiAlN Ball Nose End Mill for Finishing
Now that you’ve chosen your tool and set up your machine, let’s get to the actual machining. The process for finishing involves taking light cuts to achieve that smooth surface.
Step-by-Step Finishing Process:
1. Secure Your Part and Tool: As discussed in the setup section, ensure your workpiece is firmly clamped and your end mill is securely in the spindle.
2. Program Your Toolpath:
For 3D Contours: If you’re machining a curved surface, your CAM software (Computer-Aided Manufacturing) will generate a toolpath that follows the contour. You’ll want to set a small stepover to ensure no significant scallops are left between passes. This is where the ball nose excels – it can create smooth, seamlessly blended surfaces.
For Flat Surfaces (Areal Finishing): For general surface finishing or cleaning up a flat area, you’ll use a toolpath that covers the area systematically. The “stepover” is the distance between parallel passes of the tool.
Small Stepover: For a very smooth finish, set the stepover to be a small percentage of the tool diameter. For example, with a 1/4″ (6mm) end mill, a stepover of 0.010″ (0.25mm) or even less will produce a surface with minimal visible lines.
Ball Nose Strategy: Even on a generally flat surface, the ball nose end mill provides a continuous radius. Your software will likely use a “ball end” or “spherical” milling strategy.
3. Set the Depth of Cut (DOC): This is crucial for finishing. You’re not trying to remove much material here; you’re refining the surface.
Start with a very light DOC, perhaps 0.001″ to 0.005″ (0.025mm to 0.125mm). For very hard materials like D2, even lighter might be better initially (0.0005″ to 0.001″).
The goal is to just kiss the surface and smooth out any imperfections left by a previous roughing pass.
4. Select Spindle Speed and Feed Rate:
Use your calculated or recommended speeds and feeds. These should be optimized for the TiAlN coating and the specific material (D2 tool steel at 35 HRC).
Listen to the Cut: A good finishing cut should sound like a steady, light “hiss” or “whisper.” If it’s loud, chattering, or making harsh noises, adjust your feed rate or spindle speed, or reduce the depth of cut.
5. Execute the Finishing Pass:
Begin the machining operation.
Monitor Closely: Watch the cut and listen to the machine. Look for any signs of excessive vibration, chip packing, or tool wear. The TiAlN coating should keep the tool cutting cleanly for longer.
Coolant/Lubrication: For machining steel, using a coolant or cutting fluid is highly recommended. It helps to cool the cutting zone, lubricate the tool, and flush away chips. Flood coolant is typical for milling.
6. Inspect the Surface: Once the pass is complete, carefully inspect the surface finish.
* Feathering: For extremely critical finishes,