Quick Summary:
Learn how to use a bowl gouge on your wood lathe safely and effectively. This guide breaks down proper grip, bevel angle, cutting techniques, and sharpening, empowering beginners to create beautiful turned bowls with confidence and precision. Master the bowl gouge step-by-step.
Welcome to Lathe Hub! If you’ve ever looked at beautifully turned wooden bowls and wondered how they’re made, chances are a bowl gouge was involved. This essential wood lathe tool can seem a little intimidating at first, but with the right approach, it’s totally manageable. Many beginners find themselves wrestling with tear-outs or struggling to get a clean cut. Don’t worry, that’s completely normal! This guide will walk you through exactly how to use a bowl gouge, from holding it correctly to making those satisfying shavings. We’ll cover everything you need to know to start turning your own bowls with confidence.
Understanding the Bowl Gouge: Your Key to Beautiful Bowls
The bowl gouge is the workhorse for turning hollow forms like bowls, vases, and platters on a wood lathe. Unlike spindle gouges used for turning between centers, the bowl gouge has a deep flute and a rounded or oval cutting edge designed to get into the inside of a hollow form and also to shape the outside. Its shape allows it to cut aggressively while still maintaining a smooth finish, provided it’s used correctly. Mastering the bowl gouge is a significant step in your woodturning journey.
Types of Bowl Gouges
They come in a few common styles, each with slight advantages:
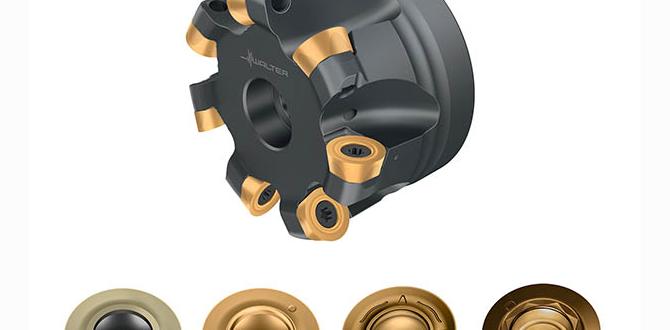
- Roughing Gouge: A heavier duty gouge with a wide, deep flute. It’s designed for rapidly removing material from a rough blank to get it round. It’s great for turning large blanks or working with less predictable wood. You can see examples of roughing gouges and their uses on resources like the Woodworker’s Journal, which often discusses the primary tools for lathe work.
- Flute or Standard Bowl Gouge: This is the most common type. It has a rounded flute and a grind angle that makes it versatile for both roughing and finishing. The flute can be more U-shaped or V-shaped depending on the grind.
- Scraping Gouge: Less common for beginners, these gouges have a flatter profile and are intended for scraping rather than cutting. They can be useful for certain effects or for final smoothing.
For beginners, a standard bowl gouge in the 1/2-inch to 3/4-inch size range is usually the most versatile and recommended starting point.
Anatomy of a Bowl Gouge
Knowing the parts helps you understand how it works:
- The Flute: The curved channel on the cutting end. This is where the wood shavings exit. The shape and depth of the flute are key to its cutting action.
- The Cutting Edge: The sharpened part of the flute’s end. This is what actually slices into the wood.
- The Bevel: The angled surface that supports the cutting edge. Maintaining the correct bevel angle during use is crucial for a clean cut.
- The Handle: Where you hold the tool. A comfortable and secure grip is essential for control.
Getting Started: Safety First!
Before you even think about touching the lathe with a bowl gouge, safety is paramount. Woodturning involves high-speed rotating wood, sharp tools, and flying chips. Always:
- Wear Safety Glasses: Always wear a full face shield and safety glasses. Wood chips can travel at high speeds.
- Use Proper PPE: No loose clothing, no gloves (they can get caught), and tie back long hair.
- Secure the Workpiece: Ensure your wood blank is firmly attached to the lathe.
- Stand Correctly: Stand in a balanced position, slightly to the side of the rotating workpiece, not directly in front of it.
- Know Your Tool Rest: Position the tool rest close to the workpiece (about 1/8 inch or 3mm away) and parallel to the lathe axis for safety and control.
- Start Slow: Begin at a slow spindle speed, especially when turning irregular blanks or when first engaging the tool.
Safety isn’t just a suggestion; it’s the foundation of enjoyable and successful woodworking. A good resource for tool safety and best practices can be found on the Occupational Safety and Health Administration (OSHA) website, which provides general guidelines for woodworking machinery safety.
Holding the Bowl Gouge: The Foundation of Control
How you hold your bowl gouge is critical for both safety and the quality of your cuts. The goal is to have a firm, controlled grip that allows the tool to pivot and move smoothly along the tool rest.
The Basic Grip
The most common and stable grip is often called the “two-handed grip” or “hand-on-handle, hand-on-flute” grip. Here’s how to do it:
- Dominant hand on the handle: Wrap your dominant hand firmly around the tool handle. Your thumb can rest on top or wrap around, whichever feels more secure.
- Non-dominant hand on the flute: Place your non-dominant hand on the flute of the gouge, near the cutting edge. Your fingers should be on one side, and your thumb on the other. This hand provides stability, guides the tool, and helps control the depth of cut.
- Elbows tucked: Keep your elbows tucked in close to your body. This gives you more leverage and control.
- Tool rest contact: The shaft of the gouge should rest firmly on the tool rest. You should be able to slide the tool along the rest easily.
Practice this grip without the lathe running. Feel how it provides stability. Imagine the tool rest as your pivot point. Your hands guide the tool, but the tool rest supports the primary load and ensures consistent depth.
Grip Variations for Different Cuts
As you progress, you might find slight variations comfortable for specific tasks:
- For internal hollowing: You’ll typically hold the gouge with the flute facing upwards, engaging the inside of the bowl.
- For external shaping: You might angle the gouge differently, with the flute facing more sideways or downwards, depending on the curve you’re creating.
- For end-grain coves and foot details: The grip can be modified to get into tight spaces.
The key is that the tool rest is always in contact with the shaft of the gouge, and your grip is secure enough to prevent unexpected movement.
The Magic of the Bevel: Understanding the Cut
Woodturning isn’t about brute force; it’s about using sharp steel to shear the wood fibers. The “bevel” is the angled surface behind the cutting edge. For a clean cut with a bowl gouge, you want to ride on this bevel.
What is the “Bevel Angle”?
The bevel angle refers to the angle of the bevel ground onto the cutting edge of your gouge. For most bowl gouges, when you’re talking about using them, it’s more about maintaining the “angle of presentation” – how you present the bevel to the wood.
Riding the Bevel
This is the most crucial concept for using a bowl gouge effectively. When you’re cutting, the bevel of the gouge should be in contact with the wood. You are essentially rubbing the bevel against the wood as you push the tool forward.
- How to achieve it: When you engage the gouge with the spinning wood, you’ll adjust the angle of the tool slightly so that the flat, ground surface (the bevel) touches the wood. As you move the tool to make a cut, you maintain this contact.
- Why it’s important: When you ride the bevel, the tool doesn’t dig in. Instead, it glides and shears the wood cleanly. If the bevel isn’t touching the wood, the sharp corner of the flute will dig in, causing what’s called a “dig-in,” which can lead to catches, splintering, and dangerous tool jumps.
Think of it like slicing with a knife versus stabbing. Riding the bevel is slicing; the sharp corner digging in is stabbing. You want to slice!
The Cutting Edge vs. The Flute
The actual cut happens at the very tip of the flute. However, the bevel supports this cutting edge. When you are about to cut, you orient the gouge so the flute is pointed where you want the cut to happen, and then you “present” the bevel to the wood. As you move the tool, the point of the flute shaves the wood away, and the bevel slides along the surface you’ve just created or are about to create.
The angle of the flute itself can also be varied. For a shearing cut, the flute might be angled somewhat steeply. For a more scraping cut (less ideal for primary hollowing), it might be flatter.
Step-by-Step: Hollowing the Inside of a Bowl
This is where the bowl gouge really shines. Let’s walk through the basic process of hollowing out the inside of a bowl blank.
Step 1: Prepare the Blank and Lathe
- Mount your wood blank securely between centers or on a faceplate.
- Ensure the tailstock is engaged for initial roughing if turning between centers. Remove it later for hollowing.
- Position your tool rest close to the blank, parallel to the lathe’s axis, and about 1/8 inch (3mm) away.
- Start the lathe at a slow speed. For a 4-inch blank, start around 800-1000 RPM. Increase speed as the blank becomes rounder.
Step 2: Start Roughing (If Necessary)
If your blank is square or irregular, start with a roughing gouge or your bowl gouge held to remove the high corners and get it round. Approach the spinning blank from the side, allowing the bevel to rub against the wood as you gently push it towards the high spots. Work from the outside in.
Step 3: Begin Hollowing
- Position yourself for comfort and balance.
- Hold the bowl gouge with your dominant hand on the handle and your non-dominant hand on the flute.
- Place the shaft of the gouge on the tool rest.
- With the lathe running and the flute of the gouge pointing slightly upwards and towards the center of where you want to hollow, approach the wood.
- Angle the gouge so that the bevel rubs against the surface of the wood. This is your starting point.
Step 4: Making the Cut
This is where the “riding the bevel” technique comes into play.
- Once the bevel is making contact, begin to push the gouge smoothly into the wood.
- You’ll feel the tool start to shear the wood. The shavings should curl away cleanly.
- As you push forward, you will pivot the gouge slightly so the flute “walks” along the inside curve of the bowl.
- Think of it as sweeping with the tool, using the tool rest as your pivot.
- Don’t try to remove too much wood at once. Make several light cuts rather than one heavy one.
- Keep the flute angled slightly upwards. As you move deeper or to the side, the angle of the flute relative to the wood will change.
Step 5: Working Towards the Rim and Base
- Work from the center outwards towards the rim, and then from the rim inwards towards the center as you deepen the bowl.
- Pay attention to the tool rest position. You may need to adjust it as your hollowing progresses, especially as you move deeper. It should always remain parallel to the lathe axis and close to the wood.
- For the interior curve: Hold the gouge with the flute at about a 45-degree angle to the surface you are cutting. Present the bevel, and push forward, sweeping the flute as you go.
- For the rim: You might need to flatten the angle of the flute slightly to create a clean edge.
Step 6: Hollowing the Bottom
As you get deeper, it can become harder to see. Use your tool rest as a guide. Maintain the bevel contact. For the very bottom, you might need to angle the flute almost straight down, still riding the bevel. Be patient. Take light cuts.
Step 7: Checking Wall Thickness
Periodically stop the lathe and use calipers or your fingers (carefully!) to check wall thickness. Aim for consistent thickness throughout the bowl’s interior. A common target for the interior walls is between 1/4 inch and 3/8 inch (6mm to 10mm), depending on the size and type of wood.
Shaping the Outside of the Bowl
Once the inside is hollowed and reasonably smoothed, you’ll move to the outside. This is where the bowl gouge is also used, often with a different presentation angle.
General Principles
- Ensure the tailstock is removed if you are no longer using it for support.
- Position the tool rest to support the bottom of the bowl and allow access to the exterior. It will likely be angled relative to the lathe bed.
- Start at lower speeds and increase as the blank becomes more balanced.
Cutting Techniques
- Roughing the exterior round: Similar to roughing the inside, use the gouge to remove corners and establish a round profile. Approach from the side.
- Shaping the curve: For the curved exterior walls, you’ll typically hold the gouge with the flute angled more sideways, or even slightly downwards, again, always riding the bevel.
- The “Shear Scraping” Cut: A very effective technique for the exterior is a variation of shear scraping. Here, the flute is presented at a shallow angle (almost parallel to the surface you want to create), and you slice with the bevel in contact. This leaves a very smooth finish. Imagine slicing a very thin layer off the wood.
- Working towards the foot: As you shape the base of the bowl, you’ll adjust the angle of the gouge to create the foot detail.
Referencing diagrams of tool presentations for external shaping can be very helpful. Many woodturners find videos on sites like YouTube or resources from the American Association of Woodturners beneficial for visual learning.
Troubleshooting Common Bowl Gouge Problems
Even with careful practice, you might encounter issues. Here are a few common ones:
- Tear-Out: Occurs when wood fibers are pulled out instead of being cut cleanly. This is often caused by a dull tool, not riding the bevel, or cutting against the grain. Solution: Ensure your gouge is sharp, maintain bevel contact, and make smoother, slicing cuts.
- Digging In/Catching: The gouge bites into the wood unexpectedly, potentially causing gouges or even throwing the workpiece. This almost always means the bevel is not riding the wood. Solution: Ensure the bevel is in constant contact. Check your grip for stability and control.
- Rough Surface Finish: Even if you’re cutting, the surface might not be smooth. Solution: Your tool might be dull, or your cuts are too aggressive. Try taking lighter, slicing cuts and ensure your bevel is rubbing fully.
- Chatter: Vibrations that leave wavy marks on the surface. Often caused by an unsteady tool rest, a dull tool, or the tool vibrating against the wood. Solution: Ensure the tool rest is secure, keep the tool firmly on the rest, and use a sharp gouge.
Patience and practice are your best friends when troubleshooting. Don’t be afraid to stop the lathe, assess, and restart.
Sharpening Your Bowl Gouge: The Secret to Easy Cutting
A dull bowl gouge is not just inefficient; it’s dangerous. It forces you to use more pressure, leading to catches and poor cuts. Regular sharpening is non-negotiable.
Common Sharpening Methods
You’ll need a sharpening system to maintain your gouge’s edge. The most common for bowl gouges involve:
- Grinding Wheels: Usually on a bench grinder. You’ll need a jig to hold the gouge at the correct angle to maintain the bevel or re-grind it.
- Sharpening Stones: Water stones, oil stones, or diamond stones can be used, often in conjunction with a jig or freehand for skilled users.
Grinding the Bevel
When sharpening a standard bowl gouge, you’