Have you ever watched a woodturner create something beautiful? The magic happens on a wood lathe. But what comes after sanding? Many people skip important wood lathe finishing steps after sanding. Did you know these steps can change a simple piece of wood into a stunning work of art?
Imagine holding a smooth bowl that gleams in the light. It catches your eye and makes you want to touch it. This is the power of proper finishing. Each step you take after sanding adds character and charm to your project.
In this article, we will explore these finishing steps. From applying a protective coat to polishing it to perfection, you will see how each part matters. Are you ready to learn how to make your wood lathe creations shine? Let’s dive in!
Wood Lathe Finishing Steps After Sanding For A Smooth Finish — When Working With Wood Lathes, Achieving A Professional Finish Involves Several Key Steps After Sanding. Proper Wood Lathe Finishing Not Only Enhances The Beauty Of Your Workpiece But Also Protects It From Wear And Tear. Below Are The Essential Steps You Should Take To Ensure A Flawless Finish After Sanding. 1. Choose The Right Finish Before You Begin, Select An Appropriate Finish For Your Project. Common Options Include: – **Oil Finishes**: These Penetrate The Wood And Enhance Its Natural Beauty While Providing A Degree Of Protection. – **Varnishes**: They Create A Hard, Protective Layer And Are Available In Various Sheens. – **Lacquer**: A Fast-Drying Finish That Can Provide A High-Gloss Look But Requires Careful Application. – **Wax**: Often Used As A Final Step For Added Sheen And To Enhance The Feel Of The Wood. 2. Prepare The Surface After Sanding, Ensure That The Surface Of Your Wood Is Clean And Free From Dust. Use A Vacuum Or A Soft Cloth To Wipe Down The Piece. It’S Crucial That No Dust Particles Remain, As They Can Interfere With The Finishing Process. 3. Apply Pre-Stain Conditioners (If Needed) If You Are Using A Stain, Consider Applying A Pre-Stain Conditioner, Especially On Softer Woods. This Will Help To Promote Even Absorption Of The Stain And Prevent Blotching. 4. Stain The Wood (Optional) If Your Project Requires Staining, Apply It After Preparing The Surface. Use A Brush Or A Clean Cloth To Evenly Apply The Stain, Following The Wood Grain. Allow It To Set As Per The Manufacturer’S Instructions, Then Wipe Off Any Excess With A Clean Cloth. 5. Apply Finish Once The Stain (If Used) Dries Completely, It’S Time To Apply Your Chosen Finish. Here Are The General Steps To Follow: – **Brush Or Spray Application**: Depending On The Finish, Apply It Using A High-Quality Brush Or Spray Gun. Using A Foam Brush Or A Spray Can Help Avoid Brush Marks. – **Follow The Grain**: Always Apply The Finish Following The Wood Grain To Achieve A Smooth Application. – **Thin Coats**: Apply Multiple Thin Coats Rather Than A Single Thick Coat For A More Effective Finish. This Will Also Minimize Runs And Drips. 6. Sand Between Coats For The Best Results, Sand Lightly Between Coats Of Finish. Use A Fine-Grit Sandpaper (Around 320-400 Grit) Once The Previous Coat Is Dry. This Step Helps To Smooth Any Imperfections And Promotes Better Adhesion Of Subsequent Coats. 7. Final Coat After Sanding, Apply The Final Coat Of Your Chosen Finish. For An Extra Glossy Look, You May Consider A Rubbing Compound After It Dries To Buff The Surface. 8. Allow To Cure After Applying The Last Coat Of Finish, Allow It To Cure For The Recommended Period. This May Take Anywhere From A Few Hours To Several Days, Depending On The Type Of Finish Used. 9. Final Polish (Optional) Once Fully Cured, You Can Opt For A Final Polish With A Soft Cloth Or A Fine Rubbing Compound To Enhance The Luster And Protect The Surface. Conclusion Following These Wood Lathe Finishing Steps After Sanding Will Elevate Your Woodworking Projects, Providing A Stunning And Durable Finish. With Practice And Patience, You’Ll Achieve Results That Not Only Look Great But Will Stand The Test Of Time.

Wood Lathe Finishing Steps After Sanding
Finishing wood lathe projects after sanding brings a stunning look. First, decide on a finish type. Oil, varnish, or wax each give different appearances. Apply the finish with a clean cloth or brush. Make sure to cover every surface evenly. Let it dry completely before handling. Did you know a good finish can enhance wood patterns? This last step brings out the beauty of your project, making it shine and stand out.Understanding the Importance of Finishing
Benefits of proper finishing for wood turned projects. Effects of finishing on aesthetics and durability.Finishing wood projects is key for many reasons. It makes the wood look beautiful and protects it. Proper finishing can boost the look and life of your turned pieces. Here are some benefits:
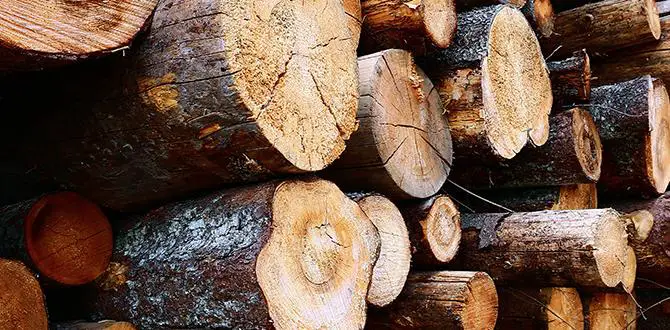
- Enhances Appearance: A smooth finish shines and shows off the wood grain.
- Increases Durability: Finishing can help resist scratches and stains.
- Improves Safety: A finished surface is safer to touch and use.
Investing time in finishing will give your work a professional touch. It’s worth it for any wood project!
Why is finishing important for wood projects?
Proper finishing makes wood nicer to look at and lasts longer, which is important for any project.
Preparing for the Finishing Process
Necessary tools and materials for applying finish. Importance of workspace cleanliness and organization.To start the finishing process, gather your tools and materials. You’ll need brushes, rags, and your chosen finish, like lacquer or oil. Don’t forget your safety gear—sunglasses aren’t just for the beach! A clean workspace is essential too. Dust and dirt can ruin all your hard work. Consider organizing your tools on a table; it’s like giving them their own VIP section! Here’s a quick list:
| Necessary Tools | Materials |
|---|---|
| Brushes | Lacquer |
| Rags | Wood Oil |
| Sandpaper | Stain |
Keeping things tidy is key. A clean spot leads to a smoother finish and fewer surprises, like that rogue piece of fluff that always shows up at the worst time!
Applying the Finish
Recommended techniques for applying finish on latheturned pieces. Tips for achieving an even coat without streaks.After sanding your lathe-turned piece, it’s time for the fun part—applying the finish! To get a smooth and even coat, try these techniques:
- Use a clean brush or cloth for application.
- Apply thin layers to avoid drips.
- Work in the direction of the wood grain.
- Let each layer dry fully before adding more.
These tips will help you achieve a stunning finish without streaks. Remember, patience is key!
What is the best way to apply finish on wood?
Using a soft brush or cloth in even strokes will give the best results. Thin layers dry faster and look better than thick ones.
Drying and Curing Times
Typical drying times for various finishes. Understanding curing vs. drying and its impact on the finish.After you finish sanding, the next big step is waiting for the finish to dry. Typical drying times vary based on what finish you use. For example, varnish can take around 24 hours, while oil might dry in just a few hours. It’s essential to understand that drying means the surface feels dry, but curing is when the finish fully hardens. Cured finishes are tougher and last longer. Remember, patience is key—don’t rush the process or you might end up with a sticky surprise!
| Finish Type | Drying Time |
|---|---|
| Water-Based Varnish | 1-2 hours |
| Oil-Based Varnish | 6-8 hours |
| Shellac | 30 minutes |
| Polyurethane | 24 hours |
Polishing and Buffing Techniques
Methods for polishing the finish to enhance shine. Tools and materials recommended for buffing.After sanding, polishing and buffing can make your wood shine. Use soft cloths or buffing wheels for best results. Here are some great methods:
- Start with a fine polishing compound.
- Use a soft, clean cloth to gently buff the surface.
- For larger areas, use a buffing pad on a low-speed tool.
This will bring out the natural beauty of the wood. Always remember to clean surfaces before buffing. Happy finishing!
What tools and materials do I need for buffing?
Soft cloths, buffing pads, and polishing compounds are great tools for buffing. A low-speed buffer can make your work easier and faster too!
Maintaining Finished Wood Projects
Best practices for cleaning and maintaining finished pieces. Tips for touchups and reapplication of finish over time.Taking care of your finished wood projects is like giving them a spa day. First, clean them gently with a soft cloth to remove dust. Avoid harsh chemicals; they don’t belong in a wood hot tub! For minor scratches, use touch-up markers or wax to hide boo-boos. Reapply the finish every few years to keep things shiny and protect your masterpiece. Here’s a quick reference to help you with maintenance:
| Task | Frequency |
|---|---|
| Dusting | Weekly |
| Deep Cleaning | Monthly |
| Reapplication of Finish | Every 3-5 years |
Remember, wood projects need love and care to last. Keep them happy, and they’ll make your home even happier!
Troubleshooting Common Finishing Issues
Identifying and resolving common problems (bubbles, uneven surface). Preventative measures to avoid finishing mistakes in the future.Finishing problems can be a real pain. Bubbles in your finish? These little nuisances often come from air trapped under the surface. Uneven surfaces? Sounds like your project might need a little more love. To avoid these woes, make sure to apply thin coats and work in a dust-free zone. Remember, patience is key! Use the table below for quick fixes.
| Issue | Solution |
|---|---|
| Bubbles | Sand lightly and apply a thinner coat. |
| Uneven Surface | Sand smooth and reapply finish evenly. |
Next time, keep it smooth and bubbly-free! You’ll be a finishing pro in no time!
Conclusion
In conclusion, finishing your wood lathe project after sanding is crucial. We apply a finish to enhance beauty and protect the wood. Start with cleaning the dust, then add stain or sealant. Don’t rush—let the finish dry completely. Finally, consider buffing for a smooth touch. For more tips, check out guides online and keep practicing!FAQs
What Types Of Finishes Are Commonly Used On Projects After Sanding With A Wood Lathe?After sanding with a wood lathe, we can use different finishes to make the wood look nice. Some common finishes are clear coat, that helps protect the wood and shows its color. We can also use oil, which makes the wood shine and brings out its patterns. Wax is another option; it creates a smooth surface and feels nice to touch. You choose the finish based on how you want the wood to look and feel!
How Do You Prepare The Wood Surface Before Applying A Finish To Ensure Optimal Adhesion?To get the wood ready for a finish, start by cleaning it. You can use a damp cloth to wipe off dust and dirt. Next, sand the surface using sandpaper. This makes it smooth and helps the finish stick better. Finally, make sure the wood is completely dry before you apply the finish.
What Techniques Can Be Used To Apply A Finish Evenly After Sanding On A Lathe-Turned Piece?To apply a finish evenly on your lathe-turned piece, you can use a few simple techniques. First, you can use a brush or cloth to spread the finish smoothly. Next, use slow, steady strokes to avoid drips or spots. You can also try rotating the piece while applying the finish to cover all areas. Finally, let it dry completely before checking your work.
How Can You Avoid Common Pitfalls, Such As Bubbles Or Uneven Coating, When Finishing Turned Wood?To avoid bubbles when finishing turned wood, always stir your finish gently. Don’t shake the can, or it will create foam. Apply a thin coat with a clean brush or cloth. Wait for each layer to dry before adding more. Sand lightly between coats to make it smooth. This helps stop uneven spots and makes your wood look nice!
What Are The Best Practices For Curing And Protecting A Finish After It Has Been Applied To Lathe-Turned Wood Pieces?After you finish your lathe-turned wood, let it cure in a warm, dry place. This helps the finish harden well. Avoid touching the finish for a few days. If it feels sticky, give it more time. Finally, store your piece away from direct sunlight to protect it.