Have you ever seen a wooden bowl and wondered how it’s made? It’s fascinating, isn’t it? With a little bit of wood and a tool called a wood lathe, you can create amazing hollow forms. Imagine transforming a simple piece of wood into a beautiful work of art. Picture yourself spinning wood on a lathe, watching the shavings fly. Did you know people have crafted with wood lathes for centuries? It’s like magic watching the wood change shape right before your eyes. Curious to learn how to make your own wood lathe hollow forms? You’re in the right place. Join us on this exciting adventure and start your own woodturning journey. Ready to get those creative gears turning? Let’s dive in!
Mastering Wood Lathe Hollow Forms: A Comprehensive Tutorial

Wood Lathe Hollow Forms Tutorial
Creating hollow forms on a wood lathe is an exciting craft. You start by selecting the right wood, ensuring it’s suitable for hollowing. Beginners learn how to set up their lathe correctly and choose the right tools. Safety first! Always wear eye protection. A fun tip: try different shapes and sizes to see what you like best. With practice, you can make beautiful bowls or vases. What unique design will you create?Essential Tools and Equipment
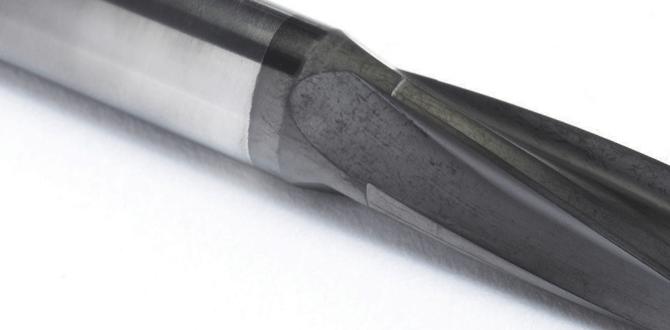
List of necessary tools and lathes. Safety gear and precautions.To make wood lathe hollow forms, you need some essential tools. First, a lathe and lathe tools are crucial. You will also need chisels, gouges, and a face shield for safety. Don’t forget your dust mask to protect your lungs. Keep a bench grinder nearby to sharpen tools. Work in a well-lit area to see clearly. Remember, your safety is important. Always wear protective gear and take necessary precautions when using these tools.
What are essential tools for wood lathe projects?
For any wood lathe project, you need a lathe, chisels, gouges, and a caliper. A face shield and dust mask ensure safety. A workshop with bright lights is helpful. Don’t forget a bench grinder to keep tools sharp.
Choosing the Right Wood
Types of wood suitable for hollow forms. Factors to consider in wood selection.Selecting the right wood is key when making hollow forms with a lathe. You want wood that is easy to shape. The best choices often include softwoods like pine or hardwoods like maple and cherry.
- Softwoods like pine are gentler to carve and great for beginners.
- Hardwoods like maple offer durability and a nice finish.
Consider these factors when choosing wood:
- Grain: Look for tight grains. They give a smooth finish.
- Moisture: Dry wood prevents cracks.
What factors make wood suitable for hollow forms?
Wood’s grain, type, and moisture content decide if it suits hollow forms. Tight grains allow smooth finishes, while dry forms reduce cracking risks.
Preparing Your Wood Blank
Techniques for wood blank preparation. Balancing and securing the blank on the lathe.Before starting, you need to prepare your wood blank well. First, cut the wood into a size that feels comfortable to work with. A good practice is to choose a piece that is about 3 inches thicker than the final product. Then, balance the wood by checking both ends for weight. Secure it tightly to the lathe using a faceplate or a chuck. This will help to prevent any slipping while you’re working.
What are the best techniques for wood blank preparation?
Some good techniques include:
- Choosing a stable wood type like maple or oak.
- Ensuring your blank size fits the lathe comfortably.
- Checking for any cracks or dark spots before starting.
Making a good blank is important. It helps the wood turn smoothly and safely. Remember to always wear protective gear, too. And that’s the first step to creating beautiful hollow forms on your lathe!
Techniques for Shaping the Exterior
Tools for exterior shaping. Methods for achieving desired exterior shapes.To shape the outside of wood hollow forms, use the right tools. Popular choices include gouges, chisels, and scrapers. Each tool helps create different shapes and designs.
- Gouges: Great for curves.
- Chisels: Perfect for sharp edges.
- Scrapers: Smooths the surface.
Methods like steering your tool and controlling the speed help you achieve your desired look. Practice makes improvement. Enjoy the process!
What tools do I need for shaping wood hollow forms?
You will need several tools for shaping the exterior of hollow forms. These include gouges, chisels, and scrapers. Each tool has its use, giving you the chance to create unique designs.
Hollowing the Interior
Strategies for effective hollowing. Tools and techniques for precision.Hollowing the interior of a wood piece can be tricky but fun! Use the right tools and techniques for a smooth process. Here are some strategies:
- Choose a sharp hollowing tool. This helps you cut cleanly.
- Go slow and steady. Rushing can lead to mistakes.
- Try using a depth gauge. It helps keep your hollowing even.
- Check your progress often. This will keep you on track.
Practice makes perfect! Each time you hollow, you’ll get better.
What tools are best for hollowing wood?
The best tools for hollowing are hollowing chisels and bowl gouges. They provide good control and precision.
Achieving a Smooth Finish
Sanding and polishing tips. Techniques for applying finishes.To achieve a smooth finish on your wood lathe hollow forms, start with sanding. Use progressively finer grits of sandpaper. Think of it like peeling an onion—start rough, then get smooth! After sanding, polishing is key. You can use wax or an oil finish to make your project shine. It’s like giving your wood a nice spa day! Check out the following table for the best tips:
| Step | Tip |
|---|---|
| Sanding | Use 80, then 120, and finish with 220 grit. |
| Polishing | Apply a thin coat of wax or oil for shine. |
Remember, patience is crucial. Rushing can mess up your hard work. Don’t be shy to try different finishes until you find the one that makes your wood sing!
Advanced Tips and Troubleshooting
Common challenges and solutions. Enhancing design with decorative elements.While shaping wood into amazing hollow forms, challenges can pop up like squirrels in a park! Common hiccups include uneven walls and pesky vibrations. But no worries! Simply adjust your tool speed or check your setup. If you want to jazz things up, add decorative elements like beads or grooves. These little touches make your project shine like a star! Here’s a quick overview in a table:
| Challenge | Solution |
|---|---|
| Uneven Walls | Adjust tool speed |
| Vibrations | Check setup |
| Design Boredom | Add beads or grooves |
Remember, practice makes perfect! Soon, you’ll be crafting beautiful hollow forms that impress everyone. So, don’t let the bumps in the road slow you down!
Showcasing Your Work
Photography tips for hollow forms. Ways to share and sell your creations.Photography can showcase your hollow forms beautifully. Use good lighting. Natural light shows details well. Avoid shadows and glare. Try different angles to highlight unique shapes. Once you capture stunning photos, share your creations online.
- Post on social media like Instagram or Facebook.
- Join crafting groups to share your work.
- Open an online store on platforms like Etsy.
This helps you reach more people. Selling your art can be rewarding, both personally and financially. Remember, every piece tells a story. Let your photos and sales reflect that story!
Where can I sell my wood lathe hollow forms?
You can sell your wood lathe hollow forms on websites like Etsy, eBay, or your own online shop. Social media, like Instagram, can also help promote your work.
Tips for promoting your hollow forms:
- Use hashtags for visibility.
- Engage with followers to build community.
- Share updates about your crafting process.
Conclusion
In learning wood lathe hollow forms, you’ve discovered essential techniques and safety tips. Practicing helps improve your skills. Understanding tool usage and hollowing methods is crucial. Try these steps with patience and creativity. Keep exploring more tutorials and guides to master this fascinating craft. Your dedication can transform pieces of wood into beautiful art. Enjoy the journey!FAQs
What Are The Essential Tools And Materials Needed For Creating Hollow Forms On A Wood Lathe?To create hollow forms on a wood lathe, you need a few important tools and materials. First, you need a wood lathe itself to hold and turn the wood. You will also need sharp chisels to cut and shape the wood. A hollowing tool helps you make the inside space. Finally, soft wood like pine or cottonwood is great for hollow forms.
How Do You Choose The Right Type Of Wood For Hollow Turning Projects?To choose the right wood for hollow turning projects, start by thinking about what you want to make. Softwoods, like pine, are easier to carve, while hardwoods, like oak, are stronger. Look for wood that is dry and not cracked. You can also try different types to see which one you like best! Remember, the best wood can make your project look great.
What Are The Basic Techniques For Shaping And Finishing Hollow Forms On A Lathe?To shape and finish hollow forms on a lathe, you start by securing your material tightly. Use a special tool called a gouge to carve out the inside and outside of the hollow shape. You can change the speed of the lathe to make it easier to work. After shaping, you smooth the surface with sandpaper to make it nice and shiny. Finally, you can apply a finish, like oil or wax, to protect your work.
How Do You Safely Hollow Out The Interior Of A Turned Wood Piece Without Compromising Its Structural Integrity?To hollow out a turned wood piece safely, start by choosing a strong wood. Use a drill to make a hole in the center. Then, use special tools called gouges to remove small pieces of wood from inside. Be gentle and take your time. This helps keep the outside strong and prevents cracks.
What Common Mistakes Should Beginners Avoid When Working On Hollow Forms With A Wood Lathe?When you work on hollow forms with a wood lathe, avoid these common mistakes. First, don’t rush. Take your time to shape the wood carefully. Also, watch your hands and keep them safe from the sharp tools. Lastly, remember to check the wood for cracks before you start. This helps you make better and safer projects.
{“@context”:”https://schema.org”,”@type”: “FAQPage”,”mainEntity”:[{“@type”: “Question”,”name”: “What Are The Essential Tools And Materials Needed For Creating Hollow Forms On A Wood Lathe? “,”acceptedAnswer”: {“@type”: “Answer”,”text”: “To create hollow forms on a wood lathe, you need a few important tools and materials. First, you need a wood lathe itself to hold and turn the wood. You will also need sharp chisels to cut and shape the wood. A hollowing tool helps you make the inside space. Finally, soft wood like pine or cottonwood is great for hollow forms.”}},{“@type”: “Question”,”name”: “How Do You Choose The Right Type Of Wood For Hollow Turning Projects? “,”acceptedAnswer”: {“@type”: “Answer”,”text”: “To choose the right wood for hollow turning projects, start by thinking about what you want to make. Softwoods, like pine, are easier to carve, while hardwoods, like oak, are stronger. Look for wood that is dry and not cracked. You can also try different types to see which one you like best! Remember, the best wood can make your project look great.”}},{“@type”: “Question”,”name”: “What Are The Basic Techniques For Shaping And Finishing Hollow Forms On A Lathe? “,”acceptedAnswer”: {“@type”: “Answer”,”text”: “To shape and finish hollow forms on a lathe, you start by securing your material tightly. Use a special tool called a gouge to carve out the inside and outside of the hollow shape. You can change the speed of the lathe to make it easier to work. After shaping, you smooth the surface with sandpaper to make it nice and shiny. Finally, you can apply a finish, like oil or wax, to protect your work.”}},{“@type”: “Question”,”name”: “How Do You Safely Hollow Out The Interior Of A Turned Wood Piece Without Compromising Its Structural Integrity? “,”acceptedAnswer”: {“@type”: “Answer”,”text”: “To hollow out a turned wood piece safely, start by choosing a strong wood. Use a drill to make a hole in the center. Then, use special tools called gouges to remove small pieces of wood from inside. Be gentle and take your time. This helps keep the outside strong and prevents cracks.”}},{“@type”: “Question”,”name”: “What Common Mistakes Should Beginners Avoid When Working On Hollow Forms With A Wood Lathe? “,”acceptedAnswer”: {“@type”: “Answer”,”text”: “When you work on hollow forms with a wood lathe, avoid these common mistakes. First, don’t rush. Take your time to shape the wood carefully. Also, watch your hands and keep them safe from the sharp tools. Lastly, remember to check the wood for cracks before you start. This helps you make better and safer projects.”}}]}