Imagine turning a rough piece of wood into a smooth, shiny masterpiece. Sounds fun, right? If you’ve ever used a wood lathe, you know how exciting it can be. But have you ever wondered how to make your wooden creation gleam? This is where a sanding sealer comes in. It’s like magic for woodworkers! Sanding sealers help to fill those tiny wood pores. This makes the surface smooth and ready for the next step.
Have you tried sealing wood but felt unsure about it? Don’t worry; you’re not alone! Many people discover the secret of a sanding sealer only after seeing their projects shine. It’s like finding a hidden gem in your toolbox. How do you think expert woodworkers get that perfect finish? They use sanding sealers to prepare their wood for a perfect finish.
What makes sanding sealer so special for your wood lathe projects? It not only saves time but also enhances the wood’s beauty. It allows paint or varnish to spread evenly. So, next time you are working with your wood lathe, consider using a sanding sealer. Your project might just turn out to be the best one yet!
Understanding The Use Of Wood Lathe Sanding Sealer

Wood Lathe Sanding Sealer Use
Imagine creating a shiny, smooth toy car from a wood lathe. To make it gleam, you need a special helper: sanding sealer. This nifty product closes tiny holes in the wood. Think of it like a magic shield that preps the wood’s surface for a perfect finish. Easy to apply and quick to dry, it saves time and effort. Ever wondered how to achieve that silky wood touch? The secret lies in the sanding sealer.Understanding Wood Lathe Sanding Sealer
Definition and purpose of sanding sealer. Benefits of using a sanding sealer on wood projects.A sanding sealer is a clear liquid that protects wood. It helps make surfaces smooth before finishing. It is often used on wood projects like tables and chairs. Why use it? Sanding sealer closes the wood pores fast. This saves time when applying varnish or paint. It also makes colors pop and keeps the finish even. It’s like a magic coat for wood! So, if you want your wood project to look great, try using a sanding sealer.
What is a sanding sealer made of?
Sanding sealers are made of a mix of chemicals that create a smooth surface. Most contain a binder like acrylic or shellac to protect the wood. These ingredients fill in tiny gaps and make sanding easier. This simple layer helps in applying the final finish.
When to Apply Sanding Sealer on Your Wood Lathe Project
Ideal stages of the woodturning process for sealer application. Types of wood and projects that benefit from sanding sealer.Adding a sanding sealer to your wood lathe project is important. But when should you do it? Usually, it is best after shaping and smoothing your project. This creates a nice base. Some projects that use softwoods like pine or projects with lots of details truly benefit from a sanding sealer. It fills small gaps and protects your work.
What kinds of wood benefit most from sanding sealer?
Softwoods, like pine or cedar, soak up finish. The sealer stops this. Hardwoods with grain details also shine with a sealer. It keeps the color even.
- Softwoods: Pine, Cedar
- Hardwoods: Oak, Walnut
Why use a sanding sealer?
Using a sanding sealer makes your project smoother. It helps the finish go on easy and look great. Plus, it saves your finish, so you use less.
In woodworking, taking the right steps is key. A fun fact: Around 79% of woodworkers say sealer makes their work look better. So, use it to bring life to your wood lathe projects!
Step-by-Step Guide to Applying Sanding Sealer
Tools and materials needed for application. Detailed application process on a lathe, including tips for even coverage.Applying a sanding sealer on a lathe is easy. Gather these items:
- Sandpaper
- Soft cloth
- Sanding sealer
- Brush or spray bottle
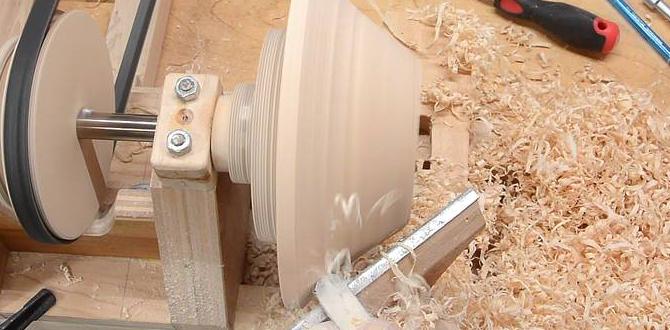
How do you apply a sanding sealer on a lathe?
Start by sanding the wood. Use sandpaper until smooth. Next, clean the piece with a cloth. Brush or spray the sanding sealer on the surface. Turn the lathe slowly. This helps spread the sealer evenly. Let it dry as per directions on the label. Sand lightly between coats for a smooth finish.
Common Mistakes and How to Avoid Them
Overapplication and ineffective surface preparation. Solutions for common issues and corrective measures.Working with a wood lathe sanding sealer can be tricky. Overapplication is a common mistake. It leaves a sticky, uneven surface. How can you avoid this? Apply thin, even coats using a clean brush. Ineffective surface preparation leads to rough finishes.
- **Solution:** Sand the surface smoothly first.
- **Check** for dust. Dust can ruin your finish.
People often ask, “How do I fix a sticky surface?” Wipe off excess with a damp cloth and let it dry. Always start with a clean area for best results.
Enhancing Your Finish with Sanding Sealer
How sanding sealer impacts the final finish. Techniques for achieving a professionalgrade finish.When you use a sanding sealer, your finish becomes smoother and more beautiful. But how does it work? A sanding sealer fills in small gaps in the wood. This makes it easier to add the final coat of paint or polish. Here’s how to make it professional:
- Apply smoothly with a brush or cloth.
- Let it dry, then sand it lightly.
- Add your final coat for a shiny, even surface.
Why is a sanding sealer important?
A sanding sealer is important because it helps the paint or polish stick better to the wood. It also saves time because you need fewer coats.
“Using a sealer first makes the final look perfect,” experts say. Plus, it protects the wood. Imagine your toy or table looking glossy and smooth like glass. Fun fact: Even famous woodworkers use these sealers!
Maintenance and Storage Tips for Sanding Sealer
Best practices for sanding sealer longevity. Storage recommendations for extended usability.To keep your sanding sealer working its best, follow some easy tips. Keep the sealer in a cool, dry place. This stops it from getting hard or sticky. Seal the container tight after using it. This keeps air out. Shake well before use to mix it up. Check the date and use it before it goes old. These steps help make your sealer last longer.
- Store in a cool, dry spot
- Seal the container tight
- Shake before use
- Use before it goes old
What is the best way to store sanding sealer?
Store sanding sealer in a cool, dry place, away from sunlight. This keeps it fresh. Sunlight might change its color or texture. A cabinet or shelf is a good place. Make sure the cap is on tight to avoid spills and air exposure.
How can I make my sanding sealer last longer?
- Check the expiry date and use before that.
- Shake before applying to mix well.
- Keep away from extreme temps.
- Clean the rim before closing to ensure a tight seal.
Think of it like this: Treat your sealer like a snack. Would you leave a snack open in the sun? Probably not! So, keep your sealer safe and sound.
Expert Tips and Tricks for Exceptional Results
Insights from experienced woodturners. Advanced techniques for optimal outcomes.To get amazing results with wood lathe sanding sealers, follow tips from seasoned woodturners. These experts have some amazing tricks! First, always ensure your surface is clean before applying the sealer. Use a soft cloth for even distribution. Select the right grain direction as it highlights the wood’s natural beauty. Experienced woodturners suggest using thin layers for a smooth finish. This helps you avoid lumps. Practice these techniques and watch as your projects glow!
Why is a sanding sealer important?
A sanding sealer is important because it prepares the wood. It creates a smooth base. This helps the final finish look better. It also reduces how much finish you need. The wood becomes more durable. This protects it from wear and tear. Using a sealer can make your work look professional.
Conclusion
Using a sanding sealer on wood lathe projects helps create smoother surfaces. It prepares the wood, making finishes look better. You should apply it before your final finish for best results. Remember to follow instructions on the product label. If you’re curious, reading more about wood finishes can enhance your future projects.FAQs
What Is The Purpose Of Using A Sanding Sealer When Working With A Wood Lathe?A sanding sealer helps make the wood surface smooth. When you put it on first, it fills tiny holes. This makes it easier to sand the wood later. It also helps the paint or finish look better when you’re done.
How Does Sanding Sealer Affect The Final Finish Of A Turned Wood Piece?Sanding sealer helps smooth the surface of your wood piece. It fills small holes and bumps, making it look nicer. When you apply the final finish, like paint or varnish, it goes on easier and looks better. Using sanding sealer can also make the colors shine more and protect the wood. Overall, it gives your project a professional look!
Can Sanding Sealer Be Applied To All Types Of Wood Used In Lathe Turning, Or Are There Specific Woods That Benefit More From Its Use?You can use sanding sealer on many types of wood for lathe turning. However, some woods, like pine or maple, work better with it. The sealer helps to fill tiny holes and makes your finished piece smooth. Using it can make your project look nicer and help the finish last longer. Always check the wood type, because some woods may need special care.
What Are The Steps Involved In Applying Sanding Sealer On A Wood Lathe Project, And Do They Differ From Traditional Hand Sanding Techniques?To apply sanding sealer on a wood lathe project, first, make sure your wood piece is smooth. Then, use a brush or cloth to apply the sealer evenly. Let it dry completely. Next, gently sand it with fine paper. This helps to make the surface even smoother and ready for finishing. This method is different from hand sanding because you’re using a sealer first to protect the wood. Hand sanding usually just smooths out the wood without any extra steps.
How Can Sanding Sealer Help In Reducing Raised Grain And Achieve A Smoother Surface On Turned Wood Pieces?Sanding sealer is a special liquid we put on wood. It helps fill tiny holes and cracks. When you use it before sanding, it makes the wood wet. This stops the grain from lifting up. As a result, you get a much smoother surface on your wood pieces.