Wood lathe tool rest adjustment problems are common. This guide provides simple, proven fixes to ensure your tool rest is secure and at the correct height for safe, smooth turning. Get back to creating with confidence!
Hey there, fellow woodturners! Daniel Bates from Lathe Hub here. If you’ve ever wrestled with a wobbly tool rest on your wood lathe, you know how frustrating and, frankly, dangerous that can be. It’s a common issue for beginners, but the good news is, it’s usually a quick and easy fix. A stable tool rest is crucial for control and safety when you’re shaping your projects. Let’s dive into why this happens and how to get your tool rest locked down tight, so you can focus on the fun part: making sawdust!
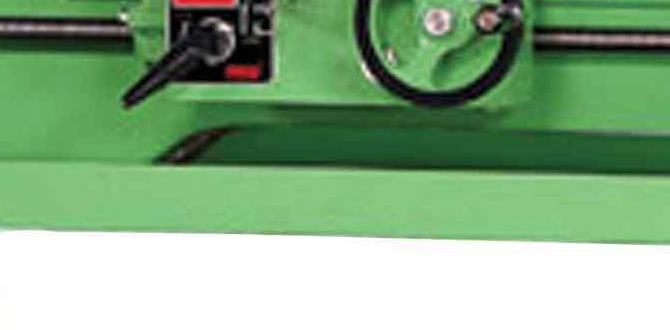
Understanding the Wood Lathe Tool Rest
Before we fix the problems, let’s get a handle on what the tool rest is and why its correct positioning is so important. It’s that sturdy support, usually made of metal, that you position near your spinning workpiece. Your turning tools (like gouges and chisels) rest on it as you shape the wood. Think of it as your workbench for turning – it needs to be solid and at just the right height and angle.
The primary job of the tool rest is to provide a stable pivot point for your cutting tools. When it’s not positioned correctly, or if it’s loose, your tool can easily catch the wood, leading to “catches” or “dig-ins.” These are the sudden, violent movements that can cause torn-out sections of wood, damage to your project, or worse, a loss of control that could lead to injury. Safety first is always the mantra in the workshop!
Positioning for Safety and Success
There are two key aspects to tool rest positioning: height and distance. For most spindle turning (like legs for furniture or bowls), the tool rest should be positioned just slightly below the diameter of the workpiece. When you bring your tool to the wood, it should meet it at an angle, with the tool rest just kissing the surface of the spinning wood. This creates a stable platform for your cutting edge.
For faceplate turning (making bowls), the gap between the tool rest and the workpiece is usually a bit wider, and the angle of the tool becomes even more critical. The goal is always to keep a safe distance between the spinning wood and any part of your body, and to ensure your tool has consistent support. A tool rest that moves or is at the wrong height makes achieving these safe and effective positions nearly impossible.
Common Wood Lathe Tool Rest Adjustment Problems
So, what exactly goes wrong? Most issues boil down to a few main culprits. Recognizing them is the first step to fixing them. These problems can make your lathe feel unstable and your turning imprecise.
1. The Wobbly Tool Rest
This is the big one. Your tool rest moves no matter how tight you think you’ve made the locking mechanism. You’ll feel it shift when you apply even the slightest pressure with your tool. This is incredibly unnerving and makes precise cuts impossible.
2. The Stubborn Locking Mechanism
Conversely, sometimes the locking lever or knob just won’t tighten down. You can crank on it, but the tool rest still slides around. It feels like it’s hitting its limit but not actually securing anything.
3. Incorrect Height/Angle Issues
Even if the tool rest is locked, you might find it difficult to get it to the right height or angle relative to the workpiece. This can be due to limitations in the tool rest post’s travel or the saddle’s design.
4. Inconsistent Positioning
You set the tool rest, turn the lathe on, and then realize it’s shifted slightly again. This inconsistency is a nightmare because it means your setup isn’t reliable from one cut to the next.
5. Damage to the Tool Rest or Post
Sometimes, the problem isn’t just adjustment; it’s that something is physically worn, bent, or broken. This could be a bent post, a worn-out locking thread, or damage to the saddle where it clamps onto the lathe bed.
Proven Fixes for a Secure Tool Rest
Don’t despair! Most of these common “wood lathe tool rest adjustment problems” have straightforward solutions. Let’s get your tool rest solid and ready for action.
Fix 1: Cleaning and Lubrication
Problem Addressed: Stubborn Locking Mechanism, Sticky Movement
Often, the simplest solution is the best. Swarf (wood dust and chips), old lubricant, and dirt can build up in the locking mechanism or on the tool rest post. This prevents smooth movement and effective tightening.
- Safety First: Ensure the lathe is unplugged and the workpiece is removed.
- Disassemble (Slightly): Loosen the locking lever or knob you normally use. If it’s a lever that pivots, see if you can get access to the threads it engages with. On some post-style rests, you might be able to lift the post slightly out of its socket.
- Clean Thoroughly: Use a stiff brush, compressed air, or a clean rag to remove all debris from the post, the inside of the saddle (the part that clamps to the lathe bed), and the threads of the locking mechanism. For stubborn buildup, a little mineral spirits can help.
- Lubricate Sparingly: Apply a light coat of machine lubricant or even paraffin wax to the tool rest post. For threaded mechanisms, a tiny dab of grease can work wonders. Avoid over-lubricating, as this can attract more dust.
- Reassemble and Test: Put everything back together. Tighten the locking mechanism. It should now move more freely and lock down much more securely.
Fix 2: Checking the Lathe Bed Contact
Problem Addressed: Wobbly Tool Rest, Inconsistent Positioning
The saddle of the tool rest assembly clamps onto the lathe bed. If the bottom surface of the saddle isn’t making solid, even contact with the bed, it will never lock down firmly. This contact area is crucial for stability.
- Inspect the Saddle: Look at the underside of the tool rest saddle. Are there any burrs, bent metal, or debris preventing flat contact with the lathe bed.
- Inspect the Lathe Bed: Similarly, check the ways (the rails the saddle slides on) of your lathe bed. Ensure they are clean, free of dents, and not excessively worn.
- Gentle Filing/Sanding (Advanced Tip): If there are minor burrs or high spots on the saddle’s contact surface, a very light pass with a fine-grit file or sandpaper (held flat against the surface) can sometimes improve the fit. Be extremely careful not to remove too much material! The goal is just to flatten any minor imperfections.
- Ensure Even Clamping: When you tighten the locking lever, you should feel it engage firmly and create pressure on the bed. If it still feels loose, the issue might be deeper, potentially with worn saddle components.
Fix 3: Addressing Worn Threads or Locking Components
Problem Addressed: Stubborn Locking Mechanism Not Tightening
Over time, the threads on the locking bolt or stud, and the corresponding nuts or receivers, can wear down. This makes it impossible to achieve a tight lock.
For Bolt-Style Levers:
- Identify the Bolt: The locking lever often operates by tightening a bolt against a mating surface or through a threaded hole.
- Inspect Threads: Loosen the lever fully and examine the visible threads on the bolt and in its receiver. Look for flattened crests or stripped sections.
- Replacement Options: If threads are significantly worn, the best solution is often to replace the bolt or the entire locking mechanism. You can often find replacement parts from your lathe manufacturer or specialized hardware suppliers. For a quick fix on some types, a strategically placed shim (thin washer) might temporarily help, but replacement is the long-term solution.
For Post-Style Rests with a Clamp:
- Check the Clamp: The post is usually held in place by a clamp mechanism that tightens around it. If the clamp’s inner surface or the post itself is worn smooth, it won’t grip effectively.
- Adding Grip: Sometimes, a thin piece of rubber or textured material (like shelf liner) placed between the clamp and the post can add friction and improve grip. Alternatively, consider replacing the clamp component if it’s excessively worn.
External Link for Parts: If you need replacement parts, check out reputable woodworking machinery suppliers. For instance, brands like Grizzly Industrial often have parts diagrams and available components for their machines, which can be a good reference point for similar lathe designs.
Fix 4: Shimming the Tool Rest Saddle
Problem Addressed: Wobbly Tool Rest Due to Slight Looseness
If your tool rest post is held in a saddle that moves along the lathe bed, and the saddle itself is slightly loose on the bed (even after tightening), you might need to add a shim to create a snugger fit.
- Material Choice: Thin, durable material is key. Brass shim stock, thin sheet aluminum, or even a few layers of heavy-duty cardstock or plastic can work in a pinch.
- Placement: Carefully slide the shim material into the gap between the saddle and the lathe bed where the locking mechanism applies pressure. You might need to experiment with the thickness and placement for the best result. Aim for a shim that fills the space without preventing the clamp from engaging.
- Test and Adjust: Tighten the locking lever and check for stability. You may need to add or remove layers of shim material. This is a temporary workaround for minor looseness; a worn saddle or bed may need more substantial repair.
Fix 5: Bending or Aligning the Tool Rest Post
Problem Addressed: Incorrect Height/Angle Issues due to a Bent Post
If your tool rest post is slightly bent, it can make it difficult to position the rest correctly, leading to awkward angles for your tools and frustrating cuts.
- Gentle Straightening: With the post removed from the lathe (if possible), you can often gently bend it back into alignment. Use a vise and a block of wood to protect the post, or carefully apply pressure by hand or with a soft mallet.
- Use a Straight Edge: Check the post against a known straight edge or its original position in the saddle to gauge if it’s straight.
- Small Adjustments: It’s better to make several small adjustments than one large one. Over-bending can weaken the metal.
- Consider Replacement: If the post is severely bent or has fatigue cracks, it’s safer to replace it.
Fix 6: Upgrading the Tool Rest System
Problem Addressed: Persistent Wobble, Limited Adjustment Range
Sometimes, the original tool rest system on the lathe is simply not robust enough for the user’s needs or has reached the end of its useful life. Upgrading can be a game-changer.
- Heavier Duty Tool Rests: Many manufacturers offer heavier, thicker tool rests with more robust locking mechanisms. These provide better stability and reduce vibration.
- Different Saddle Designs: Some aftermarket saddles might offer a more positive locking action or a smoother sliding action on the lathe bed.
- Post Variations: Consider an aftermarket post if the original is too short, too thin, or has an incompatible design for the types of work you do.
A common upgrade path includes looking at tool rests with larger diameter posts (e.g., 1-inch diameter instead of 3/4-inch) and more substantial locking knobs or levers. The increased contact area and leverage can significantly improve security. For a comprehensive overview of lathe accessories and their benefits, resources from organizations like the American Association of Woodturners can offer insights into best practices and recommended equipment.
Tool Rest Adjustment Table of Contents
Choosing the right tool rest and knowing how to adjust it is fundamental. Here’s a quick guide to common types and their adjustment quirks.
| Tool Rest Type | Typical Adjustment | Common Issues & Fixes | Best For |
|---|---|---|---|
| Standard Straight Rest | Post slides in saddle; saddle clamps to lathe bed. | Wobble (clean/shim saddle), limited angle (post bend). | General spindle turning. |
| Curved/Offset Rest | Similar to straight, but shape aids specific cuts. | Angle can throw off cutting plane; ensure saddle is secure. | Bowl rim work, cove cutting. |
| T-Handle Rest | Lever or knob tightens a screw/clamp mechanism. | Stripped threads (replace), gummed-up mechanism (clean/lube). | Versatile for most turning. |
| Quick-Release Rest | Spring-loaded or cam lever for fast repositioning. | Wear in release mechanism (adjust/replace), needs firm seating. | Rapid adjustments, varied projects. |
Maintaining Your Tool Rest for Longevity
Prevention is key when it comes to avoiding those frustrating “wood lathe tool rest adjustment problems.” A little regular maintenance goes a long way to keeping your setup reliable and safe.
Regular Cleaning Schedule
Make it a habit to quickly clean your tool rest and its mounting hardware every time you use your lathe. A quick wipe-down with a dry cloth to remove dust and chips takes seconds but prevents buildup. Periodically (e.g., monthly, depending on usage), perform a more thorough cleaning with a brush and perhaps a little solvent for stubborn grime.
Lubrication is Key
As mentioned in Fix 1, don’t let your tool rest post and saddle become dry and sticky. A light application of wax or a thin machine oil on the sliding surfaces and threads will ensure smooth operation. Use it sparingly to avoid attracting excess dust.
Inspect for Wear and Damage
Before starting a turning session, take a moment to give your tool rest a good shake. Does it feel solid? Are there any unusual noises or movements? Visually inspect the post, saddle, and locking mechanism for any signs of wear, cracks, or bends. Early detection of small issues can prevent bigger problems down the line. Remember, your tool rest is a critical safety component.
Proper Tightening Technique
Understand what “tight enough” feels like for your specific tool rest. Overtightening can strip threads or damage components, while undertightening leads to the wobble we’re trying to avoid. The goal is a firm, secure lock that doesn’t budge under normal cutting pressure. If you find yourself having to reef on a lever excessively, something is likely amiss with the mechanism itself or its contact points.
Troubleshooting Common Lathe Operation Issues
While we’re focused on the tool rest, it’s worth mentioning that other lathe components can affect your turning experience. A well-maintained lathe is a safe and efficient lathe.
1. Lathe Bed Ways
The saddle for your tool rest (and tailstock) slides on the lathe’s bed ways. If these are dirty, damaged, or have burrs, they will affect how smoothly the saddle moves and how securely it can be clamped. Wipe them down regularly and inspect for any nicks or dents. For metal lathes, proper lubrication of the ways is essential for both movement and rust prevention. You can learn more about proper metal lathe upkeep from resources like NIST’s materials science research, which often touches on the importance of precise machinery maintenance.
2. Spindle Runout
This refers to how true the headstock spindle runs. If there’s significant runout, the workpiece won’t be perfectly centered, leading to vibration and an uneven turning experience. Most beginner wood lathes have very little spindle runout, but it’s something to be aware of. Ensure your chuck or faceplate is mounted securely and correctly.
3. Motor and Speed Control
An inconsistent motor or speed control can make turning unpredictable. For woodturning, sometimes slower speeds are necessary for safety and to prevent tear-out, especially with larger or irregularly shaped pieces. Ensure your lathe’s speed settings are accurate and reliable.
Frequently Asked Questions About Wood Lathe Tool Rest Adjustment
What is the correct height for a wood lathe tool rest?
For most spindle turning, the tool rest should be set just slightly below the diameter of your workpiece. When you bring your tool to the wood, the cutting edge should engage the wood at or just above the level of the tool rest, creating a slight angle. For faceplate work, it’s typically set at a distance that allows the tool to sit parallel to the face of the workpiece, with the tool rest very close to the wood surface.