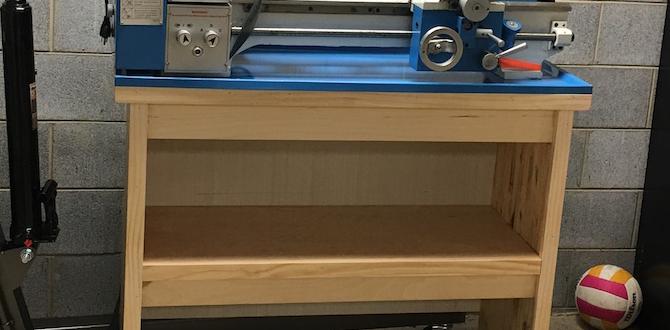
Stop wood lathe vibration with these easy homemade fixes! Learn to balance your workpiece, level your machine, and dampen vibrations for smoother turning and better results. Get your lathe running like new without buying expensive parts.
Vibration. It’s that shimmy, shake, and sometimes downright violent shudder that can turn a peaceful woodworking session into a frustrating battle. If your wood lathe is vibrating, it’s not just annoying – it can lead to rough finishes, inaccurate cuts, and even unsafe operating conditions. Don’t worry, though! As a fellow maker who’s spent countless hours in the workshop, I know how persistent this can be. But the good news is, you don’t always need fancy gadgets to fix it. Many common wood lathe vibration issues can be solved with simple, homemade solutions. We’ll walk through the most effective ways to get your lathe running smoothly again, so you can focus on creating something beautiful.
What Causes Wood Lathe Vibration?
Understanding why your lathe is shaking is the first step to fixing it. Like any precision tool, a wood lathe needs a stable foundation and properly balanced components to operate harmoniously. When things are out of sync, vibration is usually the first symptom. The most common culprits boil down to a few key areas: the workpiece itself, the lathe bed and its stability, and the tools you’re using.
Think of it like a car tire. If the wheels aren’t balanced, you feel it in the steering wheel. A wood lathe is similar. If the wood you’re turning isn’t centered or balanced, it’ll wobble. If the lathe itself isn’t sitting perfectly flat, it’ll shake. Even loose parts or unsharpened tools can contribute. We’ll tackle each of these potential problems with practical, easy-to-implement solutions.
Diagnosing the Vibration: Where’s it Coming From?
Before we start tinkering, let’s play detective. Pinpointing the source of the vibration will save you time and effort. Typically, you can narrow it down by observing when and how the vibration occurs. Grab a notepad and a flashlight; it’s time for a quick inspection!
- Is it constant? Does the vibration happen the moment you turn the lathe on, or does it only appear when the wood starts spinning, especially at higher speeds?
- Does it depend on the workpiece? Do you feel more vibration when turning a specific piece of wood, or when it’s roughly shaped versus after it’s been turned round?
- Is the lathe itself moving? Try to gently rock the lathe. Does the whole machine shift, or does the vibration seem to come from within the headstock or tailstock area?
- Listen carefully: Are there any strange noises accompanying the vibration, like knocking or grinding?
Answering these questions will guide us to the most likely cause. For instance, if the vibration changes dramatically with the shape of the wood, the workpiece balance is probably your main issue. If the entire lathe rocks, it’s time to check its foundation.
Homemade Wood Lathe Vibration Solutions
Alright, let’s get down to business. Here are the most common issues and their effective, often homemade, solutions. We’ll start with the most frequent offender: the workpiece itself.
Solution 1: Ballast, Balance, and Baffles – Taming the Workpiece Wobble
The most common, and often most intense, vibration comes from an unbalanced workpiece. When a chunk of wood isn’t perfectly centered on the lathe’s spur drive and live center, it creates a centrifugal force that’s wildly uneven. This is especially noticeable when you start with a square or irregularly shaped blank.
1. Secure and Centered Mounting
This sounds obvious, but it’s the absolute first place to check. Make sure your spur drive (the screw or pin that bites into the wood on the headstock side) is driven in firmly and centrally. Likewise, ensure the live center on the tailstock is properly seated in the dimple you’ve made in the wood. If the wood feels off-center, stop the lathe immediately, readjust, and try again.
2. Rough Shaping Techniques
When starting with a square blank, the initial turning will be very wobbly. Embrace it! Don’t try to take heavy cuts at high speeds at this stage. Start at a slower speed and gradually increase it as the wood becomes more circular. You can even use a roughing gouge to quickly knock off the corners and create a more octagonal shape, which is much better balanced than a square.
3. Using an Offset Faceplate for Irregular Shapes
For very irregularly shaped pieces or burls, a standard faceplate can still lead to imbalance. A special technique is to use an offset faceplate. This allows you to mount the workpiece off-center on the faceplate itself. While this might sound counter-intuitive, it can distribute the weight better and create a more rhythmic, manageable vibration that’s less jarring. You can find instructions on how to create an offset mounting system online, often involving bolts and a standard faceplate.
4. Adding Counterweights (Advanced Homemade Fix)
This is a more advanced technique, often used for large, unbalanced turnings or bowl blanks. The idea is to add weight to the opposite side of the workpiece to counteract the imbalance. This requires careful calculation and secure mounting. You’d typically use a faceplate and clamps, or even drill and bolt a metal weight (like a metal disc or bar stock) to the back of your workpiece. This method isn’t for beginners and requires extreme caution as a poorly secured weight can become a dangerous projectile.
Safety Note: Always ensure any added weights are extremely securely fastened. A loose counterweight is incredibly dangerous. Start with very slow speeds and gradually increase only if you feel stable.
Solution 2: Leveling the Playing Field – Foundation Fixes
A lathe that isn’t sitting perfectly level and stable is a recipe for vibration. Imagine trying to balance a tall stack of books on a wobbly table – it’s going to shake! Your lathe needs a solid, unmoving foundation.
1. Shimming and Leveling the Lathe Bed
Most lathes come with adjustable feet. Use a good quality spirit level (you can get these at any hardware store) to check if the lathe bed is level both front-to-back and side-to-side. If your lathe is on wheels, especially mobile bases, this is crucial. Place the level on the ways (the flat tracks where the tool rest and tailstock slide).
- Check both directions: Place the level along the ways and then across the ways.
- Adjust feet: Use shims (thin pieces of wood, plastic, or specialized leveling pads) or adjust the lathe’s feet to bring it perfectly level.
- Tighten everything: Once level, ensure the locking mechanisms for the feet or mobile base are securely tightened.
A common DIY shim material is thin plastic from cutting boards or even layers of cardboard glued together. For a more permanent solution, consider specialized leveling feet available online.
2. Anchoring to the Floor (Highly Recommended)
For stationary lathes, anchoring them to a solid floor is the single best way to eliminate movement. This is especially important for larger or more powerful lathes.
- Concrete Floor: Bolts can be used to secure the lathe’s mounting points directly into a concrete floor. You’ll need lag bolts and possibly a drill with a masonry bit. Many DIYers use a sturdy piece of plywood as an intermediary mounting plate if direct bolting isn’t feasible or desirable.
- Wooden Floor/Workbench: If you have a very sturdy workbench or floor joists, you can bolt the lathe through the benchtop or into the floor structure. Ensure the workbench itself is heavy and rigid.
Many commercially available mobile bases for lathes have provisions for bolting them down. If yours doesn’t, you can often drill holes through the base frame and use heavy-duty lag screws.
Resource: For information on safe workshop practices and machine anchoring, the Occupational Safety and Health Administration (OSHA) offers valuable guidance on machinery safety that applies to home workshops as well.
Solution 3: Dampening the Ride – Absorbing Unwanted Vibrations
Even with a level lathe and a balanced workpiece, some residual vibration is normal. The goal is to prevent this vibration from being amplified or transmitted to the surrounding workshop.
1. Vibration-Dampening Mats
Placing a heavy-duty rubber mat under your lathe (especially if it’s on a mobile base) can significantly absorb vibrations. Old conveyor belt material, thick industrial anti-fatigue mats, or specialized lathe mats work wonders. These mats act as a buffer, preventing the lathe’s subtle movements from resonating with the floor.
DIY Mat Idea: You can often find thick, dense rubber sheeting at industrial supply stores or even repurposed from old tire inner tubes (though be mindful of potential off-gassing from tires). Cut it to size to fit under your lathe’s base or mobile stand.
2. Adding Mass to the Lathe Stand
More mass equals more stability. If your lathe stand feels light, you can increase its weight to help dampen vibrations. This can be done by:
- Attaching heavy objects: Bolt metal plates, concrete pavers, or even sandbags securely to the base of the lathe stand. Ensure these additions don’t interfere with the lathe’s operation or moving parts.
- Filling hollow stands: Some metal lathe stands are hollow. If yours is, you might be able to fill it with sand or tightly packed gravel to add significant weight and stability. Seal the entry points well to prevent material from escaping.
Consideration: Be mindful of the total weight you’re adding, especially if your lathe is on a mobile base. You want it heavy, but still movable if needed.
Solution 4: The Tools of the Trade – Lathe Maintenance
Sometimes, the vibration isn’t with the wood or the machine itself, but how you’re interacting with the wood. The condition of your lathe’s components and tools matters more than you might think.
1. Check and Tighten All Moving Parts
Over time, everything can loosen up. Periodically check and tighten:
- Tool rest locking mechanisms: A loose tool rest will vibrate independently and amplify shaking.
- Tailstock locking lever: Ensure the tailstock is firmly locked in place.
- Headstock and tailstock spindle locks: Ensure these are snug.
- Motor mounts: If accessible, check that the motor is securely bolted to its mounting plate, and the plate is secured to the lathe.
2. Sharpen Your Turning Tools
Dull tools require more force to cut, which can translate into increased vibration. Sharp tools slice cleanly, requiring less effort and resulting in a smoother cut and less shook. Make it a habit to sharpen your gouges, chisels, and scrapers regularly. Refer to your tool manufacturer’s recommendations or online guides for sharpening techniques specific to your tools.
Resource: For detailed information on tool sharpening, woodworking forums and dedicated woodworking supply sites often have excellent video tutorials and guides. For instance, looking up sharpening guides from reputable woodworking tool brands like Woodworkers Journal can provide clear, expert advice.
3. Spur Drive and Live Center Condition
Make sure your spur drive (the one mounted in the headstock) is sharp and its teeth are intact. A dull or bent spur won’t grip the wood properly, leading to slippage and vibration. Similarly, check the live center in your tailstock. It should spin freely and have a sharp point. If it’s stiff or damaged, it can cause resistance and vibration.
Solution 5: Isolate the Drive Mechanism (Advanced)**
On some older or simpler lathes, the motor might be directly mounted, and its inherent vibrations can transfer to the whole machine. For some advanced DIYers, this might involve adding rubber isolation mounts between the motor and the lathe frame. This requires some mechanical know-how and the ability to fabricate mounting plates. You’d typically use purpose-built motor mount isolators, often available from industrial suppliers.
Important: This is a more complex modification. Ensure you maintain proper alignment between the motor pulley and the headstock pulley if you have a belt-driven system. Misalignment will cause further vibration and belt wear.
Troubleshooting Table: Quick Fixes for Common Vibrations
Having trouble getting to the root of the vibration? This quick reference table might help you pinpoint the issue and its solution.
| Symptom | Likely Cause | Homemade Solution(s) | Speed Consideration |
|---|---|---|---|
| Violent shaking, especially with new or square blanks. | Unbalanced workpiece. | Secure mounting, rough shaping to round, slower initial speeds. | Start slow, gradually increase as blank rounds. |
| Lathe rocks when turned on or during cuts. | Unlevel lathe, unstable base. | Shim and level lathe feet; anchor to floor or workbench. | N/A (machine stability issue) |
| Persistent low-level hum or shake, even with round work. | Residual vibration amplification. | Add vibration-dampening mat under lathe; add mass to lathe stand. | Can occur at any speed. |
| Jerky movement, chattering at the tool. | Dull tools, loose tool rest, or tailstock. | Sharpen tools; tighten tool rest and tailstock locks. | Often more noticeable at medium to high speeds. |
| Noticeable vibration that seems to come from the motor. | Motor mounting, motor imbalance (rare). | Check motor mount tightness. (Advanced: motor isolation mounts). | May be constant or increase with load. |
Frequently Asked Questions about Wood Lathe Vibration
Q1: My wood lathe vibrates a lot when I start it, even with a round blank. What should I do?
A1: Start by checking that the blank is truly centered on both the spur drive and live center. If it’s secure, try slowing the lathe down. Persistent vibration with a round blank often points to the lathe itself needing to be leveled and secured, or a vibration-dampening mat could help.
Q2: Is it normal for a wood lathe to vibrate when turning a square blank?
A2: Yes, it’s very normal and expected! A square blank is extremely unbalanced. You’ll feel significant vibration. The key is to turn at a slow speed and take light cuts, gradually rounding the blank. As it becomes more circular, the vibration will greatly decrease.
Q3: I have my lathe on a mobile base, and it vibrates a lot. What’s the best fix?
A3: Mobile bases can sometimes introduce wobble. Ensure all locking casters are fully engaged. The best solution is to still try and level the lathe as best as possible on the base, and consider adding a thick rubber mat underneath the mobile base, or even bolting the mobile base itself down if the floor allows.
Q4: Can unbalanced turning tools cause vibration?
A4: While less common than workpiece or machine issues, severely unbalanced or poorly made tools could theoretically contribute. However, the primary impact of dull or poorly ground tools is increased resistance, leading to chatter and vibration from the interaction with the wood, rather than the tool itself vibrating.
Q5: I added weight to my lathe stand, but it still vibrates. What else could it be?
A5: Adding weight helps, but it won’t solve everything if the vibration source is external (like an unbalanced workpiece) or if the lathe isn’t level and secure. Re-check workpiece mounting, tool sharpness, and ensure the lathe bed itself is level.
Q6: How do I know if my lathe is truly “level”?
A6: Use a good quality spirit level. Place it on the lathe’s ways (the flat tracks where the tool rest and tailstock slide). Check for levelness side-to-side and end-to-end. Adjust the lathe’s feet with shims until your bubble is perfectly centered in both directions.
Conclusion: Smooth Sailing Ahead!
Tackling wood lathe vibration might seem like a daunting task, but as we’ve seen, many of the most effective fixes are surprisingly simple and don’t cost a fortune. By systematically checking your workpiece mounting, ensuring your lathe is perfectly level and stable, implementing simple dampening techniques, and keeping your tools sharp, you can dramatically reduce or eliminate most unwanted shaking. A smooth-running lathe isn’t just more pleasant to use; it leads to better results, fewer mistakes, and a safer working environment for you and your projects.
Remember to always prioritize safety. If at any point you feel unsure or the vibration seems excessive and unmanageable,


