Cut stainless steel cleanly and easily with a 1/8″ carbide end mill. This essential guide focuses on dry cutting techniques, making it perfect for beginners working with 316 stainless steel. Learn how to achieve precise results without coolant, saving time and simplifying your setup.
Working with stainless steel can feel a bit intimidating, especially when you’re just starting out. It’s tougher than regular steel and can really give you trouble if you don’t have the right tools or know-how. One common challenge is getting clean, accurate cuts without a flood of coolant, which can get messy and complicated in a home workshop. Finding a reliable way to mill stainless steel, particularly with those precise 1/8-inch cuts you might need, feels like a big hurdle. But don’t worry! With the right approach, especially using a 1/8″ carbide end mill for dry cutting, you can absolutely tackle stainless steel projects with confidence. We’ll walk through everything you need to know, step-by-step, to make this process straightforward and successful. Get ready to mill stainless like a pro!
What is a 1/8″ Carbide End Mill and Why Use It for Stainless Steel?
An end mill is a type of cutting tool used in milling machines. Think of it like a drill bit that can also move sideways. A 1/8″ carbide end mill is specifically a small-diameter end mill, measuring one-eighth of an inch across its cutting edges. The “carbide” part is crucial: it means the tool is made from tungsten carbide, an incredibly hard and durable material. This hardness is key when cutting tougher metals like stainless steel.
Stainless steel, especially grades like 316 which is common for its corrosion resistance, is known for being difficult to machine. It work-hardens (gets harder as you cut it) and can create a lot of friction and heat. Traditional high-speed steel (HSS) end mills might struggle, dull quickly, or even melt under these conditions. Carbide, however, can withstand higher temperatures and maintain its sharpness for much longer periods, making it a superior choice for stainless steel.
The “Dry Cut” Advantage for Beginners
For beginners, the concept of “dry cutting” is a game-changer. It means cutting without using a liquid coolant. While coolants are excellent for managing heat and flushing away chips in heavy-duty industrial settings, they add complexity. You need pumps, hoses, and a way to manage and dispose of the coolant. Dry cutting, when done correctly with the right tools like a carbide end mill, simplifies your setup significantly. It’s cleaner, easier to manage in a home workshop, and often more cost-effective for smaller projects. The high heat resistance of carbide is what makes this possible; it can handle the temperatures generated without the tool failing.
Using a 1/8″ carbide end mill for dry cutting stainless steel means you can achieve intricate details and precise slots. This size is perfect for smaller parts, engraving, or creating fine features without needing a very large or expensive machine. It’s an essential tool for anyone looking to expand their capabilities with one of the trickiest, yet most useful, metals.
Choosing the Right 1/8″ Carbide End Mill for Stainless Steel

Not all carbide end mills are created equal, especially when it comes to tackling stainless steel dry. Here’s what to look for:
Key Features to Consider:
- Material: Ensure it’s solid carbide. Some tools have carbide tips, but solid carbide offers superior strength and heat resistance for this application.
- Number of Flutes: For stainless steel dry cutting, 2-flute end mills are often recommended. Fewer flutes mean more space for chips to escape, which is vital for preventing re-cutting and excessive heat buildup. 3-flute or 4-flute can work, but may require slower feed rates or specific cutting strategies to manage chips effectively. For beginners, 2 flutes are generally the easiest to start with for dry cutting.
- Coating: A TiN (Titanium Nitride), TiAlN (Titanium Aluminum Nitride), or similar high-performance coating can significantly improve tool life and performance by increasing hardness and reducing friction. While not strictly necessary for every dry cut, it’s a big plus for stainless steel.
- Geometry: Look for end mills designed for milling harder materials. Features like a variable helix angle can help reduce vibration and improve surface finish. A “square” end mill (flat bottom) is common, but “corner radius” end mills can add some strength to the corners, preventing chipping. For dry cutting stainless, a sharper, more aggressive edge geometry is usually beneficial.
- Shank: A “reduced neck” or “undercut shank” is a fantastic feature for 1/8″ end mills. It means the body of the end mill is slightly smaller in diameter than the cutting diameter, right behind the cutting head. This prevents the flutes from rubbing against the walls of a deep slot or hole, which can happen with standard end mills and cause overheating or tool breakage. For intricate work in stainless, this is a highly recommended feature.
“Reduced Neck” Explained
Imagine you’re milling a narrow slot. A standard 1/8″ end mill has a shaft that’s also 1/8″ in diameter. If you need to mill a slot that’s just slightly wider than 1/8″ and quite deep, the flutes near the shank can rub against the sides of the slot. A reduced neck end mill has a shank diameter that’s slightly smaller (e.g., 3/16″ or 1/4″ shank for a 1/8″ cutting head) than the cutting diameter. This clearance prevents rubbing and allows the tool to cut freely, especially in deeper cuts or tight-tolerance slots common when working with stainless steel.
For a 1/8″ cutting diameter end mill, you’ll often find shanks that are 1/8″, 3/16″, or 1/4. When seeking out specific tools for stainless, a 1/4″ shank with a reduced neck for a 1/8″ cutting diameter is a very robust and versatile option, providing better rigidity and chip evacuation. Look for descriptions like “1/8” Carbide End Mill, 1/4″ Shank, Reduced Neck, 2 Flute, for Stainless Steel.
Safe Dry Cutting Setup for Stainless Steel
Safety always comes first in the workshop. Dry cutting simplifies things but still requires careful setup and practices.
Essential Tools and Setup:
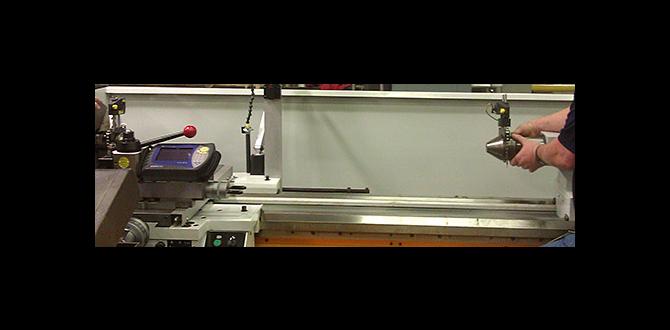
- Milling Machine: Whether it’s a benchtop CNC, a manual milling machine, or even a high-quality drill press with milling capabilities. Ensure it’s sturdy and well-maintained.
- Rigid Workholding: This is non-negotiable. Your workpiece must be clamped down securely. Use a vise with hardened jaws, T-nuts and clamps, or other robust methods. Stainless steel can exert significant forces, so any movement during cutting can lead to tool breakage or a ruined workpiece.
- Proper End Mill Holder: Use a high-quality collet chuck or a milling chuck designed to hold end mills securely. Avoid set-screw holders if possible, as they can deform the shank and lead to runout (wobble).
- Dust Collection: Even though you’re not using liquid coolant, milling stainless steel will produce fine metallic dust. A good dust collection system is essential for your health and to keep your workspace clean. Consider a shop vac with a HEPA filter.
- Safety Glasses or Face Shield: Always wear eye protection. Metal chips, especially from stainless steel, can be sharp and fly at high speeds.
- Hearing Protection: Milling can be noisy, so earplugs or earmuffs are recommended.
- Gloves: Wear cut-resistant gloves when handling sharp tools and finished parts, but avoid wearing loose gloves while the machine is running.
- Magnification (Optional but Recommended): For precise work with small end mills like a 1/8″, a magnifying lamp or even a microscope can help you see what you’re doing and ensure accuracy.
Setting Up Your Machine for Dry Cutting:
- Secure the Workpiece: Clamp your 316 stainless steel stock firmly in the vise. Ensure it’s flat and extends minimally, providing maximum rigidity.
- Install the End Mill: Insert the 1/8″ carbide end mill into a clean collet or chuck. Tighten it securely according to the manufacturer’s recommendations. Make sure the runout (how much the end of the tool wobbles) is minimal.
- Set the Z-Height: Carefully bring the tip of the end mill down to the surface of your workpiece. Use an edge finder, probe, or paper method to accurately set your Z-axis zero point.
- Check for Clearance: Ensure the end mill, collet, and spindle housing have enough clearance around the workpiece and any clamps.
- Connect Dust Collection: Position your dust collection nozzle as close to the cutting point as possible to capture chips and dust as they are generated.
Before you start cutting, it’s always a good practice to run the spindle at a slow speed (without the tool touching the workpiece) to ensure everything is running smoothly and there are no unexpected vibrations.
Dry Cutting Parameters for 1/8″ Carbide End Mill in Stainless Steel (316)

This is where machine specifics come into play. Stainless steel 316 is a moderately tough alloy, and a 1/8″ carbide end mill requires careful speed and feed rate selection. These are starting points; you’ll likely need to adjust based on your specific machine and the exact grade of stainless. Always aim for a light, consistent cut.
The keyword here is “chipload.” This is the thickness of the chip that the end mill’s cutting edge removes with each rotation. For carbide in stainless steel, maintaining an appropriate chipload is critical for preventing tool wear, work hardening, and catastrophic failure. Given the small diameter (1/8″) and the tough material, we need to be conservative.
Understanding Surface Speed (SFM) and Chipload
Surface Speed (SFM): This is the speed at which the cutting edge of the tool is moving across the material, measured in surface feet per minute. Different materials and tool types have optimal SFM ranges. For carbide milling stainless steel, a common range is 200-400 SFM, but for a small 1/8″ end mill doing dry cuts, a more conservative approach is often best.
Spindle Speed (RPM): This is how fast your milling machine’s spindle rotates. It’s calculated from the SFM and the tool diameter.
Formula: RPM = (SFM × 12) / (π × Diameter_inches)
Chipload (IPT): This is the thickness of the chip per tooth, measured in inches per tooth (IPT). For small carbide end mills in stainless steel, a chipload between 0.0005″ and 0.0015″ is typical. Too small a chipload can lead to rubbing and heat buildup (like a scraper), while too large a chipload can break the cutting edge or the tool. For a 1/8″ end mill, aiming for the lower end of this range is wise.
Feed Rate (IPM): This is the speed at which the tool moves through the material, measured in inches per minute.
Formula: IPM = RPM × Chipload × Number of Flutes
Recommended Starting Parameters (316 Stainless Steel, 1/8″ 2-Flute Carbide End Mill, Dry Cut):
These are general guidelines. Always listen to your machine and the tool. If you hear chattering or screeching, adjust your feed rate or depth of cut.
For Milling Slots or Pockets (Full Slotting):
A common strategy for slotting is to use a radial depth of cut (how much of the end mill’s diameter bites into the material sideways) of about 30-50% of the tool diameter. For a 1/8″ end mill, this would be around 0.0375″ to 0.06.
| Parameter | Value | Notes |
|---|---|---|
| Material | Stainless Steel (e.g., 316) | Assume cold-rolled or annealed. |
| Tool Diameter | 1/8″ (0.125″) | Carbide, 2-Flute |
| Surface Speed (SFM) | 200 – 300 SFM | Conservative for dry milling. |
| Spindle Speed (RPM) | ~1900 – 2500 RPM | (Calculated: (200 SFM 12) / (3.14159 0.125″) = 1909 RPM; (300 SFM 12) / (3.14159 0.125″) = 2865 RPM) |
| Chipload (IPT) | 0.0008″ – 0.0015″ | Start at lower end, listen for sound. |
| Feed Rate (IPM) | ~3.1 – 7.0 IPM | (e.g., 2000 RPM 0.0008 IPT 2 Flutes = 3.2 IPM) |
| Axial Depth of Cut (DOC) | 0.030″ – 0.060″ | Up to 50% of tool diameter. |
| Radial Depth of Cut (For Slotting) | 0.0375″ – 0.060″ | 30-50% of tool diameter. For full slotting, 100% of diameter is acceptable if chipload is maintained. |
For Side Milling or Profile Contouring (less than full slotting):
When the end mill is only taking a shallow bite sideways (e.g., cutting a perimeter), the feed rate can be higher. This is sometimes called “high efficient machining” (HEM) or “adaptive clearing” strategies where the tool takes shallow, wide cuts.
| Parameter | Value | Notes |
|---|---|---|
| Material | Stainless Steel (e.g., 316) | Assume cold-rolled or annealed. |
| Tool Diameter | 1/8″ (0.125″) | Carbide, 2-Flute |
| Surface Speed (SFM) | 250 – 400 SFM | Can afford to be slightly more aggressive with lighter radial cuts. |
| Spindle Speed (RPM) | ~2400 – 3800 RPM | (Calculated: (250 SFM 12) / (3.14159 0.125″) = 2387 RPM; (400 SFM 12) / (3.14159 0.125″) = 3820 RPM) |
| Chipload (IPT) | 0.0010″ – 0.0020″ | Can increase slightly if tool is stable. |
| Feed Rate (IPM) | ~4.8 – 15.3 IPM | (e.g., 2500 RPM 0.0015 IPT 2 Flutes = 7.5 IPM; 3500 RPM 0.0020 IPT 2 Flutes = 14 IPM) |
| Axial Depth of Cut (DOC) | 0.030″ – 0.060″ | Keep relatively shallow for less heat buildup. |
| Radial Depth of Cut (For Profiling) | 0.010″ – 0.030″ | Very shallow bite, letting the DOC do most of the work. |
Important Considerations for Dry Cutting:
- Chip Evacuation: This is your #1 priority. If chips aren’t clearing, they get recut, generate heat, and dull the tool. Ensure your dust collection is effective. Use peck drilling or shallow plunging moves when entering material.
- Ramp Plunging: Instead of plunging straight down (which can be very hard on the end mill), use a ramping motion. Program your machine to enter the material