A 1/8-inch carbide end mill can deliver stunning results in aluminum by using the right settings and techniques. This guide will show you how to achieve smooth finishes and intricate details safely and effectively.
Working with aluminum can be a bit tricky, especially if you’re new to machining. It’s a soft metal, which is great because it’s easy to cut, but it can also lead to a gummy mess if not handled correctly with the right tools. You might find your end mill snagging, leaving rough surfaces, or even breaking. It’s a common frustration for beginners, but the good news is that with the right approach, you can achieve beautiful, precise results. This guide is designed to make using a 1/8-inch carbide end mill for aluminum simple and straightforward, ensuring you get clean cuts every time. We’ll walk you through everything you need to know to get those stunning finishes.
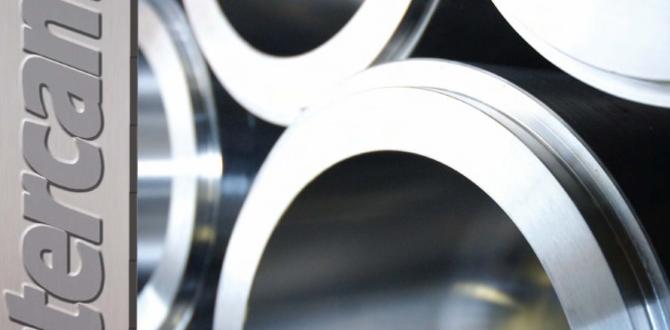
Why a 1/8 Inch Carbide End Mill is Your Aluminum Buddy
When you’re aiming for detail and precision on aluminum, a 1/8-inch carbide end mill is often the go-to tool. Why is this small but mighty tool so popular for aluminum projects? Let’s break it down.
The Power of Carbide
Carbide is a super hard material. This means it can handle higher speeds and temperatures than HSS (High-Speed Steel) tools. For aluminum, which can get gummy, carbide’s hardness is a win because it helps prevent the aluminum from sticking to the cutting edges. This leads to cleaner cuts and a longer tool life.
Size Matters (for Detail!) 1/8 Inch and Beyond
The 1/8-inch size is perfect for getting into small spaces and creating intricate designs. Think about detailed engraving, small features on a prototype, or even delicate jewelry pieces. It allows for a finer level of detail that larger end mills just can’t achieve.
The 1/4 Inch Shank Advantage
You’ll often see 1/8-inch end mills with a 1/4-inch shank. This is a common and sturdy size for collets and holders. The larger shank diameter provides good rigidity, which is crucial for preventing chatter and vibration, especially with smaller tools. This helps ensure smoother cuts and holds up better during machining.
Stub Length for Stability
Many 1/8-inch carbide end mills designed for aluminum come in a “stub length.” This means the cutting flute length is shorter relative to the overall tool length. Why is this good? A shorter flute length results in a more rigid tool. Less overhang means less chance of vibration and deflection, leading to more accurate and cleaner cuts. For soft materials like aluminum, this is a real advantage.
Heat Resistance is Key
While aluminum doesn’t create as much heat as steel, it can still get warm enough to become “gummy” and stick to the cutting tool. Carbide’s inherent heat resistance helps it stay sharp and effective even when aluminum starts to heat up during the cutting process. This allows for higher cutting speeds and feeds, which means faster machining and better surface finishes.
Choosing the Right 1/8 Inch Carbide End Mill for Aluminum
Not all 1/8-inch carbide end mills are created equal, especially when it comes to aluminum. Here’s what to look for:
Number of Flutes
- 2 Flutes: This is often the best choice for machining softer metals like aluminum. The fewer flutes mean more chip clearance. This is vital for aluminum, which tends to produce long, stringy chips that can clog up the flutes and cause problems. More space for chips means smoother cutting and less risk of tool breakage.
- 3 Flutes: Can be used for aluminum, but you need to be more careful with chip evacuation. They offer a slightly better surface finish than 2-flute tools in some applications and can sometimes handle slightly higher feed rates, but 2-flute is generally preferred for ease of use in aluminum.
- 4 Flutes: Generally not recommended for soft, gummy materials like aluminum. They have less chip clearance and can lead to chip packing and tool failure.
Coating
While uncoated carbide is common and works well for aluminum, coatings can offer additional benefits:
- ZrN (Zirconium Nitride): A good all-around coating. It offers excellent lubricity and excellent wear resistance, which helps reduce friction and keep aluminum from sticking.
- TiB2 (Titanium Diboride): This coating is exceptionally good for aluminum. It’s very hard and extremely slick, making aluminum virtually slide off the cutting edge, minimizing chip welding.
- Uncoated: Still a solid choice for aluminum, especially if you’re managing your speeds and feeds well. The key is often the geometry of the end mill itself.
Geometry and Edge Preparation
Look for end mills designed specifically for aluminum:
- Polished Flutes: Highly polished flutes help aluminum chips slide away more easily, preventing buildup.
- “Square” or “Corner Radius”: A standard square end mill has sharp 90-degree corners. A “corner radius” end mill has a rounded edge. For aluminum, a slight corner radius can help prevent chipping and improve tool life by reducing stress concentrations at the corners.
- Right-Hand Cut, Up-Cut/Down-Cut/Straight Helix: For general aluminum machining, a right-hand cut (meaning it spins clockwise to cut) with an up-cut or straight helix is typical. Up-cut helix helps pull chips away from the workpiece, which is good.
Safety First: Essential Precautions
Before we dive into the machining process, let’s talk safety. Machining involves powerful tools and metal, so being prepared is paramount. Always prioritize safety to ensure a good experience and to prevent accidents.
Personal Protective Equipment (PPE) is Non-Negotiable
- Safety Glasses or Face Shield: Always wear ANSI-approved safety glasses. A full face shield offers even better protection, especially when there’s a risk of flying chips.
- Gloves: Wear snug-fitting work gloves to protect your hands from sharp edges and metal chips. Avoid loose-fitting gloves that could get caught in rotating machinery.
- Hearing Protection: While not always necessary for short aluminum jobs, it’s good practice to use earplugs or earmuffs, especially for longer machining sessions or when working with noisy equipment.
- Shop Apron or Sturdy Clothing: Protect your regular clothes and your skin from chips and coolant. Avoid loose clothing, jewelry, or long hair that could get caught.
Machine Safety
- Secure Your Workpiece: Ensure your aluminum is firmly clamped to the milling machine table. Loose work can move unexpectedly, leading to poor cuts or dangerous situations.
- Use the Right Workholding: Vises, clamps, and fixtures are your friends. Make sure they are in good condition and properly tightened using the correct torque.
- Keep Hands Away: Never reach near a rotating tool or the workpiece while the machine is on. Use a brush to clear chips only when the spindle has stopped.
- Read Your Machine Manual: Familiarize yourself with the specific operation and safety features of your milling machine.
Tool Handling
- Proper Collet Usage: Use a clean collet that matches your shank diameter. Ensure the collet nut is properly tightened to securely grip the end mill.
- Check for Runout: A wobbly end mill can lead to poor finish and tool breakage. Ensure your collet and spindle system are accurate.
- Coolant/Lubrication: While aluminum is soft, using a cutting fluid or lubricant is highly recommended. It helps dissipate heat, lubricates the cutting edge, and flushes away chips, preventing them from building up.
Setting Up Your Mill for Aluminum Success
Getting your milling machine set up correctly is just as important as having the right end mill. A few crucial steps will make a big difference in the quality of your cuts and the longevity of your tool.
1. Workpiece Clamping
This is the foundation of good machining. Aluminum needs to be held securely to prevent any movement during the cut. Use a sturdy milling vise or clamps that are appropriate for the size and shape of your aluminum stock.
- Vise: For most hobbyist setups, a good quality milling vise is ideal. Ensure the vise jaws are clean and can grip the workpiece firmly. Position your work so that the clamping pressure is applied directly downwards onto the vise jaws, not sideways where it could lift the workpiece.
- Clamps: If using edge clamps or strap clamps, ensure they are positioned to resist the cutting forces and that the bolts are tightened securely. Use parallels or shims underneath the workpiece to lift it off the machine table and allow clearance for the end mill.
2. Tool Installation
A properly installed end mill is critical for accuracy and safety.
- Cleanliness is Key: Make sure the end mill shank and the collet are clean and free of any oil, debris, or aluminum chips.
- Collet Selection: Use a 1/4-inch collet that is the correct size for your 1/8-inch end mill. A worn or incorrect collet can cause runout (wobble), leading to poor surface finish and tool breakage.
- Secure Grip: Insert the end mill into the collet, ensuring it’s seated properly and the collet nut is tightened firmly. For a 1/8-inch end mill, you want it seated to a reasonable depth (typically at least half the cutting length, or more if possible) to maximize rigidity.
3. Setting Spindle Speed (RPM) and Feed Rate
This is where things get specific for aluminum and your 1/8-inch end mill. Getting these right is crucial for a clean cut and preventing the aluminum from gumming up your tool. We’re aiming for a fast enough spindle speed to keep the cutting edge moving efficiently, but not so fast that it overheats or creates excessive friction.
Spindle Speed (RPM): For a 1/8-inch carbide end mill in aluminum, a good starting point is typically between 6,000 and 12,000 RPM. The exact speed depends on the specific carbide grade, the number of flutes, and the type of aluminum. A higher speed is generally better for aluminum as it helps prevent chip welding.
Feed Rate: This is how quickly you move the tool through the material. For a 1/8-inch carbide end mill with 2 flutes, a starting point might be between 8 to 20 inches per minute (IPM). Again, this is a range, and you’ll adjust based on how the cut sounds and looks.
Chip Load: A common way machinists think about feed rate is “chip load,” which is the thickness of the chip being produced by each cutting edge per revolution. For aluminum with a 1/8-inch, 2-flute carbide end mill, a good chip load is often around 0.001 to 0.003 inches.
Calculation Example:
If your spindle is set to 8,000 RPM and you want a chip load of 0.002 inches per tooth:
Feed Rate (IPM) = Spindle Speed (RPM) × Number of Flutes × Chip Load (inches/flute)
Feed Rate = 8,000 RPM × 2 Flutes × 0.002 in/flute = 32 IPM
Important Note: These are starting points. Always listen to your machine and watch the chips. If you hear squealing or see chips building up on the tool, you may need to increase your feed rate or decrease your spindle speed slightly (or both), or ensure you have enough lubrication.
For more general guidance on speeds and feeds, you can consult resources like the Machining Doctor website, which provides calculators and charts based on material and tool type. Always remember that these calculators are guides; real-world conditions might require adjustments.
4. Coolant and Lubrication
While some aluminum machining can be done dry, using a coolant or lubricant is highly recommended for a 1/8-inch end mill. This accomplishes several critical tasks:
- Reduces Heat: Machining generates heat. Lubricant carries heat away from the cutting edge, preventing the carbide from overheating and losing its hardness.
- Prevents Chip Welding: This is a major issue with aluminum. A lubricant creates a barrier, making it harder for the gummy aluminum to stick to the end mill flutes.
- Improves Surface Finish: Lubrication leads to smoother cuts and a better finish on your workpiece.
- Flushes Chips: A flood of coolant or a spray of mist can help carry chips away from the cutting zone, preventing them from clogging the flutes.
Types of Lubricants for Aluminum:
- Mist Coolant: A fine spray of coolant mixed with air. Effective for high-speed machining and provides good cooling without using a lot of fluid.
- Cutting Fluid/Oil: Specifically designed for metal cutting. Many are formulated for aluminum and offer excellent lubrication.
- WD-40 or Similar: For very light cuts or a quick job, a penetrating oil can offer some lubrication, but it’s not a substitute for dedicated cutting fluids for demanding tasks.
To learn more about metalworking fluids and their applications, the Metalforming Association is a great resource for understanding industry best practices.
Mastering the Cut: Step-by-Step Machining Process
Now that you’re set up and understand the safety and preparation involved, let’s walk through the actual machining process. We’ll cover creating a simple pocket or contour to demonstrate the techniques.
Step 1: Program Your Cut (CAM or Manual)
Depending on your milling machine and your comfort level, you’ll either manually set up your machine movements or use CAM software (Computer-Aided Manufacturing) to generate toolpaths.
- Manual Machining: You’ll directly control the axis movements of your mill (using handwheels or DRO – Digital Readout) to move the end mill through the aluminum. This requires careful attention and a good feel for the cutting process.
- CAM Software: For CNC mills, software like Fusion 360, Vectric Aspire (popular for hobbyists), or others will take your 2D or 3D design and generate G-code, which the machine reads to perform the cuts. Even with CAM, understanding the principles below is essential for setting up your toolpaths correctly.
Step 2: Setting Up Your Zero Point (Work Offset)
This tells the machine (or you, in manual machining) where the edge of your workpiece is in relation to the tool. This is crucial for accurate cuts.
- Edge Finder or Probe: Use an edge finder to locate the exact X and Y boundaries of your workpiece. For Z (depth), you can use a touch-off tool or carefully bring the end mill to the top surface.
- Setting Offsets: In CNC, you’ll set your G54 (or other) work offset based on these locations. For manual machining, you’ll simply zero out your DROs at these established points.
Step 3: Roughing Passes
For any cut that is deeper than half the diameter of your end mill, you’ll likely need multiple passes. This is especially true for smaller end mills like a 1/8-inch. This prevents overloading the tool.
Depth of Cut (DOC): For a 1/8-inch end mill in aluminum, a conservative starting point for depth of cut might be 0.020 to 0.050 inches per pass. You can often push this a bit more with good lubrication and a very rigid setup, but it’s best to start conservatively.
Multiple Passes: If you need to cut 0.100 inches deep, you could do this in two 0.050-inch passes, or three passes of about 0.033 inches. Each pass should be a full-width cut or a stepped cut, depending on your strategy.
Stepover: This is how much the end mill moves sideways in each pass when milling a pocket or contour. For a 1/8-inch end mill, a stepover of 30-50% of the diameter (0.0375 to 0.0625 inches) is usually a good balance between aggressiveness and finish. For very fine detail, you might reduce this further.
Step 4: Finishing Passes
After the roughing passes have removed the bulk of the material, a finishing pass is used to achieve the final dimensions and a smooth surface finish. This pass should ideally be:
- Shallow Depth of Cut: Set the DOC for the finishing pass to be very small, perhaps 0.005 to 0.015 inches.