The 1/8-inch carbide end mill is indeed proven for excellent results in plywood, offering precise cuts and clean edges when used correctly. This versatile tool makes detailed work on plywood accessible for beginners thanks to its durability and sharpness.
Hey everyone, Daniel Bates here from Lathe Hub! If you’ve ever tried cutting intricate designs or precise shapes into plywood, you know how frustrating it can be when your tool chatters, tears out the wood, or just doesn’t give you that clean finish you’re after. It can make even the simplest project feel overwhelming. But don’t worry! Today, we’re diving into one of my favorite small-but-mighty tools for working with plywood: the humble 1/8-inch solid carbide end mill. We’ll explore why it’s such a fantastic choice for this material, the specifics you should look for, and how to get the best results without any fuss. Get ready to add a new level of precision to your plywood projects!
Why a 1/8-Inch Carbide End Mill is a Plywood Powerhouse
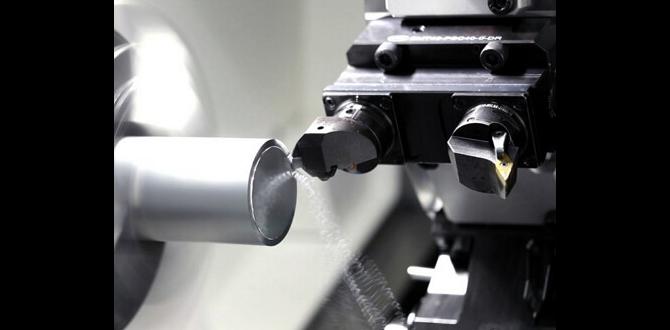
When it comes to cutting plywood, especially with a CNC router or a milling machine, tool selection is key. Plywood, with its layered construction of wood veneers glued together, can be notoriously tricky. The glue layers can be harder than the wood, and the fine grain can easily splinter or tear out if you’re not using the right cutter. This is where the 1/8-inch solid carbide end mill shines.
Here’s why it’s such a good match:
- Carbide Durability: Solid carbide is significantly harder and more wear-resistant than high-speed steel (HSS). This means it stays sharper for longer, even when cutting through the abrasive glues and wood fibers found in plywood. For a small tool like a 1/8-inch end mill, this durability is crucial for maintaining precise cutting edges.
- Small Diameter for Detail: The 1/8-inch (0.125 inch) diameter is perfect for achieving fine details, tight corners, and intricate patterns in plywood. It allows you to create delicate internal radii and sharp external corners that larger bits simply can’t manage directly. This is a game-changer for decorative work or creating small component parts.
- Clean Cutting Action: Carbide end mills, when designed for wood or plastics, often feature specific flute geometries (like sharp single or double flutes) that shear the material cleanly. This minimizes tear-out and splintering, leaving you with a smooth edge that often requires little to no sanding.
- Heat Resistance: Plywood can generate heat during cutting due to friction. Carbide’s high heat resistance allows the tool to maintain its hardness and cutting ability under these conditions, preventing premature dulling and ensuring consistent performance.
Understanding the “Carbide End Mill 1/8 Inch: Proven for Plywood” Keyword
Let’s break down what makes a good 1/8-inch carbide end mill for plywood. When you’re searching for the right tool, you’ll often see specific terms that indicate its suitability. For plywood, you want to pay attention to a few key features:
Key Features to Look For:
- Material: Always ensure it’s “solid carbide.” This is the standard for good reason.
- Diameter: “1/8 inch” is your core dimension.
- Shank Diameter: Most 1/8-inch end mills will have a 1/8-inch shank. However, it’s worth noting if you see “1/4 shank” on a 1/8-inch end mill; this implies a longer reach or a more robust connection for specific tooling setups, though for typical CNC use with a 1/8-inch collet, a 1/8-inch shank is standard. For pure plywood cutting on a hobby CNC, a 1/8″ shank is perfectly adequate.
- Flute Count: For softwoods and plywood, single-flute or double-flute (2-flute) end mills are often preferred.
- Single-flute end mills offer excellent chip evacuation, which is vital for softer materials like plywood that produce chip build-up. This helps prevent overheating and clogging.
- Double-flute end mills can sometimes offer a slightly smoother finish and are more versatile if you cut a wider range of materials. For pure plywood, single-flute is often the go-to for aggressive material removal and chip clearance.
- Coating: While not always necessary for plywood, some specialized coatings can offer additional wear resistance or help with chip evacuation. However, for most hobbyist applications with plywood, an uncoated solid carbide end mill will perform very well.
- Cut Type: “Up-cut” or “down-cut” refers to the direction of the flutes.
- Up-cut end mills pull chips upwards, which is great for clearing them away from the workpiece and preventing recutting, often resulting in a cleaner bottom surface. They can also help hold the workpiece down to the spoilboard.
- Down-cut end mills push chips downwards, which can be useful for achieving a very clean top surface without using tabs, as they effectively hold the material down. However, they can pack chips into the cut.
- For plywood, an “O-flute” end mill (which is essentially a single-flute end mill) is a very popular choice. Many O-flute bits for plastics and wood are designed for efficient chip evacuation. Some specific “compression” bits are also excellent, combining up-cut and down-cut helixes to leave a perfectly clean top and bottom edge, but these are typically larger than 1/8 inch. For 1/8 inch, an up-cut is generally versatile.
- Length: Standard length is common, but for deep pockets, you might look for extended lengths. However, longer tools are more prone to deflection.
- Low Runout: This crucial term refers to how accurately the cutting edge runs relative to the center axis of the tool. Low runout means the tool spins precisely, resulting in a more accurate cut and a better finish. For detailed work on plywood, minimizing runout is essential.
Choosing the Right 1/8-Inch Carbide End Mill for Plywood
So, when you’re at the store or browsing online, what should you pick? For plywood, I generally recommend a solid carbide, 1/8-inch diameter end mill with a 1/8-inch shank, designed for wood or plastics. A single-flute (O-flute) bit is often ideal for aggressive cutting and excellent chip evacuation. Look for bits designed for minimal runout.
Here’s a quick guide to some common types:
| End Mill Type | Pros for Plywood | Cons for Plywood | Best For |
|---|---|---|---|
| Single-Flute (O-Flute) Up-Cut | Excellent chip evacuation, prevents clogging and overheating. Good for cleaner cuts and faster feed rates. Aggressive cutting action. | Can sometimes leave a slightly rougher top surface compared to compression bits. | Detailed cutting, pocketing, general CNC routing of plywood. |
| Double-Flute Up-Cut | Good balance of cutting action and finish. More forgiving if you accidentally hit a knot or glue pocket. | Chip evacuation is not as aggressive as single-flute, can lead to more heat if feed rates are too high. | General purpose cutting, slightly tougher plywood. |
| Down-Cut (less common in 1/8″ for wood) | Can create a very clean top surface by pushing chips down. | Poor chip evacuation in plywood can lead to heat, melting of glue lines, and tool wear. Can also cause dust to pack into the cut. | Precise top surface finishes where dust management is excellent. Generally not the first choice for plywood. |
| Compression Bit (usually larger than 1/8″) | Combines up-cut and down-cut helixes for perfectly clean top and bottom surfaces. | Often not available in 1/8-inch sizes. Can be more expensive. | High-quality finishing passes where both surfaces need to be pristine. |
For beginners working with plywood on a hobby CNC or even a manual milling machine for small tasks, a good quality 1/8-inch single-flute O-flute up-cut end mill is usually your safest and most effective bet. Prioritize brands known for precision machining and low runout.
Setting Up for Success: Your First Cuts
Using your carbide end mill effectively involves more than just chucking it in your machine. Proper setup will drastically improve your results and prolong the life of your tool.
Essential Tools and Setup:
- CNC Router or Milling Machine: Ensure it’s clean, well-maintained, and capable of holding your 1/8-inch end mill securely.
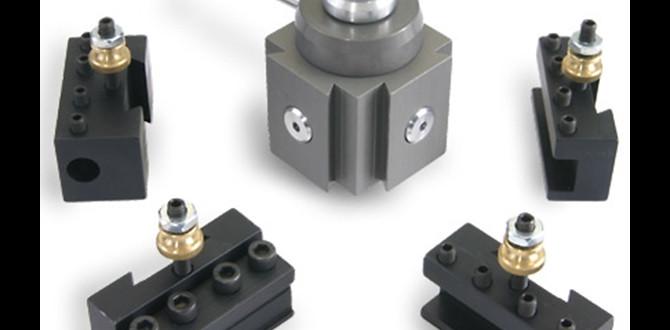
- Collet and Collet Nut: Use a high-quality collet that matches your shank diameter (1/8 inch). A good collet ensures minimal runout. Many CNC users opt for a tool holder with excellent runout specifications.
- Plywood Sheet: Choose the type of plywood suitable for your project. Baltic Birch is often favored for its stability and fewer voids.
- Sacrificial Board/Spoilboard: Always place a sheet of MDF or another inexpensive material beneath your plywood. This protects your machine bed and provides a flat surface for the end mill to cut into, ensuring a clean bottom edge on your workpiece.
- Workholding: Secure your plywood firmly to the sacrificial board. For CNC use, clamps, double-sided tape, or screws can be effective. For manual machines, a vise or generous use of clamps is necessary.
- Dust Collection: Plywood dust can be very fine and harmful. A good dust collection system is a must. This also helps keep the cutting area clear, improving visibility and cooling.
Understanding Spindle Speed and Feed Rate (Plunge Rate)
This is where many beginners struggle. Too fast, and you’ll burn the wood or break the bit. Too slow, and you’ll get tear-out or chatter. For plywood with a 1/8-inch carbide end mill:
- Spindle Speed (RPM): A good starting point for carbide end mills in plywood is often between 18,000 and 24,000 RPM. Lower RPMs might be used on very soft materials or with larger bits, while higher RPMs can generate more heat.
- Feed Rate (IPM – Inches Per Minute): This is how fast the tool moves through the material. For a 1/8-inch bit in plywood, you might start around 30-60 IPM. This will vary greatly depending on the specific plywood (hardwood vs. softwood ply, density) and the depth of cut.
- Plunge Rate: This is how fast the tool descends into the material. Always plunge slower than your cutting feed rate, typically around 10-20 IPM, to avoid shocking the tool and material.
- Depth of Cut (DOC): For a 1/8-inch end mill, it’s generally best to take relatively shallow passes. For full depth cuts, you might aim for 0.10 to 0.25 inches per pass, depending on your machine’s rigidity and the plywood’s hardness. Multiple shallow passes are always better than one deep, aggressive pass.
Where do you find these exact numbers? This is where research and testing come in. Tool manufacturers often provide suggested Speeds & Feeds for their bits. Many online calculators and resources, like those from Shapeoko’s Wiki on materials, can give you excellent starting points. Always perform test cuts on scrap material!
Here’s a simplified table of suggested starting points. Remember, these are starting points and may need adjustment:
| Parameter | Suggested Value for 1/8″ Carbide End Mill in Plywood | Notes |
|---|---|---|
| RPM | 18,000 – 24,000 | Higher RPM can cause heat; lower RPM can cause chatter. |
| Feed Rate (Cutting) | 30 – 60 IPM | Adjust based on material, rigidity, and finish. |
| Plunge Rate | 10 – 20 IPM | Always slower than feed rate. |
| Depth of Cut (per pass) | 0.10 – 0.25 inches | Lighter passes reduce stress on the tool and machine. |
Step-by-Step: Creating a Plywood Design
Let’s walk through a simple project. Imagine you want to create a decorative inlay or a complex profile on the edge of a plywood piece using your CNC router.
- Design Your Project: Use your preferred CAD (Computer-Aided Design) software (e.g., Fusion 360, SketchUp, Easel) to create your design. Ensure your design elements (lines, curves, text) are suitable for a 1/8-inch cutter. This means the smallest internal radius will be 1/16 inch (half the cutter diameter). If you need sharper internal corners, you’ll have to decide whether to accept the rounded corner, manually clean it up, or use a different approach later.
- Set Up Your CAM Software: Import your design into your CAM (Computer-Aided Manufacturing) software. Define your stock material (e.g., 0.5-inch plywood) and select your tool: a 1/8-inch solid carbide O-flute end mill.
- Define Toolpaths: You’ll likely create a few toolpaths:
- Pocketing: For creating recessed areas.
- Profiling: For cutting out shapes or defining edges.
- Engraving: For fine lines or text.
For each toolpath, set your feed rate, plunge rate, RPM, and depth of cut per pass. Consider using “tabs” in your profile cuts to keep the cut-out piece from moving around during the final cut. Many CAM software packages also have options for “lead-in” and “lead-out” moves, which help the tool enter and exit the cut smoothly to reduce marks on the workpiece.
- Generate G-Code: Once your toolpaths are set up, the CAM software will generate the G-code—the instructions your CNC machine understands.
- Prepare Your Machine:
- Clean your machine.
- Install the 1/8-inch carbide end mill into your collet and collet nut, ensuring it’s seated correctly and tightened. Crucially, ensure the runout is minimal by testing the collet and holder.
- Securely mount your plywood onto the sacrificial board. Double-check that it won’t shift during cutting.
- Set Work Zero: Using your CNC’s controller or a touch probe, set your X, Y, and Z zero points precisely where your design dictates. The Z-zero should typically be set on the spoilboard or the top surface of your plywood, depending on your CAM setup.
- Run the Job:
- Ensure your dust collection is on.
- Perform an “air cut” first. This means running the program with the spindle OFF but the machine moving through its programmed path to verify that the cutting depths and movements are correct relative to your workpiece.
- Start the spindle and run your G-code. Monitor the cut closely. Listen for unusual noises (chatter, screeches) and look for excessive smoke or melting, which indicates problems with feed rate, RPM, or depth of cut. Be ready to hit the “Pause” or “Stop” button if something seems wrong.
- Post-Processing: Once the job is complete, remove the tabs (if used) with a chisel, flush-cut saw, or your end mill. You may need a light sanding to smooth any rough edges or tab remnants.
Achieving a Superior Finish on Plywood
The 1/8-inch carbide end mill, when used correctly, can leave a surprisingly clean finish on plywood. However, several factors contribute to that polished look:
- Tool Quality Matters: A truly low-runout, sharp carbide bit from a reputable manufacturer makes a huge difference.
- Optimized Speeds and Feeds: As discussed, finding the sweet spot for your specific plywood is crucial. Too slow a feed rate can cause rubbing and burning; too fast can cause tear-out.
- Depth of Cut Strategy: Taking lighter, multiple passes is almost always better for finish than struggling to cut everything in one go. The final pass can be a lighter “finishing pass” at