Welcome to Lathe Hub! Tackling hardened steel can feel a bit daunting, especially when you’re starting out with milling. You might be wondering which tools can handle it without breaking or causing frustration. That’s where the 1/8 inch carbide end mill shines. It’s a small tool with big capabilities, especially when you need to work with tough materials like HRC60 steel. Don’t worry if this sounds advanced; we’ll break down exactly why this specific end mill is your new best friend for these jobs and how to use it effectively. Get ready to gain the confidence to take on those hardened steel projects!
Why the 1/8 Inch Carbide End Mill is a Champion for HRC60 Steel
When you’re aiming to machine materials as hard as HRC60 steel, your choice of cutting tool is critical. This isn’t just about making a clean cut; it’s about tool longevity, precision, and avoiding costly mistakes. The 1/8 inch carbide end mill, especially those designed for dry cutting, has earned its reputation as a workhorse for these demanding applications. Let’s dive into what makes it so special and why it’s the go-to for many machinists.
The Magic of Carbide
Carbide, specifically tungsten carbide, is a ceramic compound made from cobalt and tungsten. It’s one of the hardest materials in use today, second only to diamond. This extreme hardness is what allows carbide tools to cut through materials that would quickly dull or shatter high-speed steel (HSS) bits. For HRC60 steel, which is already hardened to a significant degree, carbide’s resilience is non-negotiable.
Benefits of Carbide for Hardened Steel:
- Unmatched Hardness: It resists wear and deformation even at high cutting temperatures.
- Heat Resistance: Carbide can withstand higher cutting speeds and temperatures than HSS without softening.
- Edge Retention: It holds a sharp edge for much longer, leading to more consistent cuts and better surface finishes.
- Rigidity: Carbide is a dense and rigid material, which helps minimize chatter and vibration, crucial for accurate machining.
The Significance of 1/8 Inch Diameter
The 1/8 inch size might seem small, but it offers several advantages when working with harder materials like HRC60 steel:
- Precision Detail: Smaller end mills are ideal for intricate cuts, fine details, and working in tight spaces. When machining precise features into hardened steel, the control offered by a 1/8 inch bit is invaluable.
- Reduced Cutting Forces: A smaller diameter means less material is being removed on each pass. This translates to lower cutting forces, which is beneficial for both the workpiece (reducing stress) and the milling machine’s spindle.
- Manageable Heat: While carbide handles heat well, removing material too aggressively can still generate excessive heat. The smaller diameter allows for more controlled material removal, helping to manage temperatures.
- Accessibility: It can reach areas that larger end mills cannot, making it versatile for complex geometries.
Why “Proven for HRC60 Steel”?
When an end mill is advertised as “proven for HRC60 steel,” it means it’s specifically engineered and tested to perform reliably on materials in that hardness range. This typically involves:
- Material Composition: The carbide blend is optimized for extreme hardness and wear resistance.
- Coatings: Many such end mills feature specialized coatings (like AlTiN, TiCN, or TiAlN) that further enhance hardness, reduce friction, and improve heat resistance.
- Flute Design: The number of flutes (cutting edges) and their geometry are often optimized for harder materials, balancing chip evacuation with cutting edge strength. Multiple flutes (4 or more) are usually preferred for harder materials to reduce chip load per tooth.
- Manufacturing Tolerances: They are manufactured to tighter tolerances to ensure accuracy and a good finish.
Choosing the Right 1/8 Inch Carbide End Mill for HRC60 Steel
Not all 1/8 inch carbide end mills are created equal, especially when tasked with cutting HRC60 steel. The “standard length” and “dry cutting” aspects are important clues. For this application, look for end mills with specific characteristics.
Key Features to Look For:
- Number of Flutes: For HRC60 steel, a 4-flute end mill is generally recommended. While 2-flute end mills offer better chip clearance, 4 flutes provide more cutting edges, distributing the load and heat more effectively on harder materials. This also helps prevent chipping of the cutting edge.
- Coating: Look for end mills with high-performance coatings like Aluminum Titanium Nitride (AlTiN) or Titanium Aluminum Nitride (TiAlN). These coatings are excellent for high-temperature applications and machining hardened steels. They form a protective layer that resists wear and reduces friction, allowing for higher cutting speeds and longer tool life.
- End Mill Geometry:
- Square End: This is the most common type and is suitable for general-purpose milling, facing, and slotting.
- Corner Radius: For increased tool strength, especially when taking heavier cuts or milling corners, an end mill with a small corner radius can be beneficial. It helps prevent chipping at the corners and can improve surface finish by reducing stress concentration.
- Roughing/High-Feed: While not usually the first choice for finishing, some specialized roughing end mills have serrated cutting edges that break up chips efficiently, reducing cutting forces. However, for precision finishing on HRC60, a sharp, high-quality square or slight radius carbide end mill is usually preferred.
- Shank: A 1/4 inch shank is common for 1/8 inch end mills, providing a balance of rigidity and compatibility with many milling machine collets. Ensure the shank has a flat (Weldon shank) if your collet system requires it for better holding power and to prevent the end mill from being pulled out under load.
- Length: “Standard length” typically refers to a length that provides a good balance between rigidity and reach. For small diameter end mills, a shorter flute length relative to the overall tool length is generally more rigid. Avoid excessively long end mills for hardened steel unless absolutely necessary, as they can lead to bending and chatter.
- “Dry Cutting” Designation: While not a strict rule, many end mills designed for hardened steel are optimized for dry cutting with the aid of effective chip evacuation and coolant mist if available. Machining HRC60 steel at high speeds can generate significant heat, and while carbide is resistant, managing this heat is still crucial for tool life. Dry machining is often preferred for simplicity and to avoid issues with coolant contamination or chip packing in small flutes.
Material Hardness Recap: HRC60 Explained
The Rockwell Hardness scale (HRC) is a way to measure the hardness of materials. HRC60 is considered very hard. For comparison, most common steels you might find in everyday objects range from HRC20 to HRC35. Tool steels and high-strength alloys are often heat-treated to achieve hardness levels like HRC50, HRC60, or even higher. Machining HRC60 steel requires tools that are harder than the workpiece and can withstand the high temperatures generated.
Setting Up for Success: Your 1/8 Inch Carbide End Mill in Action
Successfully machining HRC60 steel with a 1/8 inch carbide end mill involves more than just having the right tool. Proper setup, speeds, feeds, and machining strategies are crucial for achieving good results and ensuring the longevity of your tool.
Essential Tools and Accessories:
Before you start, gather these items:
- Milling Machine: A good quality benchtop CNC mill or manual milling machine capable of precise spindle speed control.
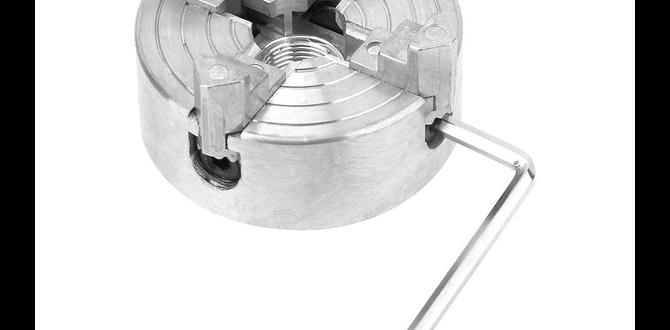
- Collet Chuck or R8 Collet: A high-quality collet system is essential for securely holding the 1/8 inch shank (if it’s 1/4″ with a Weldon flat) and ensuring concentricity.
- End Mill: Your chosen 1/8 inch carbide end mill, ideally with an AlTiN or TiAlN coating and 4 flutes.
- Workholding: A robust vise or fixture to securely clamp your HRC60 steel workpiece. Precision ground, hardened vises are best for this.
- Cutting Fluid/Lubricant (Optional but Recommended): While “dry cutting” end mills are discussed, a mist coolant system or a specialized high-temperature cutting fluid can significantly improve tool life and surface finish.
- Chip Brush/Vacuum: For cleaning chips and ensuring visibility.
- Safety Glasses: Absolutely non-negotiable. Safety glasses or a face shield are required at all times.
- Work Gloves (for handling hot parts): Not while operating the machine.
- Wrenches/Tooling: For your specific milling machine.
Understanding Speeds and Feeds
This is often the trickiest part for beginners. For HRC60 steel, the goal is to remove material efficiently without overheating or damaging the tool. Speeds and feeds will vary based on the specific end mill, the machine’s rigidity, and the coolant used. However, here are general guidelines and how to approach them:
Surface Speed (SFM) / Spindle Speed (RPM)
Carbide cutters generally run at higher surface speeds than HSS. For HRC60 steel with a coated carbide end mill, a starting point for surface speed might be anywhere from 40-80 SFM (Surface Feet per Minute).
To calculate RPM (Revolutions Per Minute), use the formula:
RPM = (SFM 3.25) / Diameter (inches)
For a 1/8 inch (0.125 inch) end mill:
RPM = (SFM 3.25) / 0.125
If starting at 40 SFM: `RPM = (40 3.25) / 0.125 = 130 / 0.125 = 1040 RPM`
If starting at 80 SFM: `RPM = (80 3.25) / 0.125 = 260 / 0.125 = 2080 RPM`
Beginner Recommendation: Start conservatively, perhaps around 1000-1500 RPM. Listen to the cut and observe chip formation. If it sounds smooth and produces small, well-formed chips, you can cautiously increase RPM within the recommended range.
Feed Rate (IPM) / Chip Load (IPT)
Feed rate is how fast the workpiece moves into the cutter. Chip load is the thickness of material removed by each cutting edge.
Chip Load (IPT – Inches Per Tooth): For a 1/8 inch, 4-flute carbide end mill in HRC60 steel, a very small chip load is typical. Start with 0.0005 to 0.0015 inches per tooth (IPT).
To calculate the Feed Rate (IPM – Inches Per Minute):
Feed Rate (IPM) = RPM Number of Flutes Chip Load (IPT)
Using our RPM example of 1200 RPM and a chip load of 0.001 IPT:
Feed Rate = 1200 RPM 4 Flutes 0.001 IPT = 4.8 IPM
If you increase the chip load to 0.0015 IPT:
Feed Rate = 1200 RPM 4 Flutes 0.0015 IPT = 7.2 IPM
Beginner Recommendation: Start with a low end feed rate, around 5-8 IPM. The cut should sound like a crackle or hiss, not like the tool is rubbing or screaming. If the chips are very fine dust, you might be feeding too slowly or cutting too dry/hot. If the chips are large or you hear obvious rubbing, slow down the feed rate.
Depth of Cut (DOC)
For HRC60 steel, especially with small tools, shallow depths of cut are crucial. This is often referred to as “high-speed machining” (HSM) techniques, even in manual machining.
Radial Depth of Cut (Stepover): The sideways step the end mill takes. For finishing, a small stepover (e.g., 10-20% of the tool diameter) is best for surface finish. For roughing, you can go wider.
Axial Depth of Cut (DOC): How deep the end mill cuts into the material vertically. Start conservatively. For HRC60 steel, an axial DOC of 0.010 to 0.020 inches is a good starting point for a 1/8 inch end mill. You might be able to go deeper with aggressive HSM strategies, but for beginners, shallow passes are safer.
Machining Strategy: Step-by-Step Example
Let’s say you want to mill a small pocket or clear out a feature in a block of HRC60 steel with your 1/8 inch end mill.
1. Secure the Workpiece: Mount your HRC60 steel block firmly in a sturdy vise. Ensure it’s indicating perfectly square to the milling table for accurate cuts.
2. Set Up the End Mill: Install the 1/8 inch carbide end mill into a precision collet chuck. Ensure the shank is seated properly.
3. Set Zero: Carefully jog the mill head down to touch off on the workpiece. Set your X, Y, and Z zero points at your desired starting location. The edge of the workpiece or a machined datum surface is common.
4. Tool Engagement: Decide on your cutting entry strategy.
Plunging: For HRC60, avoid plunging straight down if possible, as it creates immense heat and stress. If you must plunge, use a very shallow depth of cut and a slow feed rate, or consider a helical interpolation if your machine supports it.
Ramping/Engaging from the Side: This is preferred. Program or manually command the machine to move horizontally into the material while the end mill is already at its cutting depth, or feed into the side of the material at a shallow angle (ramping).
5. Begin the Cut:
With your RPM set (e.g., 1200 RPM) and Feed Rate programmed (e.g., 5 IPM), engage the end mill.
Use a shallow axial DOC (e.g., 0.015 inches).
If milling a pocket, you’ll likely want to engage the material from the side of the pocket wall.
Use a controlled stepover (e.g., 0.010 inches for a finishing pass) or a climb milling motion.
6. Monitor and Adjust:
Listen: Is the cut smooth, or is there chattering or a high-pitched squeal?
Look: Are the chips forming cleanly, or are they melting into dust? Is the workpiece or tool glowing?
Feel (Carefully): Is the tool or workpiece excessively hot? (Allow to cool before touching!)
Adjust: If the cut is rough, slow down the feed rate. If chips are melting, slow down RPM or increase feed rate slightly, or apply coolant. If the tool seems to be rubbing, ensure your Z-depth is correct.
7. Coolant Application (If Used): If using a mist coolant system or a liquid coolant, ensure it’s directed at the cutting zone. This helps manage heat, lubricate the cut, and clear chips. For HRC60 steel, a good quality synthetic coolant or a heavy-duty lubricator is recommended.
8. Multiple Passes: For deeper pockets, take multiple shallow passes rather than one deep pass. This is crucial for tool life and accuracy. For example, if you need to mill to a depth of 0.100 inches, take 5-6 passes of 0.015-0.020 inches each.
9. Finishing Pass: After roughing out the material, consider a final “spring pass” at a very shallow depth of cut (e.g., 0.001-0.003 inches) and a slightly faster feed rate to achieve the best surface finish.
Dry Cutting vs. Wet Cutting for HRC60 Steel
The term “dry cutting” doesn’t mean you’ll never use any lubrication. It often signifies an end mill designed to perform well with minimal lubrication, often meaning a mist coolant or specialized dry-milling lubricant.
Dry Cutting (with mist/lube):
Pros: Simpler setup, no messy coolant, no chip contamination issues in small flutes, good heat dissipation with proper mist.
Cons: Can still get hot, tool life might be slightly less than optimal wet cutting if not managed perfectly. Required for applications where coolant is undesirable or difficult to manage (e.g., some specific heat-treated alloys).
Wet Cutting (with flood coolant):
Pros: Excellent heat dissipation, washes chips away, superior tool life and surface finish if the right coolant is used.
* Cons: Messy, requires proper coolant management and disposal, can cause