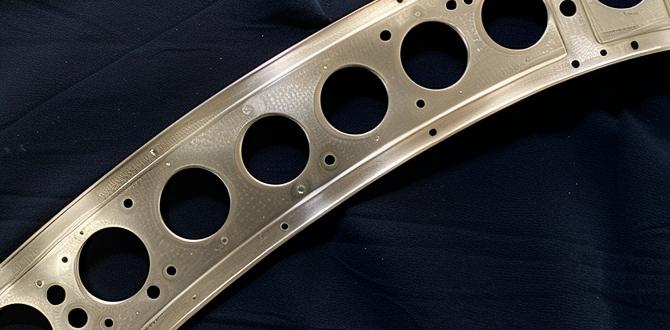
Looking for a reliable way to machine brass without annoying cutter deflection? Using a sharp, appropriately sized carbide end mill, especially one with a smaller diameter and longer reach on a 3/8″ shank, is your proven solution. This setup minimizes flex, ensuring cleaner cuts and better accuracy every time.
Working with brass on a milling machine can be a rewarding experience, but it can also present some unique challenges, especially for beginners. One common frustration is “deflection.” This is when your cutting tool, the end mill, bends or moves slightly away from where you intended it to cut. When this happens in brass, it can lead to rough surfaces, inaccurate dimensions, and even tool breakage. It’s enough to make anyone scratch their head! Don’t worry, though. Many machinists face this issue, and fortunately, there’s a well-understood solution involving the right kind of end mill. This guide will walk you through understanding and overcoming brass deflection so you can get back to making great parts. We’ll cover why deflection happens and how selecting the right carbide end mill makes all the difference.
Understanding Cutting Tool Deflection in Brass
When you’re milling any material, the cutting tool experiences forces. These forces push and pull on the end mill as it slices through the metal. Brass, while relatively soft compared to steel, has its own unique characteristics that can encourage deflection if you’re not careful.
Here’s why deflection can be a problem, especially with brass:
- Material Properties: Brass can sometimes be “gummy.” This means it can cling to the cutting edges, creating more resistance than expected. This increased resistance means more force is being applied to the end mill.
- Tool Holding: If your tool isn’t held securely in the collet or tool holder, it can wiggle. This wiggle exacerbates the forces from the cut.
- Tool Geometry: The design of the end mill itself plays a huge role. Long, thin tools are more flexible than short, stout ones.
- Cutting Parameters: How fast you spin the tool (spindle speed) and how much material you take off with each pass (depth of cut and feed rate) directly impact the cutting forces. Taking too big a bite can overwhelm the tool.
When an end mill deflects, it’s like trying to draw a straight line with a bent crayon. The result isn’t crisp or accurate. In brass, this deflection can cause:
- Poor Surface Finish: The cut edge might be rough or wavy instead of smooth and shiny.
- Dimensional Inaccuracy: Your part might end up slightly oversized or undersized where the deflection occurred.
- Chatter: A vibrating noise and appearance during cutting, indicating the tool is bouncing. This is terrible for tool life and surface finish.
- Tool Breakage: In severe cases, the excessive bending stress can cause the end mill to snap, which is costly and can be dangerous.
Why Carbide End Mills Are Key for Brass
When it comes to tackling brass deflection, the material of your end mill is crucial. While High-Speed Steel (HSS) is a common choice for many machining tasks, carbide end mills offer distinct advantages when working with materials like brass, especially when fighting deflection.
Carbide, a composite material, is substantially harder and more rigid than HSS. This increased rigidity is the primary reason it excels at resisting the bending forces that cause deflection.
Advantages of Carbide for Brass Machining:
- Superior Rigidity: Carbide’s inherent stiffness means it bends significantly less under cutting load compared to HSS. This directly combats deflection.
- Higher Red Hardness: Carbide can withstand much higher cutting temperatures before losing its hardness. This allows for faster cutting speeds, which can sometimes help in clearing chips more effectively in brass, reducing the gumming issue.
- Better Edge Retention: Carbide edges stay sharp for longer, maintaining their geometry. This consistency is vital for predictable cutting and avoiding issues that arise from dull tools.
- Faster Cutting Speeds: Because carbide is so hard and rigid, you can often push it faster. This means quicker machining times and potentially better chip evacuation, which is beneficial in brass.
While carbide tools are generally more expensive upfront than HSS, their superior performance, longer life, and ability to reduce machining problems like deflection often make them the more cost-effective choice in the long run for specific applications. For brass, where deflection can be a persistent headache, a good quality carbide end mill is an investment that pays off.
Choosing the Right Carbide End Mill: Size and Geometry Matters
Now that we know why carbide is great, let’s talk about the specifics of the end mill itself. For brass, and especially for minimizing deflection, the size and design of your end mill are paramount. We’re looking for traits that maximize rigidity and optimize cutting action.
The Role of Diameter and Shank Size
The relationship between the diameter of the cutting flutes and the diameter of the shank is fundamental to rigidity.
- Smaller Diameter for Finer Cuts: When dealing with deflection, a smaller diameter end mill will always be more rigid than a larger one of the same length and material. For instance, a 1/8 inch end mill will deflect far less than a 1/2 inch end mill when subjected to the same cutting force per unit width. This is why we often reach for smaller end mills when accuracy is critical in softer metals like brass.
- Larger Shank Diameter = More Rigidity: The 3/8 inch shank is a very common and robust size for many milling operations. A larger shank diameter provides more material to resist torsional (twisting) and bending forces. Compared to a tiny 1/8 inch shank, a 3/8 inch shank on an end mill of the same cutting diameter is significantly stiffer. It offers a much more stable platform for the cutting edges.
Extra Length Considerations
You mentioned “extra long” in your keyword search. For milling brass without deflection, you generally want the opposite of extra length. A shorter tool is always more rigid. However, sometimes a project requires reaching into a deeper feature. If you absolutely need extra length, it’s a compromise.
- The Deflection Trade-off: If you must use an extra-long end mill, you are inherently introducing more flexibility. To combat this, it’s even more critical to use the smallest diameter possible for the task and to minimize your depth of cut and the feed rate.
- When Extra Length is Necessary: You might need an extra-long end mill if you are milling a deep pocket or need to reach a feature far from the workpiece’s edge. In these situations, you’ll have to manage the increased deflection by taking lighter passes.
Flute Count and Design
The number of cutting edges (flutes) on an end mill also affects its performance in brass.
- 2-Flute End Mills: These are often preferred for softer, “gummy” materials like aluminum and brass. The larger chip gullets (the space between the flutes) allow for better chip evacuation. This is crucial because packed chips can cause friction, heat, and increased cutting forces, leading to deflection and gumming. The fewer flutes mean less contact area per revolution, which can sometimes reduce cutting forces.
- 3-Flute End Mills: These offer a good balance between chip evacuation and smoother cutting action. They can be a good option for brass if chip buildup isn’t a major issue.
- 4-Flute End Mills: Generally best suited for harder materials or finishing operations. They have smaller chip gullets, which can lead to chip packing in soft metals like brass, and can exert more downward force on the workpiece.
For your specific goal of solving brass deflection, starting with a 2-flute carbide end mill with a 3/8 inch shank and a 1/8 inch cutting diameter would be an excellent choice. This combination maximizes rigidity for its diameter and offers good chip clearance for brass.
Essential Carbide End Mill Features for Brass
Beyond material and basic dimensions, certain design features can make a carbide end mill even more effective for machining brass and minimizing deflection.
Coating Considerations
While not always necessary for brass, coatings can enhance performance.
- Uncoated Carbide: Often perfectly adequate and cost-effective for brass. The natural properties of carbide are usually enough.
- ZrN (Zirconium Nitride): A common, all-around coating. It’s fairly slick and can help reduce friction and wear, which is good for brass. Offers good lubricity.
- TiCN (Titanium Carbonitride): A harder coating that offers excellent wear resistance. It might be overkill for general brass work but can be beneficial if you’re running higher speeds or taking slightly heavier cuts.
For minimizing deflection, the rigidity of the carbide itself is far more important than the coating. An uncoated tool is often just fine.
Corner Radius vs. Square End
The shape of the cutting tip can also influence deflection.
- Square End Mills: Have sharp 90-degree corners. These are versatile but can sometimes create more stress in the material at the corner, potentially leading to deeper deflection if forces are high.
- Ball End Mills: Have a fully rounded tip. Great for creating 3D shapes and 2D contouring, but their cutting action is more like “plowing” and can be prone to deflection if not used carefully.
- Corner Radius End Mills: Have a small radius at the tip (e.g., 0.010″ or 0.020″). This offers a bit of a “filleting” action. It strengthens the tip, improving tool life, and can help reduce stress concentration compared to a sharp square corner, sometimes contributing to a more stable cut.
For general milling and pocketing in brass, a square end mill or a corner radius end mill with a small radius is usually a good bet. A square end mill is often the go-to for simple slots and pockets.
Step-by-Step Guide: Milling Brass with a Carbide End Mill to Minimize Deflection
Alright, let’s get practical. Here’s how to set up and machine brass using your chosen carbide end mill to combat deflection. We’ll assume you have a basic understanding of your milling machine’s controls.
What You’ll Need:
- Milling Machine (Benchtop or larger)
- Carbide End Mill (e.g., 1/8″ diameter, 3/8″ shank, 2-flute, suitable for aluminum/brass)
- Collet Chuck or R8 Collets (to hold the end mill securely)
- Workholding: Vise, clamps, or appropriate fixture
- Brass stock
- Cutting Fluid or Lubricant (optional but recommended for brass)
- Safety Glasses and appropriate PPE
- Measuring tools (calipers, depth gauge)
Step 1: Securely Mount Your Workpiece
A workpiece that moves during cutting is a recipe for disaster and deflection. Ensure your brass stock is clamped down firmly in your vise or fixture. If using a vise, make sure the jaws are clean and provide good surface contact.
Beginner Tip: Use soft jaws in your vise if you’re worried about marring the brass surface. Always ensure there’s enough material sticking out for your operation but not so much that it becomes flexible.
Step 2: Install the Carbide End Mill Correctly
This is critical for rigidity. A loose end mill will deflect dramatically.
- Clean Everything: Ensure the collet and the shank of the end mill are clean and free of any chips or oil.
- Insert the End Mill: Place the end mill into the collet.
- Tighten the Collet: Insert the collet with the end mill into your collet chuck or spindle. Tighten the collet securely using the appropriate wrench. Make sure it’s snug. For R8 collets, tighten them in the spindle itself.
Crucial Point: Never tighten a collet with just the end mill in it and leave it there while you go do something else. Always secure it in the spindle or chuck.
Step 3: Set Up Your Cutting Parameters
This is where we actively fight deflection through smart settings.
- Spindle Speed (RPM): For brass with a 1/8″ carbide end mill, a good starting point is often around 5,000 to 10,000 RPM. You might need to experiment, but higher speeds can help chip evacuation. Consult a machining calculator for more precise recommendations based on your specific end mill. A reliable online resource like ISCAR’s Milling Calculator can provide excellent starting points.
- Feed Rate: This is how fast the tool moves into the material. For a 1/8″ end mill in brass, start conservatively. Something like 0.001″ to 0.003″ (0.025mm to 0.075mm) per tooth is a reasonable starting point. This translates to roughly 5-10 inches per minute (IPM) or 125-250 mm per minute for a 2-flute tool at 5000 RPM. You want to hear a consistent cutting sound, not a loud grinding or screaming.
- Depth of Cut (DOC): This is how deep the end mill cuts into the material on each pass. To minimize deflection, take shallow passes. For a 1/8″ end mill, aim for a DOC of no more than 0.050″ to 0.100″ (1mm to 2.5mm). For very delicate work or to ensure absolute accuracy, even shallower cuts are better.
- Stepover: This is the amount the end mill moves sideways for successive passes when milling a larger area. For a 1/8″ end mill, a stepover of 25-50% of the diameter (0.030″ to 0.060″) is typical for roughing. For finishing, you might reduce this.
Step 4: Engage the Spindle and Begin Cutting
With everything set and the safety checks done:
- Apply Lubricant: If using cutting fluid, apply it to the cutting area.
- Start Spindle: Turn on your milling machine spindle to the set RPM.
- Plunge or Approach: Carefully bring the spinning end mill down to the surface of the brass. If using a DRO (Digital Readout) or conversational CNC, you can precisely find zero. For manual machines, use a depth stop or touch method.
- Initiate Feed: Gently feed the end mill into the material at your set feed rate. Listen to the cutting sound. If it becomes rough or chattery, back off the feed rate slightly.
- Take Shallow Passes: Make your first pass at your chosen shallow depth of cut.
- Make Subsequent Passes: Continue your milling operation, taking successive passes at your set depth of cut until you reach your desired final depth. If you need to go deeper than your initial shallow DOC, you can increase the DOC on subsequent passes, but always listen to the tool and watch for signs of chatter or deflection.
Step 5: Inspect and Measure
Once the machining is complete, turn off the spindle and carefully remove the finished part.
- Clean the Part: Remove any chips or coolant.
- Measure: Use your calipers or other measuring tools to check the dimensions and surface finish. You should find that the deflection has been minimized, leading to accurate results.
Troubleshooting: If you still experience deflection, try reducing the feed rate, using an even shallower depth of cut, or ensuring your spindle speed is optimized. Sometimes, a slightly different end mill geometry can make a difference. For more demanding applications, it might be worth consulting resources like the Machinery’s Handbook for advanced techniques.
Carbide End Mills vs. Other Tooling for Brass: A Quick Comparison
To really drive home why carbide is your best friend for this task, let’s look at how it stacks up against other common end mill choices when machining brass and dealing with deflection.
Carbide vs. HSS (High-Speed Steel)
| Feature | Carbide End Mill | HSS End Mill | Impact on Brass Deflection |
| :—————- | :——————————————— | :———————————————— | :——————————————————- |
| Rigidity | Very High | Moderate | Carbide is inherently stiffer, resisting bending better. |
| Hardness | Very High (maintains hardness at high temps) | Moderate (loses hardness at high temps) | Carbide’s rigidity is key; hardness less so for deflection. |
| Edge Retention| Excellent | Good | Consistent sharp edge means predictable cutting forces. |
| Cutting Speed | Can run faster | Slower | Faster speeds can help chip evacuation, reducing gumming. |
| Cost | Higher initial cost | Lower initial cost