Quick Summary: Achieve precise, low runout cuts in tool steel with a carbide end mill by ensuring proper setup, tool selection, and machining parameters. Our guide simplifies this for beginners, focusing on stability and accuracy for a perfect finish.
Hey everyone, Daniel Bates here from Lathe Hub! Ever tried cutting into tough tool steel and ended up with a shaky, wobbly mess instead of a crisp, clean edge? It’s a common frustration for many of us getting started with machining. That imprecise wobble, often called “runout,” can ruin your workpiece and your confidence. But don’t sweat it! With the right approach, even beginners can achieve fantastic, low-runout results using a carbide end mill. We’re going to break down exactly how to get that smooth, precise cut that makes tool steel machining a joy, not a headache. Read on, and let’s turn that wobble into wonderful!
Why Low Runout Matters When Milling Tool Steel
When you’re working with hard materials like tool steel, precision is key. Imagine trying to carve a detailed sculpture with a wobbly chisel – it’s a recipe for disaster, right? The same applies to milling. Low runout is absolutely critical for a few big reasons:
- Surface Finish: High runout means the cutting edges aren’t consistently engaging the material. This leads to a rough, stepped surface finish that’s hard to clean up. Low runout ensures a smooth, consistent cut.
- Tool Life: When an end mill wobbles, some cutting edges take more abuse than others. This uneven wear dramatically shortens the tool’s lifespan. Consistent engagement with low runout helps your carbide end mill last much longer.
- Accuracy: If your tool is wandering, your dimensions will be off. This is especially bad when you need to hold tight tolerances, which is often the case with tool steel parts.
- Chatter Reduction: Runout is a major contributor to that annoying, loud “chattering” sound and vibration during machining. Lowering runout quiets things down and leads to a much more pleasant machining experience.
For beginners, understanding and controlling runout might seem complex, but it all comes down to a few key principles. By focusing on these, you’ll be well on your way to making impressive parts from even the hardest steels.
Understanding Runout: The Wobble Factor
Runout, in simple terms, is the amount a rotating tool deviates from its true axis of rotation. Think of a slightly bent bicycle wheel – it wobbles as it spins. In machining, this wobble happens with your end mill.
There are two main types of runout to be aware of:
- Radial Runout: This is the wobbling side-to-side. The center of the end mill’s cutting edge moves out, then in, as it rotates.
- Axial Runout: This is the up-and-down movement. The end-of-flute cutting edges aren’t perfectly aligned with the spindle’s axis, causing them to cut deeper or shallower than intended as they rotate.
The combination of these can lead to inconsistent cutting depths, poor surface finish, chatter, and premature tool wear. For tool steel, where you’re often pushing through tough material, even a small amount of runout can cause significant problems.
The goal when working with tool steel is to minimize both types of runout as much as possible. This means looking at everything from your machine’s spindle to the way you hold your end mill.
Choosing the Right Carbide End Mill for Tool Steel
Not all carbide end mills are created equal, especially when you’re tackling materials like A2 tool steel. Here’s what to look for to ensure you’re setting yourself up for success:
Material & Coating
- Solid Carbide: Generally, solid carbide end mills offer superior rigidity and heat resistance compared to high-speed steel (HSS). This is essential for cutting hard steels.
- Coatings: For tool steel, consider end mills with specialized coatings like TiAlN (Titanium Aluminum Nitride) or AlTiN (Aluminum Titanium Nitride). These coatings add hardness, reduce friction, and improve performance at higher temperatures.
Flute Design
- Number of Flutes: For milling harder materials like tool steel, end mills with fewer flutes (typically 2 or 4) are often preferred. More flutes can lead to chip packing in tough materials. A 2-flute end mill is excellent for slotting and aggressive material removal, while a 4-flute offers a better surface finish when milling contours or shoulders.
- End Mill Geometry: Look for end mills designed for general machining or specifically for hardened steels. Some have a center-cutting geometry, meaning they have cutting edges on the very tip, allowing you to plunge straight down. Others are non-center-cutting.
Shank and Length
When seeking that “genius low runout for tool steel,” the shank diameter and length are crucial. We’re often looking for something like a “carbide end mill 3/16 inch 8mm shank extra long for tool steel a2 low runout.”
- Shank Diameter: A larger shank diameter means more rigidity. For a 3/16″ cutting diameter, an 8mm shank (which is close to 5/16″) provides significantly more stiffness than a 3/16″ shank, helping to reduce flex and vibration.
- Extra Long vs. Standard: While “extra long” can be useful for reaching deep features, for minimizing runout and maximizing rigidity when milling tool steel, a standard or even a “stub” length end mill is often better. A shorter tool is inherently stiffer and less prone to bending or vibrating. If you need to reach deep, ensure your collet and machine setup are top-notch.
Tolerances
Look for end mills with tight manufacturing tolerances, especially regarding the shank diameter. A shank that’s slightly undersized will reduce the gripping power of your collet, increasing potential runout. Reputable manufacturers often specify shank tolerance (e.g., h6).
The Three Pillars of Low Runout: Machine, Holder, Tool
Achieving low runout isn’t just about the end mill itself; it’s a system. Think of it like building a sturdy table – you need strong legs (your machine spindle), a way to firmly attach the legs to the tabletop (your tool holder), and a well-made tabletop (your end mill).
Pillar 1: The Machine Spindle & Its Condition
The heart of your milling operation is the spindle. Even the best end mill won’t perform if the spindle itself has issues. For beginners:
- Cleanliness: ALWAYS ensure the spindle taper and the collet/tool holder taper are spotless. Even a tiny speck of dirt or coolant can introduce runout. Use a clean rag and, if necessary, a specialized spindle cleaner.
- Spindle Bearings: Worn or damaged spindle bearings are a primary cause of high runout. If your machine feels rough when you spin the spindle by hand (when the motor is off!), or if you hear excessive noise during operation, the bearings might be an issue. This is often a job for a professional, but a machine that’s well-maintained will have less inherent runout.
- Taper Fit: The taper inside your machine’s spindle needs to match the taper of your tool holder or collet. Ensure you’re using the correct type and size.
Pillar 2: The Tool Holder (Collets are King!)
This is where you grip your end mill. For minimizing runout, especially with smaller shank diameters like 3/16″ or 8mm, a high-quality collet system is your best friend.
- Collet Chucks: These systems use a set of individual collets that seat into a larger chuck that then mounts into the spindle. Precision collet chucks (like ER systems) are designed to grip the tool shank very accurately, offering excellent runout performance.
- Collet Quality: Not all collets are created equal. Invest in good quality collets from reputable brands. Cheap, poorly made collets can introduce significant runout on their own.
- Shank Fit: When you insert your end mill into the collet, ensure the shank is fully seated. For an 8mm shank, use an 8mm collet. Avoid using a “close fit” collet (e.g., trying to grip an 8mm shank in a 3/8″ or 9.5mm collet) unless absolutely necessary and you understand the risks. For a 3/16″ shank, use a 3/16″ collet.
- Tightening Procedure: Follow the manufacturer’s instructions for tightening your collet. Ensure the nut is torqued correctly to get a secure grip without deforming the collet excessively. When inserting the end mill into an ER collet, it’s often best to insert the mill into the collet before placing the collet into the chuck nut, then threading the nut onto the chuck.
- Pull Studs/Retention Knobs: For machines that use them (like CNC mills), ensure your pull studs are clean and properly seated in the tool holder.
External Link: For a deeper dive into CNC tool holders, resources like the Iscar Tool Holders section can offer valuable insights into different systems and their applications.
Pillar 3: Proper Tool Installation & Setup
Even with a great machine and holder, how you put it all together matters.
- Clean Everything: We’ve said it before, but it bears repeating. Clean shank, clean collet, clean collet nut, clean spindle taper.
- Correct Collet Size: Use the collet that matches your end mill’s shank diameter (e.g., an 8mm collet for an 8mm shank).
- Full Shank Engagement: Insert the end mill deep enough into the collet so that as much of the shank as possible is supported. This maximizes rigidity and minimizes the leverage that can cause deflection and runout. For an “extra long” end mill, be mindful of how far you are inserting it. Sometimes, a shorter, stubbier end mill is far superior for rigidity.
- Check for Damage: Inspect your end mill shank for nicks, burrs, or damage. Any imperfection here will affect how securely it grips and can introduce runout.
- Balance: For very high-speed machining, balanced tool holders and tools are important. For typical hobbyist speeds, this is less of a concern but worth knowing about.
Step-by-Step: Implementing Low Runout Techniques
Let’s walk through the process of setting up your end mill for minimal runout when milling tool steel.
Step 1: Prepare Your Machine
- Ensure your milling machine is on a stable surface.
- Check that the machine’s Z-axis and spindle are clean.
- If using a CNC, jog the tool changer or prepare for manual tool change.
Step 2: Prepare Your Tool Holder (Collet Chuck)
- Select the correct collet size for your end mill shank (e.g., an 8mm collet for an 8mm shank).
- Clean both the inside of the collet and the shank of your end mill thoroughly with a clean, lint-free cloth and a bit of solvent if needed.
- Inspect the collet for any damage or wear.
Step 3: Install the End Mill into the Collet
- Insert the end mill shank into the collet, ensuring it is seated fully and squarely.
- For an ER collet system, it’s generally best to place the collet into the chuck nut first, then insert the end mill shank into the collet.
- Tighten the collet nut by hand as snug as possible.
Step 4: Mount the Tool Holder into the Spindle
- Ensure the spindle taper and the tool holder taper are clean.
- Carefully insert the tool holder assembly into the machine’s spindle.
- If using a tool release mechanism or retention knob system, engage it according to your machine’s procedure.
Step 5: Final Tightening & Verification
- Once the tool holder is in the spindle, use the appropriate wrench to fully tighten the collet nut. For ER collets, this is usually done with a specific torque wrench or by feel, ensuring a firm grip without overtightening.
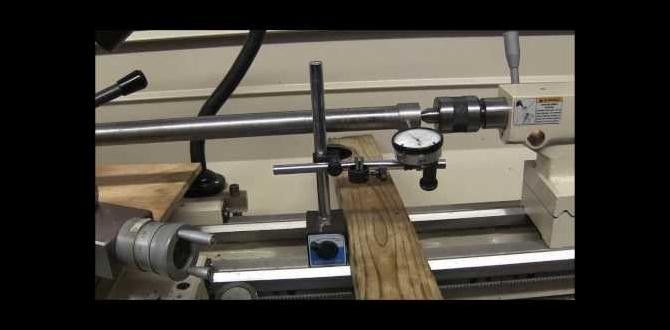
- (Optional but Recommended) If you have a dial indicator and a way to mount it, you can check the runout. Mount the indicator so its stylus touches the end mill shank or, more critically, the cutting edge of one of the flutes. Spin the spindle slowly by hand and observe the dial. Aim for less than 0.001″ (0.025mm) of runout for critical tool steel work.
Step 6: Set Your Machining Parameters
Now that your tool is securely held with minimal runout, you can focus on cutting. For tool steel using carbide:
- Speeds and Feeds: Consult charts or use CAM software to determine appropriate cutting speeds (SFM) and feed rates (IPM). Tool steel is hard, so you’ll likely be running slower than with softer metals. Remember that for carbide, higher spindle speeds coupled with appropriate feed rates are often beneficial, but always start conservatively.
- Depth of Cut (DOC): Start with a conservative depth of cut. For example, for a 3/16″ end mill, a DOC of 0.060″ to 0.120″ might be appropriate, depending on the material and the machine’s rigidity.
- Stepover: For peripheral milling, a side stepover of 20-40% of the tool diameter is common. For finishing passes, you might use a smaller stepover.
- Coolant/Lubrication: Use an appropriate cutting fluid or coolant. This is vital for tool life and chip evacuation when milling tool steel. Flood coolant is ideal, but mist or even a good cutting paste can help.
External Link: Learning about optimal speeds and feeds is crucial. For general guidance, resources like Sandvik Coromant’s Tool Selection pages provide valuable performance data and recommendations for various materials and tools.
Common Beginner Mistakes to Avoid
Even with the best intentions, fresh machinists can stumble. Here are a few common pitfalls when trying to achieve low runout with end mills in tool steel:
- Using the Wrong Collet Size: Trying to grip an 8mm shank in a 1/4″ (6.35mm) collet, or a 3/16″ shank in a collet that’s too large, is a recipe for disaster. Always use a “to size” collet.
- Not Seating the Tool Fully: If the end mill is sticking too far out of the collet, it creates a long, flexible lever arm that will bend and vibrate.
- Dirty Tooling: Grease, chips, or coolant residue on the shank of the end mill or inside the collet will prevent a truly concentric grip.
- Worn Tooling: A worn-out collet chuck, a damaged collet, or a damaged spindle taper will introduce runout no matter how careful you are.
- Overtightening/Undertightening: While you want a secure grip, overtightening can distort the collet and holder, and undertightening leads to slipping and chatter.
- Ignoring Machine Condition: Believing your tool and holder are perfect while the machine spindle bearings are shot is a path to disappointment.
Table: Comparing Tool Shank Diameters and Rigidity
When considering a “carbide end mill 3/16 inch 8mm shank extra long for tool steel a2 low runout,” understanding the impact of shank diameter is important. Here’s a comparison:
| Cutting Diameter | Shank Diameter | Relative Rigidity (Approximate) | Best Use Case |
|---|---|---|---|
| 3/16″ (4.76mm) | 3/16″ (4.76mm) | 1x | Very light duty, non-critical work, where flex is less of an issue. |
| 3/16″ (4.76mm) | 1/4″ (6.35mm) | ~2.2x | Good balance for general machining. |
| 3/16″ (4.76mm) | 8mm (0.315″ /
Related Posts |