For Inconel 718, a carbide end mill with a reduced neck and 8mm or 3/16-inch shank is a proven solution. This design minimizes deflection, crucial for this tough aerospace alloy, ensuring cleaner cuts and longer tool life.
Working with Inconel 718 can feel like trying to machine a superalloy brick. It’s notoriously tough, resists cutting, and loves to eat up tools. If you’ve struggled with chatter, poor surface finish, or rapid tool wear when milling this material, you’re not alone. Many beginners (and even experienced machinists!) find it a real challenge. But don’t worry! There’s a specific type of carbide end mill that’s becoming a go-to solution for this stubborn metal. We’ll break down exactly why it works and how to use it effectively, making your Inconel machining projects much smoother.
Why Inconel 718 is a Machining Beast
Inconel 718 (often just called Inconel) is a nickel-chromium superalloy. Its name hints at its legendary strength and heat resistance. This makes it fantastic for jet engines, rocket parts, and other high-stress environments. However, these same properties make it incredibly difficult to machine.
Here’s why Inconel 718 is a machining challenge:
- Work Hardening: As soon as you start cutting, the material right next to the cut gets even harder. This “work hardening” means each new pass is like cutting into an even tougher material.
- Low Thermal Conductivity: Inconel doesn’t let heat escape easily. This means the cutting edge of your tool gets super hot, leading to faster wear and potential tool failure.
- Gummy Nature: It tends to “gum up” on the cutting tool rather than chip away cleanly, which can cause tool breakage and poor surface finishes.
- High Strength: At room temperature, it’s incredibly strong, requiring significant force to cut.
Traditional machining methods and standard end mills often struggle. They can lead to excessive tool pressure, heat buildup, and a frustrating cycle of broken tools and scrap parts. That’s where specialized tooling comes in.
The Carbide End Mill Solution for Inconel 718
When tackling Inconel 718, the right tool makes all the difference. While various materials exist, carbide has emerged as the champion for milling this superalloy. But not just any carbide end mill will do. We’re looking for a specific design: a carbide end mill with a reduced neck and often an 8mm shank (or the imperial equivalent, 3/16 inch).
This specialized design is engineered to combat the biggest problems when machining Inconel 718. Let’s break down why this combination works so well.
What is a Reduced Neck Carbide End Mill?
Imagine a standard end mill. It has cutting flutes that run all the way from the tip to the shank. Now, picture an end mill where the flutes stop a bit short of the shank, and the remaining un-fluted portion (the neck) is narrower than the cutting diameter. That’s a reduced neck design.
This design has a few key benefits specifically for tough materials like Inconel:
- Minimized Deflection: This is the big one. When milling, especially in materials that require higher cutting forces, the end mill can bend or “deflect” away from the cut. A standard end mill with flutes all the way up to the shank is more prone to this. The reduced neck feature, where the un-fluted portion is narrower and stiffer, provides more clearance and support. This significantly reduces the likelihood of the end mill bending under pressure, leading to more accurate and stable cuts. This relates directly to our keyword: “carbide end mill 3/16 inch 8mm shank reduced neck for inconel 718 minimize deflection.
- Improved Chip Evacuation: The longer, un-fluted neck provides extra space for chips to move away freely. This is vital for Inconel, which can produce long, stringy chips. Better chip evacuation means less chance of recutting chips, which can dull the tool and overheat the workpiece.
- Increased Strength and Rigidity: While the neck is reduced, the overall construction of a quality carbide end mill is very strong. The reduced neck transitions smoothly, maintaining rigidity where it counts.
Why 8mm (or 3/16 Inch) Shank?
You’ll often see these specialized end mills in sizes like 8mm or 3/16 inch for the shank diameter. Why this specific size? It often represents a sweet spot for hobbyist and smaller industrial CNC machines. These dimensions offer a good balance of:
- Rigidity: A thicker shank is generally more rigid than a thinner one, which helps further combat deflection, especially when the tool needs to reach into cavities.
- Machine Compatibility: Many tool holders and collets in common milling machines are designed to accommodate these popular shank sizes.
- Reach: The shank length, combined with the reduced neck, allows for adequate reach into the workpiece without sacrificing rigidity too much.
For Inconel 718, every bit of rigidity helps. The less the tool deflects, the more consistent your cutting forces will be, leading to a better surface finish and longer tool life. This is why a “carbide end mill 3/16 inch 8mm shank reduced neck for Inconel 718” is such a targeted and effective solution.
Key Features to Look For
When you’re shopping for the perfect carbide end mill for Inconel 718, here are some important features to keep an eye out for:
- Carbide Grade: Look for a high-quality sub-micron grade carbide. These are harder and more wear-resistant, ideal for superalloys.
- Number of Flutes: For Inconel, 4 flutes are common. While fewer flutes can sometimes offer better chip clearance in very gummy materials, 4 flutes provide a good balance of rigidity and material removal rate without excessive chatter.
- Coating: A PVD (Physical Vapor Deposition) coating like AlTiN (Aluminum Titanium Nitride) or TiAlN (Titanium Aluminum Nitride) is highly recommended. These coatings add a layer of hardness and heat resistance, further protecting the tool.
- End Geometry: A square end (flat tip) is standard. Some specialized tools might have a ball nose or corner radius, but for general Inconel milling, a square end is often preferred.
- Helix Angle: A higher helix angle (e.g., 30-45 degrees) can help with chip evacuation and reduce cutting forces by slicing through the material more effectively.
Setting Up Your Machining Parameters
Even with the best tool, incorrect settings will lead to frustration. Machining Inconel 718 requires a different approach than softer metals like aluminum or mild steel. The goal is to maintain a consistent cutting action, avoid dwelling in the cut, and keep the tool cool.
Here’s a general guide for setting your cutting parameters (always consult your specific tool manufacturer’s recommendations for best results):
Speeds and Feeds Primer
Speeds and feeds are critical. Too fast, and you’ll burn up the tool. Too slow, and you risk work hardening or chatter. Start conservatively and adjust upwards if possible.
- Surface Speed (SFM): For carbide end mills in Inconel 718, a typical starting range might be 30-80 SFM (Surface Feet per Minute). This is significantly lower than for softer materials.
- Chip Load: This is how much material each cutting edge removes per revolution. For a 3/16 inch (or 8mm) end mill, starting chip loads might be in the range of 0.001″ to 0.003″ per tooth. Again, this is small!
- Spindle Speed (RPM): You calculate this using the Surface Speed and the tool diameter.
RPM = (SFM 3.82) / Tool Diameter (inches)For example, if you’re aiming for 40 SFM with a 3/16″ (0.1875″) end mill:
RPM = (40 3.82) / 0.1875 = 815.47 RPM - Feed Rate (IPM): You calculate this by multiplying the RPM, the number of teeth (flutes), and the chip load per tooth.
Feed Rate (IPM) = RPM Number of Teeth Chip Load (inches per tooth)Using our example of 815 RPM, 4 flutes, and a 0.002″ chip load:
Feed Rate = 815 4 0.002 = 6.52 IPM
Important Note: These are starting points. Your specific machine, rigidity, coolant, and the exact grade of Inconel 718 will influence the optimal settings. It’s always best to check the data sheets provided by your end mill manufacturer.
Coolant/Lubrication is Essential
Machining Inconel 718 generates a lot of heat. Proper coolant and lubrication are not optional; they are absolutely critical. They:
- Cool the cutting edge, preventing premature wear.
- Lubricate the cut, reducing friction and forces.
- Help flush chips away from the cutting zone.
For Inconel, use a high-quality synthetic coolant or a heavy-duty cutting fluid designed for difficult-to-machine metals. A flood coolant system is ideal. For manual machining, a dedicated cutting paste or a strong soluble oil applied liberally can help.
Resources like the NASA Material Science pages sometimes touch upon the properties and applications of advanced alloys, which indirectly highlights the need for robust machining solutions.
Machining Strategies for Inconel 718
When you’re actually milling, keep these strategies in mind:
Maintain Chip Load: Always aim to have the tool cutting. Avoid shallow passes or “air cutting” where the tool isn’t engaged with the material. This prevents the tool from rubbing and work hardening the surface.
Use High-Pressure Coolant: If your machine supports it, high-pressure coolant delivered directly to the cutting zone is highly effective.
Take Conservative Depth of Cut: Start with shallow axial depths of cut and moderate radial depths of cut. You can experiment with increasing these if your setup is rigid and stable.
Use Climb Milling (if possible): Climb milling (where the cutter rotates in the same direction as the feed) can sometimes yield better results by engaging the tooth at its thickest point and reducing the tendency for chip buildup. However, it requires a rigid machine with no backlash. Conventional milling is often safer for beginners.
* Listen and Watch: Pay attention to the sound of the cut. A smooth, consistent sound means things are going well. Any chatter or harsh noise is a sign something needs to be adjusted – usually feed rate, depth of cut, or tool rigidity.
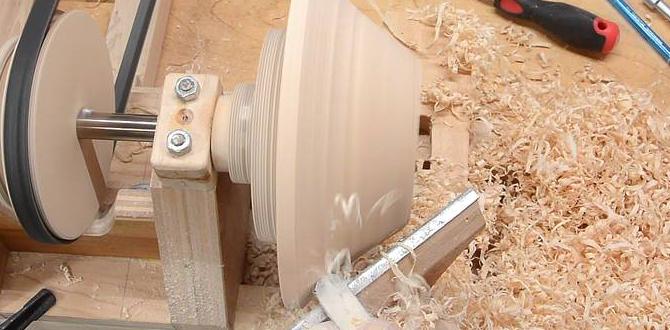
A Practical Example: Milling a Slot in Inconel 718
Let’s say you need to mill a simple slot in a block of Inconel 718 using a 3/16 inch reduced neck carbide end mill.
Tools and Materials Needed:
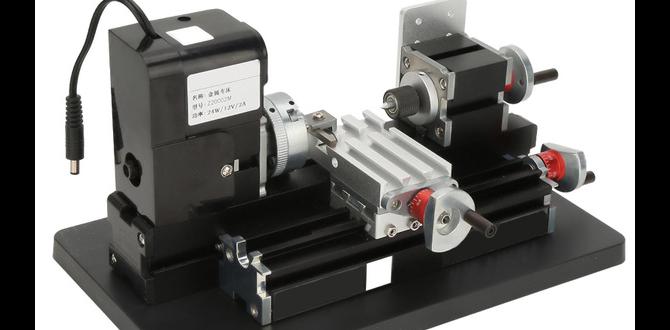
- CNC Milling Machine (or a very rigid manual mill)
- 3/16 inch (8mm shank) 4-flute, AlTiN coated carbide reduced neck end mill
- Inconel 718 workpiece
- Appropriate workholding (e.g., strong vise, fixture)
- High-quality cutting fluid or flood coolant system
- Tool holder (e.g., ER collet chuck for good runout)
- Calipers or micrometer for measurement
- Safety glasses and appropriate PPE
Step-by-Step Process:
- Secure the Workpiece: Mount the Inconel 718 block firmly in your vise or fixture. Ensure it’s stable and won’t move during machining.
- Install the End Mill: Place the 3/16 inch reduced neck carbide end mill into a high-quality collet chuck. Ensure the collet is the correct size and tightened properly.
- Set Zero and Tool Length: Carefully find the X, Y, and Z zero points on your workpiece using your preferred method. Measure the tool length accurately.
- Program/Set Speeds and Feeds: Based on the general guidelines and manufacturer data, set your spindle speed (RPM), feed rate (IPM), axial depth of cut, and radial depth of cut. Remember, for a 3/16″ end mill, you might start with an axial depth of cut around 0.020″ and a radial depth of cut of 0.040″ to 0.060.
- Apply Coolant: Ensure your coolant system is running and directed at the cutting zone.
- Begin the Cut: Start your milling operation.
- Monitor the Process: Listen for any unusual sounds (chatter, rubbing). Watch the chip formation. Are they small and clear, or long and stringy?
- Make Adjustments: If you hear chatter, you might need to increase the feed rate slightly, reduce the depth of cut, or ensure your tool holder has minimal runout. If the tool seems to be wearing quickly or the finish is poor, you might need to reduce your sfm or chip load.
- Multiple Passes (if necessary): For deeper slots, you’ll likely need multiple passes, clearing out the material gradually. Always ensure you have good chip evacuation between passes.
- Final Cut/Finishing: For critical dimensions, you might take a light finishing pass at a slightly higher feed rate and a very shallow depth of cut to achieve a better surface finish.
- Inspect Your Work: Once the operation is complete, remove the workpiece and inspect the slot for dimensions, surface finish, and any signs of tool damage.
This step-by-step process, combined with the right tool, turns a daunting task into a manageable one.
Comparison: Reduced Neck vs. Standard End Mill for Inconel
To really highlight why the reduced neck design is superior for Inconel 718, let’s compare it to a standard end mill.
| Feature | Reduced Neck End Mill (Ideal for Inconel) | Standard End Mill (Less Ideal for Inconel) |
|---|---|---|
| Deflection Resistance | High: Narrower, un-fluted neck provides better support and reduces bending. Minimizes chatter and improves accuracy. | Lower: Full flutes up to the shank offer less support, making it more prone to bending under high cutting forces, leading to chatter and inaccuracy. |
| Chip Evacuation | Good to Excellent: Extra space in the neck helps clear chips more effectively, reducing recutting and heat. | Fair: Can sometimes trap chips, leading to tool breakage or poor surface finish. |
| Tool Rigidity | Very Good: Designed for high-strength alloys. Strong carbide structure with optimized flute geometry. | Good: Sufficient for many materials but can be pushed beyond its limits in demanding applications like Inconel. |
| Recommended Use Case | Inconel |