Carbide End Mills are the proven best choice for cutting mild steel, offering superior performance, speed, and tool life compared to other materials. For beginners tackling mild steel projects, understanding carbide’s advantages and how to use it effectively is key to achieving clean cuts and successful machining.
Hey there, machinist friends! Daniel Bates here from Lathe Hub. Ever stare at a piece of mild steel and wonder which cutting tool will make that chip-breaking dream a reality? It can feel a bit overwhelming with so many options out there. But when it comes to mild steel, there’s one tool that consistently proves its worth: the carbide end mill. It might sound a bit technical, but trust me, once you get the hang of it, you’ll wonder how you ever machined without it. We’ll break down exactly why carbide shines with mild steel and how you can use it to get those amazing results you’re aiming for.
Why Carbide is King for Mild Steel
Mild steel, while forgiving compared to harder alloys, still benefits immensely from the robust nature of carbide end mills. Unlike their High-Speed Steel (HSS) cousins, carbide tools can handle higher cutting speeds and tougher conditions, making them exceptionally efficient for this common workpiece material.
The Advantages of Carbide End Mills
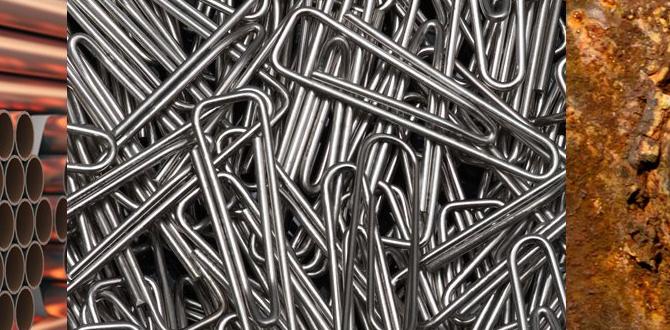
Carbide end mills are made from tungsten carbide, a composite material known for its extreme hardness and ability to withstand high temperatures. This makes them ideal for various machining tasks, especially with materials like mild steel.
Superior Hardness: Carbide is significantly harder than HSS. This means it can cut through materials more effectively and maintain its sharp edge for much longer. For mild steel, this translates to cleaner cuts and less force required.
Higher Heat Resistance: Machining generates heat. Carbide’s ability to resist deformation and maintain hardness at higher temperatures allows for faster cutting speeds. This significantly speeds up your machining time. Think of it like wearing oven mitts – you can handle more heat for longer.
Increased Rigidity: Carbide tools are stiffer than HSS. This rigidity reduces vibration and chatter, leading to better surface finishes and more precise dimensions on your workpiece. For a beginner, this means fewer frustrating mistakes!
Longer Tool Life: Because carbide holds its edge longer and resists wear better, your end mills will last significantly longer. This saves you money and reduces the frequency of tool changes, keeping your workflow smooth.
Versatility: While we’re focusing on mild steel, carbide end mills can also handle a range of other materials, making them a versatile addition to your workshop.
What is Mild Steel Exactly?
Mild steel, also known as low-carbon steel, is an iron alloy with a carbon content typically below 0.3%. It’s popular because it’s relatively inexpensive, easy to form and weld, and offers good toughness. However, its ductility means it can sometimes “gum up” softer cutting tools, leading to poor chip formation and tool wear. This is where carbide’s superior cutting action comes in handy.
For those interested in the metallurgy of steel, the National Institute of Standards and Technology (NIST) offers a wealth of information on various metal properties and their behaviors.
Choosing the Right Carbide End Mill for Mild Steel
Not all carbide end mills are created equal, and selecting the right one for your mild steel project is crucial for optimal results. Here’s what to look for:
Key Features to Consider
Number of Flutes: This refers to the number of cutting edges on the end mill.
2 Flutes: Excellent for softer materials like aluminum and plastics. For mild steel, they can be used, especially for slotting applications, but can sometimes lead to chip packing if not managed.
3 Flutes: A good all-around choice for mild steel. They offer a good balance between material removal rate and chip evacuation.
4 Flutes: Generally preferred for harder materials or when a smoother finish is desired. They offer better stability and heat dissipation. For general roughing and finishing of mild steel, 3 or 4 flutes are excellent.
Coating: End mills often come with coatings that enhance their performance.
Uncoated (Bright): A good starting point for mild steel, especially if you’re using a coolant or lubricant.
TiN (Titanium Nitride): A common, cost-effective coating that adds hardness and lubricity, reducing friction and heat. It’s particularly good for mild steel.
TiCN (Titanium Carbonitride): Offers even higher hardness and abrasion resistance than TiN, making it excellent for tougher jobs and extended tool life.
AlTiN (Aluminum Titanium Nitride): Designed for high-temperature applications and tougher steels. While maybe overkill for plain mild steel, it offers excellent performance and extended life if available.
Shank Diameter: This is the diameter of the part of the end mill that grips into your tool holder. Ensure it matches your machine’s collet or tool holder size. Common shank diameters include 1/4″, 1/2″, 3/8″, 6mm, 8mm, and 12mm.
Length of Cut (LOC) and Overall Length (OAL):
Length of Cut: How far down the flutes the cutting edges extend. Choose a LOC that’s sufficient for your desired cut depth.
Overall Length: The total length of the end mill. A longer tool (long reach) can be useful for reaching into deep pockets or around features, but it also increases the chance of deflection.
End Type:
Square End: The most common type, used for general milling, slotting, and profiling.
Corner Radius: Features a rounded corner which adds strength to the cutting edge and can produce a fillet in the workpiece.
Ball Nose: A hemispherical tip, used for 3D contouring and creating curved surfaces or fillets.
A common and very effective choice for beginners working with mild steel is a 3 or 4 flute, uncoated or TiN coated, square end carbide end mill with an 8mm shank. For example, a carbide end mill 3/16 inch 8mm shank long reach for mild steel MQL friendly is a great phrase to search for if you’re looking for specific features. The “MQL friendly” aspect means it’s designed to work well with Minimum Quantity Lubrication, a very efficient way to cool and lubricate your cut.
Essential Machining Parameters for Mild Steel with Carbide
Getting the settings right is crucial. These are starting points, and you might need to adjust them based on your specific machine, setup, and the exact grade of mild steel. When in doubt, always err on the conservative side.
Understanding Cutting Speed and Feed Rate
Cutting Speed (Surface Feet per Minute – SFM or Meters per Minute – m/min): This is the speed at which the cutting edge moves across the surface of the workpiece. Carbide can handle much higher SFM than HSS. For mild steel with an uncoated carbide end mill, a good starting point is around 300-600 SFM (approx. 90-180 m/min). Coated tools can often handle higher speeds.
Feed Rate (Inches per Tooth – IPT or Millimeters per Tooth – mm/tooth): This is how much material each flute of the end mill cuts on each revolution of the spindle. It’s directly related to the cutting speed and spindle speed. A common starting point for a 1/4″ or 6mm end mill in mild steel might be 0.002 – 0.005 IPT (0.05 – 0.12 mm/tooth).
Calculating Spindle Speed (RPM)
Your CNC machine or mill operates in Revolutions Per Minute (RPM). You need to calculate this based on your desired cutting speed and the diameter of your end mill.
Formula:
`RPM = (Cutting Speed (SFM) 12) / (π Diameter of End Mill (inches))`
Or in Metric:
`RPM = (Cutting Speed (m/min) 1000) / (π Diameter of End Mill (mm))`
Example:
Let’s say we want to mill mild steel with a 1/2″ diameter, 4-flute TiN coated carbide end mill.
We’ll aim for a cutting speed of 400 SFM.
`RPM = (400 SFM 12) / (3.14159 0.5 inches)`
`RPM = 4800 / 1.5708`
`RPM ≈ 3056`
So, you’d set your spindle speed to around 3000-3100 RPM.
Calculating Feed Rate (IPM or mm/min)
Once you have your spindle speed (RPM), you can calculate your feed rate in inches per minute (IPM) or millimeters per minute (mm/min).
Formula:
`Feed Rate (IPM) = RPM Number of Flutes Feed per Tooth (IPT)`
Or in Metric:
`Feed Rate (mm/min) = RPM Number of Flutes Feed per Tooth (mm/tooth)`
Example (continuing from above):
We have our 3056 RPM. Let’s use a feed rate of 0.004 IPT.
`Feed Rate (IPM) = 3056 RPM 4 flutes 0.004 IPT`
`Feed Rate (IPM) ≈ 48.9 IPM`
Set your machine’s feed rate to approximately 49 IPM.
Here’s a handy table summarizing typical starting parameters for uncoated carbide end mills in mild steel:
| End Mill Diameter | Flutes | Cutting Speed (SFM) | Feed per Tooth (IPT) | Depth of Cut (Radial – DOC) | Depth of Cut (Axial – WOC) |
|---|---|---|---|---|---|
| 1/4″ (6mm) | 3 or 4 | 300 – 500 | 0.002 – 0.004 | 0.05″ – 0.10″ (1.2mm – 2.5mm) | 0.02″ – 0.05″ (0.5mm – 1.2mm) |
| 1/2″ (12mm) | 3 or 4 | 300 – 500 | 0.003 – 0.006 | 0.10″ – 0.20″ (2.5mm – 5mm) | 0.04″ – 0.08″ (1mm – 2mm) |
| 3/4″ (18mm) | 4 | 300 – 500 | 0.004 – 0.008 | 0.15″ – 0.30″ (3.8mm – 7.6mm) | 0.05″ – 0.10″ (1.2mm – 2.5mm) |
Note: These are starting points. Adjust based on machine rigidity, coolant, and specific steel type.
Depth of Cut (DOC)
Axial DOC (WOC – Width of Cut): How deep the end mill cuts into the material along the Z-axis. For roughing, you can take deeper cuts. For finishing, shallower cuts are needed for a better surface finish. A good rule of thumb for roughing is 0.1 to 0.5 times the tool diameter, but start shallower with less rigid setups.
Radial DOC (Stepover): How much the end mill moves sideways across the material. For roughing, you might take a full or nearly full radial cut (stepover of 50-100% of the tool diameter). For finishing, a smaller stepover (e.g., 20-40% of the tool diameter) will yield a smoother surface.
Step-by-Step Guide to Milling Mild Steel with a Carbide End Mill
Here’s a basic process for using your carbide end mill on mild steel. Always remember to prioritize safety!
Step 1: Preparation and Safety
1. Safety First: Wear safety glasses at all times. Ensure your workpiece is securely clamped. Keep hands and loose clothing away from moving parts.
2. Inspect Your End Mill: Check for any chips or damage on the cutting edges. A damaged end mill can lead to poor results or breakage.
3. Secure the Workpiece: Use sturdy clamps, vises, or fixtures to firmly hold your mild steel workpiece. Any movement can cause a crash.
4. Install the End Mill: Insert the end mill into a clean collet and tighten it securely in your machine’s spindle. Ensure it’s centered.
5. Set Up Coolant/Lubrication: For mild steel and carbide, a coolant or lubricant is highly recommended. This could be a flood coolant system, a spray mist system (like MQL), or even a simple cutting fluid applied manually. This cools the cutting zone, extends tool life, and helps evacuate chips.
Step 2: Setting Up Your Machining Parameters
1. Enter Data into CAM or Controller: Input your calculated spindle speed (RPM), feed rate (IPM or mm/min), and depths of cut into your CNC controller or your CAM software. If you’re operating manually, you’ll set these on your machine.
2. Establish Work Zero (Z-Zero): Carefully set your Z-axis zero point at the top surface of your workpiece. This ensures the tool cuts to the correct depth.
Step 3: Performing the Cut
1. Initiate the Spindle: Start the spindle at the programmed speed.
2. Ramp In or Plunge:
Ramp In: For a smoother entry, program a helical ramp or lead-in move. The end mill spirals down into the material. This is gentler on the tool.
Plunge: If ramping isn’t an option, the end mill will feed straight down. Ensure your plunge feed rate is significantly slower than your cutting feed rate (often 25-50% of the cutting feed rate).
3. Execute the Milling Path: Let the machine follow its programmed path (e.g., profiling, pocketing, contouring).
4. Monitor Chip Formation: Watch the chips being produced. They should be relatively small and curly, breaking easily. If they are long, stringy, or packing up, your feed rate might be too low, or your chip evacuation is poor. Adjust settings if necessary.
5. Listen to the Machine: Pay attention to the sound. A smooth, consistent hum is good. Loud chattering or high-pitched squealing can indicate an issue with feeds, speeds, rigidity, or coolant.
Step 4: Finishing and Inspection
1. Finishing Passes: For critical dimensions or a smooth surface finish, make a final pass with a reduced depth of cut and often a slightly slower feed rate.
2. Retract the Tool: Program the tool to retract completely from the workpiece.
3. Clean Up: Coolant and chips will need to be cleaned up. Use compressed air or a brush.
4. Inspect Your Work: Measure your part to ensure it meets your required tolerances and check the surface finish.
Important Note on MQL (Minimum Quantity Lubrication):
MQL systems are fantastic for making machining more efficient and environmentally friendly. They deliver tiny amounts of lubricant and air directly to the cutting zone, providing excellent cooling and lubrication without the mess of flood coolants. For setups using MQL, ensure your carbide end mill is designed to work with it – often referred to as “MQL friendly.” This usually means it has flute designs that help distribute the mist effectively. For more on MQL systems, reputable manufacturers like IGF provide detailed technical resources.
Common Issues and Troubleshooting
Even with the best tools, you might run into snags. Here’s how to troubleshoot:
Chatter or Vibration:
Cause: Machine rigidity, worn tooling, incorrect speeds/feeds, too deep of a cut.
Fix: Ensure workpiece and tool are held rigidly. Slow down spindle speed or increase feed rate slightly (or vice-versa, depending on the nature of the chatter). Reduce depth of cut. Use a tool with a helix angle or harmonic pitch flutes if available.
Chip Packing (Galling):
Cause: Feed rate too low, insufficient chip evacuation, wrong tool for the job.
Fix: Increase feed rate per tooth slightly. Ensure coolant is effectively clearing chips. Try a 2-flute end mill if slotting, or ensure you’re not taking too deep a pass. Consider a different coating or a tool with better chipbreaker features.
Poor Surface Finish:
Cause: Too high spindle speed for the feed rate, worn tool, too shallow depth of cut, workpiece deflection.
Fix: Implement a finishing pass with lower DOC and appropriate feed. Ensure tool is sharp. Check rigidity and clamping.
Tool Breakage:
* Cause: Too aggressive feeds/speeds, plunging too fast, workpiece moving, weak clamping, running