
Quick Summary:
A die holder for a lathe securely grips a die, allowing precise threading on external diameters. This guide explains what a die holder is, why you need one, how to choose the right type, and offers clear, safe instructions for its use, empowering beginners to achieve professional results on their lathe.
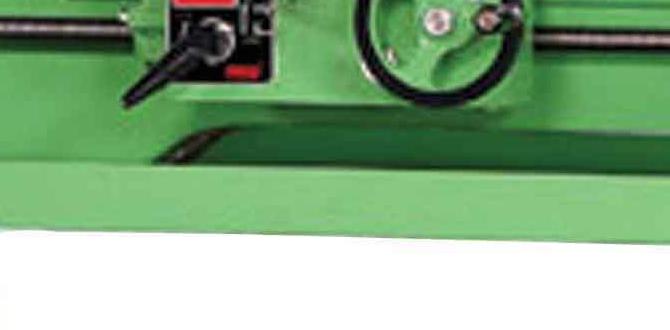
Threading on a metal lathe might seem a bit daunting at first. You’ve got your workpiece spinning, and you need to cut some neat, tiny grooves of a specific pattern onto it. For internal threads (holes), we use taps, and that’s a topic for another day. But for the outside threads, the ones you see on bolts or shafts, we need a special tool called a die. Now, just holding a die in your hand and trying to guide it against a spinning metal piece? That’s a recipe for trouble! That’s where a die holder for your lathe comes in. It’s a sturdy clamp that holds the die firmly, making it safe and accurate to cut external threads. We’re going to break down everything you need to know to get started.
What Exactly is a Die Holder for a Lathe?
Think of a die holder as a specialized vise or clamp designed specifically for holding a die head when you’re threading on a lathe. A die itself is a hardened steel cutting tool with internal threads. It’s used to create external screw threads on a workpiece. Without a proper holder, a die is difficult, if not impossible, to control precisely on a lathe. The die holder attaches to the lathe tool post, just like your regular turning tools. It then provides a stable, adjustable platform to hold the die, allowing you to feed it into the spinning workpiece smoothly and accurately.
The main job of a die holder is to:
- Securely grip the die: This ensures the die doesn’t slip or chatter during operation, which could ruin your workpiece or damage the die.
- Provide alignment: It helps align the die perfectly with the axis of the workpiece, leading to straight, clean threads.
- Allow for controlled feeding: The holder, mounted on the compound rest or tool post, lets you advance the die onto the material at a consistent rate.
- Facilitate thread cutting: It’s the essential component for performing external threading operations on a lathe.
Why Do You Need a Die Holder for Lathe Threading?
If you’re aiming for professional-looking external threads on your lathe projects, a die holder isn’t just a nice-to-have accessory; it’s a necessity. Trying to thread without one is like trying to hammer a nail with a feather – it’s inefficient, inaccurate, and potentially dangerous. Here’s why it’s so important:
- Safety First: A spinning metal workpiece is unforgiving. Holding a die by hand while the lathe is running is incredibly risky. It can easily get caught, break your grip, and cause severe injury. A good die holder keeps the die locked in place, minimizing the risk of accidents.
- Achieve Accurate Threads: For any functional screw thread, precision is key. A die holder maintains the correct alignment between the die and the workpiece. This ensures that the threads are straight, have the correct pitch, and are concentric with the part’s diameter. Sloppy threads are useless and can lead to parts not fitting together or failing under load.
- Consistent Results: Whether you’re threading a single bolt or a batch of components, a die holder helps you achieve consistent results every time. This repeatability is crucial for manufacturing and for hobbyists who want their projects to look and function professionally.
- Ease of Use: While threading still requires skill and attention, a die holder significantly simplifies the process. It provides a stable reference point and allows for controlled movements, making the task much more manageable, especially for beginners.
- Die Protection: A die is a precision cutting tool. Improper use, like letting it skip or bind, can easily damage the cutting teeth, rendering it useless. A secure die holder protects your investment in the die.
Types of Die Holders for Lathes
Die holders come in a few main varieties, each with its own advantages. Understanding these can help you pick the one that best suits your lathe and threading needs.
Adjustable Die Stocks (for smaller lathes or hand threading)
While not strictly lathe-mounted die holders, these are essential tools for many machinists, especially for smaller lathes or for threading operations where a dedicated die head isn’t used. These are essentially handles that you screw the die into. You can sometimes use them in conjunction with a tailstock-mounted adapter, or simply by hand for shorter threads and less critical applications. They are often used for chasing threads where you might need to back the die off and retreat. For lathe work, they are less common for continuous threading but useful for certain setups.
Die Heads (MT Shank / Morse Taper)
These are very common for manual lathes. A die head is a more complex assembly that holds the die chasers (the cutting inserts). It typically mounts into the lathe’s tailstock via a Morse Taper shank. The head itself has a mechanism that allows it to open and close, disengaging the chasers automatically once a desired thread length is reached, or allowing you to manually retract it. This is excellent for preventing over-threading or accidentally running the die off the end of the workpiece. They offer very stable and precise threading.
Quick-Change Tool Post Mounted Die Holders
If your lathe is equipped with a quick-change tool post system (like a bxa or usa style), you can get specialized holders that mount directly into the tool post. These are designed to be held by the tool post, just like any other cutting tool. They provide a very rigid setup and are easy to position and align. The main advantage here is that they integrate seamlessly into your existing tool holding system. Often, these holders will accept standard die sizes.
Hex Die Holders
These are a simpler type of holder, often used with a standard die. They have a shank that fits into the tool post or tailstock chuck and a hexagonal socket to grip the die. They are less common for precision lathe threading compared to die heads but can be useful for quick, less critical jobs. They rely on a strong shank and a good grip on the die via a grub screw or clamping mechanism.
Choosing the Right Die Holder For Your Lathe
Selecting the correct die holder involves considering a few factors about your lathe, the work you do, and the dies you plan to use.
Lathe Size and Taper
Morse Taper: Most lathes have a Morse Taper (MT) in the tailstock. 2MT and 3MT are common. Ensure your die head or holder has the correct taper shank to fit. For example, a die head with an MT2 shank fits a tailstock for MT2.
Die Size and Type
Standard Dies: Most thread cutting on lathes uses round dies. These come in standard fractional inch or metric sizes. Your die holder needs to be able to securely grip the diameter of the die you have. For example, a holder might be specified for 1-inch round dies.
Tool Post System
Quick Change Tool Posts (QCTP): If you have a QCTP, you’ll likely want a die holder that fits directly into your tool post holders. This offers rigidity and easy setup.
Application and Precision Required
General Purpose: For occasional general threading, a sturdy die head with a tailstock mount is excellent.
High Precision/Production: For more demanding work, a QCTP-mounted holder provides excellent rigidity.
Hand threading on small lathes: Adjustable die stocks can be your primary tool, sometimes used with tailstock support.
Budget and Availability
Die heads can be more expensive than simple die holders. Consider what you can afford and what is readily available for your specific lathe model and threading needs.
Essential Accessories and Dies
Just having the die holder isn’t enough. To thread effectively, you’ll need the right dies and a few other items.
Dies
- Types: Typically, you’ll use round, split, or button dies for external threading. Split dies can often be adjusted slightly for minor thread size correction.
- Sizes and Pitches: You’ll need dies that match the thread size (e.g., 1/4-20, M6x1) you want to cut. “20” in 1/4-20 means there are 20 threads per inch. “M6x1” means a 6mm diameter bolt with a 1mm pitch between threads.
- Material: High-speed steel (HSS) is common and durable for most metalworking.
Threading Lubricant
Crucial for cutting clean threads and prolonging die life. Different lubricants are best for different materials:
- General Purpose: Tap Magic, Mobilmet, or even 3-in-1 oil can work for various metals.
- Aluminum/Brass: Kerosene-based or specialized aluminum cutting fluids.
- Steel: More robust EP (Extreme Pressure) additives are beneficial.
You can learn more about cutting fluids and their uses from resources like the Metalworking Fluids Guide.
Dial Indicator or DRO (Digital Readout)
While not strictly mandatory for every threading job, a dial indicator or DRO is invaluable for setting the depth of cut accurately when using a die head that requires manual advancement or for setting the initial die position precisely. This helps ensure your threads start at the correct location and are of the intended depth.
Centers (Live/Dead)
For holding the workpiece securely between the headstock and tailstock. A live center is preferred as it rotates with the workpiece, reducing friction and heat.
Measuring Tools
- Calipers: For measuring thread diameter and ensuring it’s within spec.
- Thread Pitch Gauge: To verify you are using the correct die and to check your finished thread pitch.
How to Use a Die Holder for Lathe Threading: A Step-by-Step Guide
This guide focuses on using a typical die head mounted in the tailstock. The principles are similar for other types of holders, but the manipulation might differ slightly.
Step 1: Prepare Your Lathe and Workpiece
- Select and Mount Workpiece: Securely mount your workpiece between centers or in the chuck, ensuring it’s running true.
- Deburr the End: Lightly chamfer or deburr the end of the workpiece where you will be threading. This helps the die start smoothly without catching. Use a file or a small countersink tool.
- Set Lathe Speed: Threading requires much slower speeds than turning. Consult your lathe manual or a threading speed chart. For much shafting, speeds can be as low as 50-100 RPM.
- Prepare the Die Holder: Ensure the die head is clean and the die is correctly seated and tightened within the head. Test its opening and closing mechanism.
Step 2: Mount the Die Holder
- Insert Die Head: Mount the die head’s Morse Taper shank into the lathe’s tailstock.
- Align with Workpiece: Carefully advance the tailstock so the die head is close to the end of the workpiece, but not touching. Ensure the die is centered on the workpiece’s diameter.
Step 3: Engage the Die
- Lubricate: Apply a generous amount of threading lubricant to the end of the workpiece and the die.
- Start Rotation: Set the lathe to its slowest spindle speed.
- Engage Die: Slowly advance the tailstock handwheel to bring the die into contact with the spinning workpiece. You should feel it begin to cut. Many die heads have a ratcheting mechanism that will engage automatically, or you may need to push firmly.
- Feed and Continue Cutting: Once the die starts cutting, you can often release some pressure on the tailstock handwheel, allowing the die to pull itself onto the workpiece. Continue to feed lubricant.
Step 4: Completing the Thread
- Monitor Progress: Keep an eye on the thread length. For automatic-closing die heads, they will eventually disengage. For manual ones, you might need to listen for changes in sound, feel, or use a dial indicator to precisely stop the cut.
- Retract: Once the desired thread length is achieved, stop the lathe. Open the die head (if it has a manual open/close feature) or allow it to disengage automatically.
- Back Away: Carefully retract the tailstock to pull the die head away from the workpiece.
Step 5: Finishing and Inspection
- Clean: Clean the workpiece and the die to remove chips and lubricant.
- Inspect: Use calipers and a thread pitch gauge to check the diameter and pitch of your new thread.
- Minor Adjustments (if applicable): If the thread is slightly rough or too large, you might be able to use a split die and slightly adjust its opening to skim the thread for a cleaner finish. This often requires practice.
- Back Taper (Optional): For some applications, a slight back taper on the thread is desired. This is achieved by slightly angling the die head or by specific die head designs.
Safety Precautions for Lathe Threading
Threading operations require extra vigilance. Always prioritize safety:
- Never use hands to guide the die: Always use the die holder and engage it properly.
- Wear appropriate PPE: Safety glasses are non-negotiable. Gloves are generally discouraged when operating machinery due to the risk of them getting caught.
- Slower speeds are safer: Threading is not a race. Slower speeds allow for better control and reduce the risk of severe accidents if something goes wrong.
- Keep hands clear: Always be aware of where your hands are relative to the spinning workpiece, the tool post, and the tailstock.
- Sharp tooling: Ensure your dies are sharp and that you are using adequate lubrication. Dull dies require more force, increasing the risk of binding and accidents.
- Secure workpiece: A loose workpiece can easily chatter, break the die, or be ejected from the machine.
- Emergency Stop: Know where your lathe’s emergency stop button is and be ready to use it.
- Clear chips: Chips can build up quickly and may get caught in rotating parts. Clear them with a brush or magnet when the machine is stopped.
Troubleshooting Common Lathe Threading Issues
Even with the right tools, you might encounter problems. Here are a few common ones and how to fix them:
Problem: Threads are rough or have torn surfaces.
Cause: Dull die, insufficient lubrication, or too fast a cutting speed. The workpiece material might also be “gummy” (like some mild steels or aluminum).
Solution: Use a sharper die, a better cutting lubricant for the material, and reduce the spindle speed. For gummy materials, try a lubricant with higher sulfur content or use a coolant mist. Ensure the die is properly seated.
Problem: Die doesn’t start cutting or slips.
Cause: Workpiece end not deburred, insufficient initial feed pressure, or the die is not aligned perfectly.
Solution: Ensure the workpiece end is slightly chamfered. Apply more steady forward pressure with the tailstock handwheel to initiate the cut. Double-check the alignment of the die head with the workpiece.
Problem: Threads are too loose (undersized).
Cause: Die might be worn, or the die holder is not providing enough consistent pressure. Sometimes it’s the die itself not being correctly sized.
Solution: Try a new die. If it’s an adjustable die, try tightening it slightly to take a deeper cut. For split dies, you can often adjust them to take a slightly finer cut.
Problem: Threads are too tight (oversized).
Cause: Usually a symptom of a die that’s either worn in a way that makes threads larger or an incorrect die being used. Forcing it can also cause issues.
Solution: Verify you have the correct die for the thread specification. If using an adjustable die, ensure it’s not set to take too small a cut. Sometimes, a very light “finishing” pass with a carefully adjusted die can help.
Problem: Die binds or snags.
Cause: Insufficient clearance at the end of the thread, material buildup in the die, or a workpiece that is not running true (wobbly).
Solution: Ensure you’re not trying to thread past a shoulder where clearance is needed. Lubricate generously. Clean the die periodically. Make sure the workpiece is correctly mounted and running concentric.
Frequently Asked Questions (FAQ) about Die Holders for Lathes
<div class="
Related Posts
- Top Cnc Metal Lathe Tools For Precision Machining
- Carbide End Mill 3/16″ Extra Long: Essential PVC Tool

Ultimate Setup Guide: Metal Lathe Power Feed Made Easy
Ultimate Buying Guide: Metal Lathe Wiring Diagram Explained
Maximize Performance: Lathe Headstock Bearing Drive System
Enhance Precision With Milling Tool Presetting For Accuracy- Carbide End Mill: Proven Steel Cutting Tool Life
- This is a bit tricky! The provided keyword, “carbide end mill 1/8 inch 3/8 shank extra long for stainless steel 316 mirror finish,” is **extremely specific to machining and manufacturing**, not directly to “how to cancel car wash subscription.” It looks like there might be a misunderstanding or a mix-up in the request, as these two topics are entirely unrelated. I cannot create a relevant and compelling SEO blog title for “how to cancel car wash subscription” using that machining keyword. **If you intended the topic to be about the carbide end mill, please confirm, and I can generate a title for that.** **If you still want a title for “how to cancel car wash subscription” and the machining keyword was a mistake, please provide a relevant keyword for that topic.**