Build a DIY mini wood lathe from a drill! This guide offers a simple, step-by-step process for turning a basic power drill into a functional mini lathe. It’s a cost-effective way for beginners to explore woodturning without a big investment, perfect for small projects and learning foundational skills safely.
Ever wished you could shape wood into intricate forms but found traditional lathes too expensive or complex? Many budding woodworkers feel the same way. The idea of turning, where you spin a piece of wood against a sharp tool to carve it, is incredibly appealing. But the cost of a commercial lathe can be a real barrier. It’s frustrating when your creative ideas are held back by your budget! Luckily, there’s a clever and accessible solution that’s perfect for beginners. We’re going to show you how to build your very own mini wood lathe using a common household tool: a power drill.
This project is designed with you in mind. We’ll break down the process into easy steps, using readily available materials. By the end of this guide, you’ll have a working mini lathe ready for small projects and a solid understanding of how it operates. Let’s transform your drill into a woodworking marvel!
What is a DIY Mini Wood Lathe from a Drill?
Essentially, a DIY mini wood lathe from a drill is a homemade machine that uses the spinning power of a standard cordless or corded drill to rotate a piece of wood. This rotating wood can then be shaped using chisels or other cutting tools. Think of it as a simplified, scaled-down version of a professional wood lathe. It’s a fantastic project for:
- Anyone new to woodturning.
- Hobbyists with limited workshop space.
- Those who want to try turning without a significant financial commitment.
- Makers looking for a fun, hands-on woodworking project.
The core idea is to securely mount the drill and create a stable platform where you can hold your wood and guide your cutting tools. Because it’s DIY, you can customize its size and features to suit your needs. It’s an excellent way to learn the fundamental principles of lathe operation and wood shaping.
Why Build Your Own Mini Lathe?
You might be wondering why you’d go through the effort of building one when you can buy a small lathe. Here are a few compelling reasons:
- Cost-Effectiveness: This is often the biggest driver. Building a mini lathe from a drill can be significantly cheaper than buying even a basic commercial mini lathe. You likely already own the main component—the drill!
- Learning Experience: The process of building the lathe itself is a fantastic learning opportunity. You’ll gain practical skills in woodworking, assembly, and understanding mechanical principles.
- Customization: You can design and build it to your exact specifications. Need it to be a certain size? Want to add specific features? You have full control.
- Skill Development: Once built, it’s an excellent platform to practice woodturning techniques on small projects, like making custom pen blanks, small bowls, or decorative parts.
- Satisfaction: There’s immense satisfaction in creating something functional with your own hands.
Safety First: Important Considerations
Before we dive into the build, let’s talk safety. Woodturning involves spinning objects at speed and using sharp tools. It’s crucial to take precautions:
- Eye Protection: Always wear safety glasses or a face shield. Flying wood chips are a real hazard.
- Hand Protection: While turning, it’s generally recommended to NOT wear gloves. Loose clothing or gloves can get caught and pulled into the spinning wood, causing serious injury.
- Secure Mounting: Ensure all components are securely fastened. A wobbly lathe is dangerous.
- Tool Rest Stability: The tool rest must be solid and properly positioned.
- Wood Stability: The wood must be securely mounted to the drill’s chuck and the live center.
- Drill Power: This DIY lathe is best suited for softer woods and smaller projects. Don’t overload the drill.
- Dust Collection: Wood dust can be harmful. Work in a well-ventilated area or consider a dust collection system.
- Learn Proper Technique: Understand how to hold and use turning tools safely. This involves using the tool rest correctly and applying gentle, controlled pressure.
For more detailed safety information on woodworking, the Occupational Safety and Health Administration (OSHA) provides extensive guidelines on machine guarding and safe workshop practices.
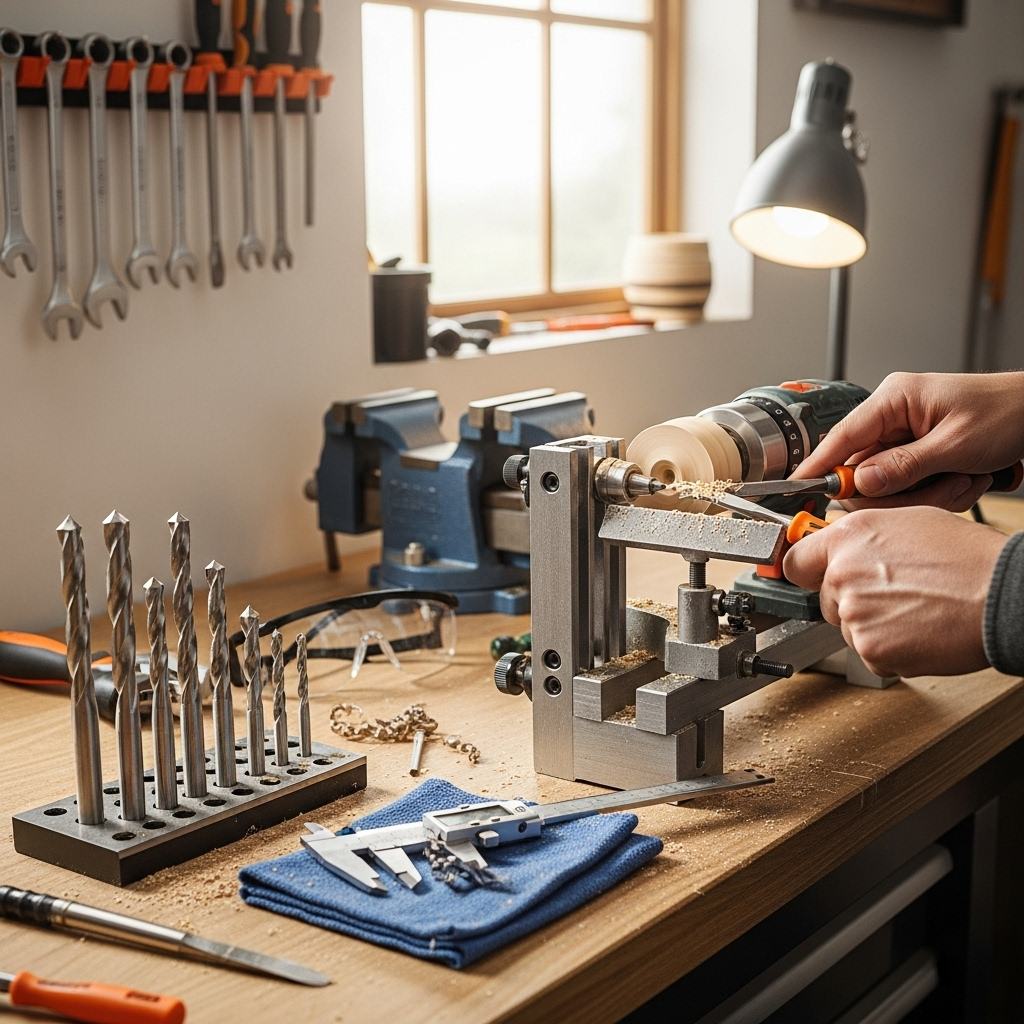
Materials and Tools You’ll Need

Gathering your supplies is the first step in any DIY project. Here’s a list of common materials and tools you’ll likely need. You might be able to scavenge some items from your workshop or local hardware store.
Essential Materials:
- Power Drill: A sturdy corded or cordless drill with a keyless chuck is ideal. Variable speed is a big plus.
- Wood for Bed: Two long, straight pieces of sturdy lumber (e.g., 2x4s, 1x4s) to create the lathe bed.
- Wood for Support: Sturdy pieces for the headstock and tailstock supports.
- Plywood: A piece of plywood for the base and possibly for the headstock/tailstock mounts.
- Wooden Dowel or Metal Rod: For the tool rest. Length will depend on your design.
- Lag Screws and Wood Screws: Various sizes for assembly.
- Drill Chuck Adapter (Optional but Recommended): A Jacobs chuck or similar that can be mounted to a threaded rod to hold the wood securely.
- Live Center and Dead Center (or Spur Drive): A live center threads onto the tailstock support and spins with the wood. A dead center (or spur drive) is mounted on the headstock end to stabilize the wood. You can find these at woodworking supply stores.
- Wood Glue: For strong joints.
Essential Tools:
- Saw: Miter saw, circular saw, or handsaw for cutting wood.
- Drill Bit Set: Various sizes for pilot holes and clearance holes.
- Screwdriver Set (or Drill Driver Bits): To match your screws.
- Measuring Tape: For accurate measurements.
- Pencil: For marking.
- Clamps: To hold pieces together while gluing or screwing.
- Sandpaper: For smoothing rough edges.
- Safety Glasses: Non-negotiable!
- Optional:
- Wood Chisels: For actually turning (you’ll need specific turning chisels for a lathe).
- Jigsaw or Bandsaw: For cutting more intricate shapes if needed.
- Orbital Sander: For faster smoothing.
Step-by-Step Guide to Building Your Mini Lathe
Here’s how to construct your DIY mini wood lathe from a drill. Remember to measure twice and cut once!
Step 1: Design and Plan
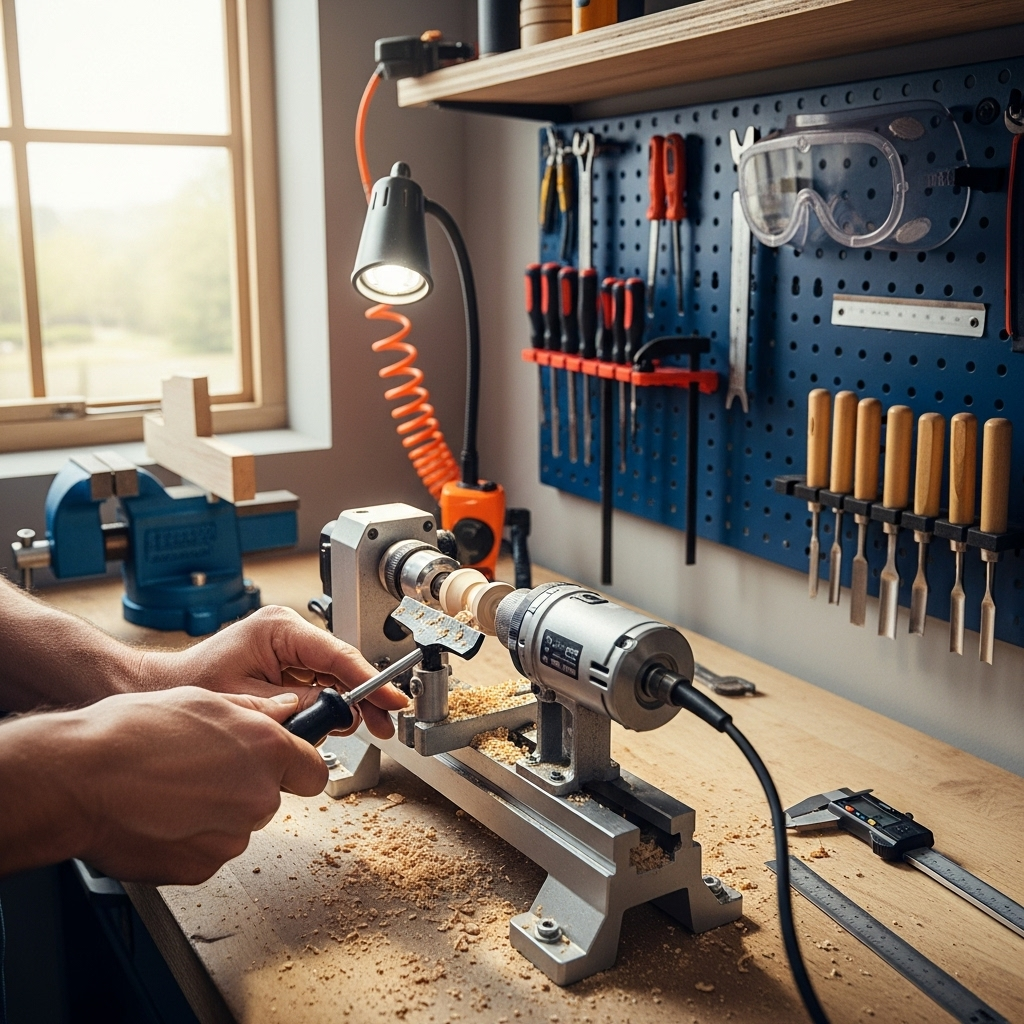
Before cutting any wood, sketch out your design. Consider the length of your bed, the height of your headstock and tailstock, and how your drill will be mounted. A common setup uses two parallel rails for the bed, with the drill mounted at one end (headstock) and a stationary support at the other (tailstock). The tool rest sits on the bed, adjustable and positioned between the headstock and tailstock.
Key Design Elements:
- Bed Length: Dictates the maximum workpiece length.
- Bed Width: Needs to be stable enough to prevent rocking.
- Headstock Height: Where the drill will sit. Ensure it supports the drill securely.
- Tailstock Height: Must align perfectly with the drill’s spindle axis to support the other end of the workpiece.
- Tool Rest Position: Needs to be adjustable and at the correct height.
Step 2: Construct the Lathe Bed
Cut your lumber for the bed. You’ll typically use two long, parallel lengths of wood connected by shorter cross braces. This forms a strong, stable foundation. For example, take two 4-foot long 2x4s and use shorter 1×4 pieces screwed and glued perpendicularly across their ends and at one or two points in the middle for stability.
Tip: Ensure the bed is perfectly flat and the two main rails are parallel. This is crucial for everything else to align correctly.
Step 3: Build the Headstock Support
This is where your drill will be mounted. You need a sturdy structure that holds the drill securely with its spindle pointing horizontally. A common method is to create a block of wood or a small box that the drill can sit in or be clamped onto. This entire assembly then attaches firmly to one end of your lathe bed.
Mounting the Drill:
- You can build a cradle for the drill body.
- Use strong clamps or straps to secure the drill to this support.
- Ensure the drill’s chuck is easily accessible at the spindle end.
Drill Chuck Setup:
If you’re using a separate chuck adapter, mount it now. The idea is to have a reliable chuck that can grip the wood. Some builders might thread a rod into a hole drilled through a block, then attach a Jacobs chuck to the end of the rod. The other end of the wooden block is then screwed to the drill’s spindle (if the drill allows direct spindle threading, which is rare) or mounted to a spindle held by the drill’s chuck itself and supported by the headstock structure.
A simpler and more common approach is to fabricate a mount that holds the drill itself, then create a method to attach the wood directly to the drill’s chuck.
Example of a Headstock Assembly:
| Component | Description |
|---|---|
| Base Plate | A piece of plywood or solid wood to mount the drill cradle onto. |
| Drill Cradle | Wooden blocks shaped to hold the drill body securely. |
| Mounting Brackets | Sturdy brackets or strong screws to fix the base plate to the lathe bed. |
Step 4: Build the Tailstock Support
The tailstock support needs to be at the exact same height as the drill’s spindle axis. It will hold the dead center (or spur drive) that supports the other end of your workpiece. This support can be a simple block of wood or a more elaborate structure that allows for some adjustment if needed.
Function of the Tailstock Support:
- To hold the dead center firmly in place.
- To provide stability for the end of the wood being turned.
- To align perfectly with the headstock’s axis.
It’s crucial that the tailstock support is mounted on the bed and can be slid to accommodate different workpiece lengths. Some designs incorporate a simple sliding mechanism with locking screws.
Step 5: Create the Tool Rest

The tool rest is where your turning chisels rest as you shape the wood. It needs to be sturdy, smooth, and adjustable in height and position. A common DIY method involves a metal rod or a thick, smooth wooden dowel mounted on an adjustable bracket that slides along the lathe bed.
Building an Adjustable Tool Rest:
- The Rest Bar: Find a smooth, round metal rod or hardwood dowel (around 1/2″ to 3/4″ diameter). Its length should be enough to span the bed with some overlap.
- The Support Bracket: Fabricate a bracket that holds this rest bar. This bracket will likely have a vertical post that slides into a slot or a channel on the lathe bed.
- Securing the Rest Bar to the Bracket: The rest bar needs to be attached to the bracket, often with screws or a clamp, so it can be angled slightly if desired.
- Adjustable Height: Ensure the bracket allows you to slide the rest bar up or down to be just slightly below the center line of your workpiece.
- Sliding Mechanism: The bracket needs to slide smoothly along the lathe bed and have a locking mechanism (like a set screw or a wing nut) to hold it firmly in place.
Aligning the Tool Rest: The top surface of the tool rest should be positioned just slightly below the center line of the workpiece. This allows the chisel to shear the wood as it spins.
Step 6: Assemble and Mount the Workpiece Holders
Now, let’s put it all together. Mount the headstock support (with the drill attached) and the tailstock support onto your lathe bed. Ensure they are parallel and aligned. The distance between them will determine the maximum length of wood you can turn.
For the headstock side, you’ll typically connect the wood directly to the drill chuck. Some builders use a screw that threads into the wood, with its head being gripped by the drill chuck. Others might use a specialized spur drive adapter that screws into the wood and is then held by the drill chuck. The key is a secure grip.
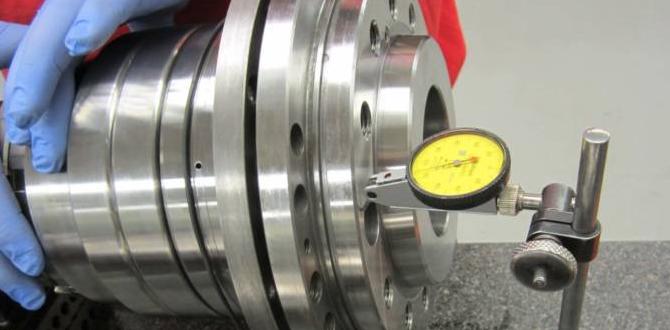
On the tailstock side, you’ll mount a dead center. This is usually a pointed piece of metal that you can thread into a block or hold securely in a custom mount. The point of the dead center should align perfectly with the center of the piece of wood held in the drill chuck.
Important Alignment Check:
- Ensure the drill chuck and the dead center are perfectly aligned on the same horizontal plane.
- Measure from the bed to the center of the drill chuck.
- Measure from the bed to the point of the dead center. These heights must match.
Step 7: Test and Refine
Before your first turning session, test your lathe. Mount a scrap piece of wood. Turn the drill on at a low speed. Watch for any wobbles, excessive vibration, or looseness. Adjust and tighten as needed.
Safety Check:
- Is the drill held securely?
- Is the tailstock support stable?
- Is the tool rest firmly in place?
- Does the wood spin true without excessive wobble?
If everything looks good, try a small piece of soft wood. Start at a very low RPM and gradually increase speed. Practice holding your turning tools against the rest. Remember to keep the tool rest close to the wood.
Operating Your DIY Mini Lathe
Once your mini lathe is built and tested, it’s time to turn! Here’s a basic overview of how to use it:
1. Preparing Your Wood
- Select Material: Start with softwoods like pine or poplar. They are easier to turn. Ensure the wood is relatively straight-grained and free of major knots or defects.
- Cut to Size: Cut your wood stock to length, slightly longer than your desired final piece.
- Round the Ends: If your wood is square, you might need to rough it into a more cylindrical shape using a saw or even a drawknife before mounting it.
- Mounting: Mount one end of the wood securely into the drill chuck. For the other end, position the dead center onto the end of the wood. You might need to gently tap it with a mallet to get it started and ensure it’s centered.
2. Setting Up for Turning
- Position Tool Rest: Place your tool rest on the bed, about 1/4 inch away from the spinning wood. Adjust its height so it’s slightly below the center line. Ensure it’s locked securely.
- Drill Speed: Start your drill at its lowest speed setting. You can increase it gradually as you become more comfortable and as the workpiece becomes more balanced.
3. Turning Techniques
- Holding the Tool: Use specialized woodturning chisels. Hold them firmly with both hands, resting the handle on your palm.
- Shearing Action: Approach the spinning wood with the bevel of the chisel rubbing against the wood. Gently push the